Installation Guide for MacOS
Installation Guide for MacOS
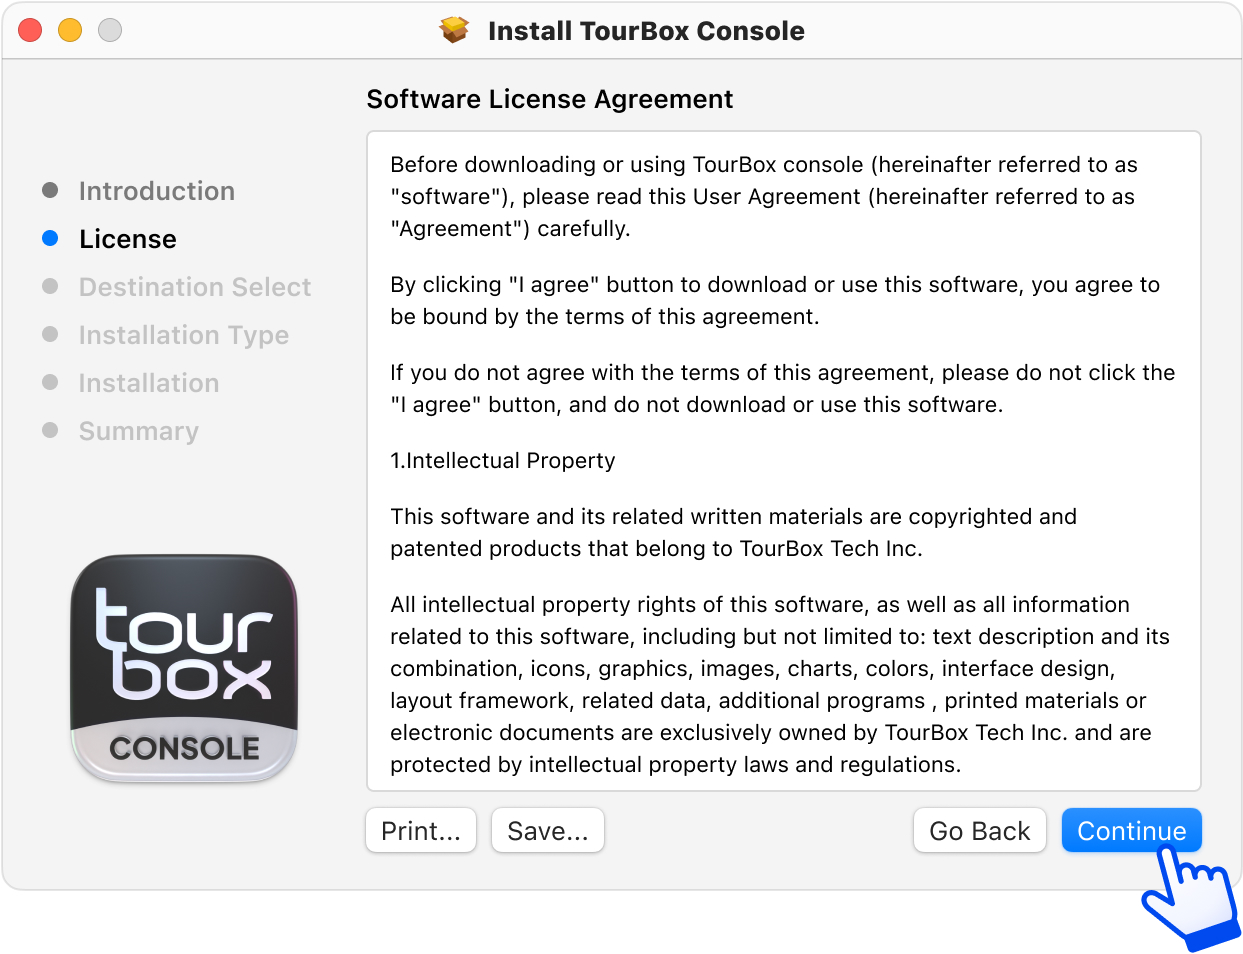
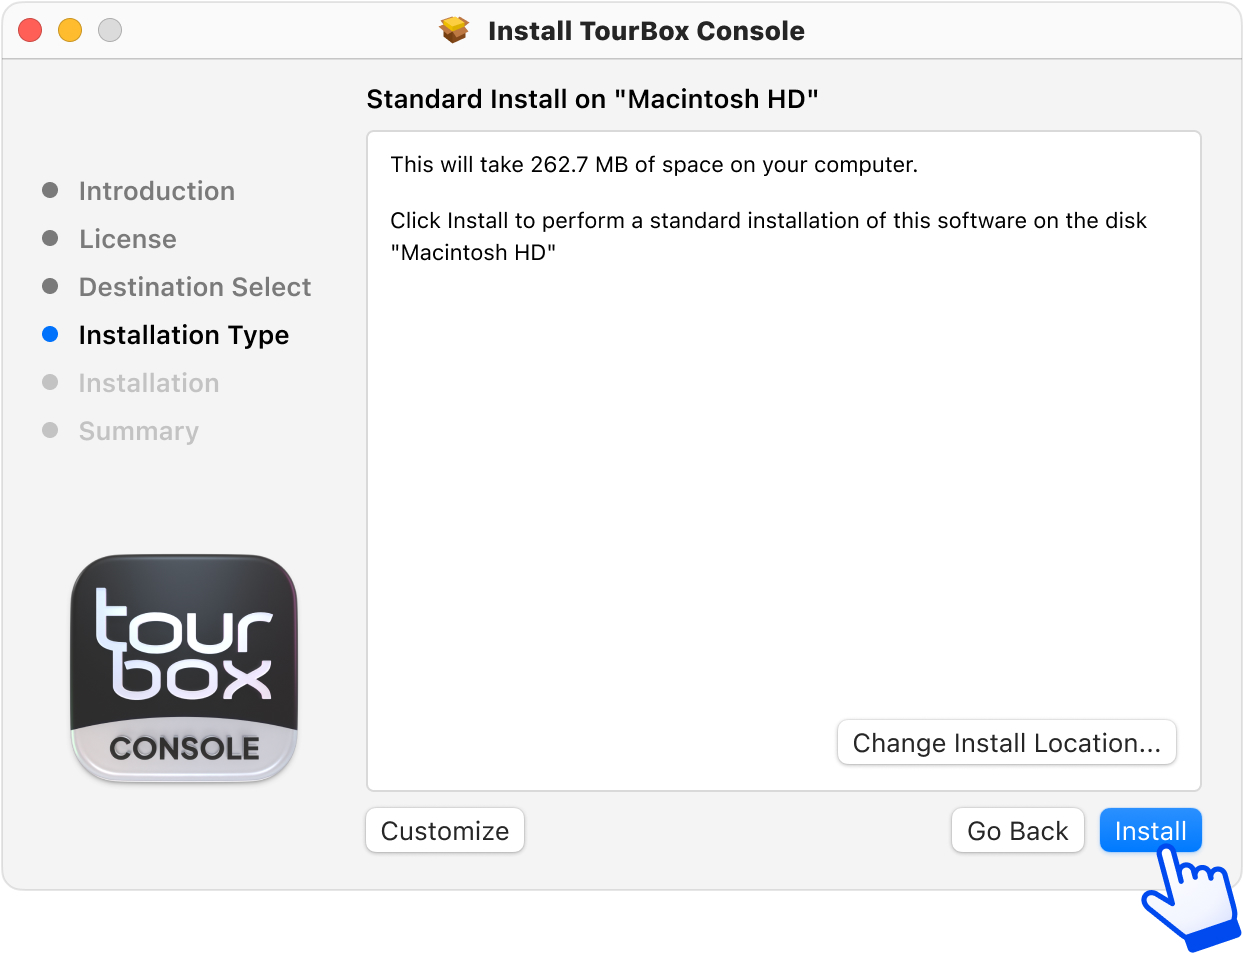
Double click the file “TourBox Console Setup.pkg” to installTourBox Console Software.

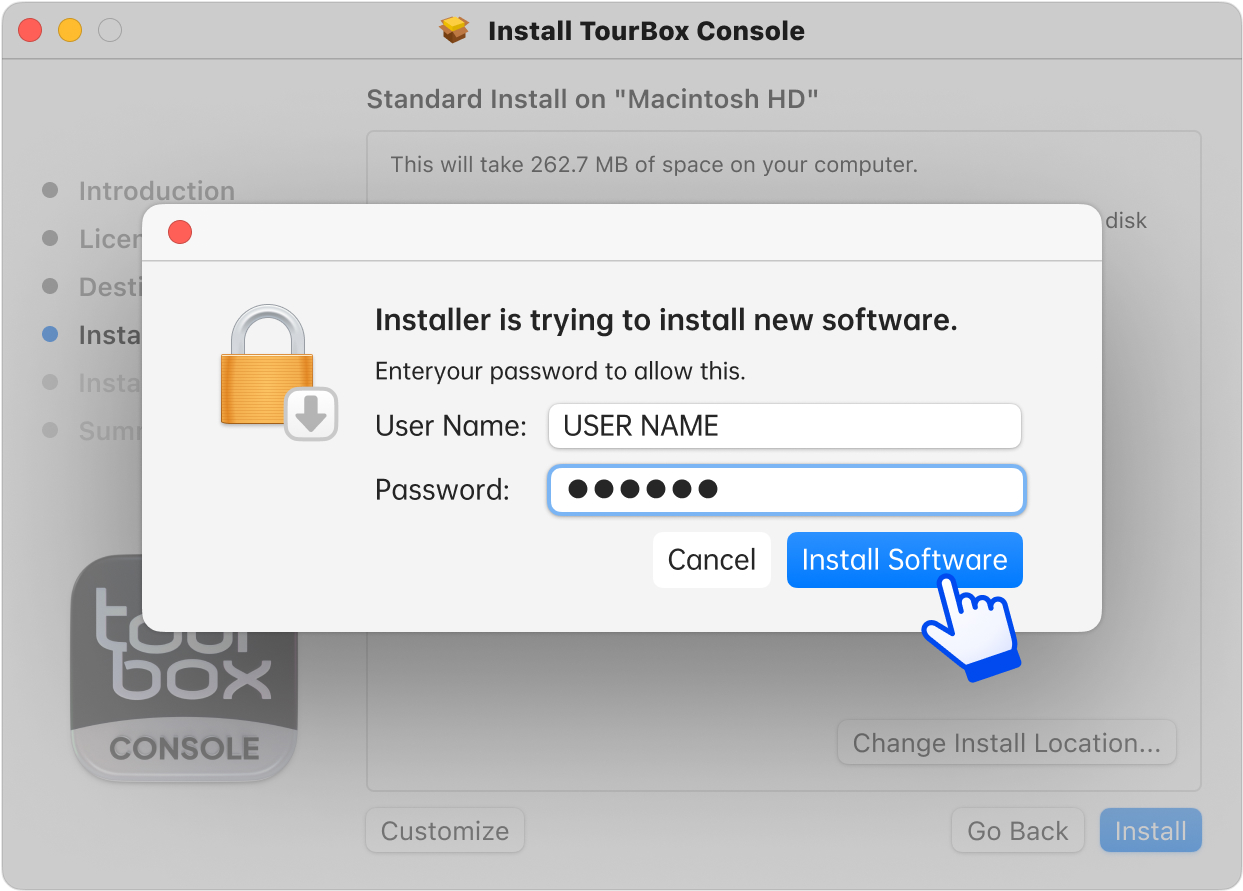
Fill in the computer power-on password, and then click "install software".

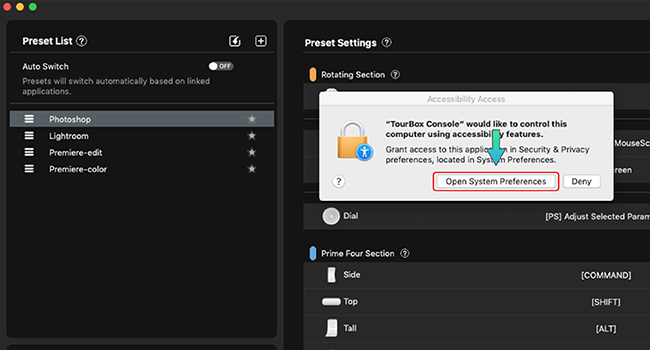
Please connect the device and run TourBox Console, following the provided instructions to complete permission settings
Setting System Permissions
Select your corresponding operating system
Please open“TourBox Console” after installation.
1.To configure Accessibility settings, please follow these steps:

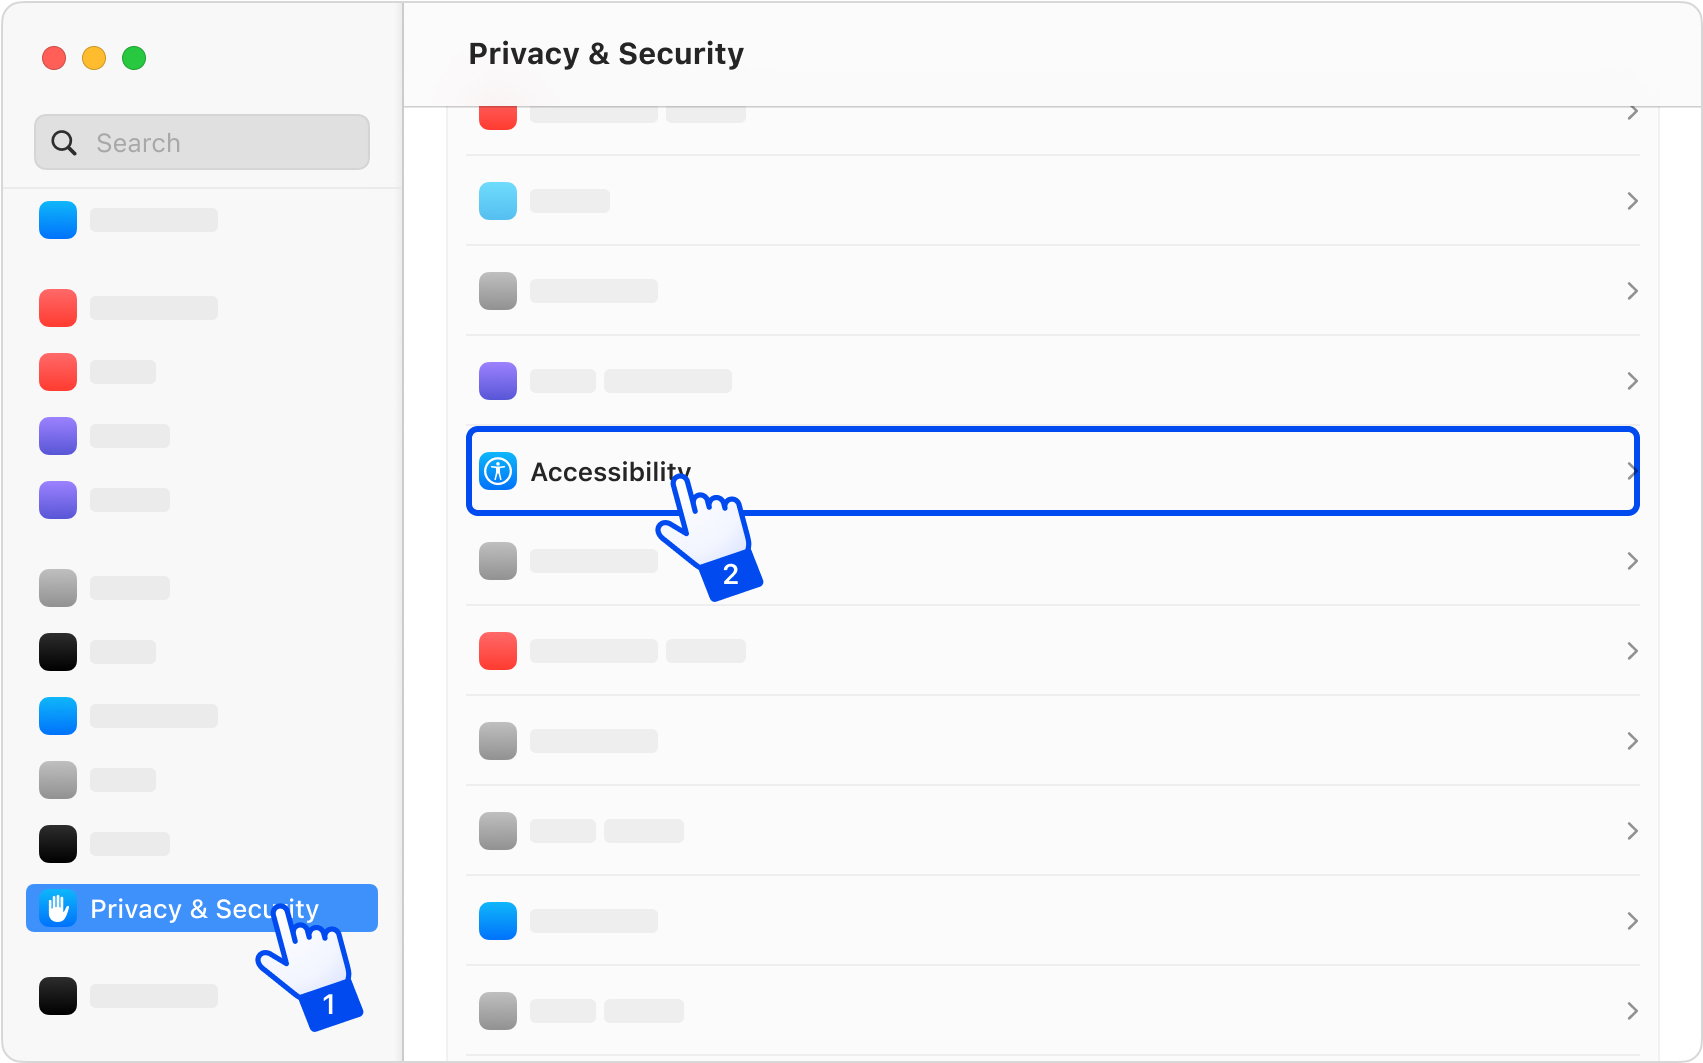
1 Open 'System Preferences' and select 'Privacy & Security' from the left-hand list
2 On the right-hand list, locate and select 'Accessibility'
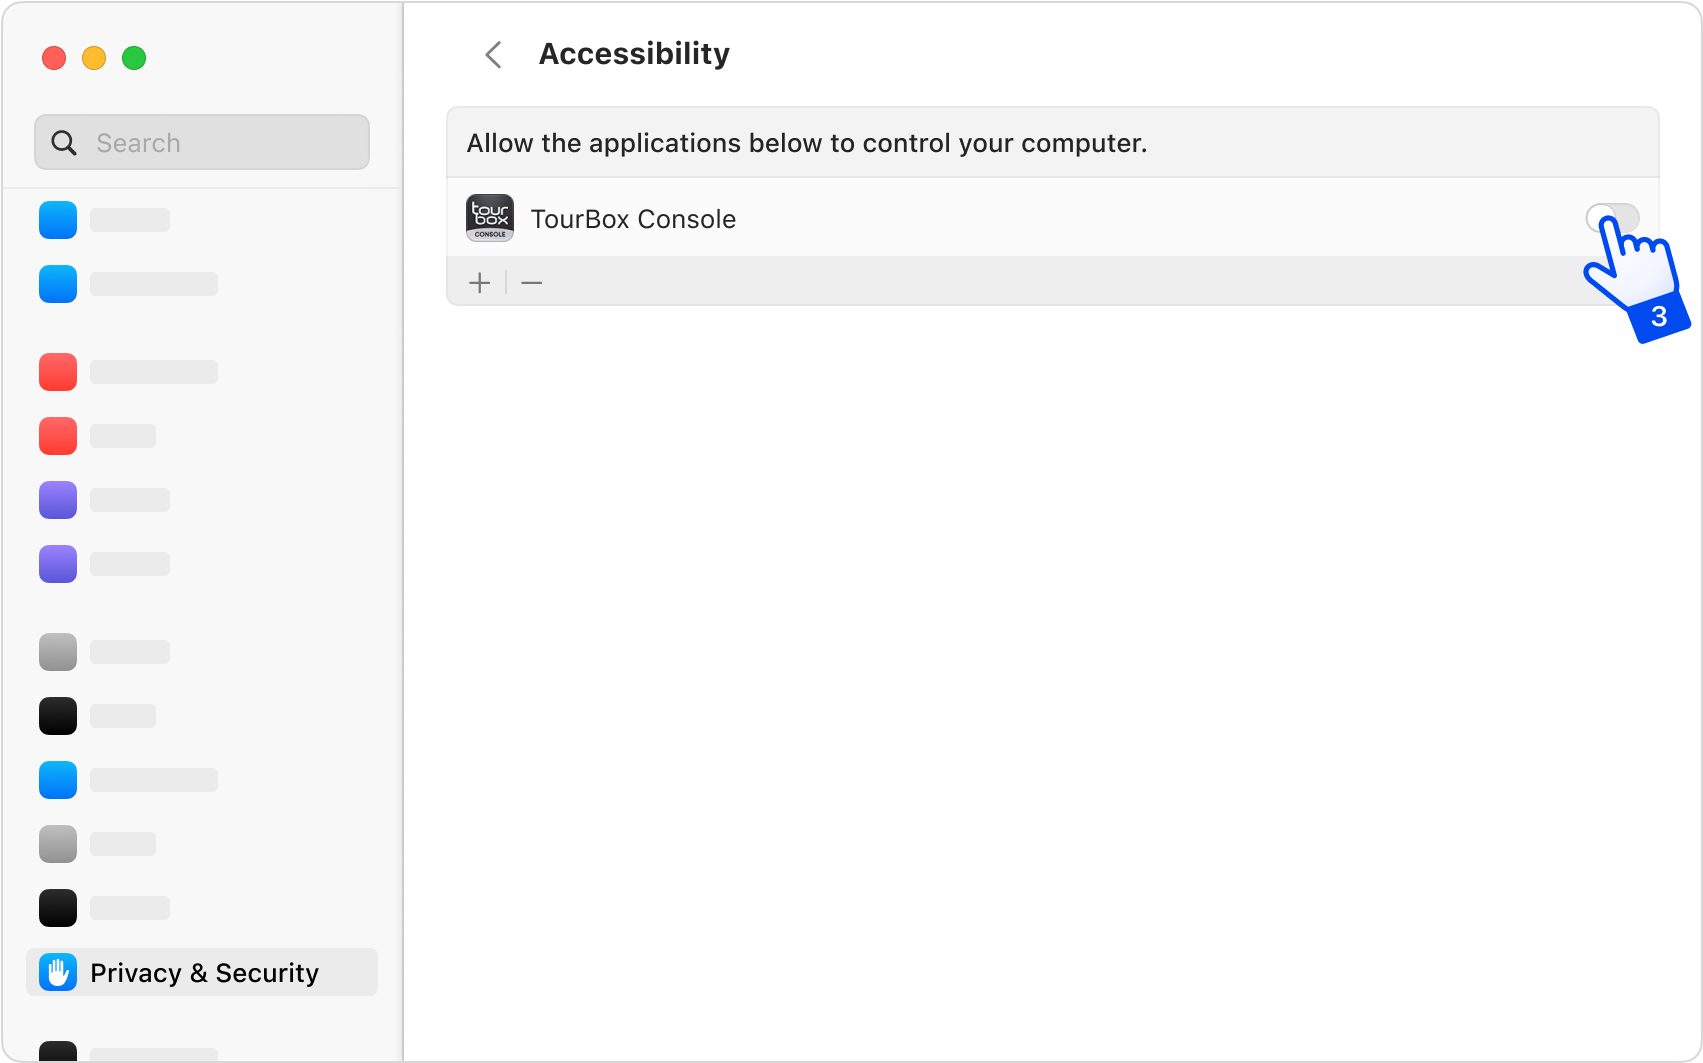
3 Find 'TourBox Console' and toggle the switch to enable it
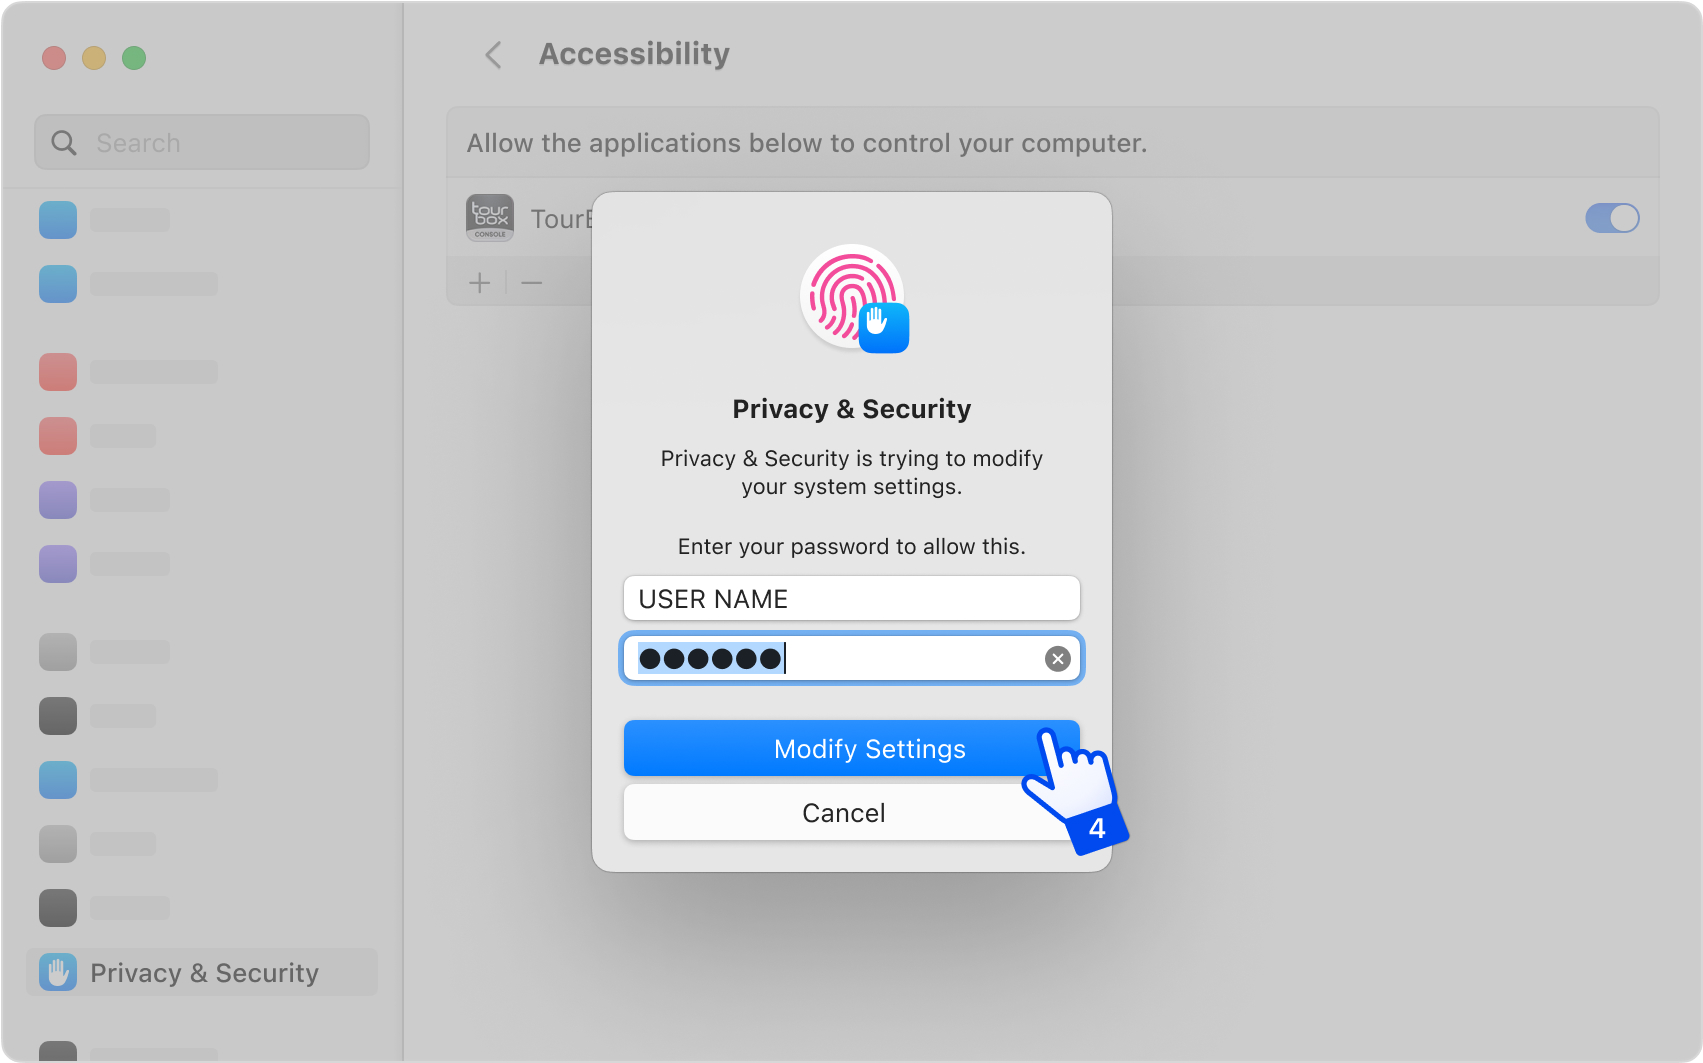
4 Use Touch ID or enter your password to make the changes
2.If you are using TourBox Elite (Bluetooth version), you will also need to configure Bluetooth permissions as follows:
1 Open 'System Preferences' and select 'Privacy & Security' from the left-hand list
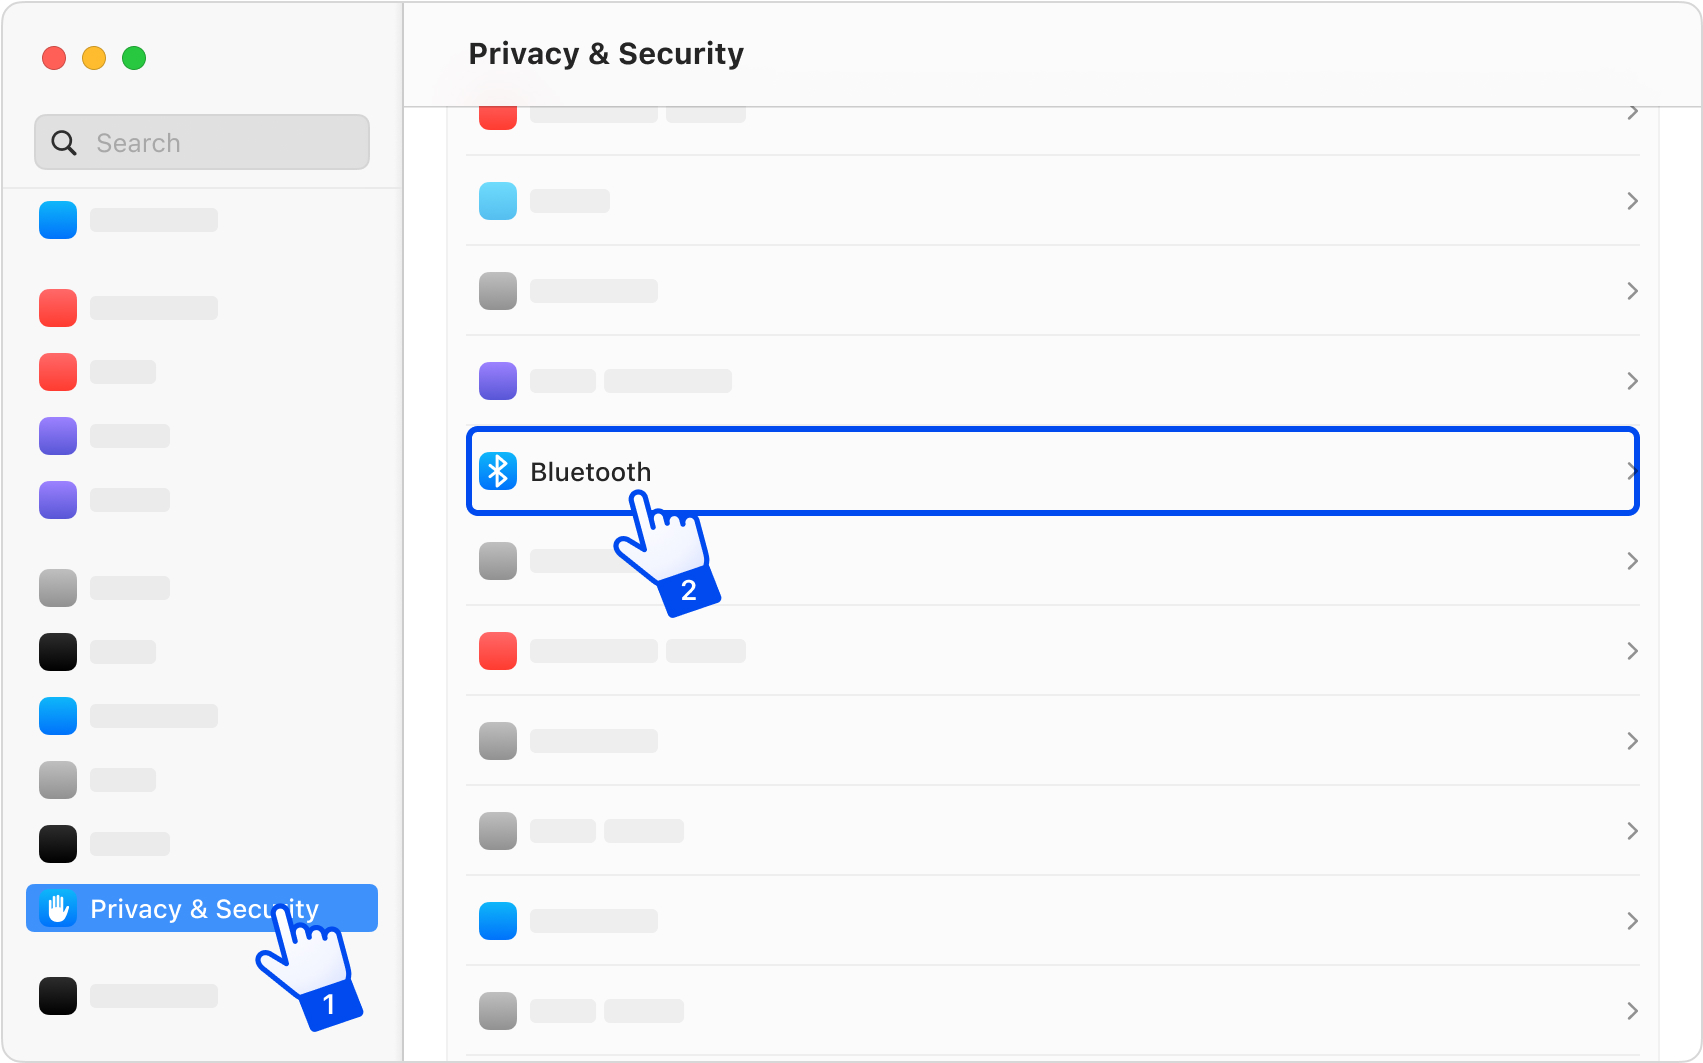
2 After selecting 'Bluetooth' on the right-hand list, toggle the switch for 'TourBox Console'
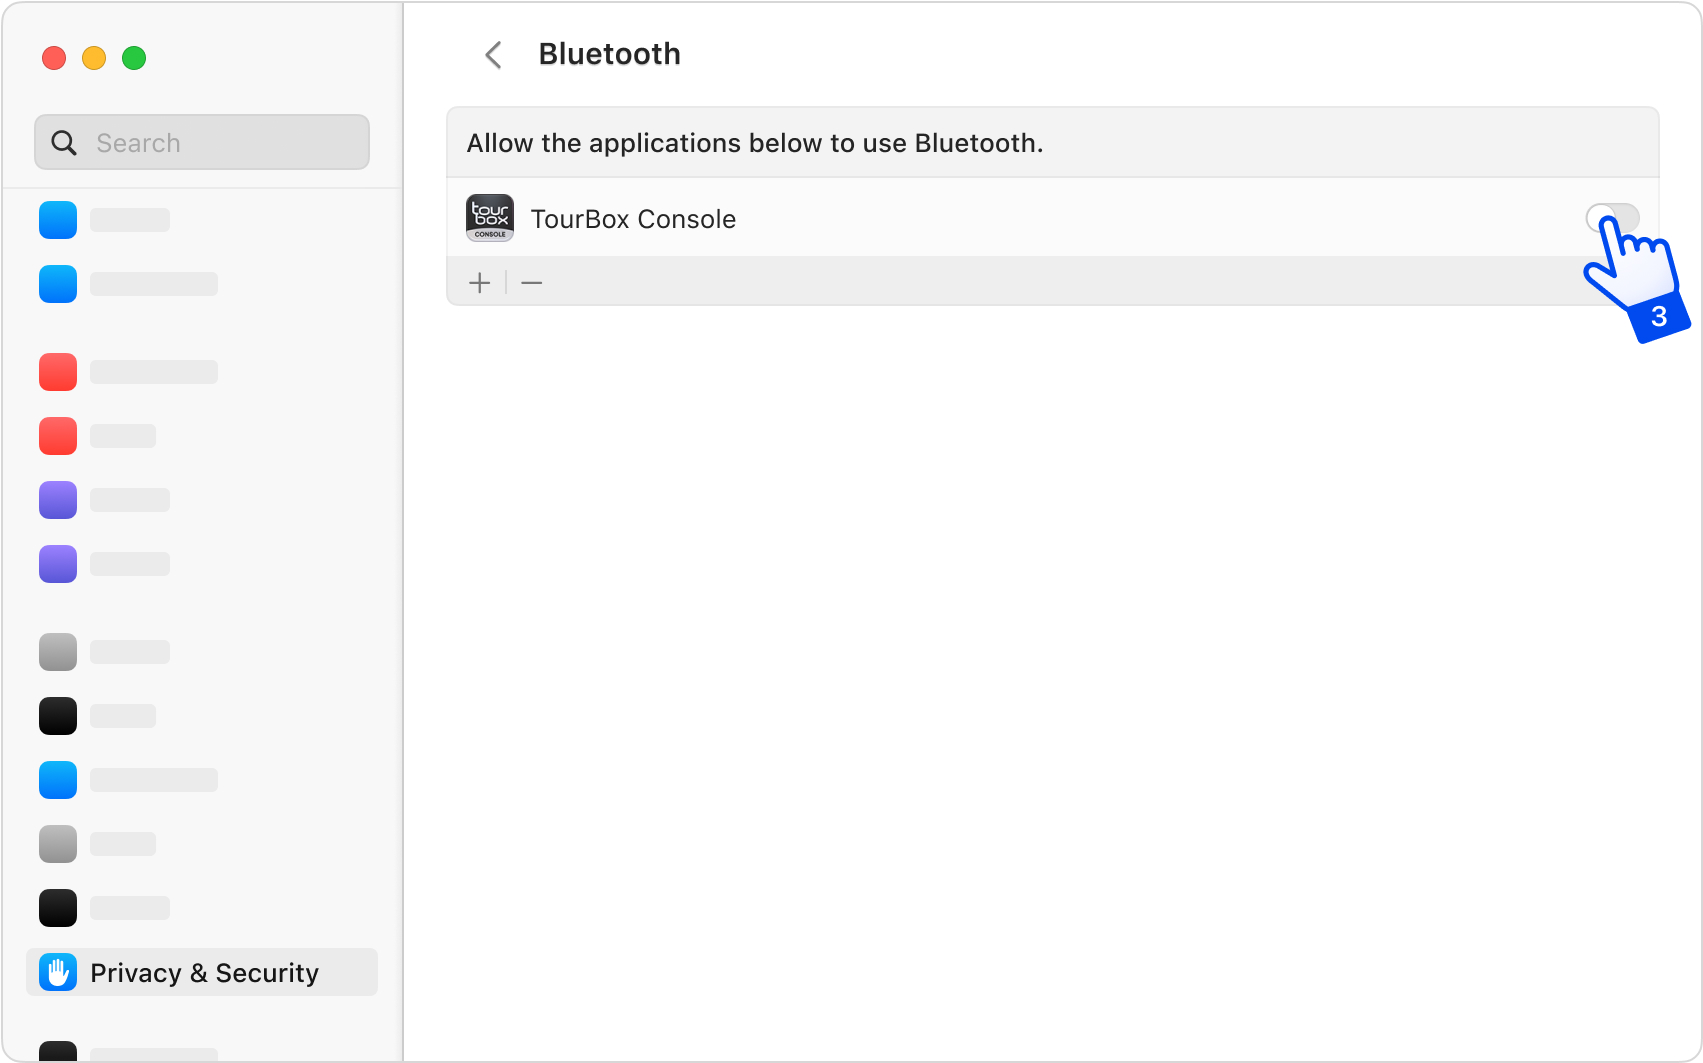
3 Use Touch ID or enter your password to make the changes

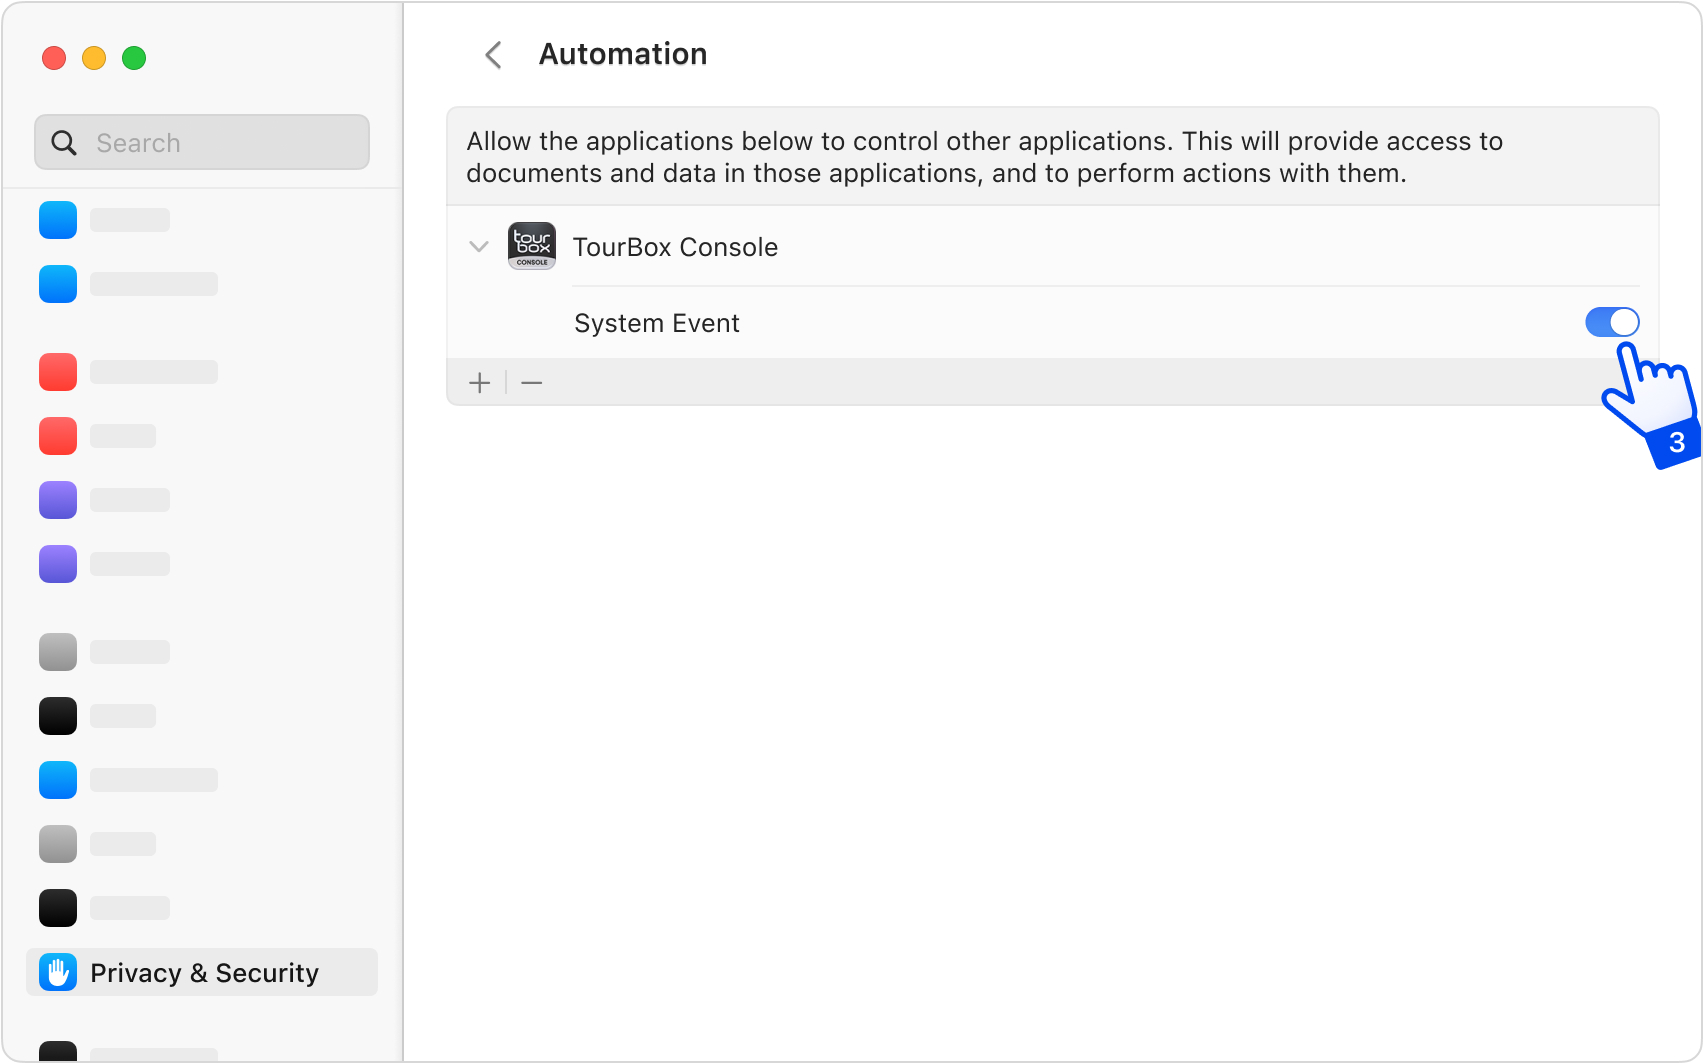
3.Finally, please complete the Automation permission settings:
1 Open 'System Preferences' and select 'Privacy & Security' from the left-hand list
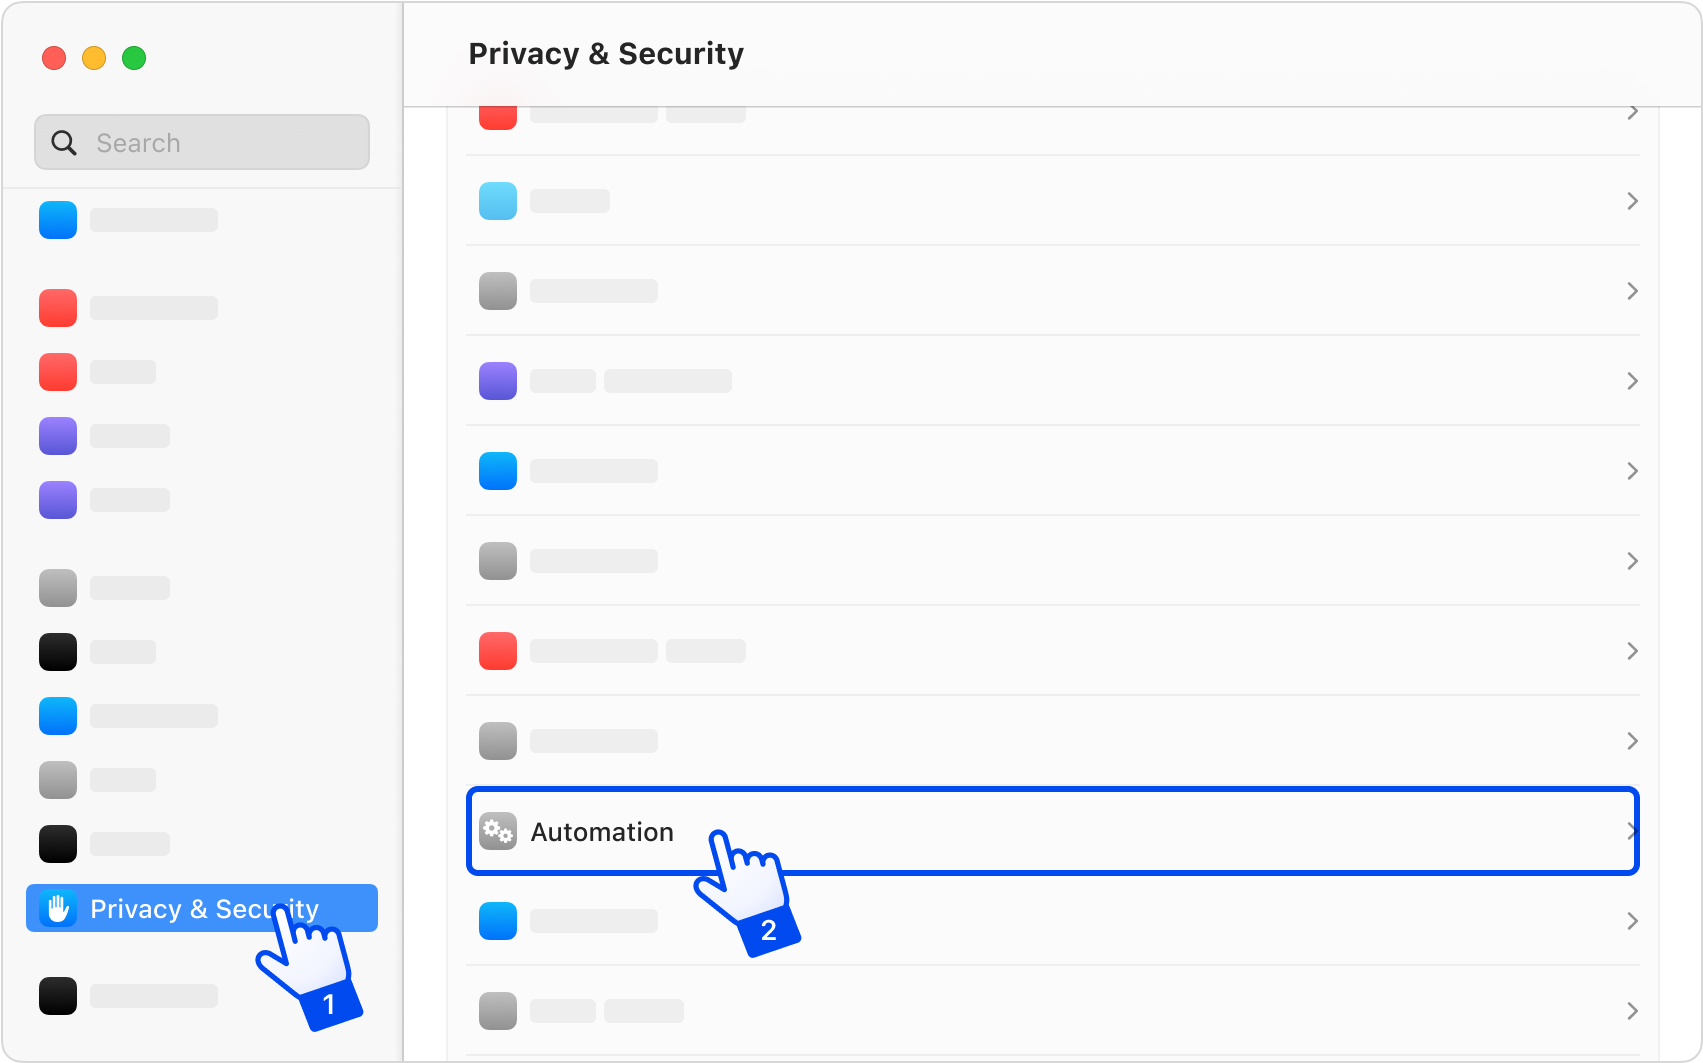
2 After selecting 'Automation' on the right-hand list, enable the 'System Event' switch under 'TourBox Console'
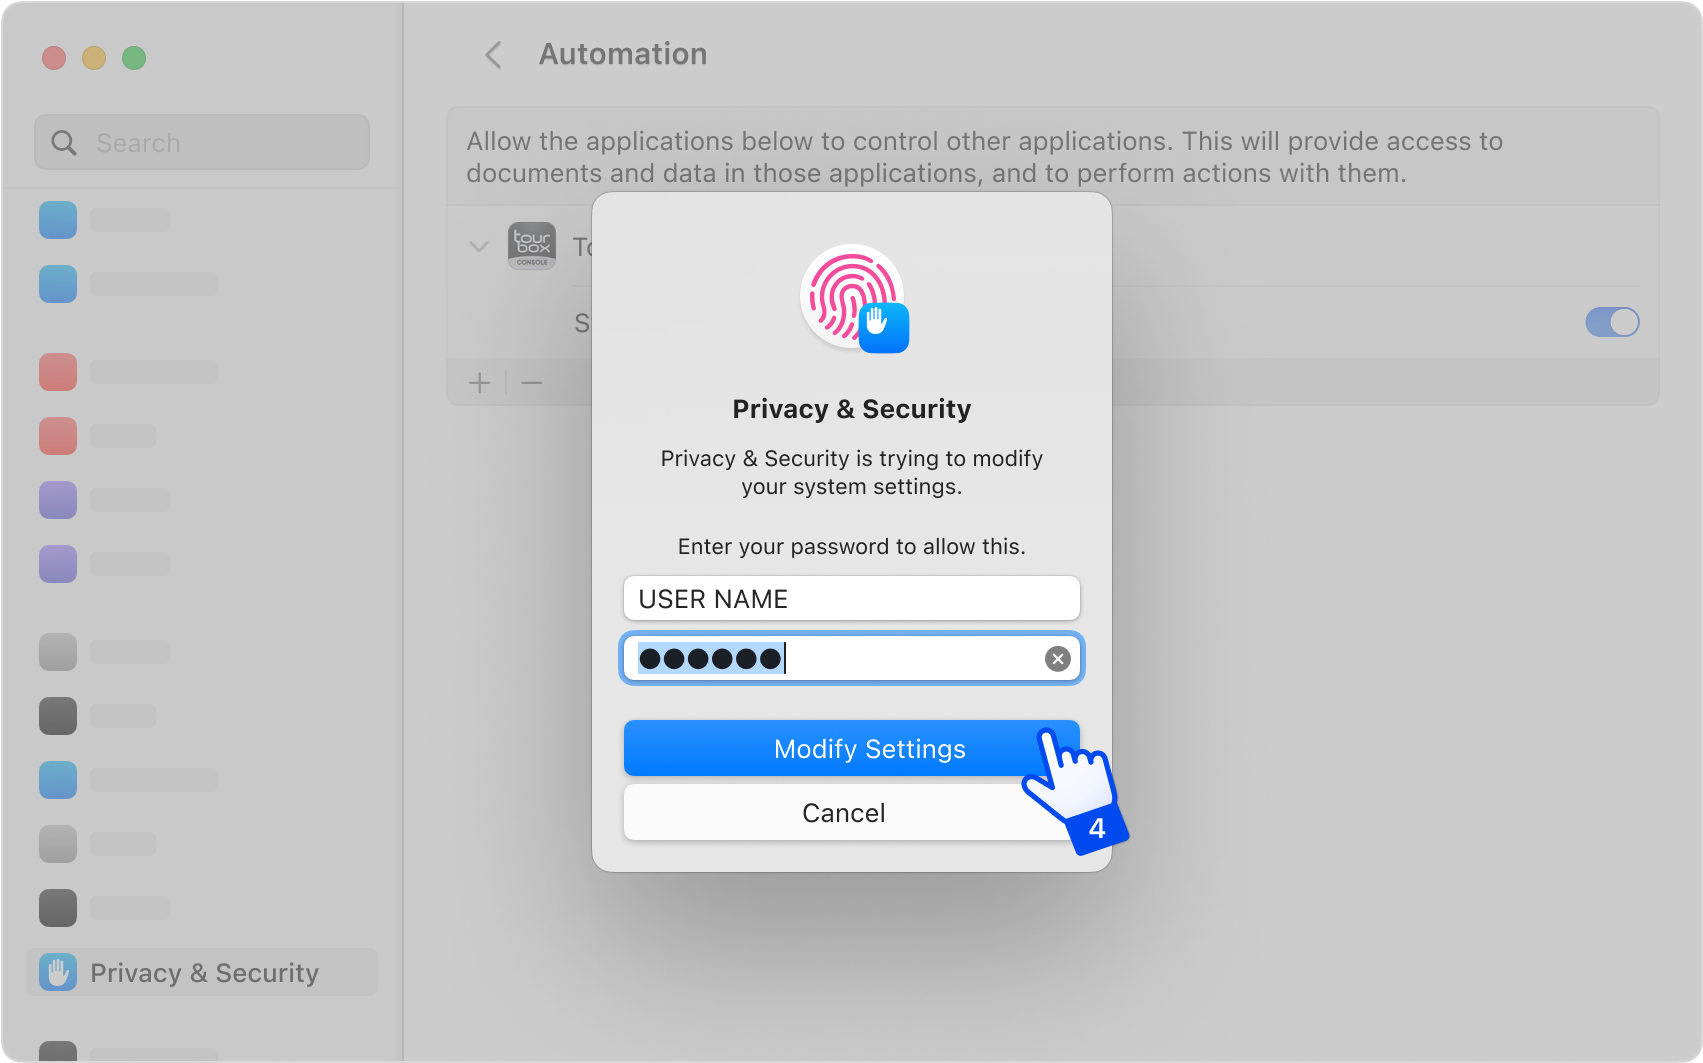
3 Use Touch ID or enter your password to make the changes
1.Please follow the instruction below to finish the permission settings in the Accessibility.
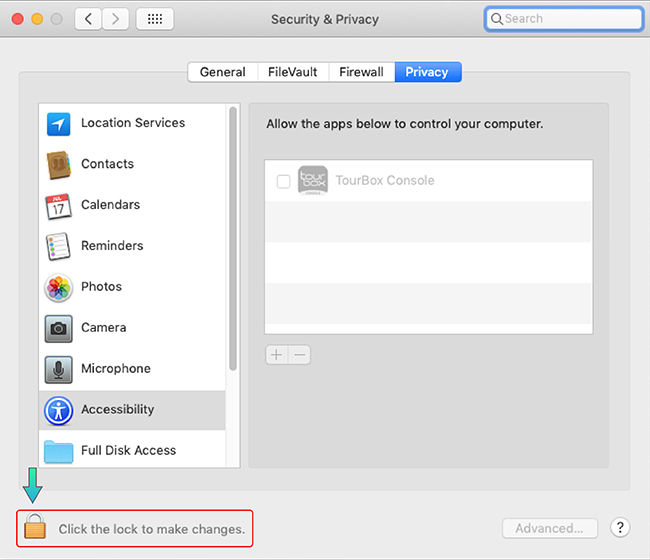
Click the unlock button.
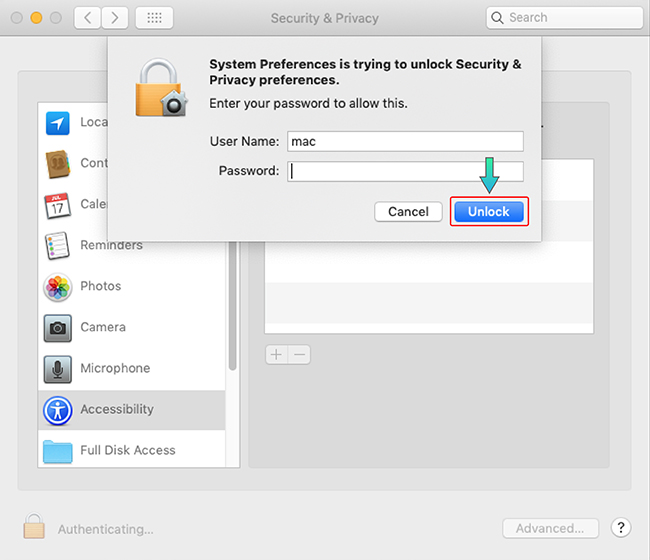
Enter the password and click the unlock button.
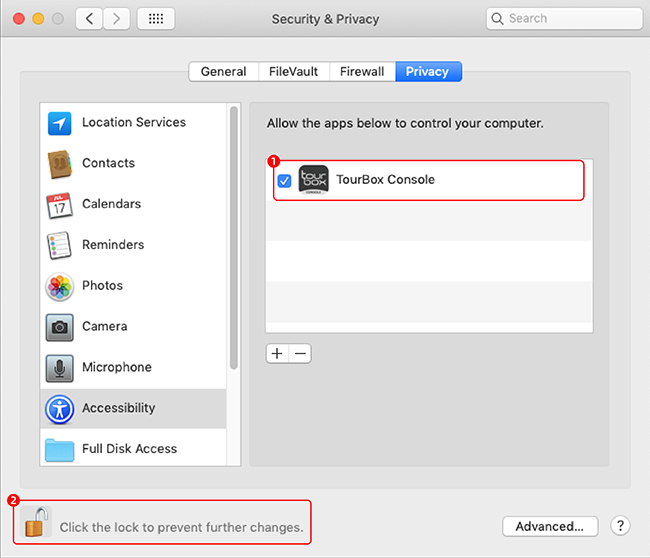
1 Tick in front of this item;
2 Tap the lock button to lock it.
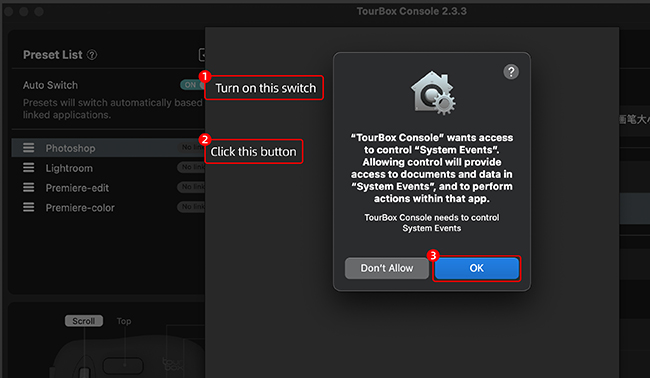
2.Please follow the instruction below to turn on the Automation permission.
1 Turn on the Auto Switch function;
2 Click the “unlink” button right next to the preset;
3 Click OK.
With these steps, you have completed all the necessary system permission settings