Mastering Adobe Camera Raw in Photoshop: A Comprehensive Tutorial
If you've used Photoshop before, you've probably heard of Camera Raw.
As the name suggests, Camera Raw was originally designed for processing photographic images. Therefore, when it comes to editing and manipulating photos and images, Camera Raw provides a standardized workflow.
In this tutorial, we will break down the various functions of Camera Raw and provide specific demos to help you quickly familiarize yourself with this powerful feature in Photoshop. So, let's get started and dive into the world of Camera Raw.

In this article, you will learn:
- What Is Adobe Camera Raw?
- Five Key Functions of Adobe Camera Raw
- How to Use Adobe Camera Raw?
- What Is the Difference Between Camera Raw and Lightroom?
What Is Adobe Camera Raw?
Adobe Camera Raw (ACR) is Adobe's photo RAW file processor. Originally introduced as a plugin, Camera Raw eventually became an integrated feature of Photoshop with the release of Photoshop CS5.
Therefore, you don't need to download and install the Camera Raw plugin separately. Once you have Photoshop installed, Camera Raw is automatically included.
Note: Adobe regularly updates the version of Camera Raw. You can update to the latest version of Camera Raw here.
1. How to Open Camera Raw in Photoshop?
- Dragging and Dropping RAW Files: The first method is the straightforward approach of simply dragging and dropping the RAW format files directly into Photoshop. This will automatically open the ACR interface for editing.
- Selecting From the Filter Menu: If you only want to edit JPG or PNG image files, you can still take advantage of the powerful features of Camera Raw. Open the photo in Photoshop and then select "Camera Raw Filter" from the Filter menu to access the ACR interface.
2. What Are RAW Files?
RAW files, also known as digital negatives, are the original format files generated by digital cameras, capable of storing more information compared to JPEG format.
Almost every camera manufacturer has its RAW file format, with common RAW file extensions including .NEF, .DNG, .CR2, and so on.
Due to the varying formats of RAW files from different manufacturers, Photoshop itself cannot directly recognize these diverse RAW formats. They need to be processed and converted using the Camera Raw processor.
Additionally, Camera Raw offers numerous adjustment options. These adjustments made to RAW files are completely non-destructive, meaning that the original image information is not overwritten, allowing you to revert to the original with just a click.
For an in-depth understanding of what RAW files are, check out this article.
Five Key Functions of Camera Raw
Camera Raw encompasses five major functions, which are based on our practical experience and not necessarily the only standards. We hope the following insights will be helpful to you.
1. Color Grading
One common issue we often encounter in photos is color cast. Additionally, sometimes the desired atmosphere may not be adequately portrayed. In such cases, we rely on Camera Raw for color correction.
- Color adjustment: For instance, if your photo appears too red, you can use Camera Raw to reduce the redness and achieve color balance.
- Atmosphere enhancement: Camera Raw allows you to adjust the colors to enhance the desired atmosphere, instantly evoking the strongest emotions in the viewer.

2. Adding Texture
When using Photoshop, we often adjust images using tools like "Curves," "Levels," "Contrast," "Saturation," and "Color Balance" to enhance texture.
However, Camera Raw provides three prominent features that can simplify the process: "Contrast," "Clarity," and "Sharpening." By adjusting the sliders for these three functions, you can quickly enhance the texture of your photos and images.
(We will provide specific instructions in the following section.)
3. Quick Portrait Retouching
When it comes to retouching portraits, besides using plugins, using the technique of Frequency Separation Retouching is also a common choice.
However, popular plugins like the Portraiture Plugin often come with a price tag. Additionally, manual portrait retouching is not as simple as it seems.
We have shared three methods for retouching facial features. If you're interested, you can take a look here: How to Smooth Skin in Photoshop.
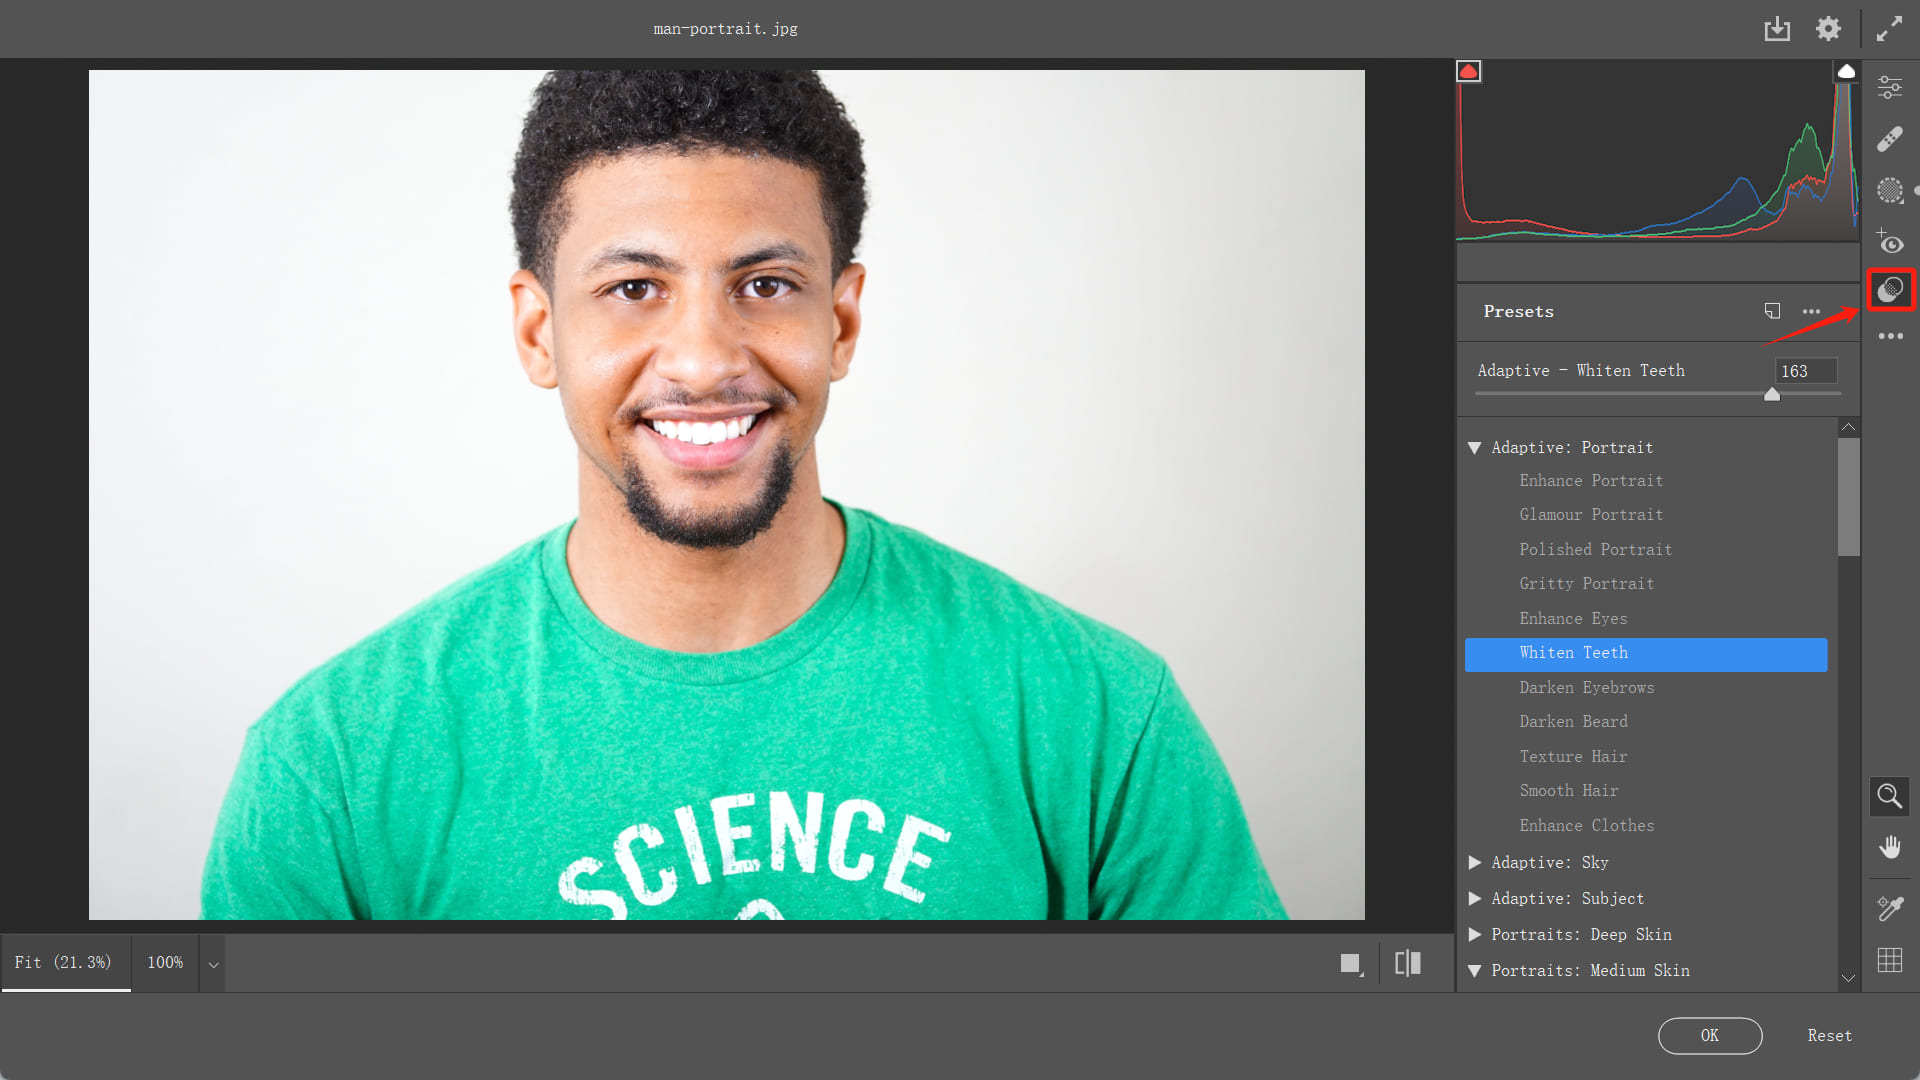
But Camera Raw provides you with the most convenient and efficient method. Simply click on the Presets in the right-side toolbar of Camera Raw.
Here, you will find a wide range of portrait presets. Troublesome issues in portrait retouching, such as teeth whitening or enhancing facial hair, can be quickly fixed by simply adjusting the parameter sliders.
4. Powerful Photo Editing Toolset
With each update, Adobe Camera Raw has evolved from a simple tool for processing RAW files to a powerful image editing tool that is suitable for other file formats such as JPG and PNG.
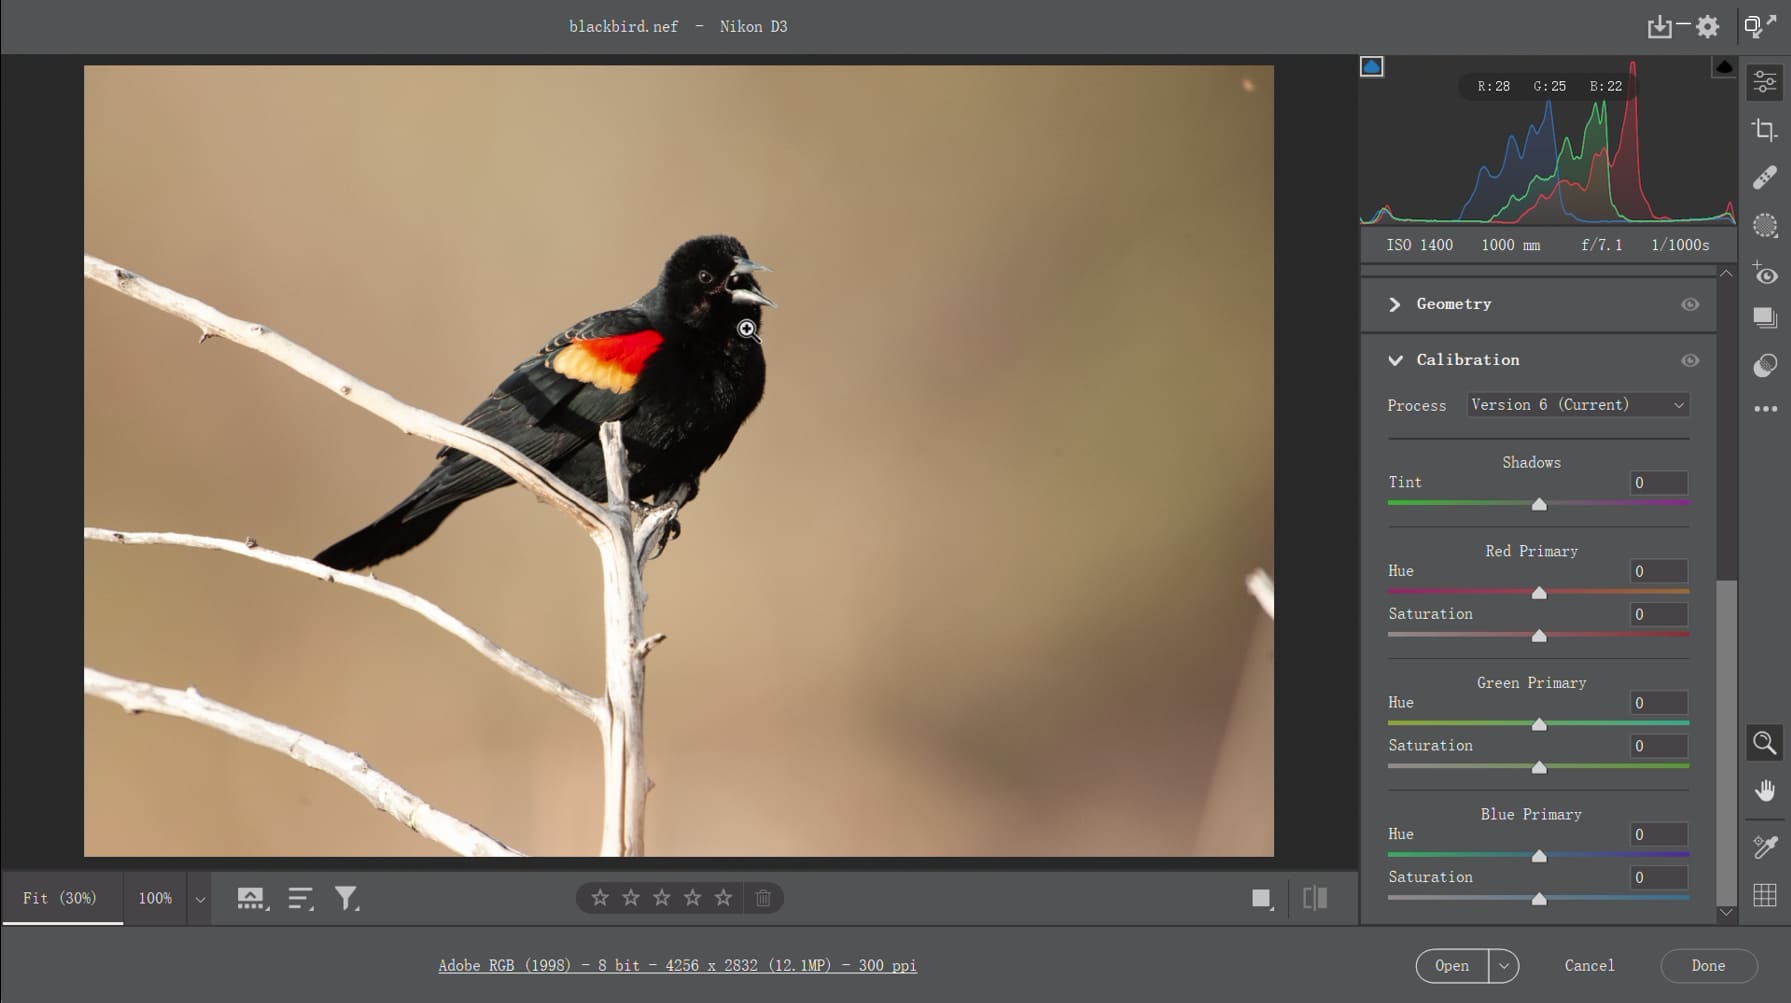
Of course, you can still perform calibration for RAW files in Camera Raw. However, the lens correction feature requires separate adjustments in the Lens Correction section of the Filter menu.
Currently, in Adobe Camera Raw, you can use tools like Healing, Red Eye, and Masking. With just the Camera Raw Filter, you can complete the basic editing of the majority of your photos.
5. Standardization
This is a highly convenient feature of Camera Raw. In practical work, multiple designers may be working on the same project, requiring editing of a large number of photos.
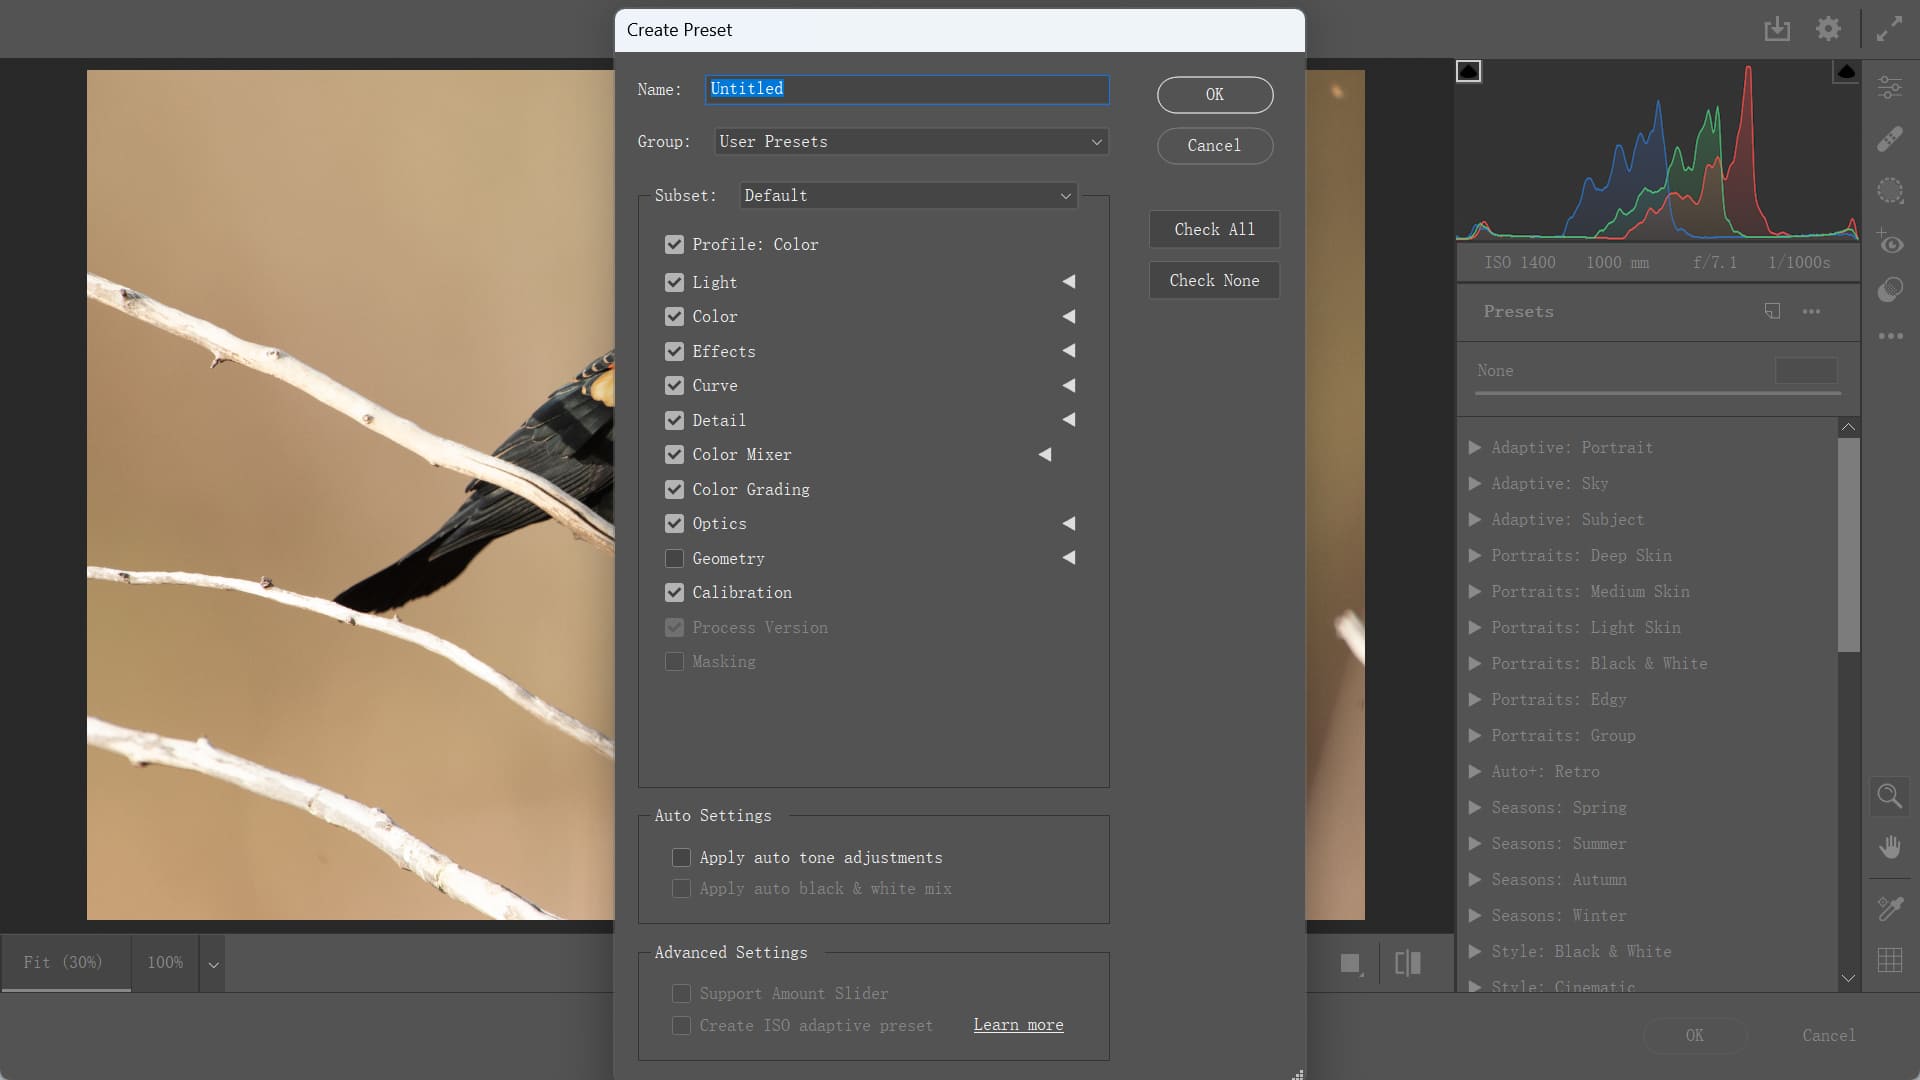
Assuming the photos taken by the photographer are captured under the same lighting conditions, to ensure consistency in tone and color, our usual approach is to first use the Camera Raw Filter to achieve a satisfactory result.
Then, we create a preset and save it, so that everyone on the team can use the same preset, greatly improving work efficiency and standardizing the visual style.
How to Use Adobe Camera Raw?
After understanding the powerful features of Camera Raw, we will try to provide a practical case study to help you better understand how to use Camera Raw.
Let's start by importing the following image into Photoshop.

The photography of this image is actually fine, so there is no need for extensive retouching. With just the use of Camera Raw, we can achieve great results.
As you can see, the color of the watch dial in the photo appears to be reddish and lacks a strong texture. If this were a mid-to-high-end mechanical watch, it might not give off a sophisticated impression.
So, how can we use Camera Raw to enhance the metallic texture of this watch and make it appear more sophisticated?
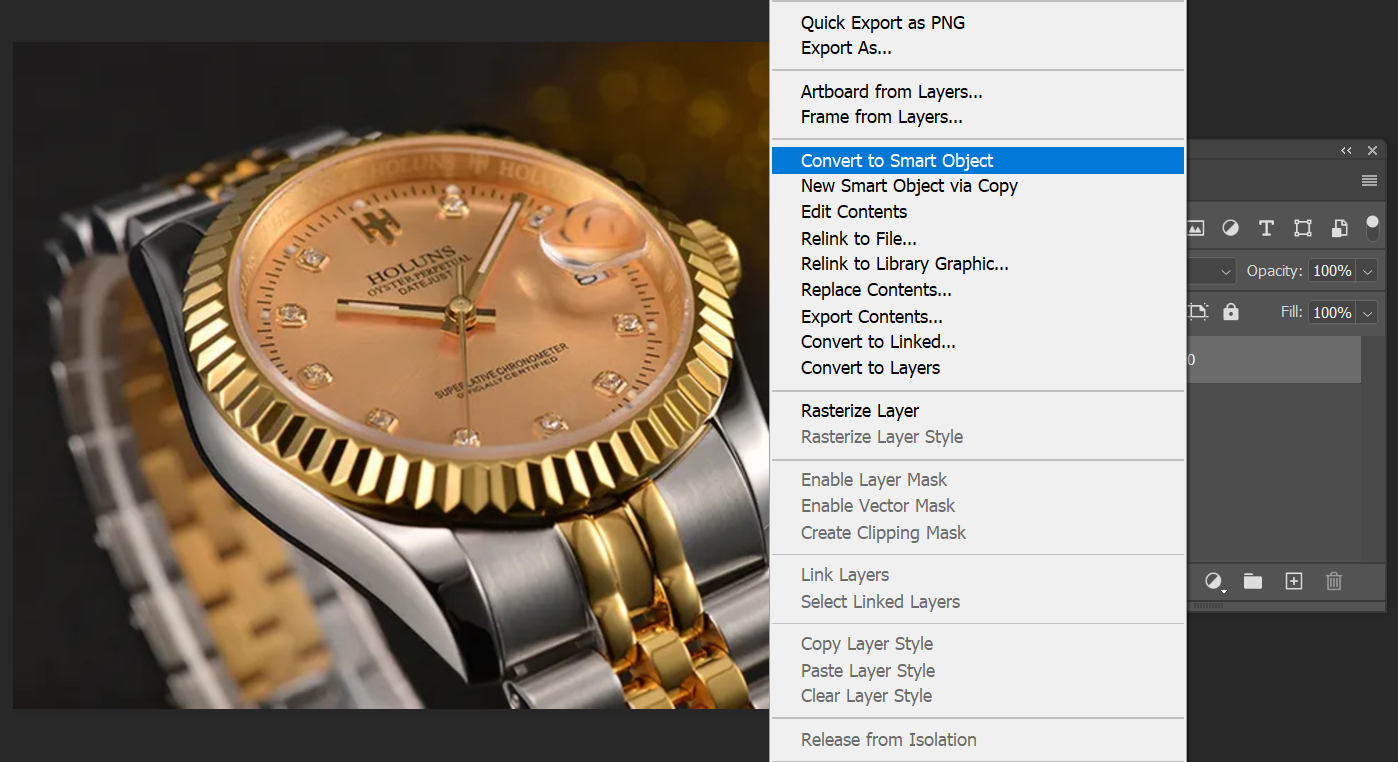
1. Convert to Smart Object
First, we need to convert the layer into a smart object. This will allow us to preserve specific parameters for future modifications.
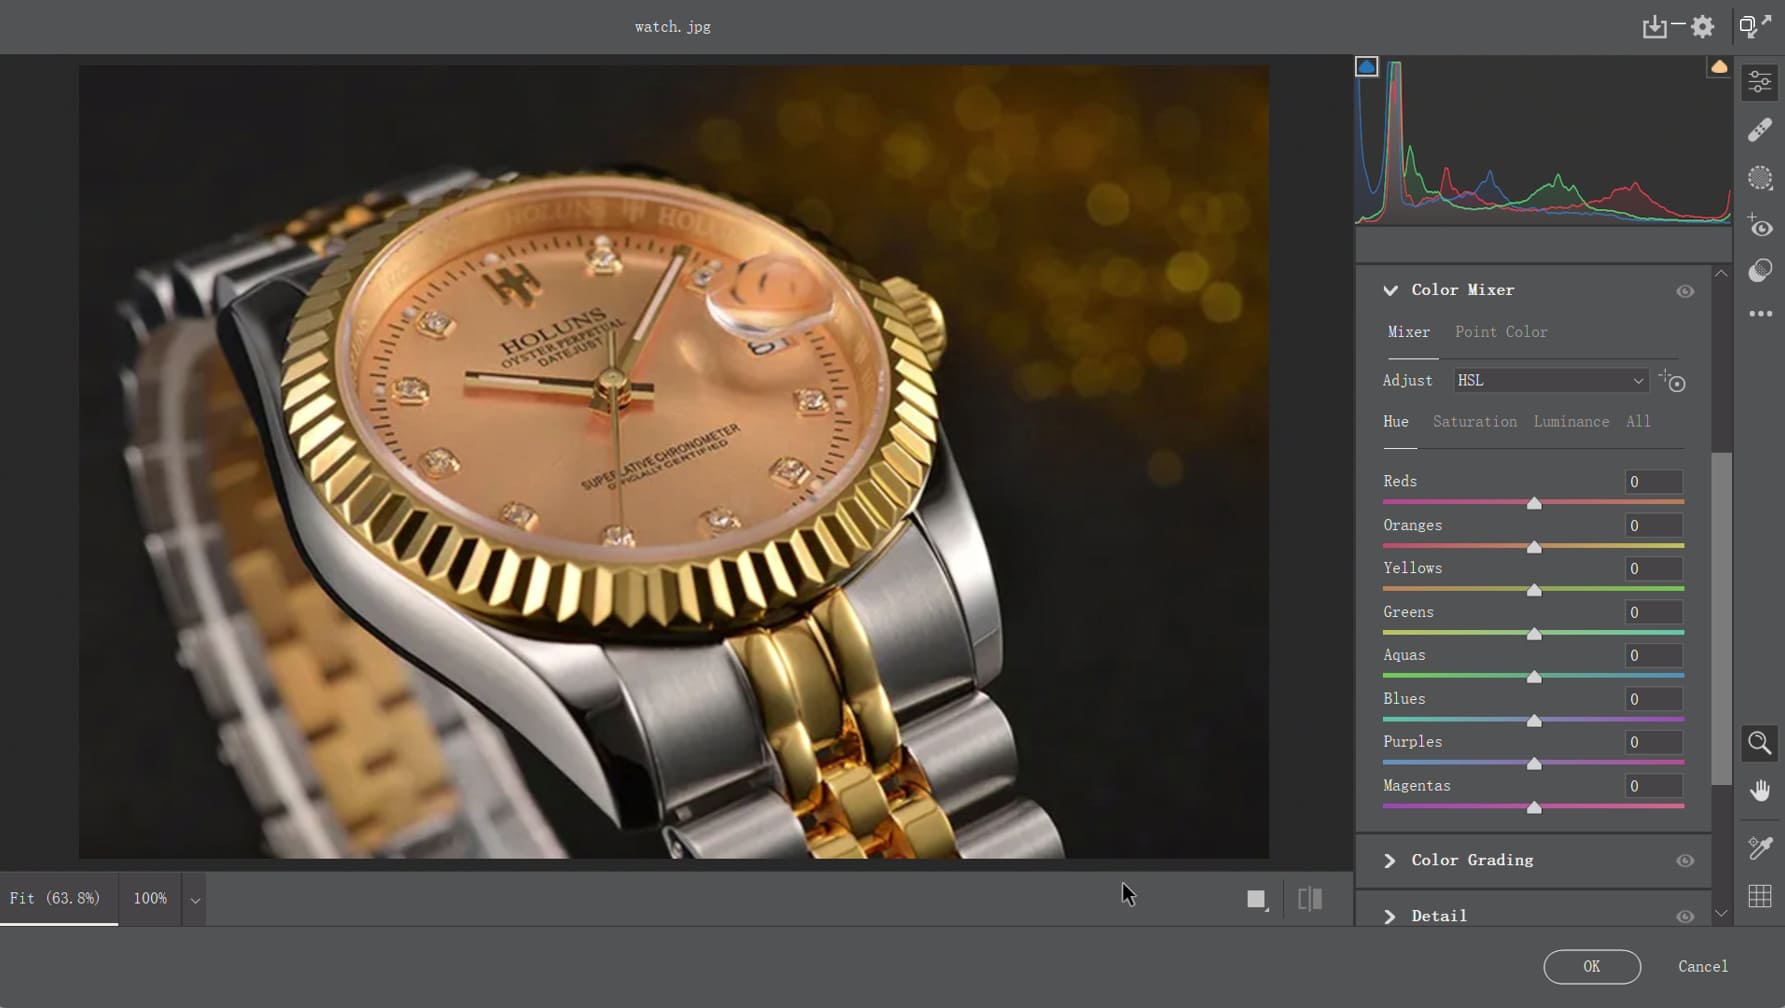
2. Color Mixer
Next, we need to perform color correction on this photo. The purpose of color correction is to remove any color cast in the image and achieve a balanced color palette.
Open the Camera Raw panel and navigate to the Color Mixer in the Edit workspace on the right side of the Camera Raw panel.
In the Color Mixer, you will see familiar options such as Hue, Saturation, and Luminance, which are similar to the default color correction panel in Photoshop and should be relatively easy to understand.
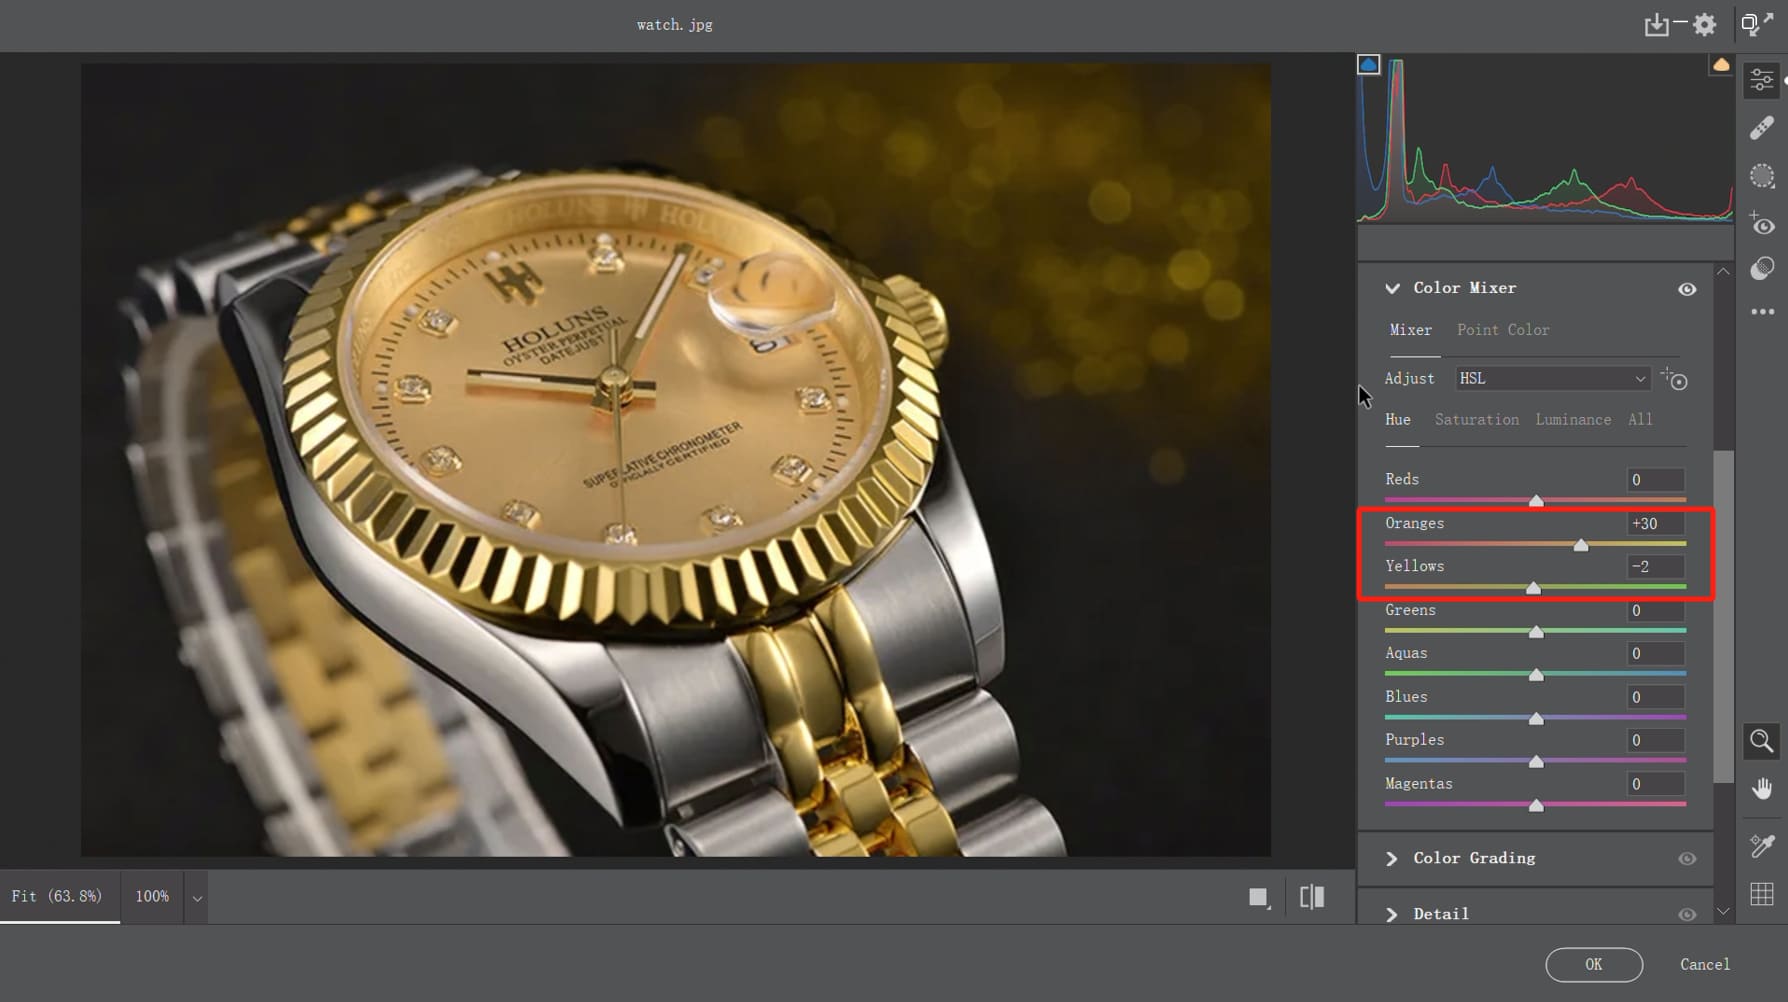
In the "Hue" option, we will add more yellow to both the orange and yellow colors, as shown in the image below:
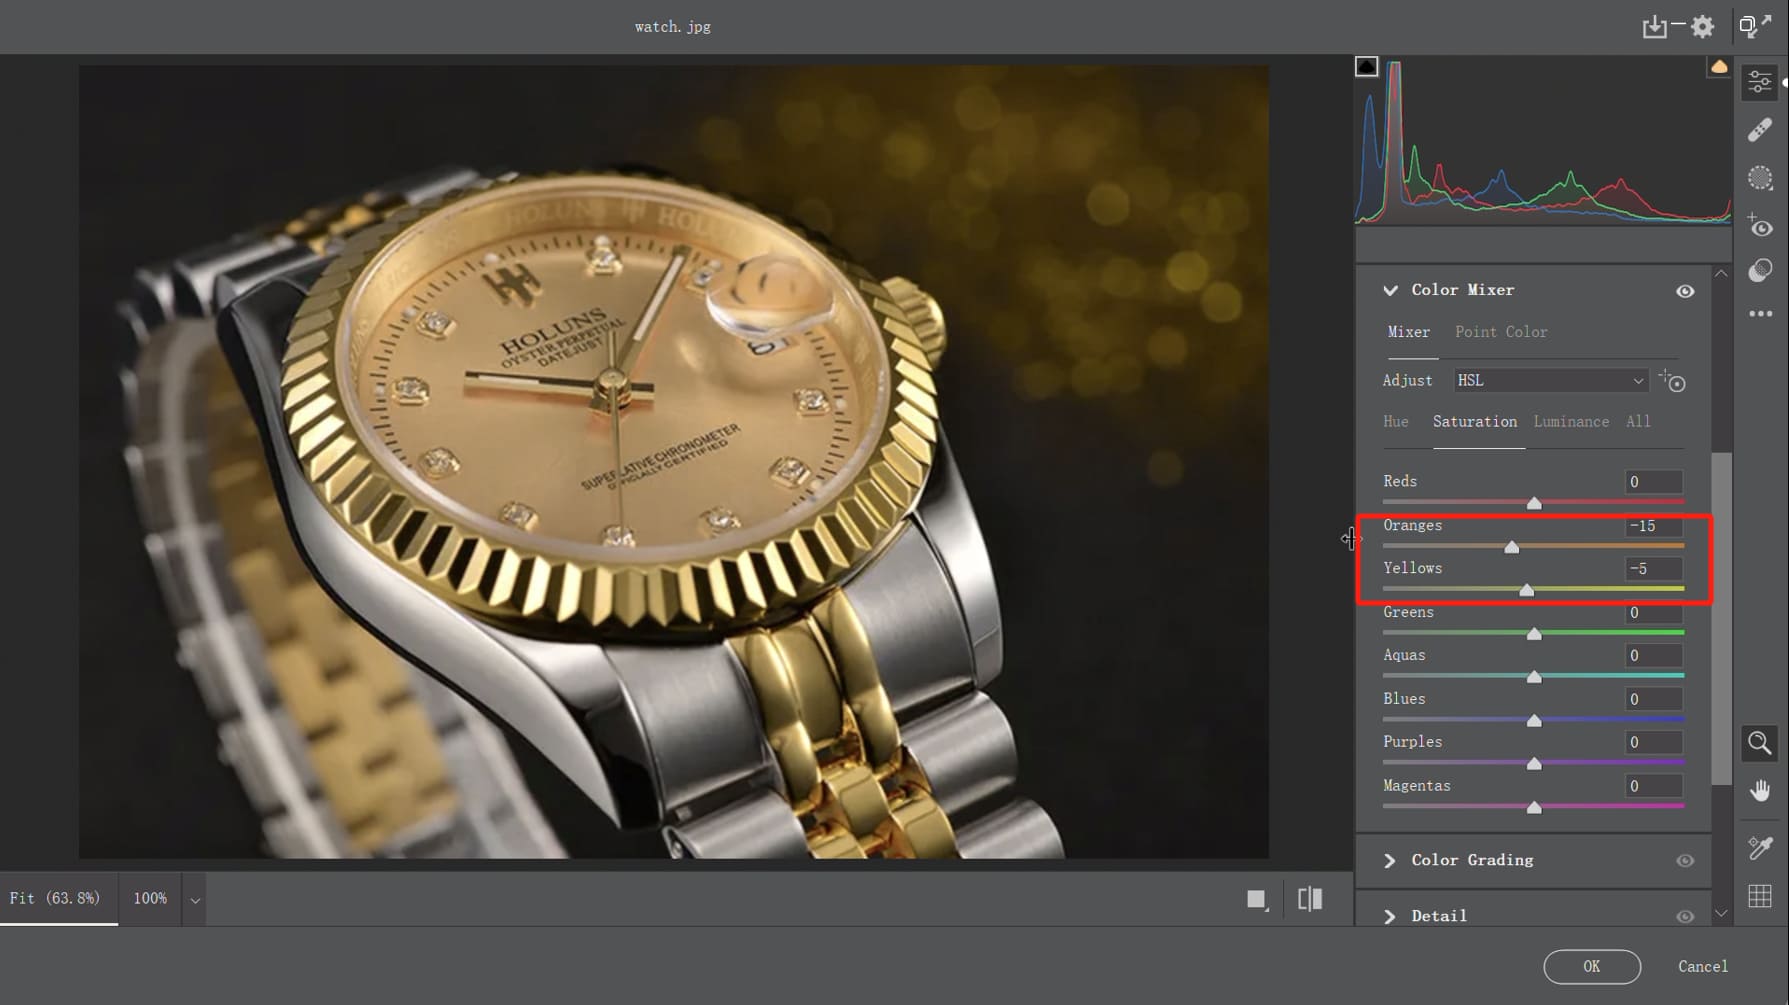
In the "Saturation" option, we will decrease the value for orange and slightly reduce it for yellow as well, as shown in the image below:
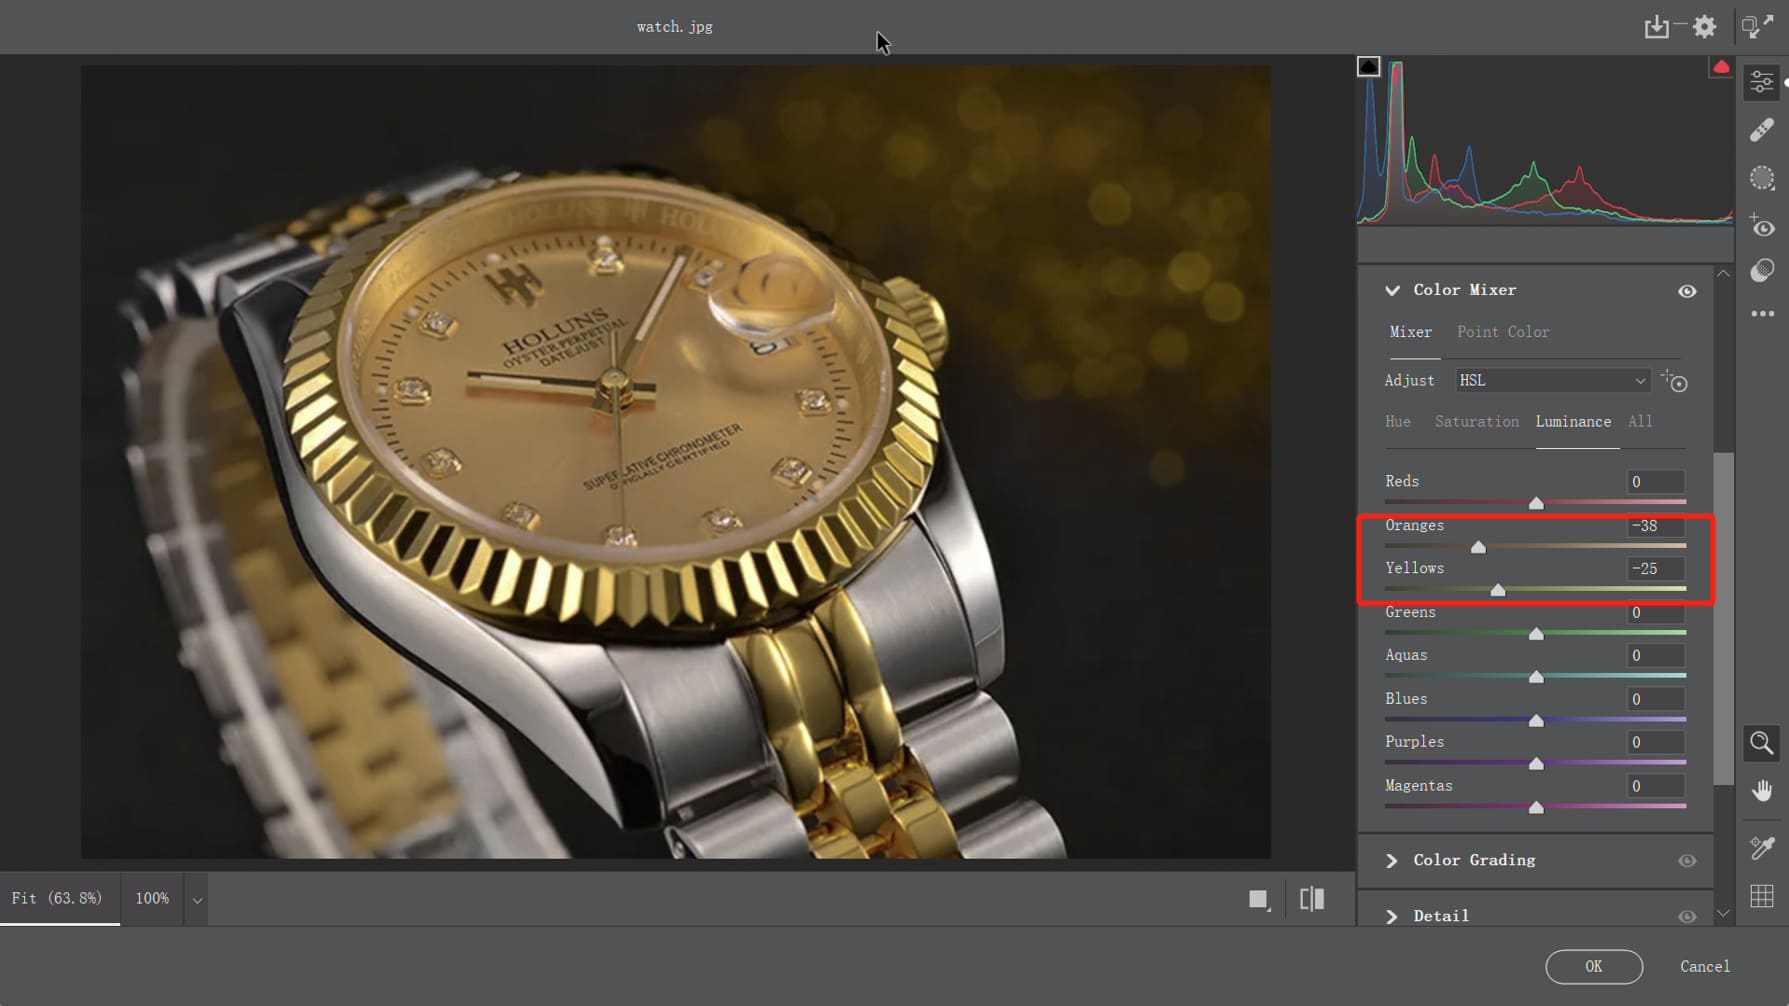
Finally, in the "Luminance" option, we will darken the values for both orange and yellow. Since we want the effect to be more pronounced, the adjustments will be relatively significant.
You will notice a significant change in the image, as shown in the image below:
3. Brighten the Image
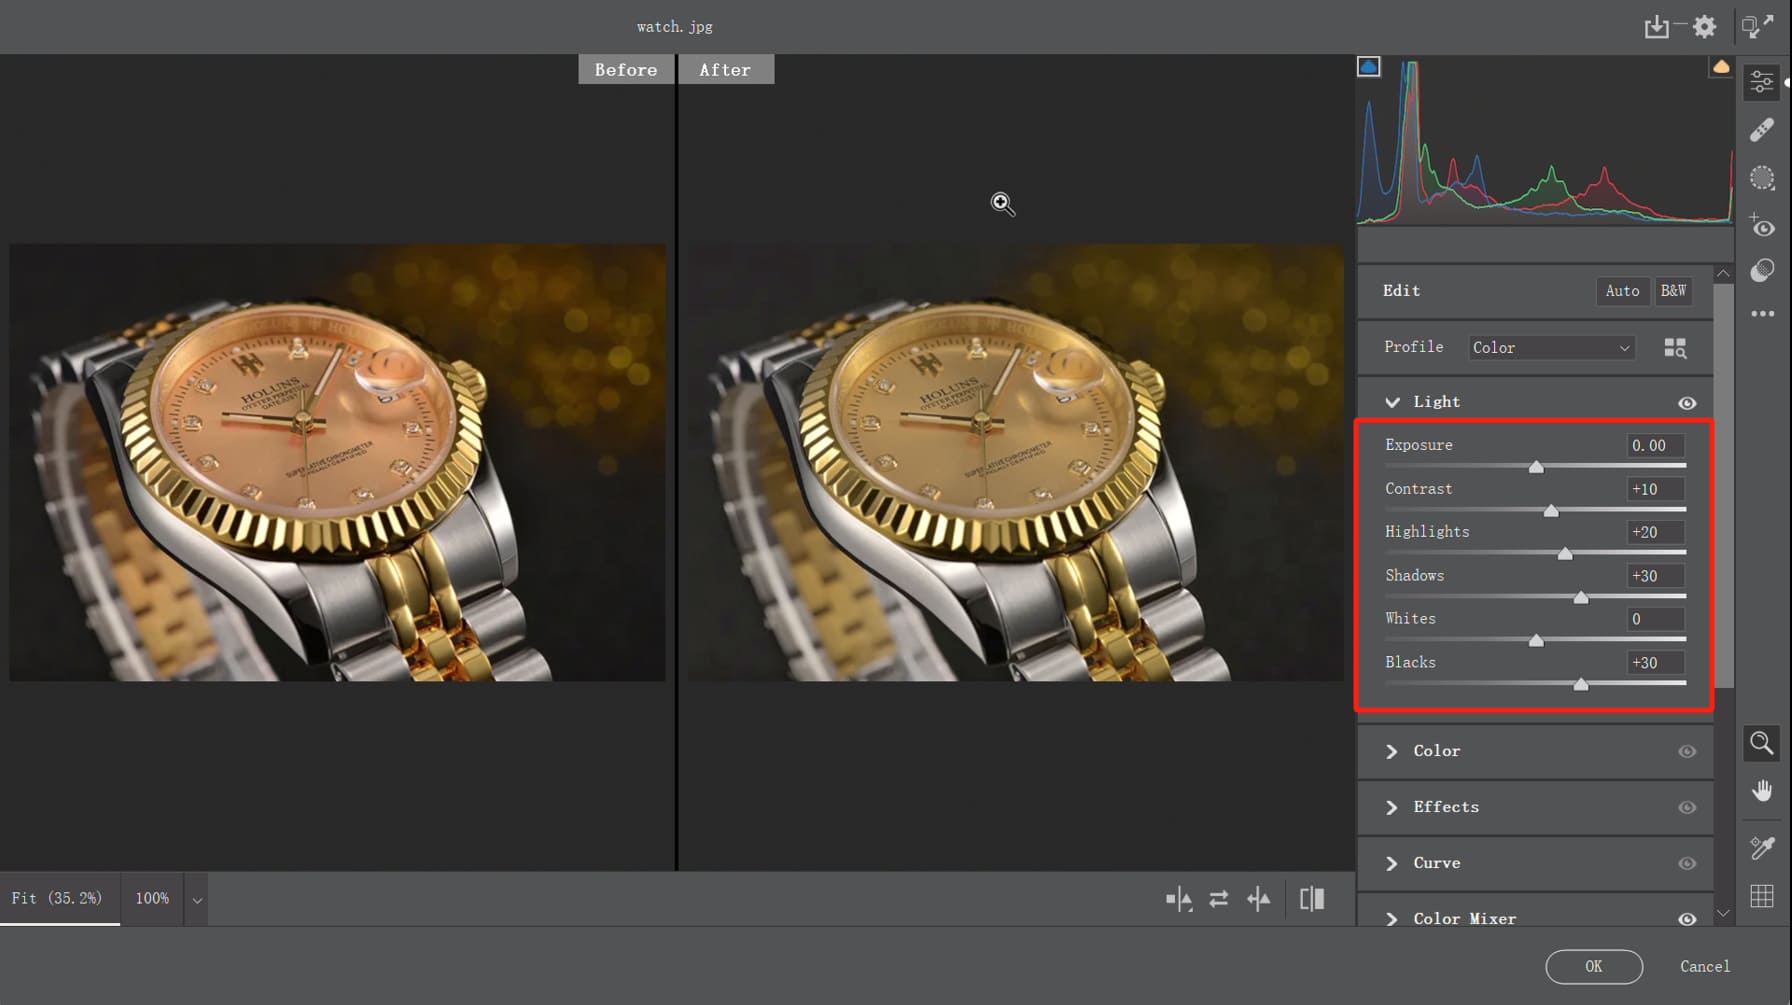
After performing color correction on the photo, the next step is to adjust the dark shadows, brighten the overall image, and enhance the atmosphere.
First, we need to adjust the overall feel of the image. Click on the dropdown panel for "Light" and make adjustments to "Contrast," "Highlights," "Shadows," and "Blacks," as shown in the image below:
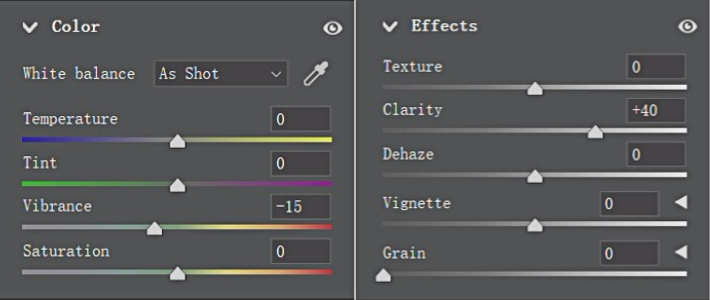
Click on the dropdown panel for "Color" and slightly decrease the value of vibrance. Then, click on the dropdown panel for "Effects" and increase the value of clarity, as shown in the image below:
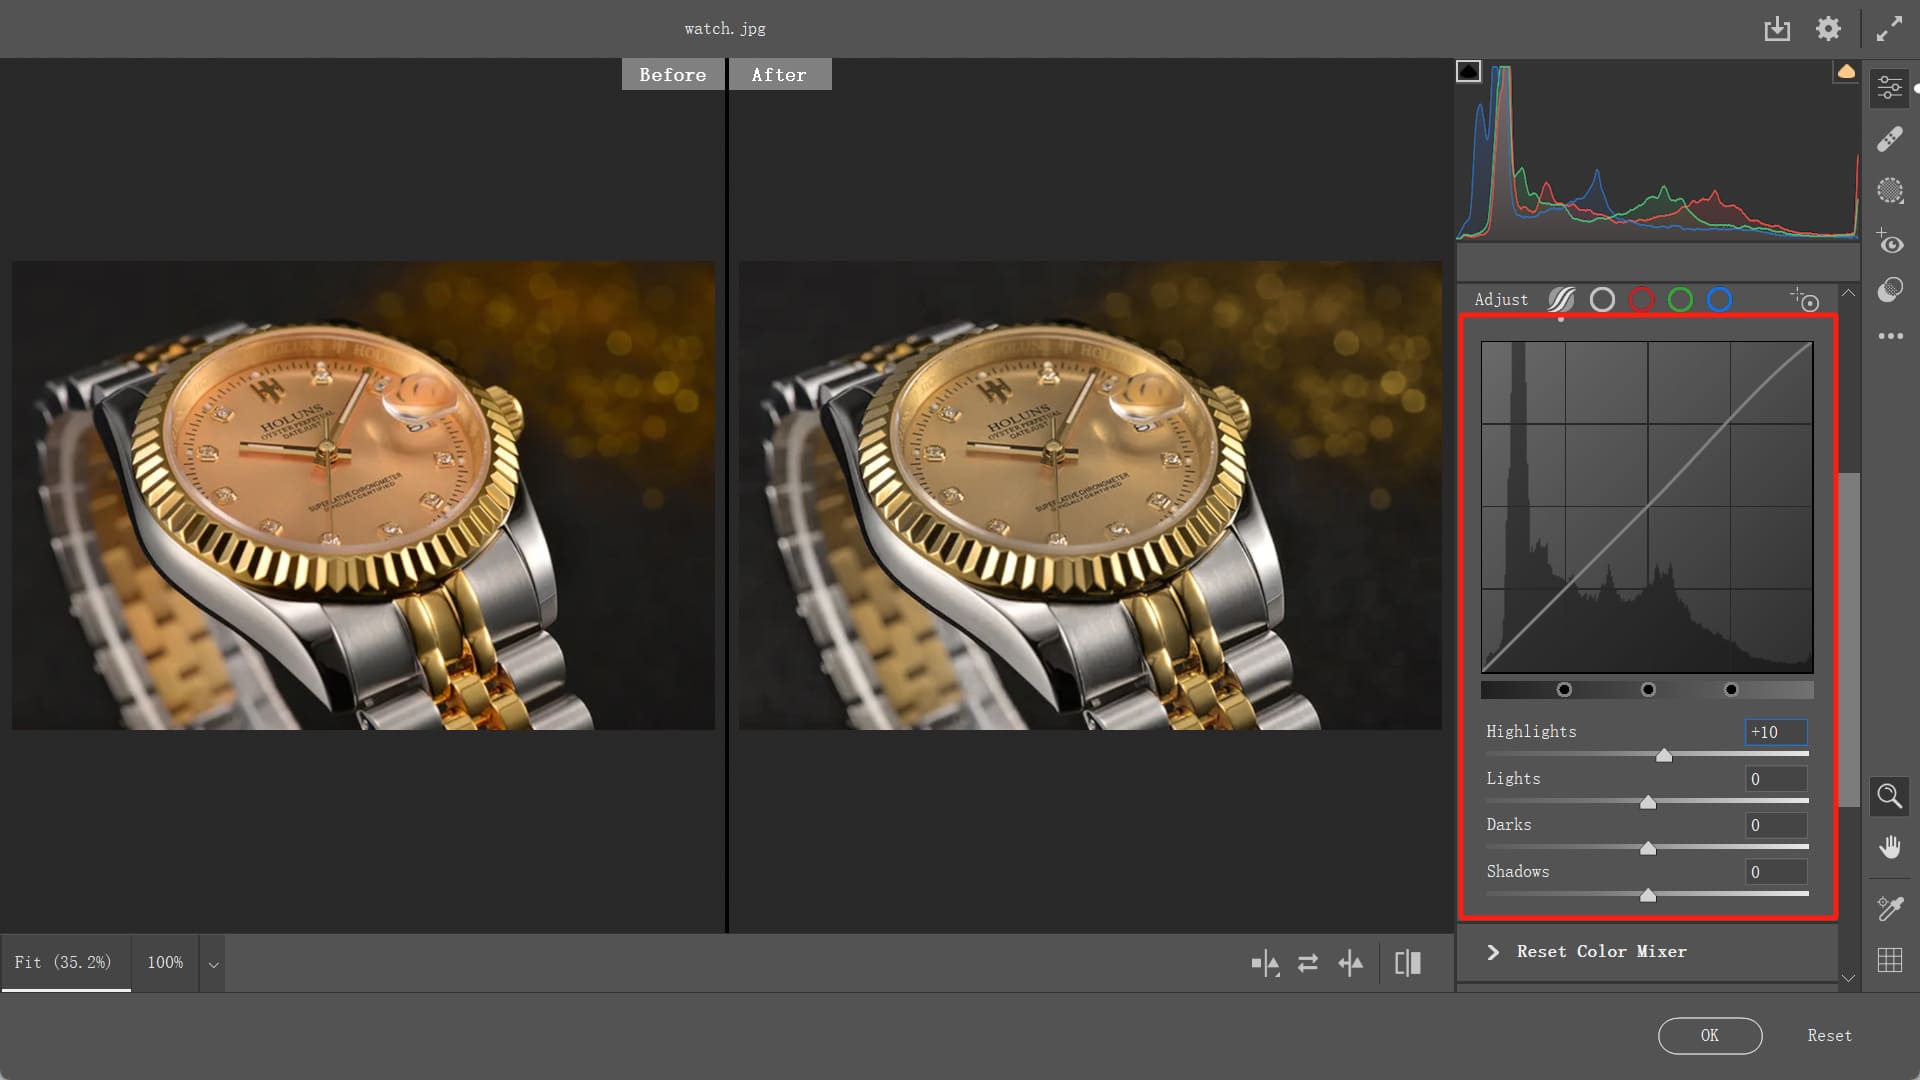
If you feel that the current effect is not quite satisfactory, you can click on the Curve panel and drag the curve to brighten the highlights as needed.
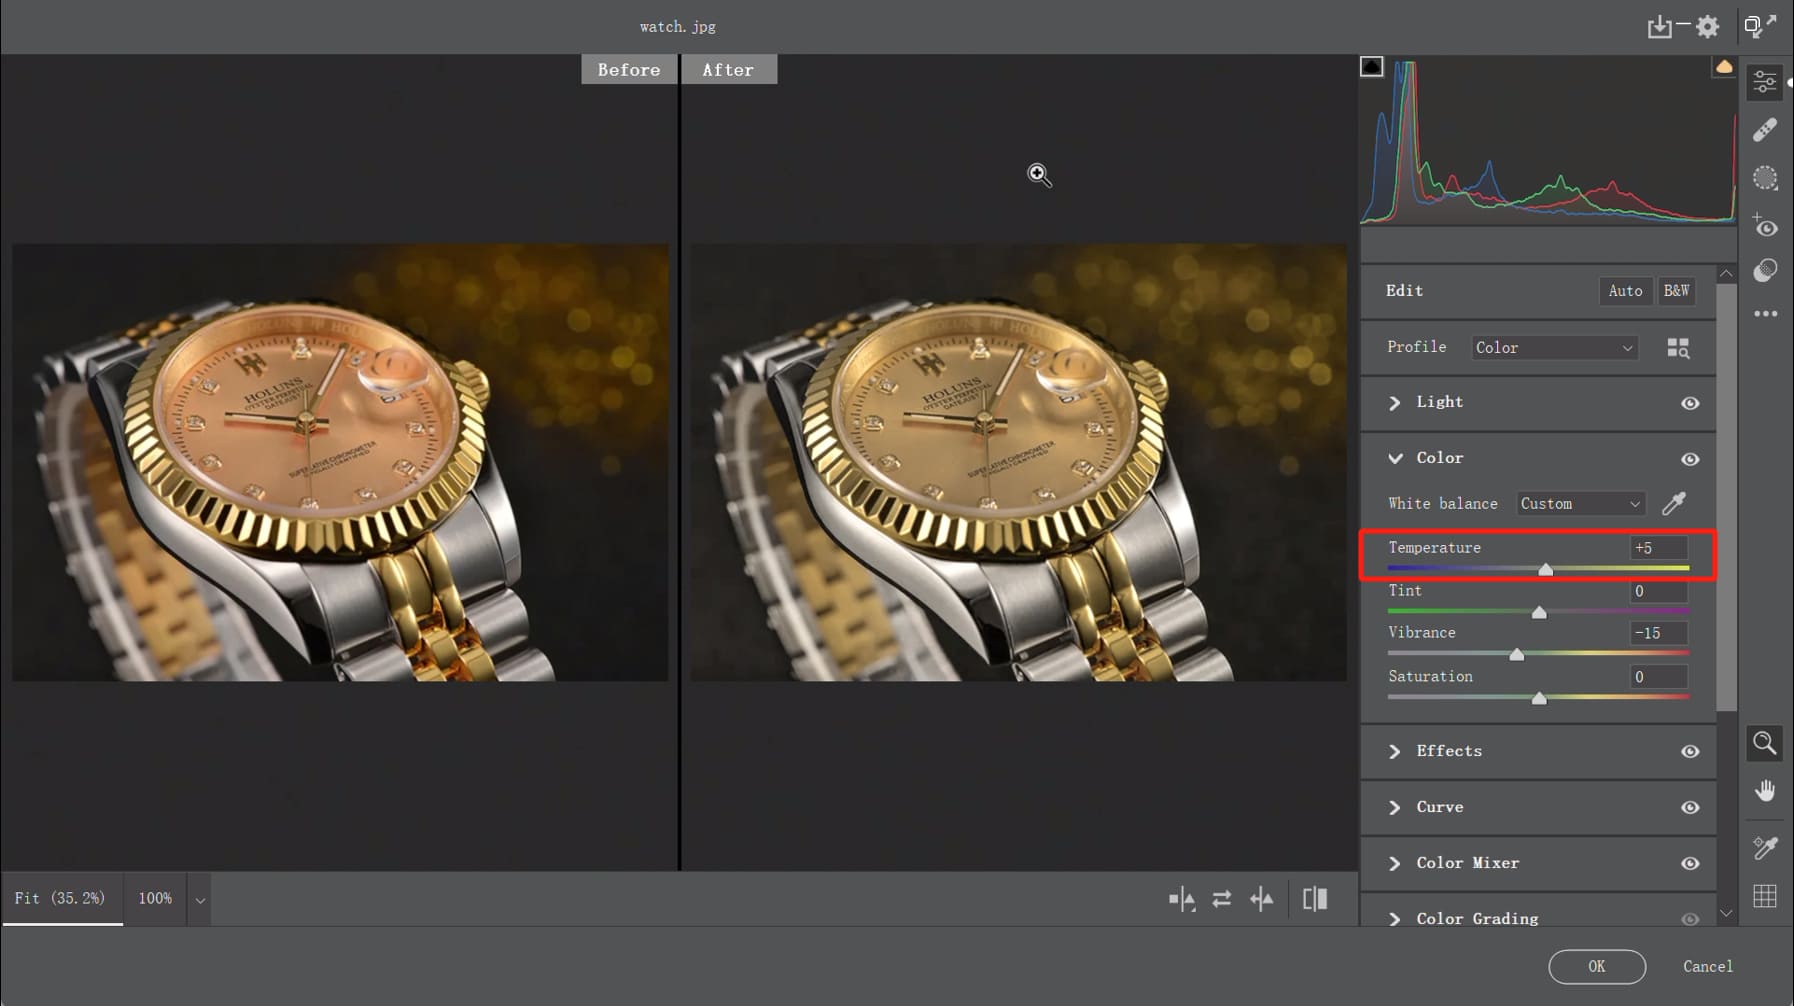
Lastly, we need to enhance the atmosphere of the photo. The "Temperature" of the photo should be slightly warmer, to better emphasize the metallic texture. Therefore, we need to slightly slide the temperature slider towards the yellow side in the "Color" panel.
4. Adding Details
In the final step of editing the image using Adobe Camera Raw, we need to add some details to the photo. The purpose is to reduce noise in the image and further enhance the atmosphere:
- Sharpening: Adjust the "Amount," "Radius," "Detail," and "Masking."
- Noise Reduction: Adjust the "Noise Reduction" and "Detail."
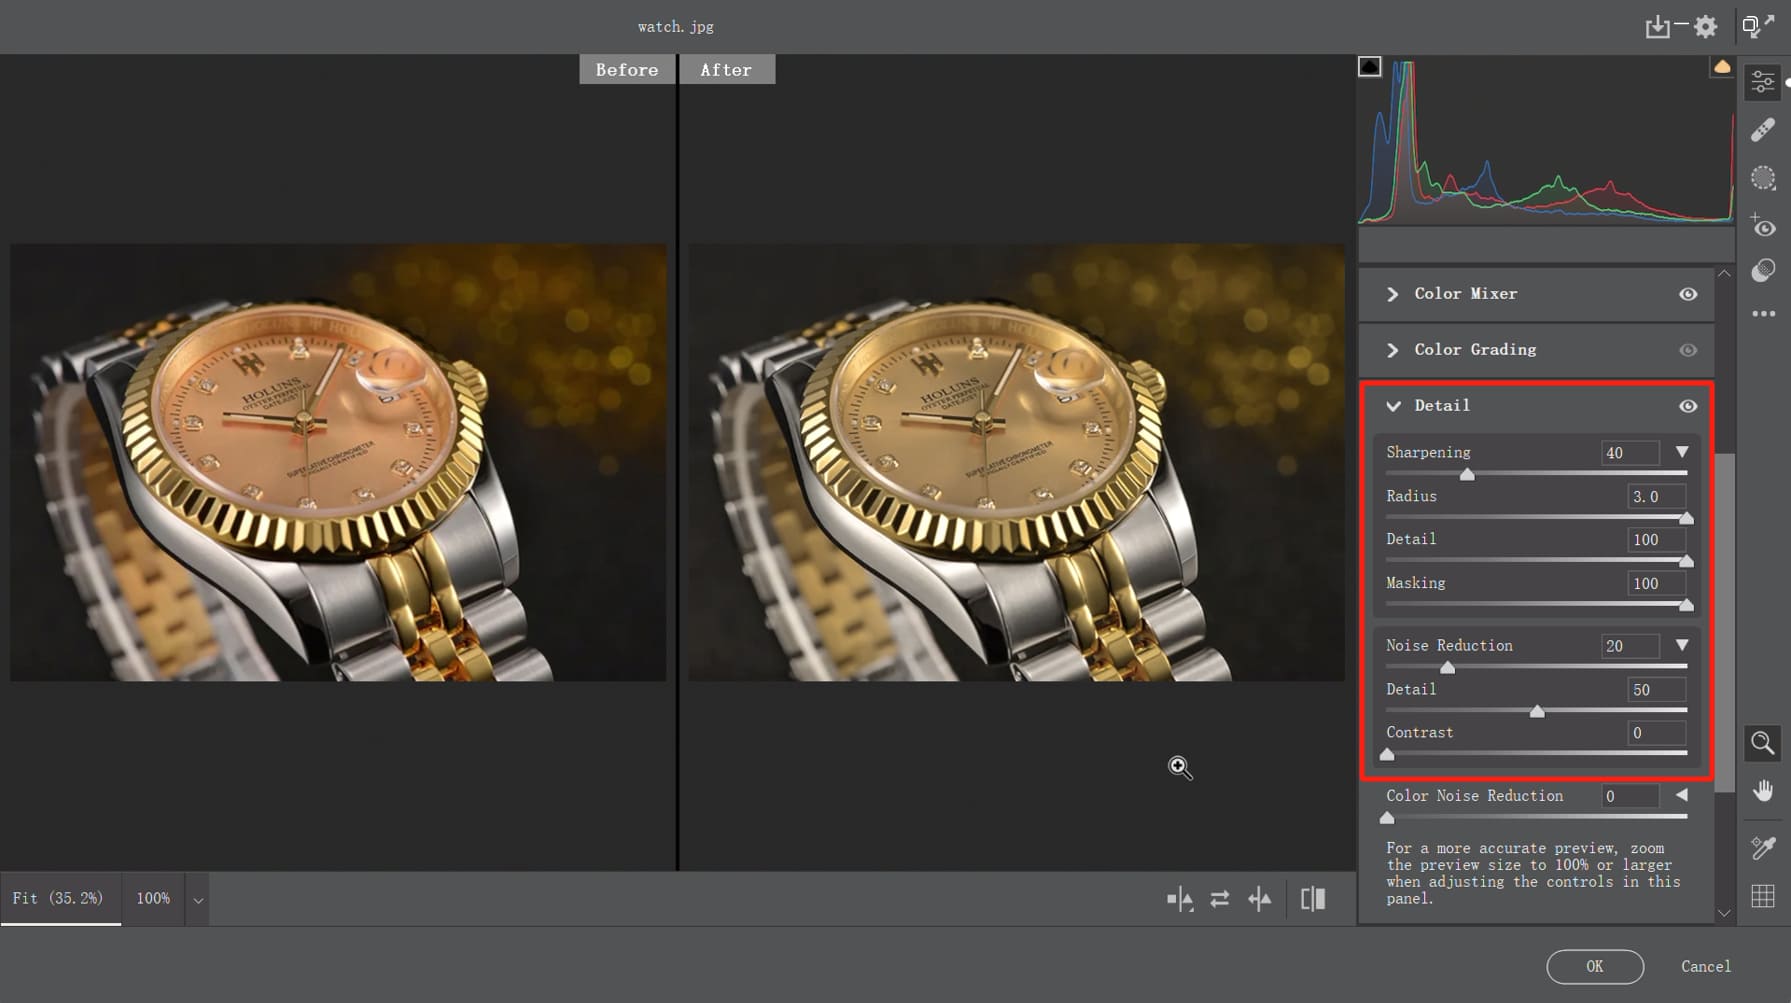
Great job! Let's take a look at the before and after comparison.

What Is the Difference Between Camera Raw and Lightroom?
If you have also used Adobe's Lightroom Classic, you might be confused because Camera Raw and Lightroom are quite similar. In terms of editing photos, Lightroom and Camera Raw are almost identical.
However, Lightroom offers more than just processing raw files; it has powerful organizational features as well. Lightroom provides photographers with a comprehensive workflow solution, including library management, photo editing, print output, and more.
If Lightroom is so powerful, why use Camera Raw?
The biggest advantage of using Camera Raw is its convenience and ease of use. Sometimes, you may not need extensive management and batch processing of a large number of photos. You may simply want to quietly fine-tune one or two images. In such cases, Camera Raw is much more convenient.
Furthermore, learning Camera Raw is simple and easy to get started with. Once you learn Camera Raw, you essentially learn the editing panels in Lightroom as well.
Therefore, beginners can start with Camera Raw, become proficient with it, and then gradually master the additional features in Lightroom, progressing step by step.
In summary:
- ACR (Adobe Camera Raw) is the built-in raw file processor in Photoshop.
- Lightroom offers additional features such as image management, making it more powerful and complex.
- The editing components of ACR and Lightroom are essentially the same. Mastering ACR also means mastering Lightroom editing.
Product Recommendation:
In this tutorial, we have explored the various features and capabilities of Camera Raw, learning how to fine-tune our photos for optimal results.
But what if there was a tool that could further enhance our editing experience, allowing us to intuitively control Camera Raw parameters with just a few simple adjustments? That's where TourBox comes in.

TourBox is a revolutionary device designed to streamline your editing workflow. With its ergonomic design and intuitive controls, including Dial, Knob, and Scroll, TourBox provides a seamless integration with Camera Raw.
Imagine being able to quickly access the Camera Raw panel with just a press of a button on TourBox, and then using the Dial to adjust the exposure, the Knob to manipulate color temperature, and the Scroll wheel to navigate through your image.
Experience the seamless integration, intuitive controls, and enhanced editing capabilities with TourBox. Take your Camera Raw editing to new heights and unlock your creative potential. Try TourBox today and see the difference it can make in your editing process.
And that concludes our tutorial on Camera Raw. We hope it has been enlightening and inspiring for you.