How to Add Transitions in CapCut?
Have you ever watched someone else's video and thought, "Wow, those transitions are as smooth as in a movie"? Then you check out your own video and feel, "Yikes, these transitions are so awkward!"
For content creators, a good transition is a key way to boost the viewer experience. Using the right transitions helps your video flow better and makes a strong visual and emotional impact.
Today, we're going to show you how to add transitions using CapCut. With these tips, your videos will connect seamlessly and instantly look more professional.

In this article, you will learn:
- What Is a Transition?
- How to Add Transitions in CapCut?
- How to Replace a Transition in CapCut?
- How to Apply the Same Transition to All Clips on a Track?
- How to Adjust the Duration of CapCut Transitions?
- Conclusion
What Is a Transition?
Let's start by talking about what a transition is. A transition is like walking down a road and suddenly turning a corner into a new scene. In a video, it's the "bridge" that connects two different shots or scenes.
When done right, transitions make your video flow smoothly. When done poorly, they can make the video feel choppy and awkward. If you're not too familiar with the basics of video transitions, click the link below to learn more.
How to Add Transitions in CapCut?
Here we'll use the CapCut PC version to show you how to add transitions. To add a transition in CapCut PC, you need at least two clips on the same track. If there is only one clip on a track, you cannot add a transition.
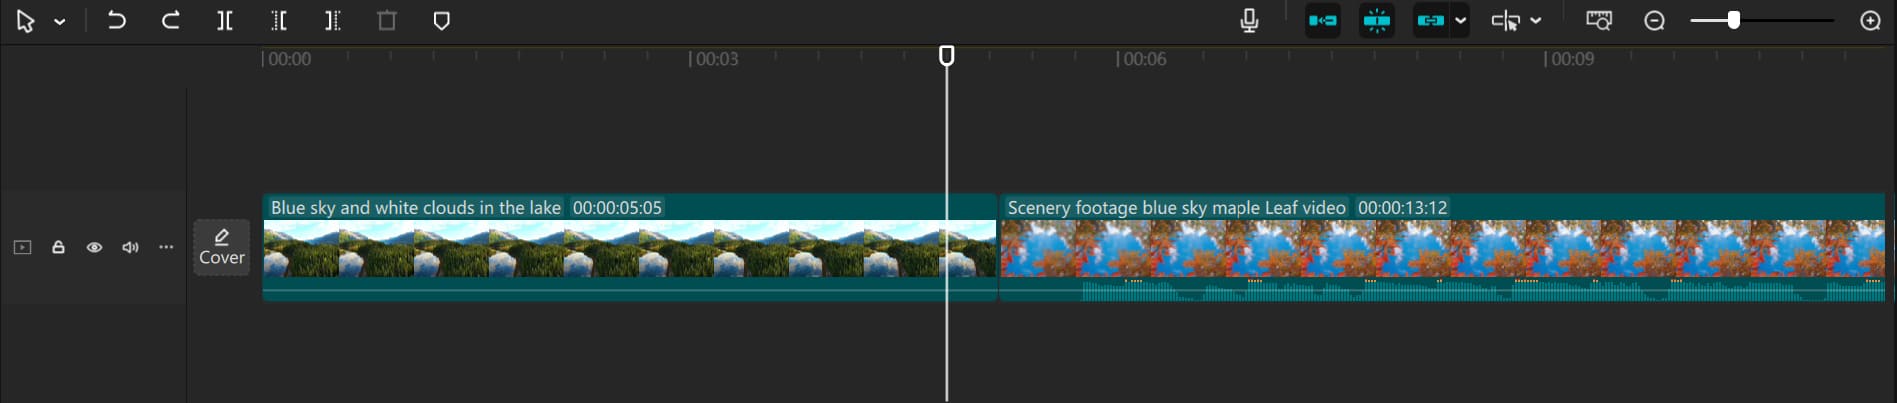
Step 1: First, add two clips to the track. They can be images or videos.
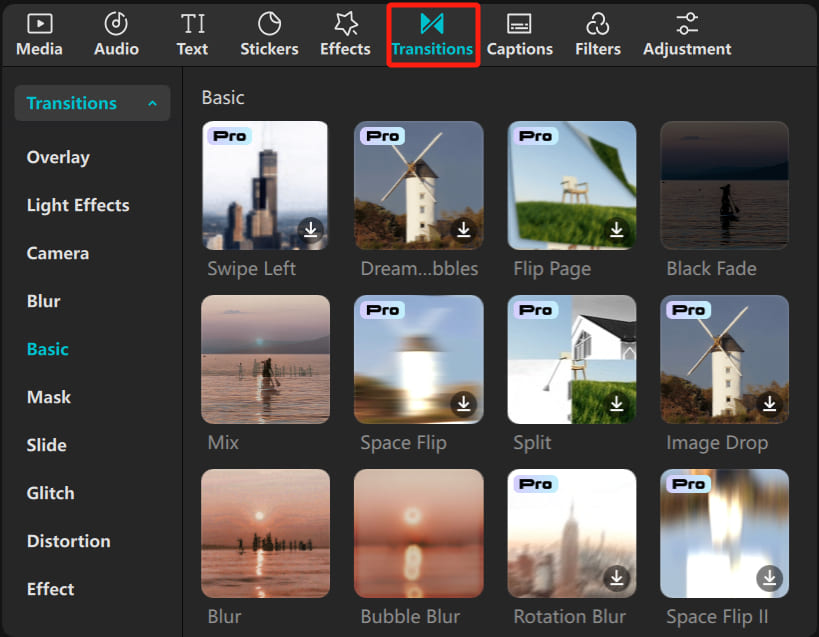
Step 2: Click the "Transitions" tab at the top left. Then, choose a transition from the list on the left.
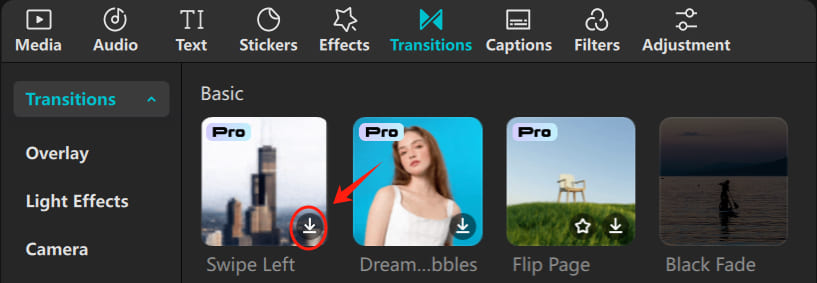
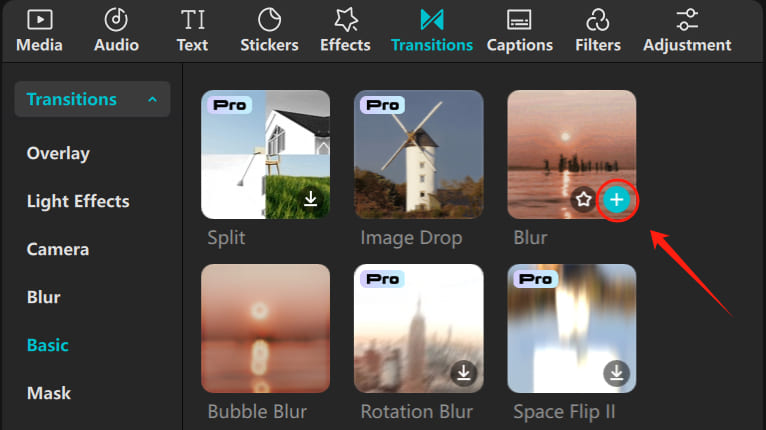
Step 3: If you are using a transition for the first time, you must download it before use. Click on the transition thumbnail or click the small download icon at the bottom right of the thumbnail to download it.
Step 4: Let's use the "Blur" transition as an example. Hover your mouse over "Blur." Press and hold the left mouse button, drag it between the two clips on the track, and then release. The transition will be added!
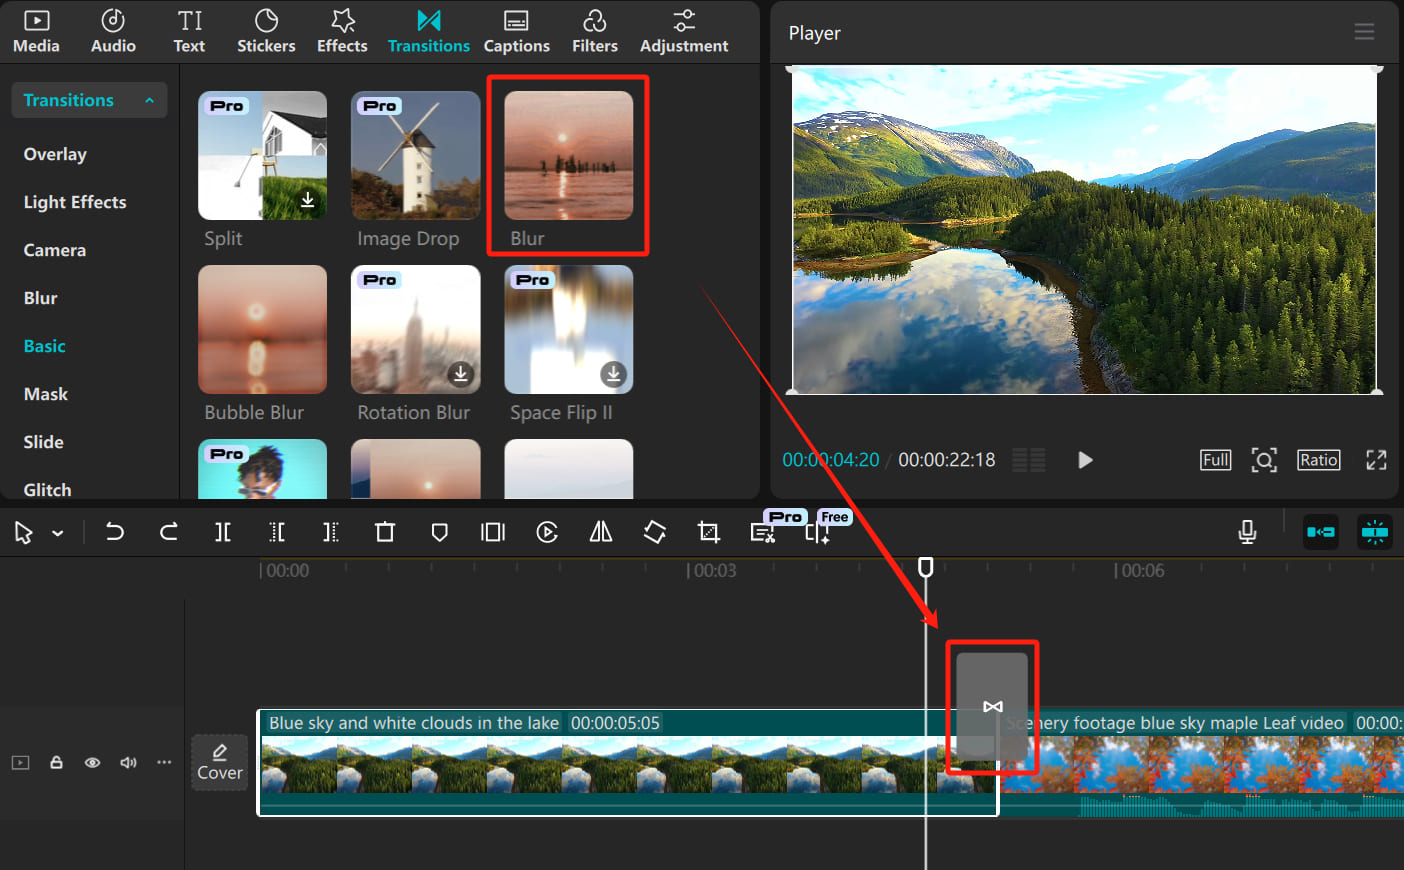
Besides dragging, you can also click the plus icon (add to track) at the bottom right of the thumbnail to add the transition.
Here are a few things to keep in mind when adding a transition to the track in CapCut:
- If the playhead is in the first half of a clip, the transition will be added at the beginning of that clip. If it's in the second half, the transition goes at the end.
- If there are only two clips on the track, the transition will always be placed between them, no matter where the playhead is.
- If the main track (the default first track) is empty but there are clips on an auxiliary track, the transition will be added to the auxiliary track. If both the main and auxiliary tracks have clips, it will be added to the main track.
How to Replace a Transition in CapCut?
In CapCut, you can replace a transition even after you've added it. Just drag the new transition over the existing one on the track and let go. You don't need to delete the old one first.
How to Apply the Same Transition to All Clips on a Track?
If you want to use the same transition between every clip on the track, you don't have to add it repeatedly.
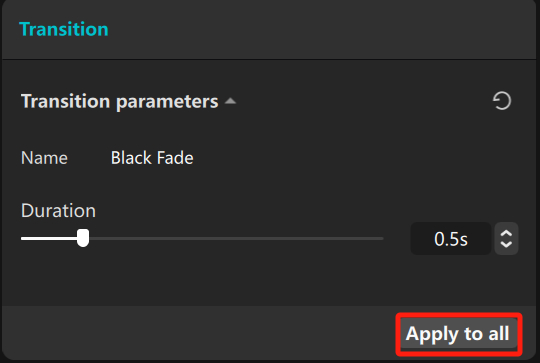
Just add one transition to the track first. Then click on the transition you just added to the timeline. A settings panel for the transition will appear on the right side of CapCut.
Click "Apply All" at the bottom right of the panel, and the transition will be added to every clip on the track.
How to Adjust the Duration of CapCut Transitions?
In CapCut, the maximum duration of a transition is half the length of the shorter adjacent clip. For example, if one clip is 4 seconds and the other is 3 seconds, the longest transition can be 1.5 seconds.
To adjust the transition duration, you can either change it directly in the transition's properties panel or drag the start or end point of the transition on the timeline to set the desired length.
Conclusion
At the end of our CapCut transitions tutorial, we'd like to recommend a tool that can really boost your editing efficiency: the TourBox.

As a content creator or video editor, having a smooth workflow is key. A creative console like the TourBox can make your process a lot easier.
The TourBox gives you tactile feedback and lets you customize its controls. You can assign different editing functions to its buttons and dials, which makes editing more intuitive and cuts down on keyboard shortcuts and mouse clicks.

For example, in CapCut, you can simply turn the TourBox knob to adjust the playhead on your timeline, almost like using a game controller.
The TourBox is especially handy during intensive editing sessions. If you're curious about it, check out our video editing page for more on how the TourBox can help you work smarter.