Color Banding Explained: What It Is and How to Fix It?
Color banding is every photographer and editor's worst nightmare. Those smooth, seamless gradients you worked so hard to create suddenly turn into harsh, ugly color stripes, ruining the look of your image and driving you crazy.
In this article, we'll explain what causes color banding and share practical tips to help you avoid — or even fix — this frustrating issue in both shooting and post-processing.

In this article, you will learn:
- What Is Color Banding?
- How to Minimize Color Banding?
- How to Fix Color Banding?
- Conclusion: Say Goodbye to Color Banding
What Is Color Banding?
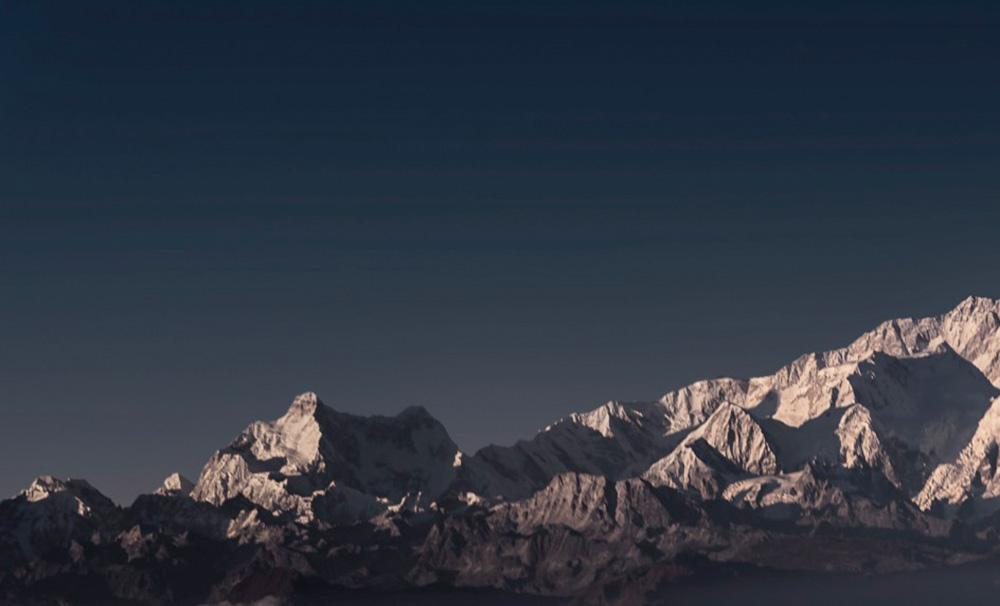
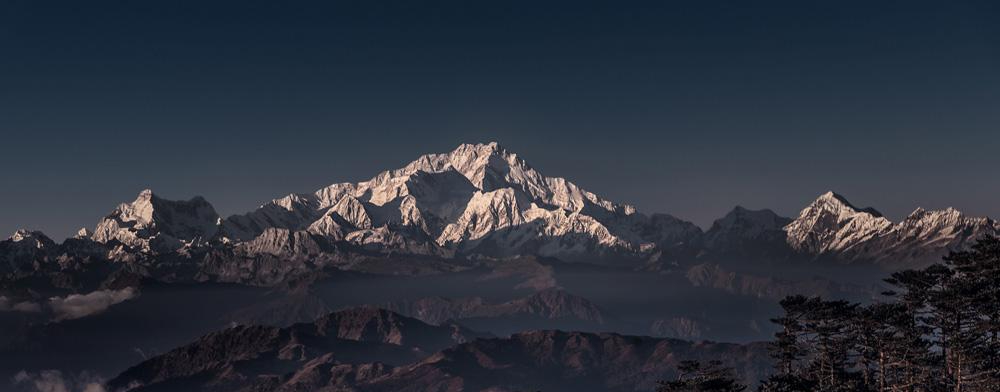
Have you ever noticed something strange in photos like the one below? A clear blue sky that should look smooth and seamless instead breaks into visible color bands.

When we zoom in, the issue becomes even more obvious — this is what we call color banding.

Color banding usually happens in areas with soft gradients, like sunset skies, studio backdrops, or light projections. It occurs when the image's color depth isn't high enough to display subtle transitions between shades.
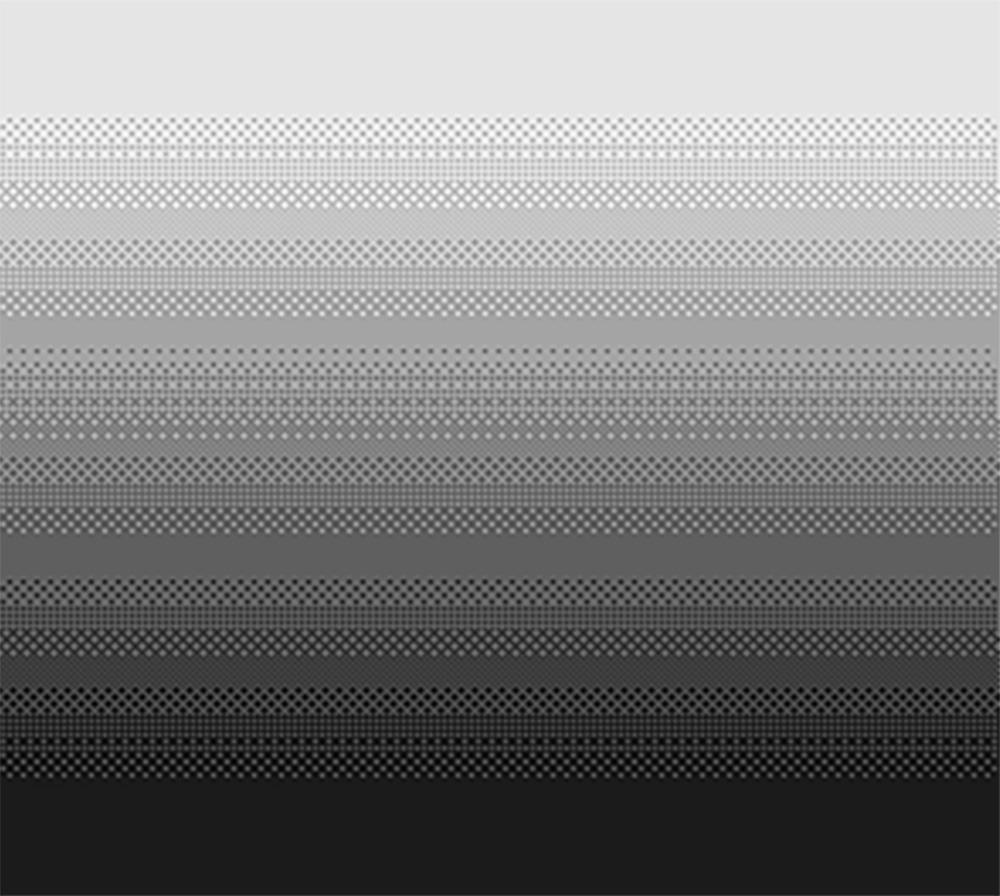
As a result, what should be a smooth gradient turns into something choppy, like this:

Originally, the gradient should look like this:
0, 0.25, 0.5, 0.75, 1, 1.25, 1.5, 1.75, 2, 2.25, 2.5...
But with low color depth, the small decimal values get rounded off, turning it into:
0, 0, 0, 0, 1, 1, 1, 1, 2, 2, 2...
In other words, banding happens because each pixel's color gets rounded to the nearest available value, creating visible jumps between shades.
If a large part of your photo includes smooth gradients, color banding becomes especially noticeable, as shown in the image below.
It gets even worse when you print your photo — banding can stand out even more, potentially ruining what could have been a perfect shot.
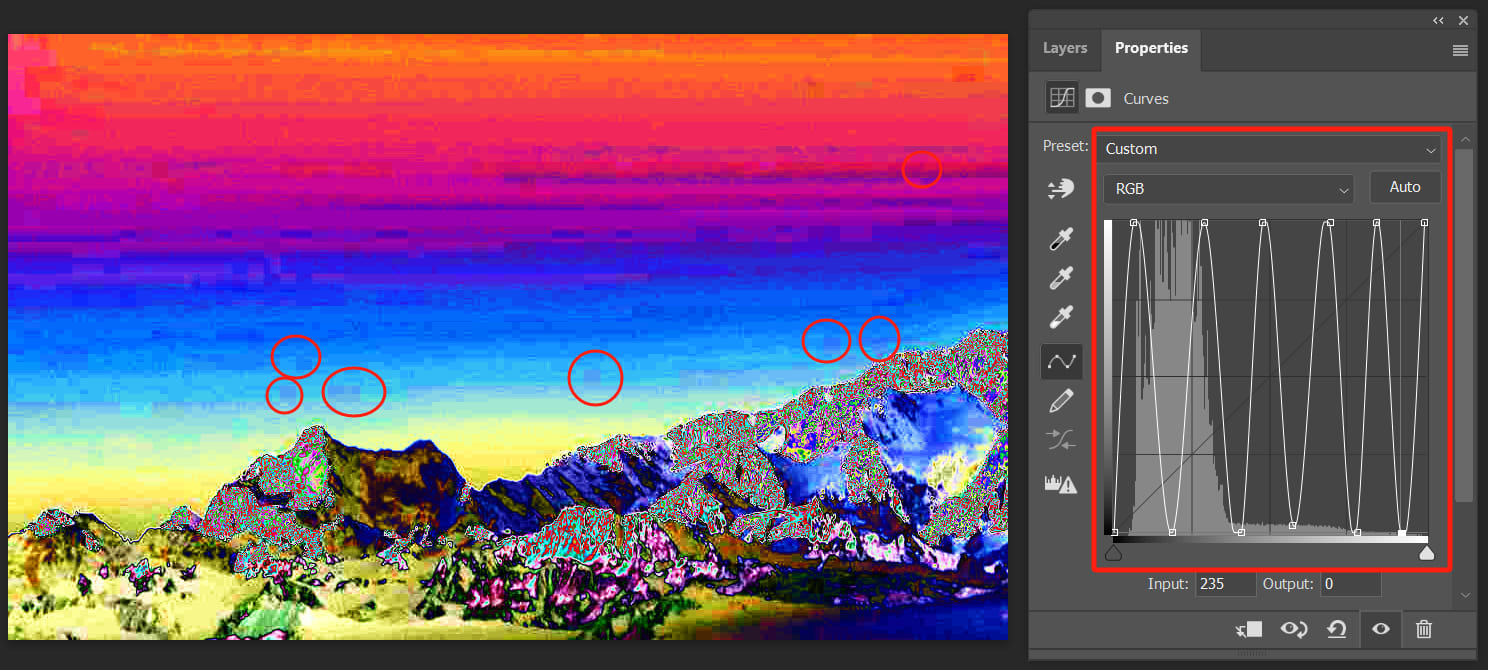
To get a better look at color banding, we often use something called a solar curve.
Professional photographers might already be familiar with this. A solar curve looks similar to a sine wave in math. It exaggerates small changes in the image, making it easier to spot flaws that are usually hard to notice.
For example, in this photo, applying a solar curve reveals several hidden dust spots that were hard to see before.
It also makes the gradient banding in the sky much more obvious, so you can see where the smooth transitions break apart.
How to Minimize Color Banding?
As mentioned earlier, color banding happens mainly because of low color depth. Images with lower bit depth, like 8-bit JPEGs, carry less original information, making them more likely to show banding during processing.
To avoid this, start by shooting in uncompressed or lossless compressed RAW format. If the scene has a high dynamic range scene, try using exposure bracketing and merging the shots later, instead of simply dragging the highlights down to -100 on a single image.
During editing, make as many adjustments as possible in RAW processors like Camera Raw or Lightroom. These programs take full advantage of the rich data in RAW files, reducing the risk of banding.
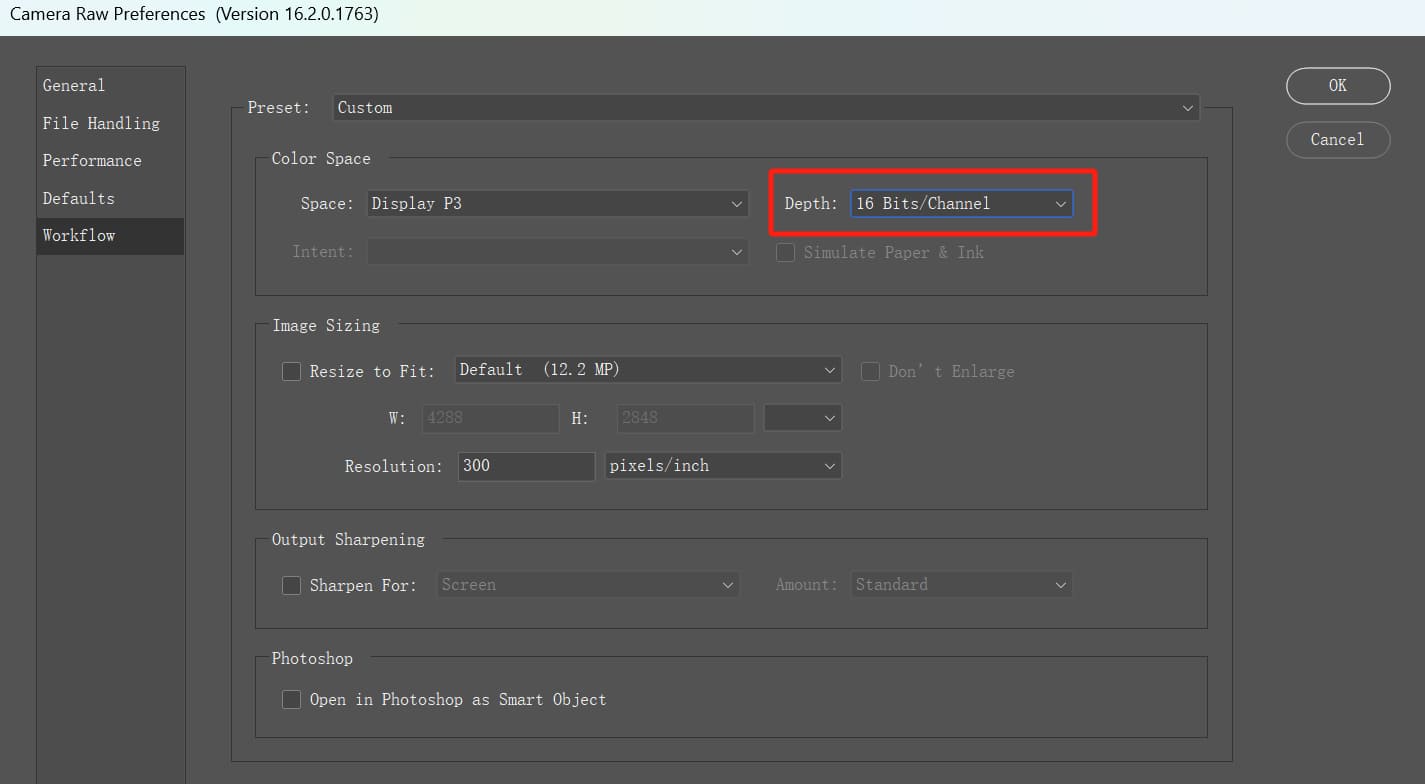
When you bring your RAW file into Photoshop, make sure to use a 16-bit color depth. To do this in Camera Raw, click the text bar at the bottom of the interface or the gear icon in the top-right corner to open the Camera Raw Preferences panel.
In the preferences panel, set the color depth to "16 bits/channel."
How to Fix Color Banding?
In the world of imaging, we can use a technique called dithering to hide color banding.
Dithering works by simulating colors. Its main goal is to create the illusion of smoother color transitions, even when fewer colors are available.
Instead of showing sharp, blocky transitions between colors, dithering blends them together. This makes the gradients appear smoother and more natural to the human eye, like how colors look in real life.
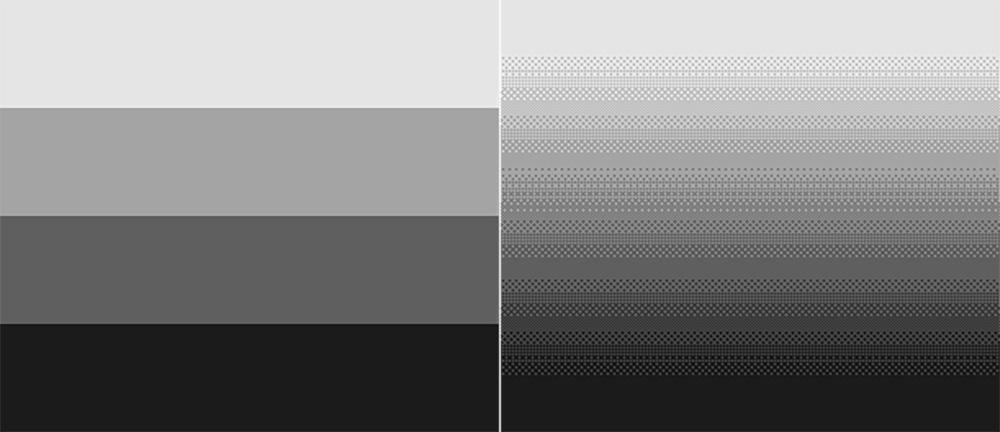
For example, take the gradient example above. Both the left and right images use only four colors.
On the left, the boundaries between colors are sharp, so the banding is obvious. On the right, by blending the colors together in the transition zones, the gradient looks much smoother.
So, how can we simulate dithering in Photoshop?
Take a closer look at those tiny speckles in a dithered gradient. Don't they remind you of an old friend we photographers know well?
That's right — it's noise!
It may sound surprising, but to fix color banding, all you need to do is add a bit of grain to the affected areas of your photo.
There are several ways to simulate dithering by adding noise. Here, we'll use Photoshop as an example:
- First, create a stamped visible layer by pressing Ctrl+Alt+Shift+E (or Command+Option+Shift+E on a Mac).
- Then, go to Filter > Camera Raw Filter.
- In the Camera Raw panel, find the Effects section on the right-hand settings panel, and look for the Grain option.
- Move the Amount slider to the right. As you do this, watch your image closely. You'll see more grain appear, and the color banding will gradually fade away.
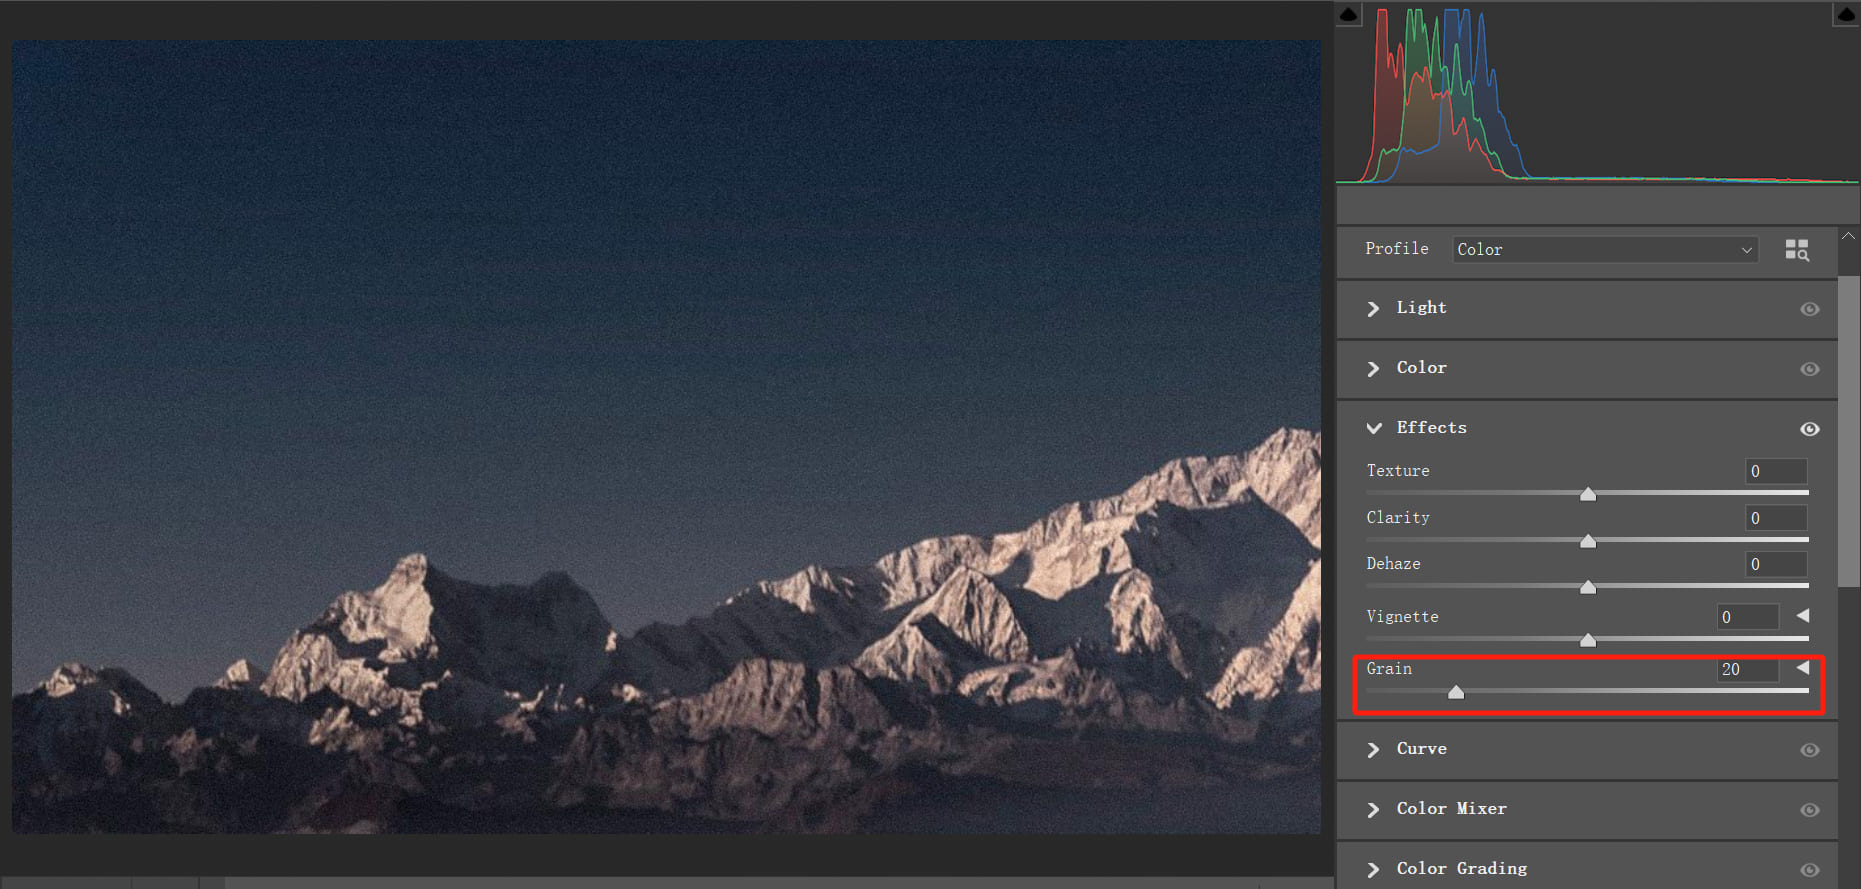
For the example image we're using, a grain amount of around 20 works well.
If you're tired of the hassle and imprecision of adjusting sliders with a mouse during photo editing, give the TourBox creative console a try. It lets you make precise adjustments, like +1 or -1, with incredible ease and a great tactile feel.

Interested? Check out our photo editing page to learn more about how TourBox can enhance your post-processing workflow.
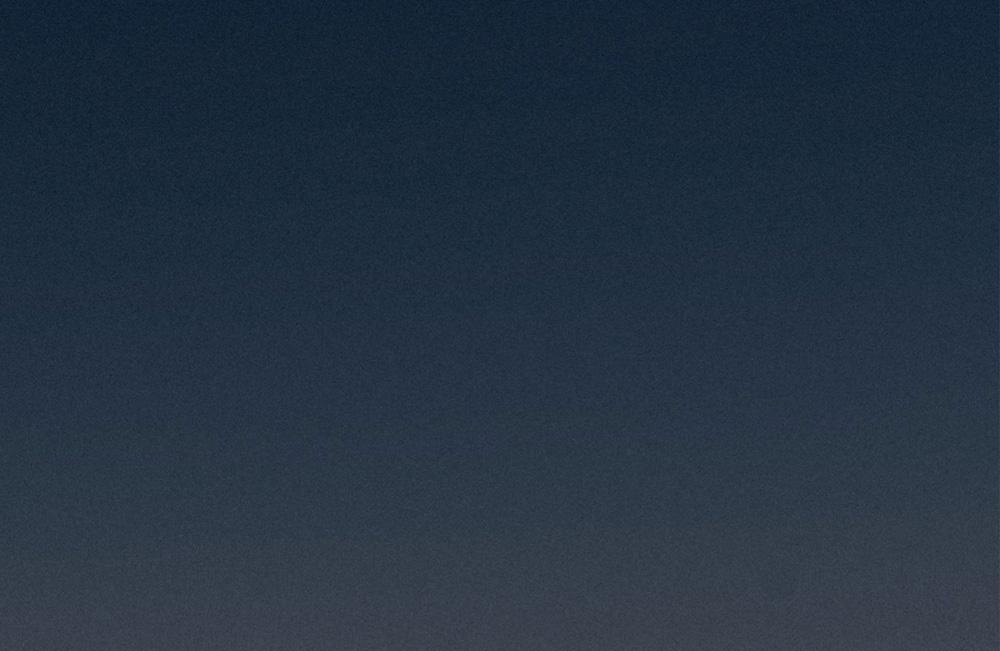
After clicking OK, zoom in on your photo. You'll notice that the once-clean sky now has visible grain, but the color banding is almost completely gone.
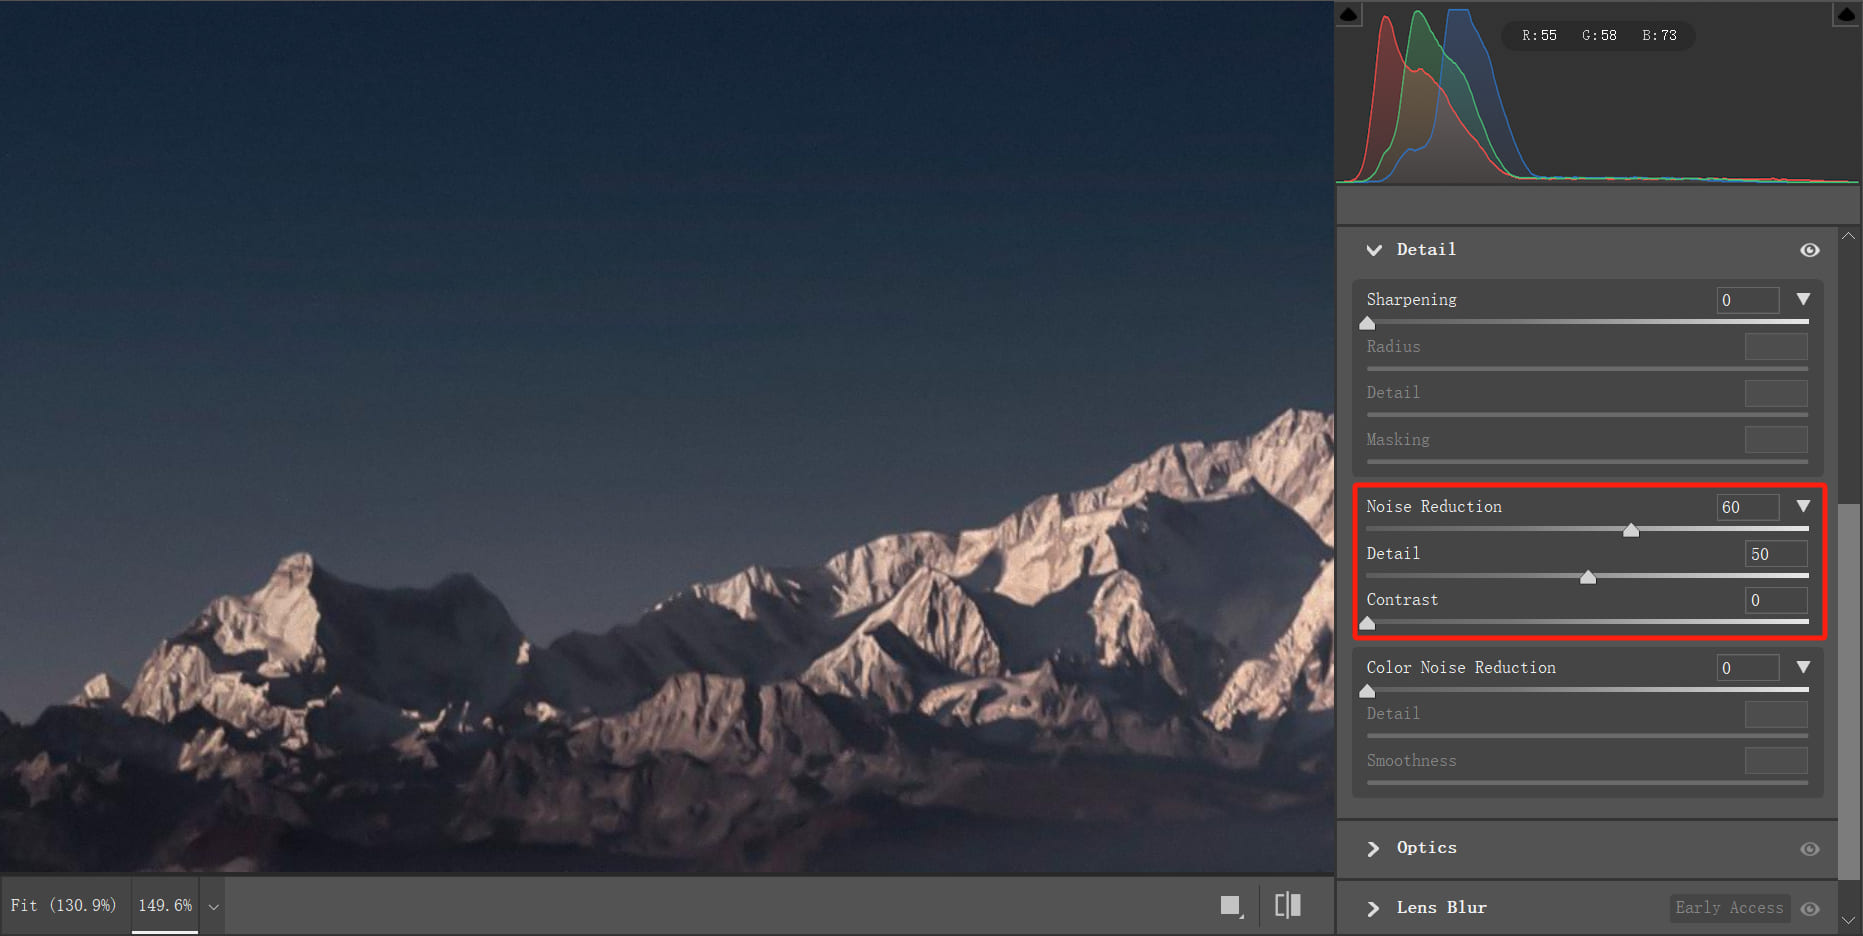
Of course, the grain in the sky might look a bit too harsh. To fix this, we can reopen the Camera Raw and adjust the settings.
- Go to the Detail panel on the right side.
- Increase the Noise Reduction slider to around 60.
Further Reading:
How to Reduce Noise in Images: Tips for Shooting and Editing
This step isn't about completely removing the grain — if you do that, the color banding will come back. Instead, it's about softening the grain so it blends better into the sky and looks less noticeable.
Since the adjustments we made affect the entire photo, the final step is to isolate the areas without color banding. This ensures the changes only apply to the sky with banding and don't interfere with details on the ground.
Here's how to do it:
- Add a layer mask to the stamped layer.
- Use a black brush to paint over the ground area, hiding the adjustments from that part of the photo.
Now let's take a look at the final result after fixing the color banding.
Conclusion: Say Goodbye to Color Banding
Color banding is a common challenge in post-processing, especially in gradient areas like skies and backgrounds. To tackle it, you can take steps both during shooting and in post-production:
- Shoot in RAW format to give yourself more flexibility in editing.
- Process images with 16-bit color depth for smoother gradients.
- If banding still appears, use noise to mask it and make the image look more natural.
Color banding isn't something to fear — it's simply a reminder of the delicate balance between technique and art.
Instead of getting frustrated, embrace the process of solving it. That's the true beauty of photo editing.
After all, every photo is a product of our dance with light and shadow. And isn't it through challenges like these that true art is born?
To close, we'd like to once again recommend a favorite tool among photographers and creative professionals: TourBox.

In photo editing, tasks like fine-tuning colors or fixing issues can sometimes feel tedious. If you're looking to boost your efficiency and make your workflow smoother — like using a game controller to play a video game — TourBox is a tool worth considering.
With customizable buttons and knobs, TourBox lets you create your own workflows in editing software, making post-processing faster and easier. This way, you can focus more on your creative vision and less on repetitive tasks.