Mastering the Double Exposure: Tips for Photoshop and Photography
Double exposure is a captivating technique that combines two or more images to produce stunning, ethereal compositions.
In this tutorial, we will guide you through the step-by-step process of achieving impressive double exposure effects, even if you're a beginner. So let's dive in and unlock the secrets of this mesmerizing artistic technique.

In this article, you will learn:
- What Is Double Exposure?
- How to Do Double Exposure in Photoshop?
- How to Do Double Exposure in Photography?
- Final Thoughts About Double Exposure
What Is Double Exposure?
The term "double exposure," also known as "multiple exposure," refers to the same concept. It's basically the effect you see in the image below.
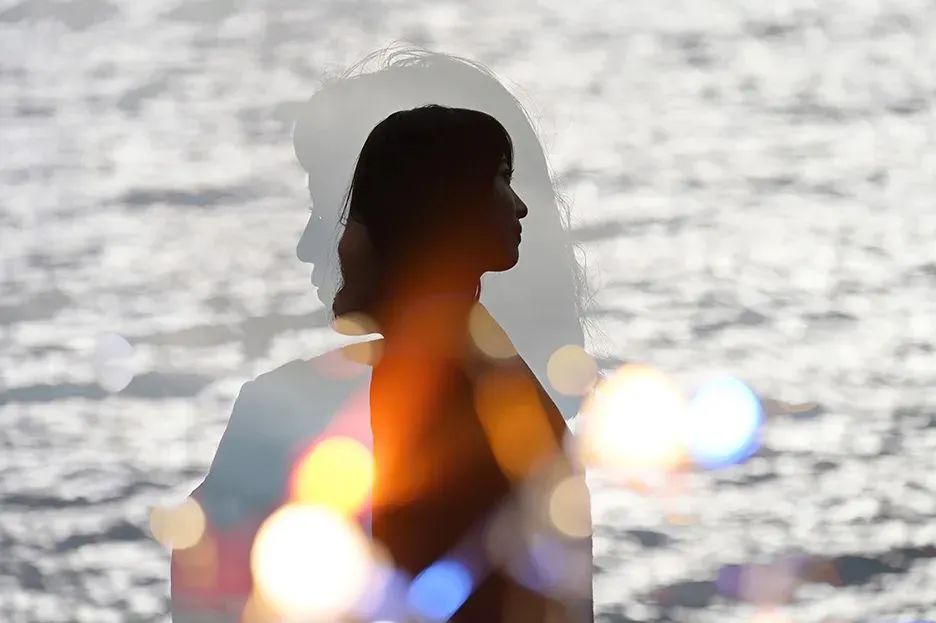
Double exposure is a technique that involves overlaying two different exposures or images together. The overlaid images are not completely opaque, allowing both images to be visible and creating a mysterious and ethereal effect.
You can create multiple or double exposure effects either within a digital camera or by using editing programs like Photoshop. If you're working with an actual film, you would need to expose the same portion of the film twice, overlaying the second image onto the first.
Why Would You Want to Use Double Exposure Effects?
In the early days of photography, double exposure was used to achieve special effects. Nowadays, double-exposure photography is more of an aesthetic choice.
In the late 19th century, before the advent of digital cameras with multiple exposure settings and post-production effects, photographers and filmmakers had to create their ideal worlds with what they had.
When they discovered how to achieve double exposure with their lenses, it can be said that they stumbled upon the first special effect in history.
Georges Méliès, a filmmaker and magician, showcased the mesmerizing effect of double exposure for the first time in his 1898 film "Un homme de têtes" (or "The Four Troublesome Heads").
Méliès, driven by curiosity and innovation, played a pivotal role in the creation of what we now know as chroma key compositing.
He used a glass plate coated with black paint as a mask to block a portion of the lens, preventing that part of the film from being exposed. After capturing the desired footage, Méliès would rewind the same film and block another portion of the lens with the mask, capturing a second exposure.
In this way, two or more exposures would appear on the same film. This technique was later regarded as the primitive form of green screen compositing.
Imagine, this was all happening in the 19th century. The characters on the screen, as well as the effects, were products of the Victorian era.
Before the familiar post-production effects we are now accustomed to, this was the best way to capture vast spaces or fantastical worlds - by blending everything together to create incredible scenes.
Double exposure is a powerful storytelling tool. It captures hidden elements within a scene that can surprise, inspire, or delight the audience. It can also convey a range of emotions.
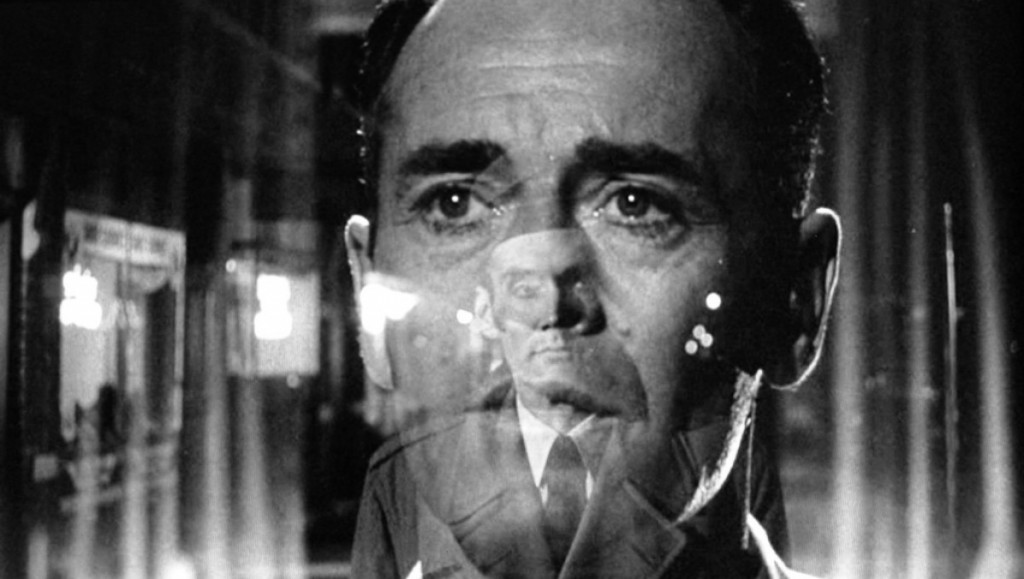
A great example is the multiple exposure shot used by the renowned director Alfred Hitchcock in his film "The Wrong Man."
Another example would be the iconic scene in the movie Blade Runner 2049. The combination of music, performances, and visual effects in this particular scene is absolutely breathtaking.
Of course, even in still images, double exposure can tell a story. And that brings us to the next section we want to share with you: how to do double exposure in Photoshop.
How to Do Double Exposure in Photoshop?
First, you'll need to import a portrait image into Photoshop. Then, simply press "Ctrl + J" to duplicate the layer.
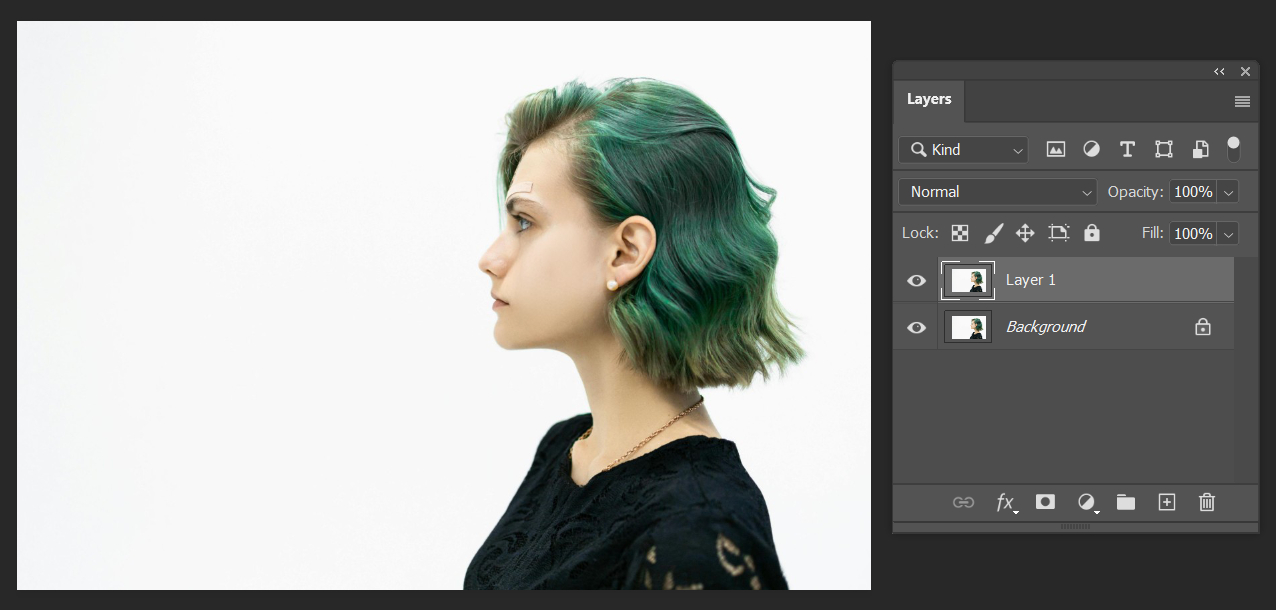
Next, locate any selection tool of your preference in the left toolbar of the Photoshop interface. Click the "Select Subject" button in the top settings bar to quickly select the person in the image.
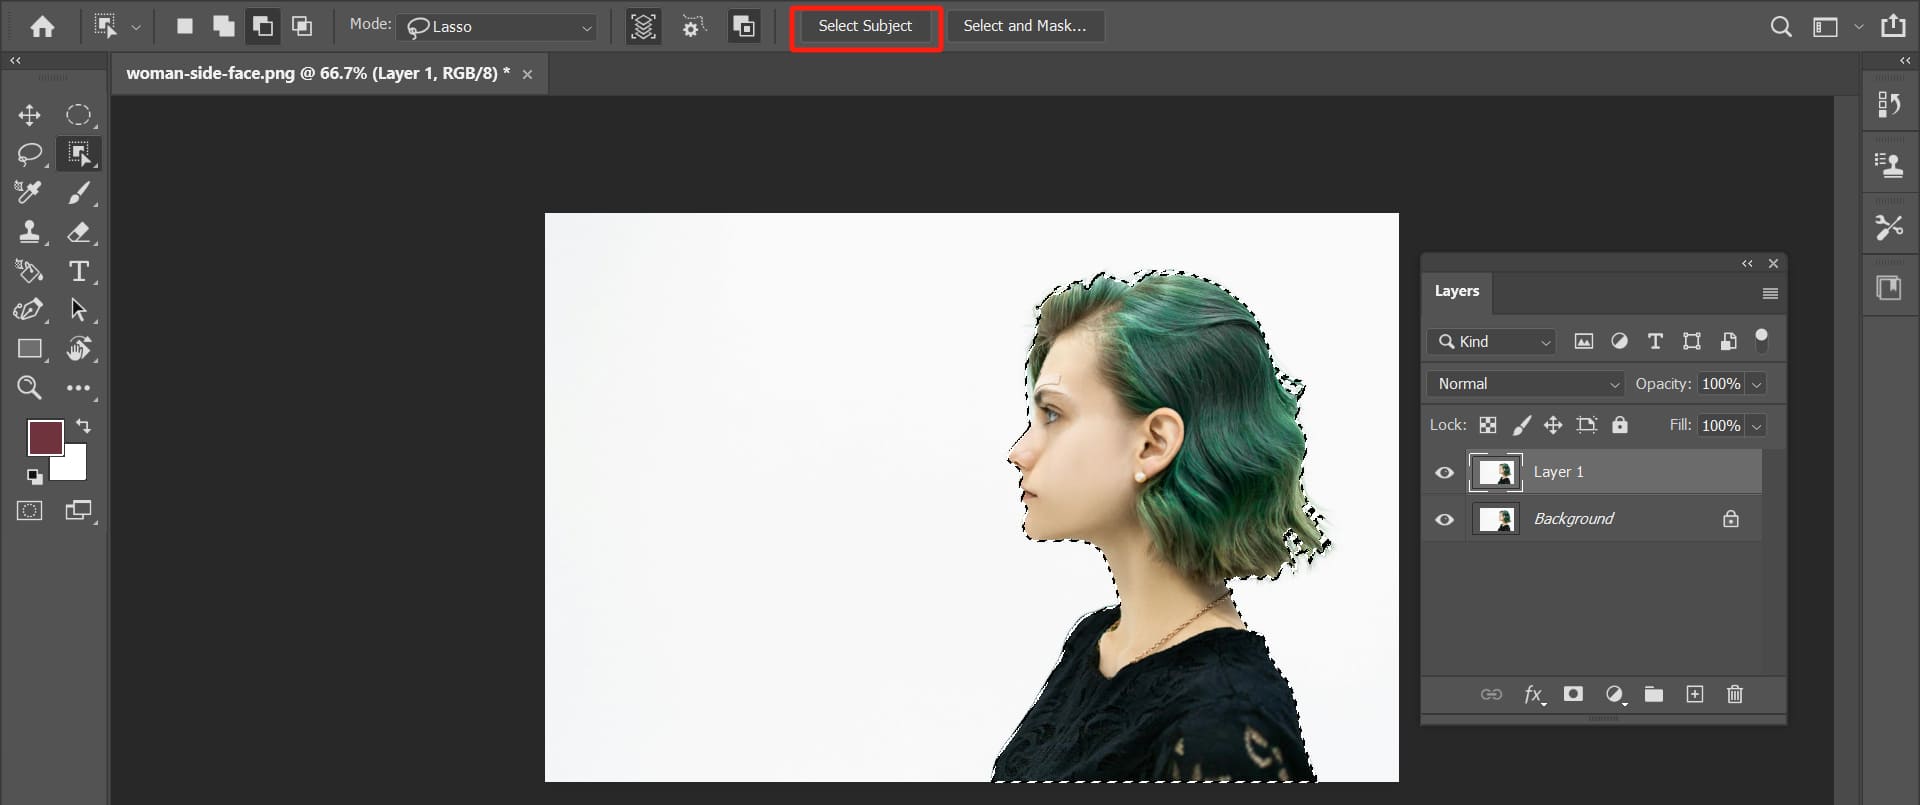
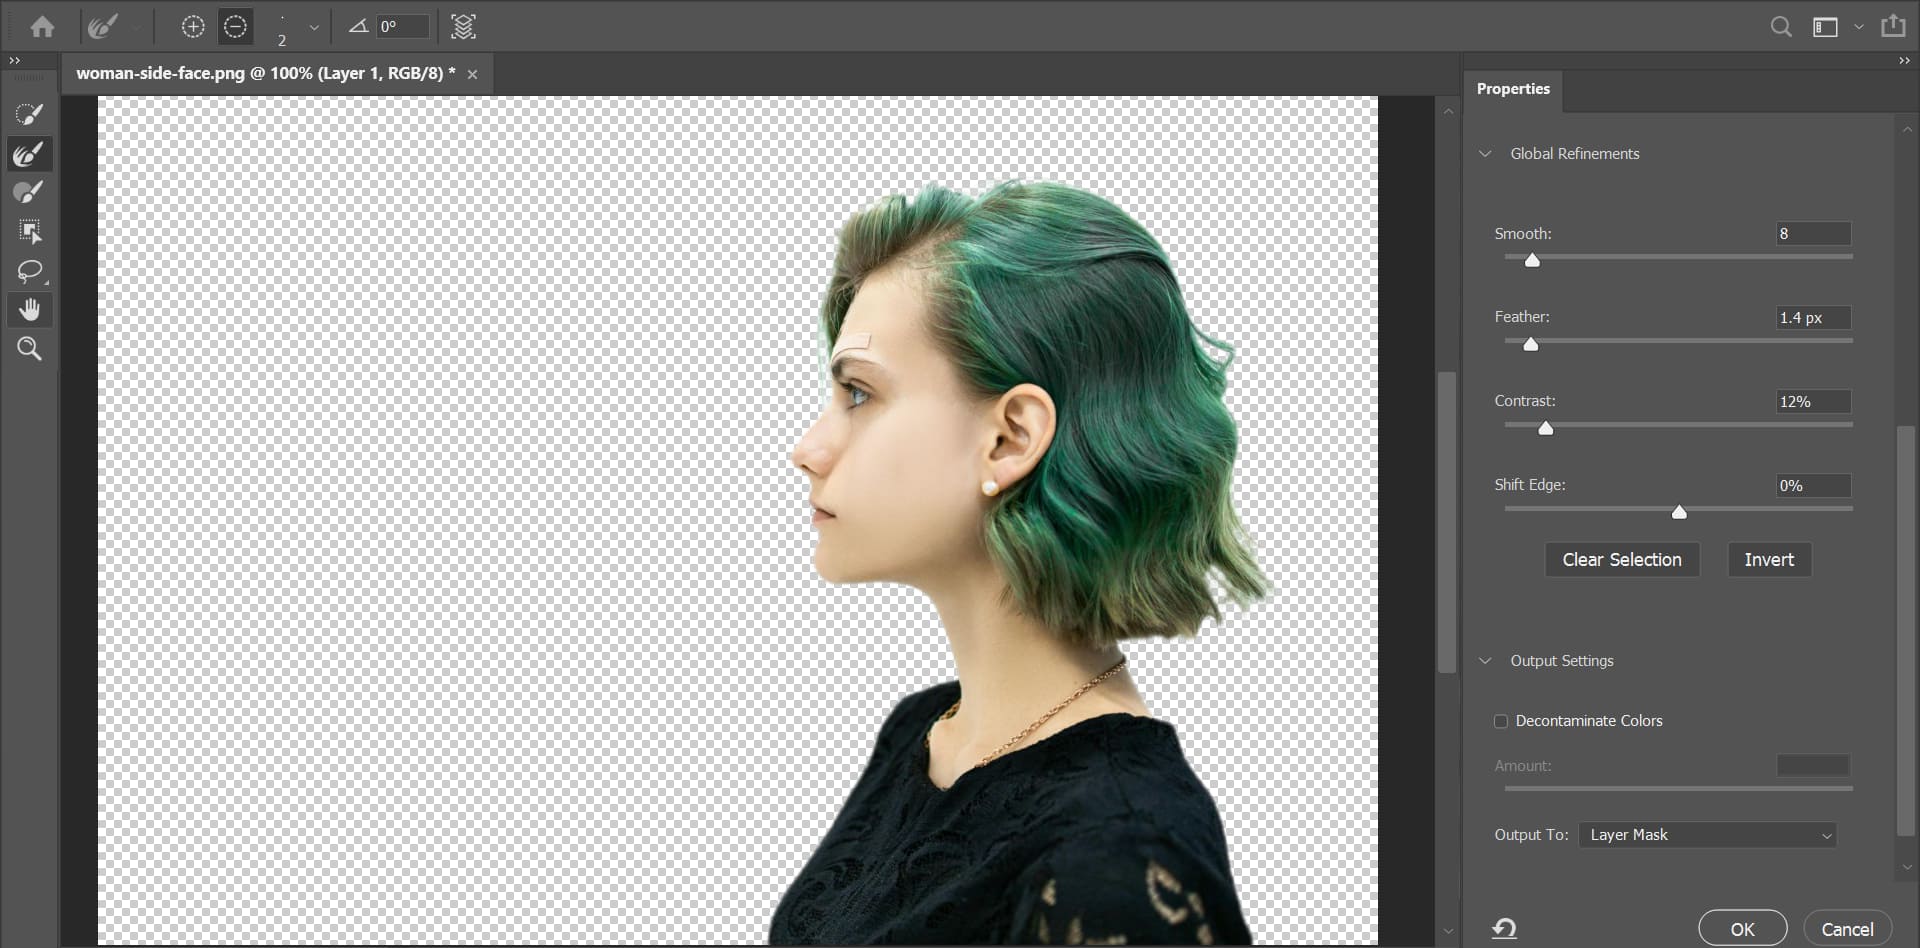
Then, click the "Select and Mask" button and choose the appropriate parameters, paying attention to refining the edge details. In the "Select and Mask" tool, you can set the output as a layer mask to isolate the subject.
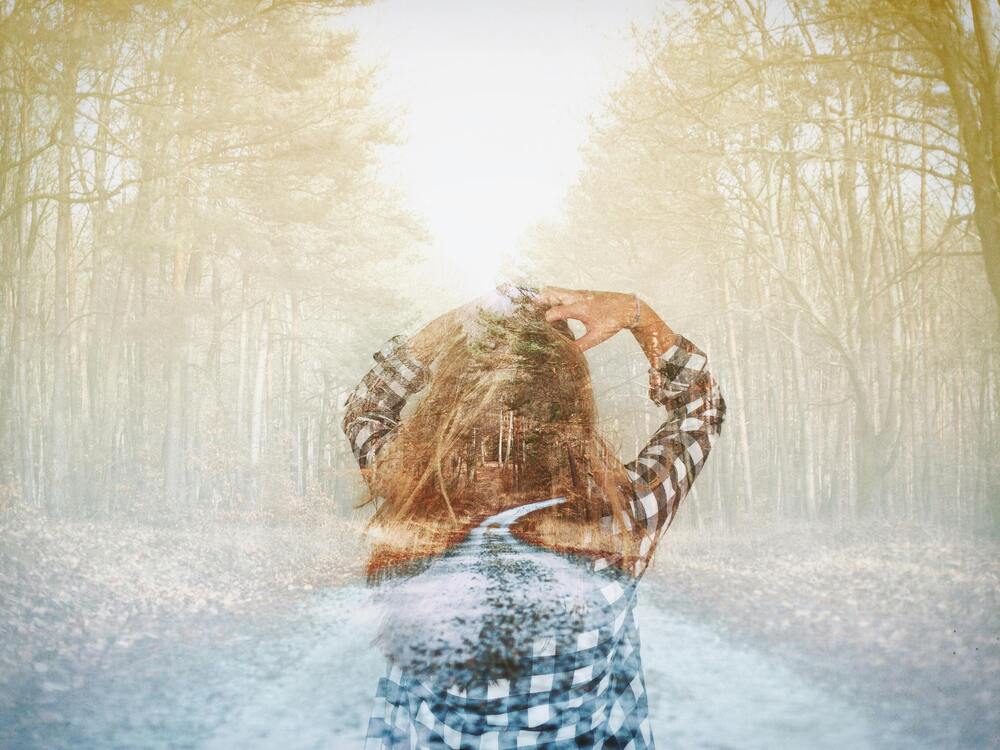
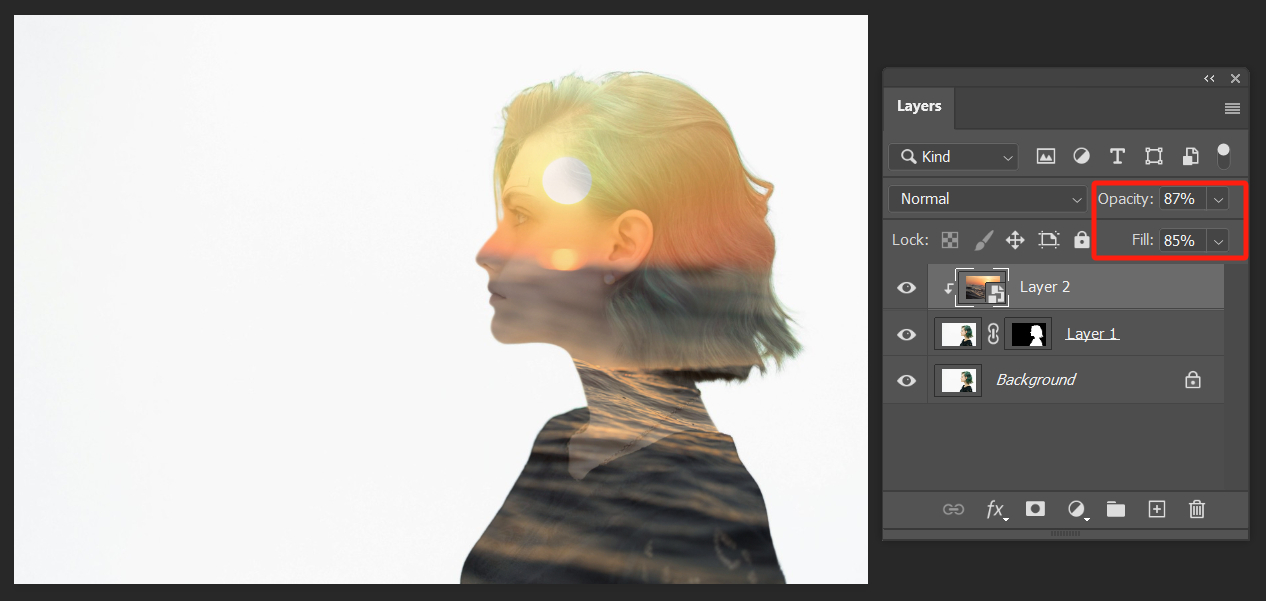
Next, import another background image and place it above the subject layer, as shown in the image below.
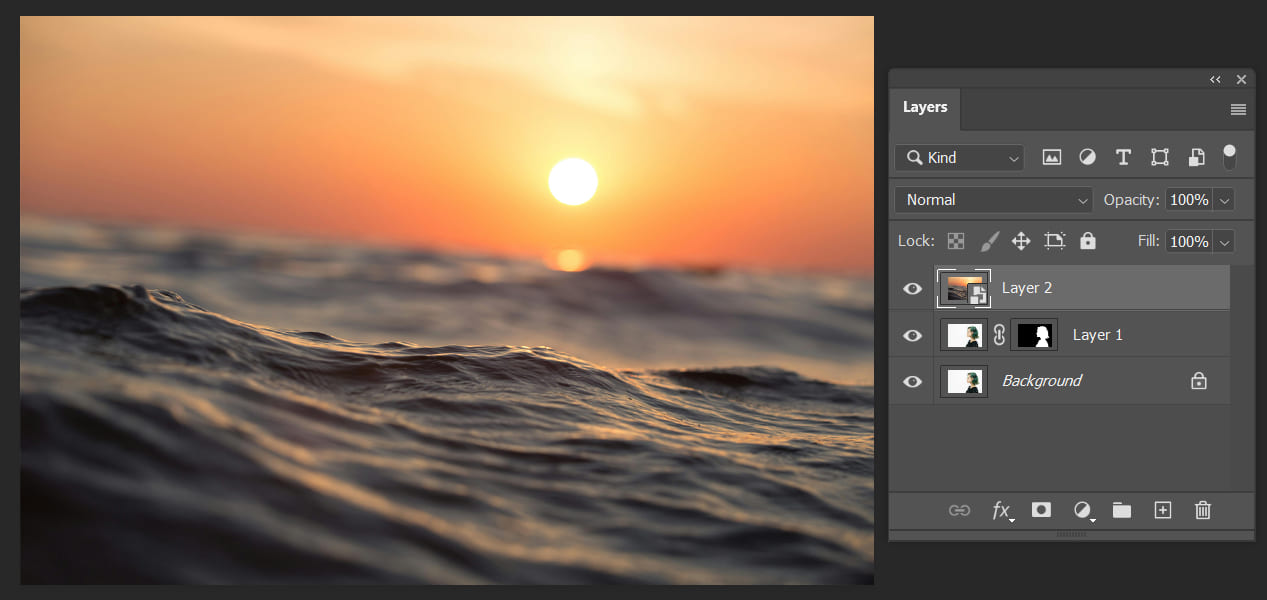
While holding the Alt/Option key and with the mouse positioned between the upper background layer and the subject layer, click to create a clipping mask.
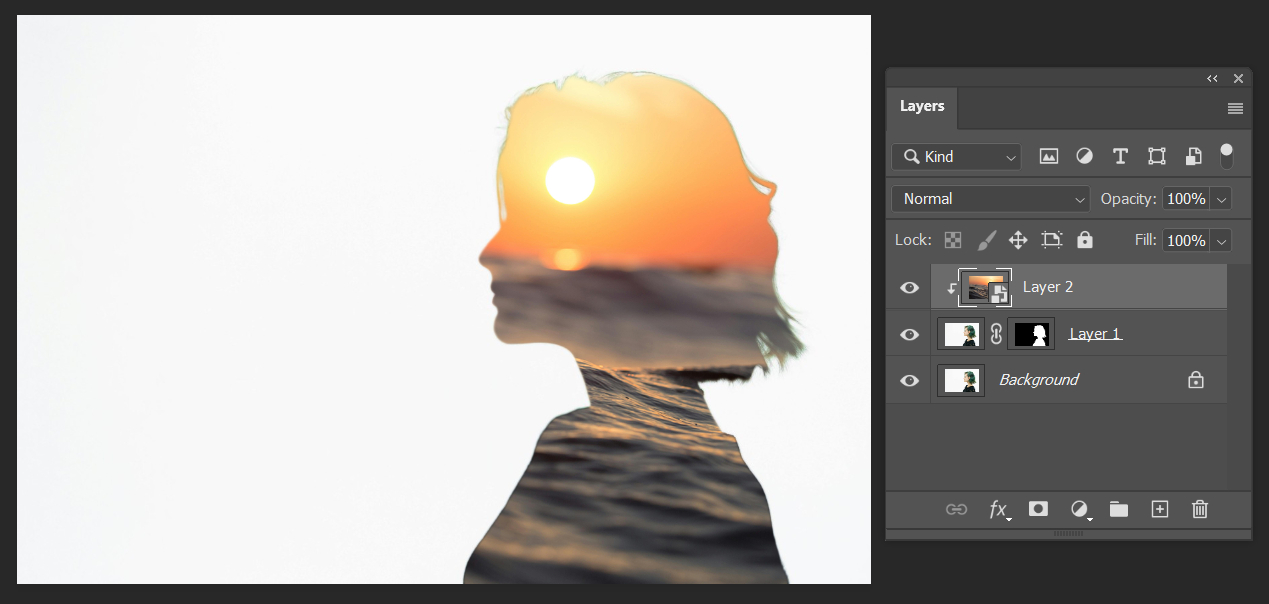
You can achieve a suitable double exposure effect by adjusting the Opacity and Fill values of the upper background layer.
Note:
This process involves using the clipping mask feature in Photoshop. If you're unsure about how to use clipping masks in Photoshop, please refer to our tutorial on the topic: The Complete Guide to Clipping Masks in Photoshop.
You can also adjust the overall color tone, contrast, and brightness according to your personal aesthetic. Additionally, you have the option to add another background layer to enhance the effect of the double exposure. It all depends on your creative vision.
How to Do Double Exposure in Photography?
As mentioned above, besides creating double exposure effects in Photoshop, you can also set it up directly in your camera.
Different cameras have different methods for double exposure, so you can refer to the camera manual or online tutorials for specific instructions. The principle behind it remains the same.
To master this technique, you can watch a tutorial on multiple exposure in photography shared by Kim Grant on YouTube.
Overall, the process of achieving double or multiple exposure in-camera is relatively straightforward. The real challenge lies in conceptualizing the desired scenes and their combination.
You need to think about what kind of images to overlay and anticipate the resulting effect. This requires experimentation and personal exploration.
Final Thoughts About Double Exposure
Creating stunning double exposures, whether in Photoshop or through in-camera techniques, is an accessible process that primarily relies on your creativity and ideas.
However, we understand that navigating the intricacies of post-processing software can sometimes be time-consuming and distract from your artistic vision. That's where TourBox comes in.

TourBox is a remarkable tool designed to simplify and enhance your post-processing workflow. With its intuitive layout and customizable controls, TourBox empowers you to effortlessly manipulate various parameters and tools in Photoshop, allowing you to focus on unleashing your creativity.
Its ergonomic design ensures comfort and precision, enabling seamless navigation and effortless adjustments. By incorporating TourBox into your editing process, you'll experience newfound efficiency and fluidity, enabling you to bring your double-exposure visions to life with ease.