How to Draw Hair: a Simple Step-by-Step Guide
Have you ever been frustrated because you drew a nice face but couldn't get the hair right, wasting the good face you just finished? In this article, we'll share some tips on how to draw hair.

In this article, you will learn:
- Does a Hairstyle Affect a Character's Design?
- How to Draw Hair?
- Practical Demo: How to Paint Hair in Digital Art?
- Conclusion
Does a Hairstyle Affect a Character's Design?
Yes — definitely. As a quick test, look at the image below. Can you tell they're the same character? (From the manga One Punch Man)
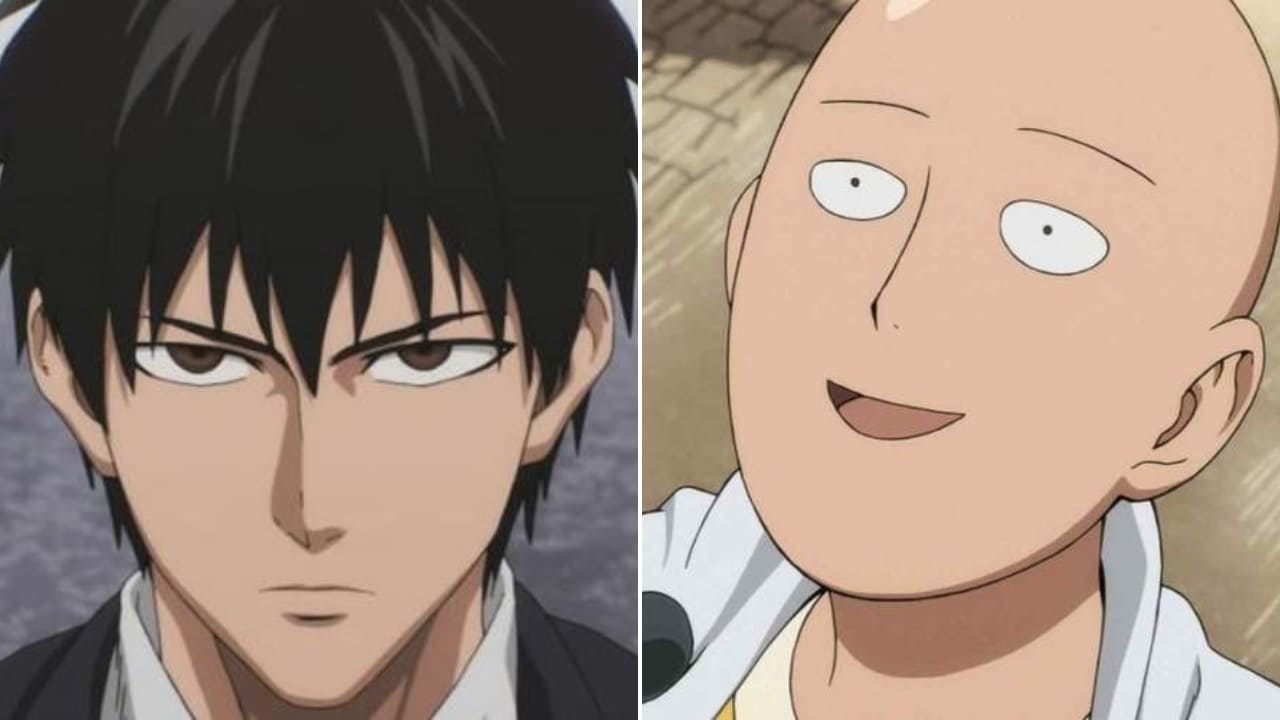
This also shows how important hair is to a character. Different hairstyles can give the same character a very different vibe.
Of course, you should design hairstyles, but that doesn't mean you have to invent everything from scratch.
Just open Pinterest, type "hairstyles" in the search bar, and pick whatever styles you want to use as reference. If you draw and look at hair a lot, you'll build a mental library of hair examples — and then you can draw without references.
How to Draw Hair?
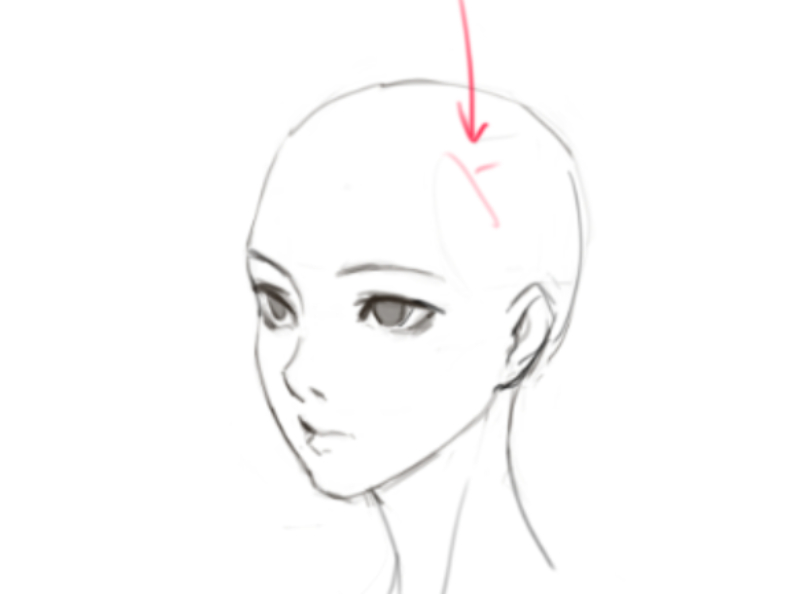
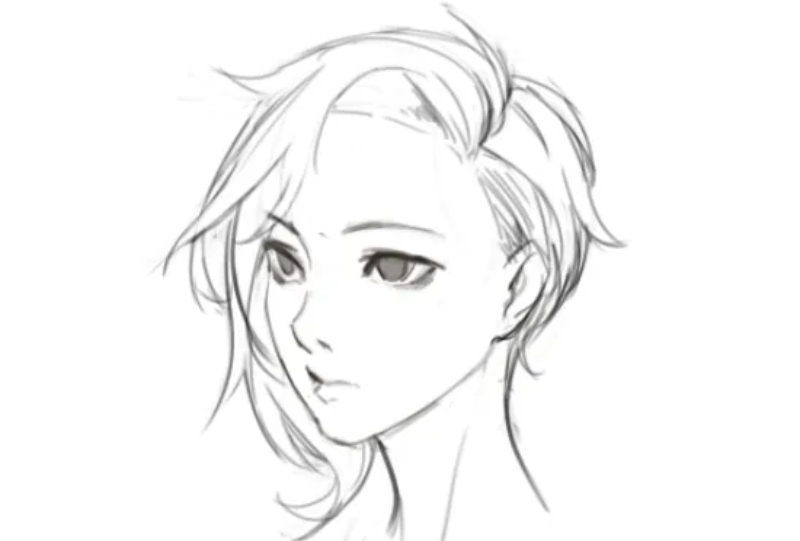
1. Hairline
Before you draw a hairstyle, first find the hairline. The hairline is the edge above the forehead where the hair starts to grow.
Its shape and height change with age, sex, and genetics. It's not the same for everyone.
The hairline isn't a flat line. It wraps around the skull in 3D. So when you draw hair, think about the hairline's curve.
Hairlines also vary in shape. Some have sharp turns, others are smooth and round. You don't need to worry about every detail — just keep the basic shape in mind.
2. Bangs
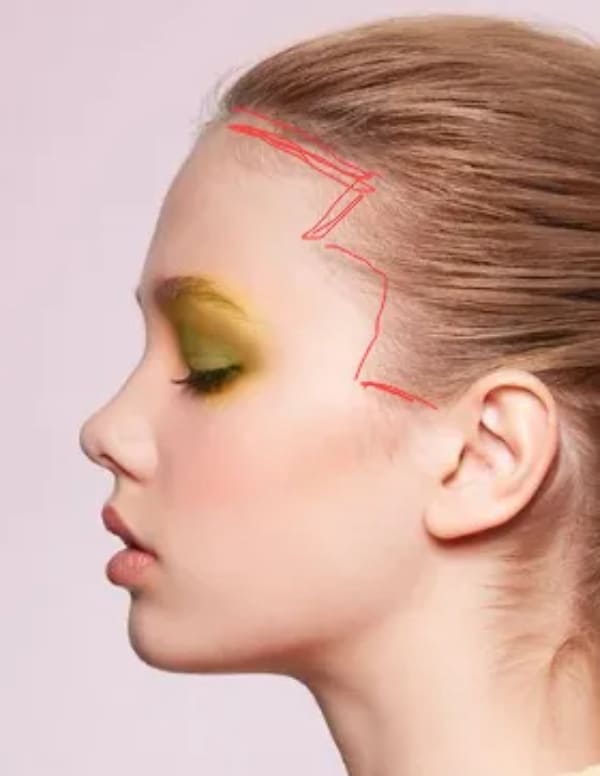
You might think bangs start at the hairline, like in the photo below.
But actually, the root of the bangs sits higher — near the crown of the head. The front strands of the bangs lay flat against the scalp.
So when you draw splits or gaps in the bangs, don't start those gaps at the root of the bangs.
Start the gaps from the hairline instead.
3. How to Add Richness with Variation
3.1 Turning Planes of Hair
When you draw hair, think of it as surfaces with turns — like panels that bend — not as a tangled mess of individual strands. If you can draw these turning surfaces well, you can draw convincing hair.
3.2 Shape Changes in a Hairstyle
Don't try to draw every single hair strand. Treat hair like pieces of cloth.
Both hair and fabric can change shape a lot: a broad area can taper to a thin strip, then widen again.
These changes can be random. You don't need to show how every strand twists. Focus on making the overall flow and major changes clear. Once the big flow is right, fill in the smaller details.
3.3 Ways to Create More Variation
Add small cutouts, gaps, or little locks inside the main hair mass. Put small changes inside big changes to make the hairstyle more interesting.
One rule: avoid repeating the same shapes and sizes. Try to keep each large, medium, and small element unique. If you spot two parts that look the same, change one so they differ.
This makes the hair feel richer and more natural.
Extra tip: the differences between large, medium, and small areas must be obvious. If they're too similar, it will look like there's no variation at all.
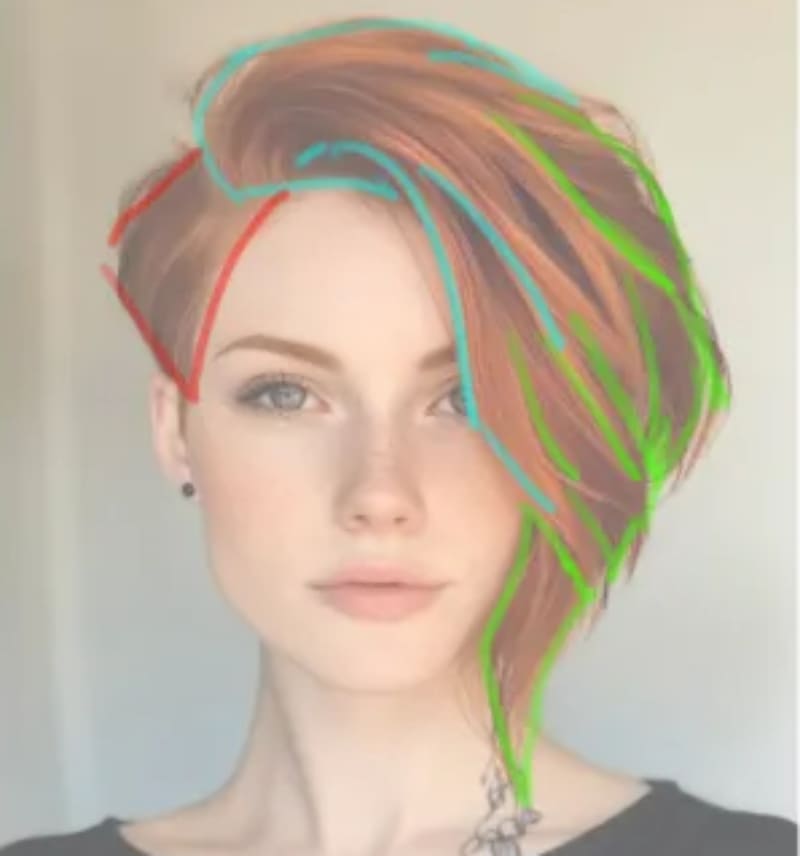
4. Grouping the Hair
When drawing hair, group it roughly into front, side, and back sections. Put each group on its own layer if you use layers. That makes managing depth and overlap much easier later.
You don't need to label every single strand as front or back. Just make sure you can tell which parts sit in front and which sit behind.
Practical Demo: How to Paint Hair in Digital Art
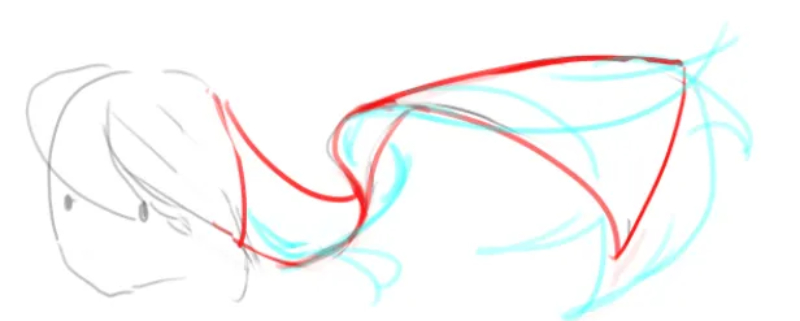
1. Workflow for Drawing Hair Structure
With the basics from the last chapter, we'll use a simple example to give a character hair that has clear layers and a good rhythm.
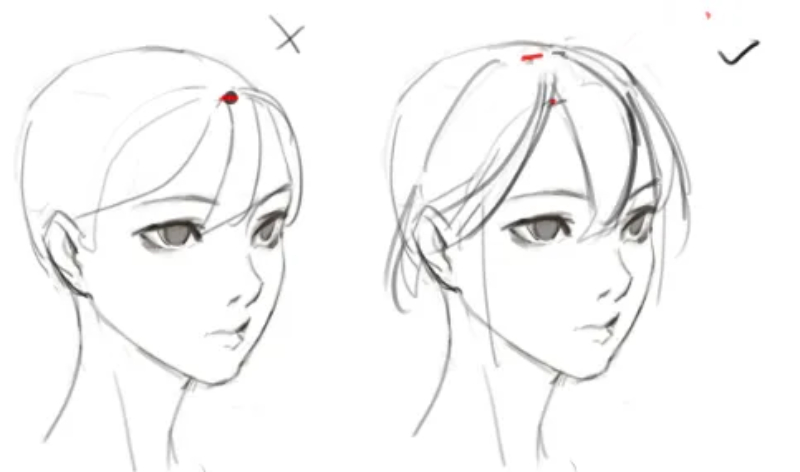
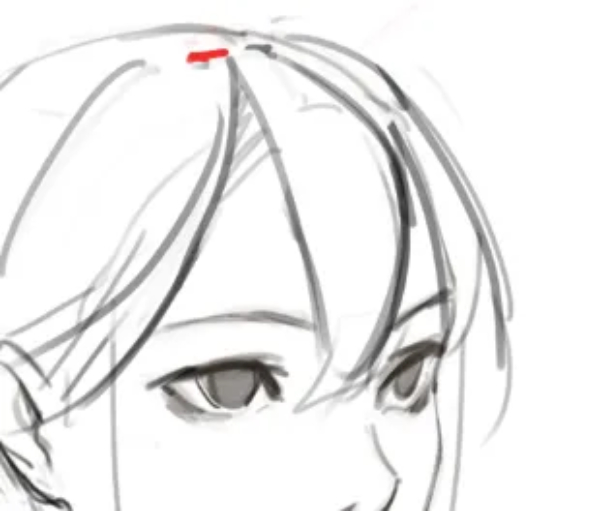
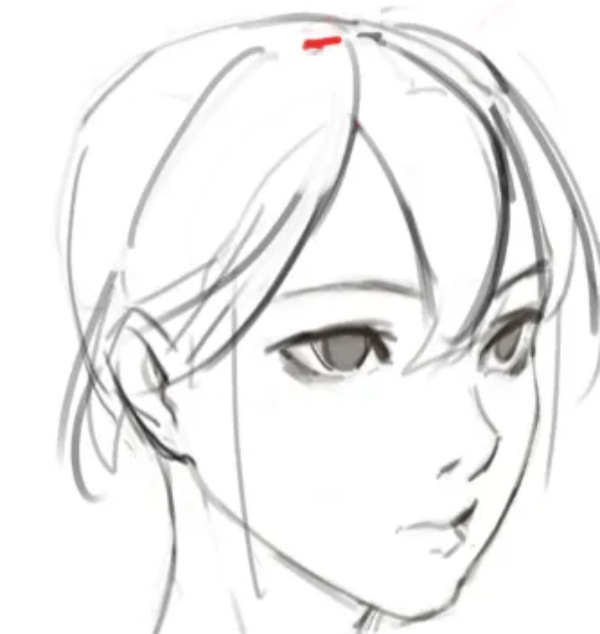
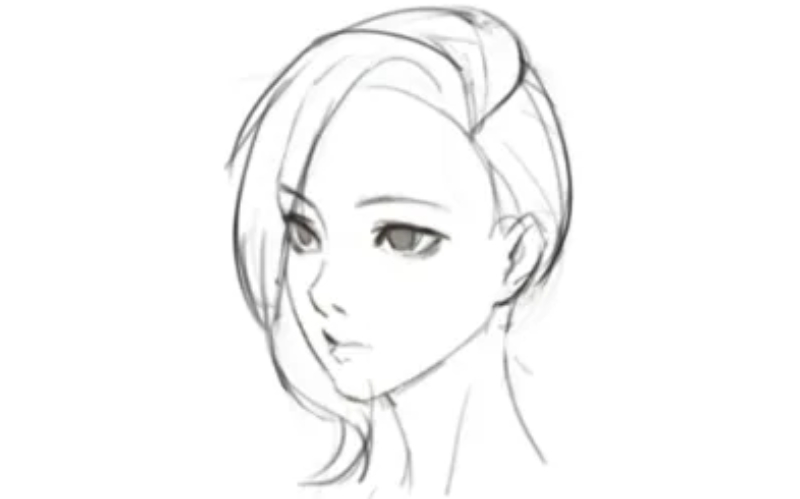
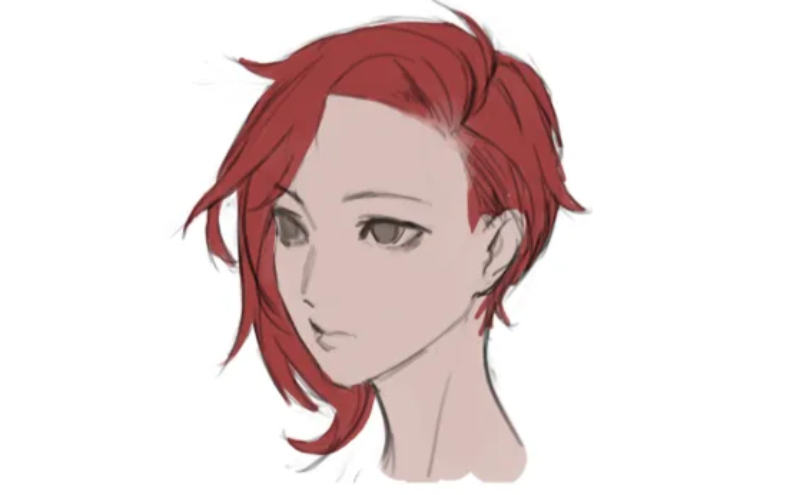
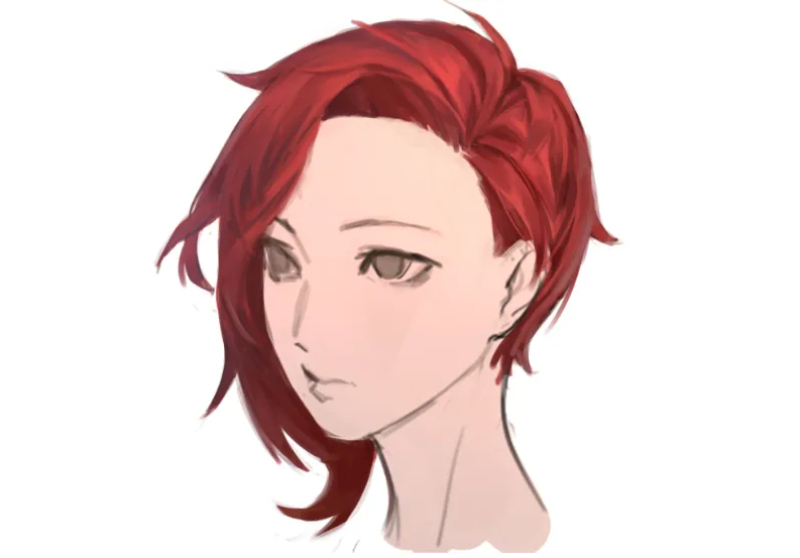
First, pick a hairline point to work from. For example, this area in the image below.
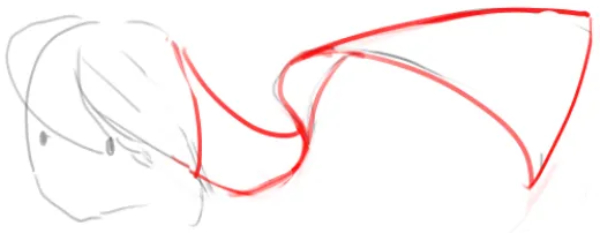
Start there and sketch the main hair chunks you analyzed earlier. After the rough sketch, make the silhouette more varied.
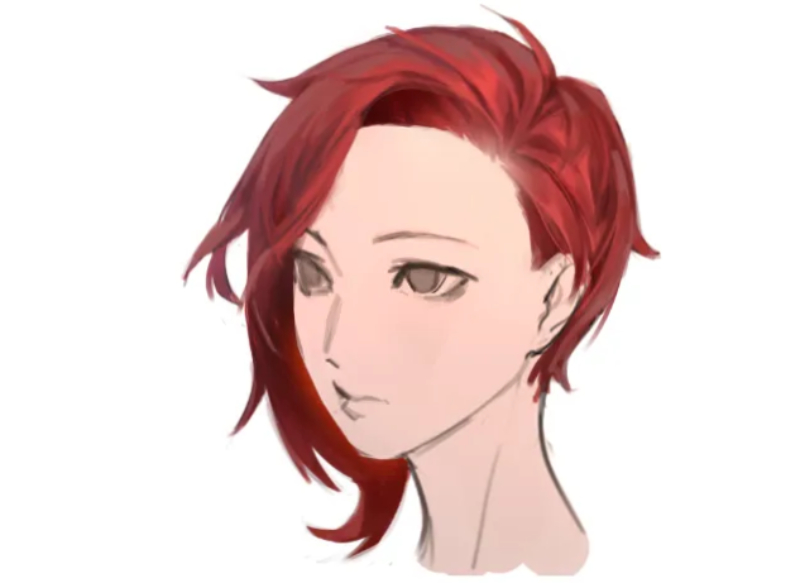
Add some small shapes on top of the original silhouette. These can be bent bits, gaps, or cutouts. Use whatever helps make the outline more interesting.
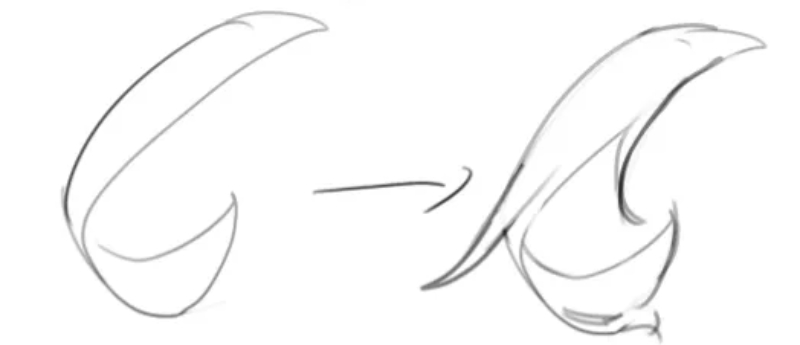
Look at the before-and-after. It's not only that the hair looks fuller — the shapes are richer. You control how much detail to add.
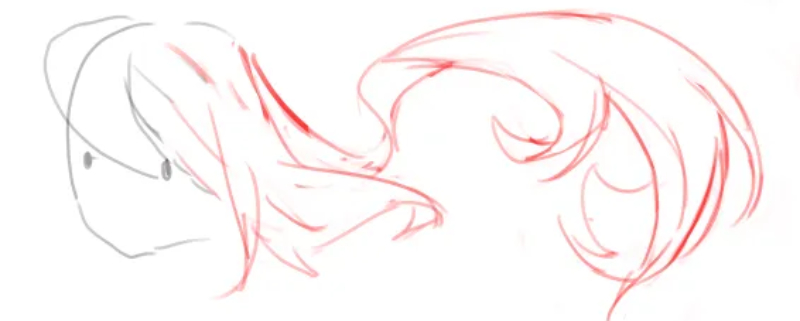
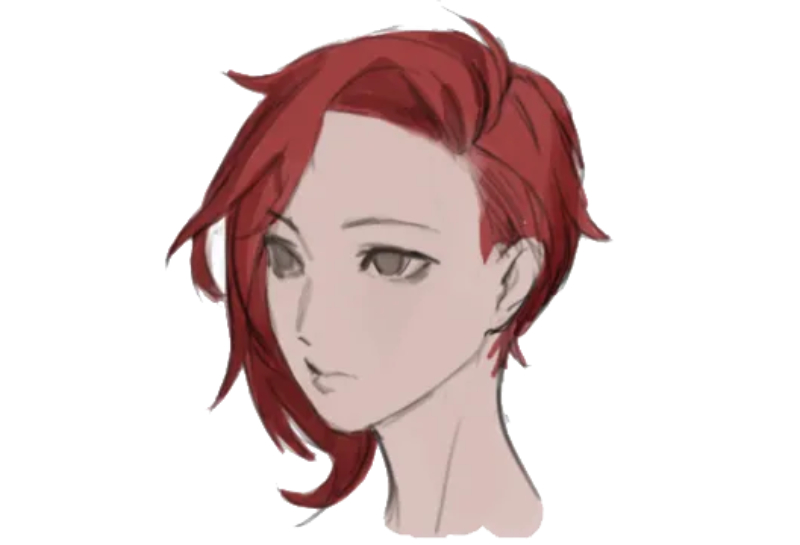
After you enrich the shapes, move on to finer details.
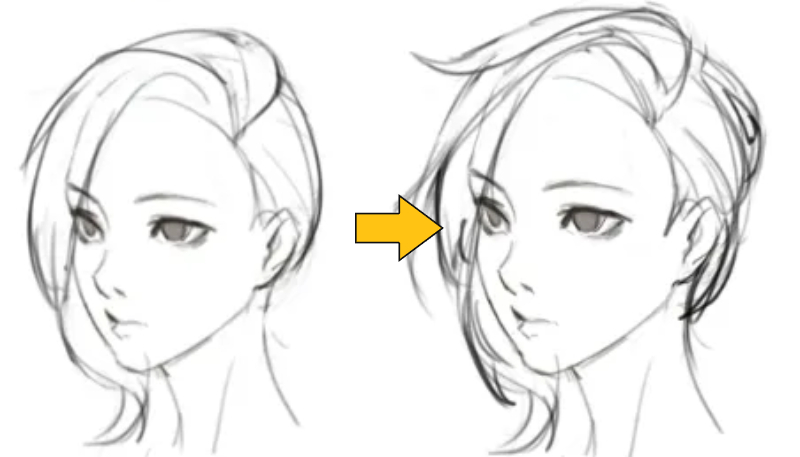
If you see repetitive lines (like the left example below) or evenly sized strokes (like the right example), remove them. They make the hair look flat or artificial.
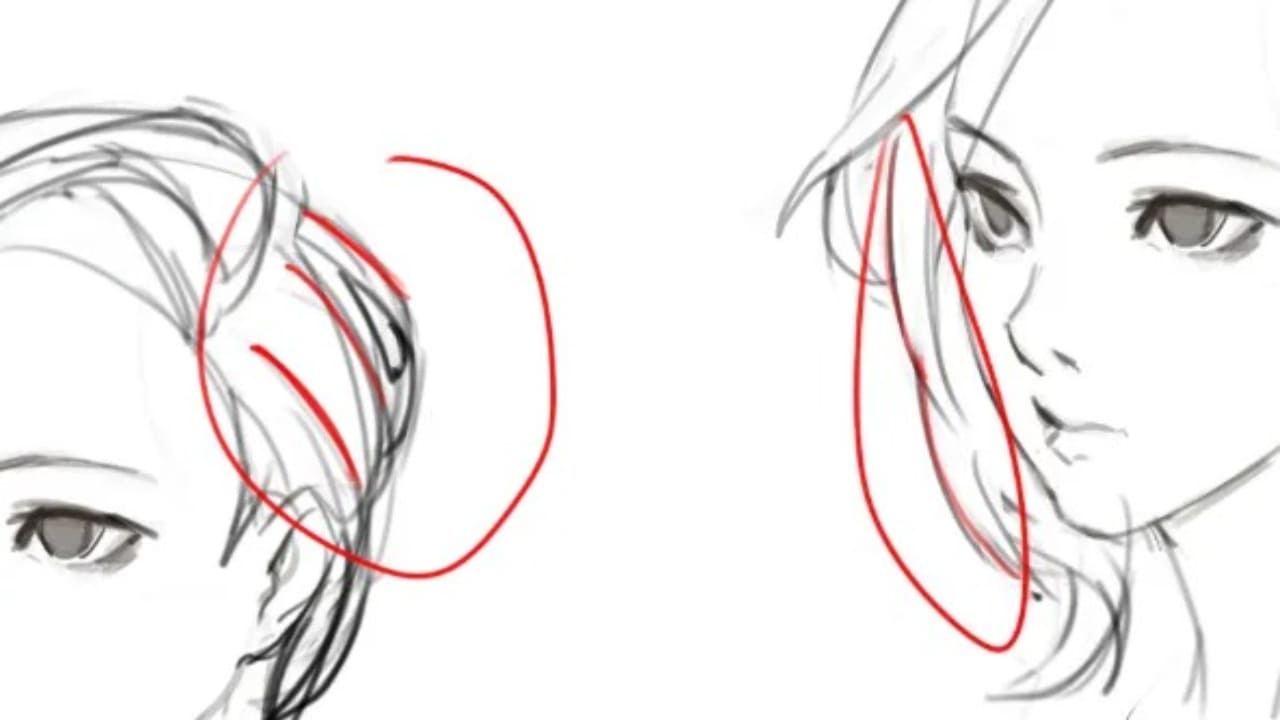
Whether to close every hair line or leave small gaps is a personal choice. The goal of detailing is not to draw perfectly sealed boundaries but to make the hair look right. Small gaps can make hair feel more natural.
2. Workflow for Coloring Hair
Note that different art styles use different coloring rules. Feel free to adapt this to your own style.
Start by slightly blending the hairline color into the skin. Make a soft transition from skin to hair.
Then simplify the hair area into two main tones: the lit side (highlights) and the shadow side (darker areas). This quickly sets the basic light structure.
You can add an overlay layer to paint the color of the light. If the light's color is close to the hair color, the highlights will look more saturated, and the hue may shift. Using an overlay blend mode gives a good rough result automatically.
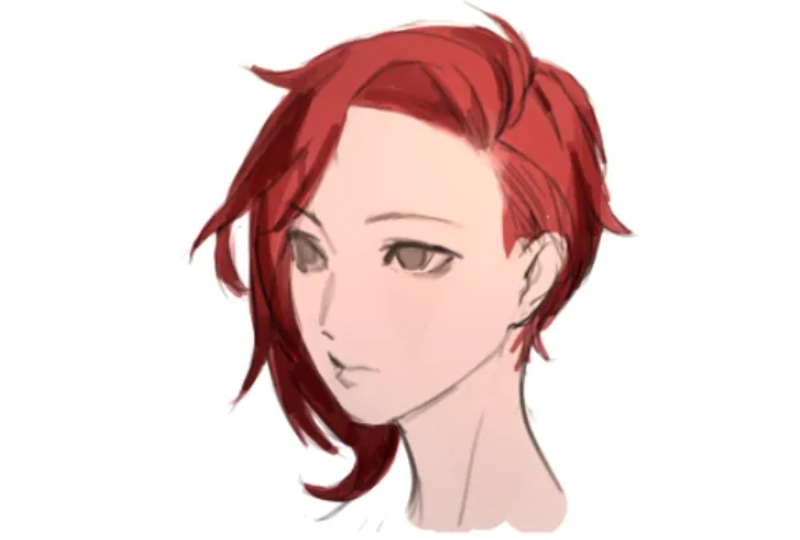
When a hair chunk sticks out, place the highlight on its most protruding spot. Highlights aren't single lines. If the surface curves gently, the highlight will be wide. If the curvature is sharp, the highlight will be thinner.

For finer work, use hatching strokes — a series of parallel or crossing lines — to show shadow, tone, and texture. This helps suggest individual strands without drawing every hair.
As a final step, paint some reflected or ambient light along the hair edge near the head. This gives the hair more depth.
Now look at the final result.
Conclusion
In this article, we share practical methods and tips for drawing hair, including linework, coloring, and detail work. After reading it, you should have a clearer sense of how to design and draw hairstyles. Then you can tweak a character's hair to fit the personality you want in your character design or illustration.
Finally, we want to introduce TourBox — a creative controller loved by many digital artists. With TourBox, common repetitive tasks in digital painting — like switching brushes, changing brush settings, zooming the canvas, and switching layers — become easy to do with one hand.

You can map your favorite app shortcuts and functions to TourBox's physical buttons and dials. It also has plenty of built-in features to give you more control and freedom. When you're creating, it's like having a game controller at your side — your workflow feels cleaner and more efficient.

If you work on both a desktop and a tablet, check out our Elite Plus model and see how it can speed up your workflow.