Mastering the Eyedropper Tool in Illustrator: Tips and Tricks
Sometimes, a designer's day can be summed up in one sentence: "You're either working on colors or thinking about colors."
That's where Illustrator's Eyedropper Tool comes in — a trusty companion that always gets the job done.
Whether you're picking colors with precision or copying styles, the Eyedropper Tool can instantly make you look like a pro. In this article, we'll explore some tips and tricks for using the Eyedropper Tool in Illustrator.

In this article, you will learn:
- What Is the Eyedropper Tool?
- Basic Operation: The Art of Color Picking
- Advanced Techniques: Hidden Features of the Eyedropper Tool
- Combining the Eyedropper Tool with Other Features
- Things to Watch Out for with the Eyedropper Tool
What Is the Eyedropper Tool?
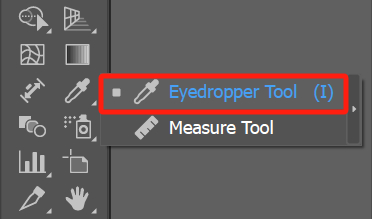
The Eyedropper Tool is one of the most commonly used tools in Adobe Illustrator. Its icon looks like an eyedropper, and you can easily find it in the toolbar on the left. You can also activate it quickly by pressing the "I" key.
While the Eyedropper Tool is best known for picking colors, its capabilities go far beyond that. You can use it to sample colors from objects or images and apply them to other elements in your design.
It can also copy object styles, such as strokes, transparency, gradients, and more. This makes it much easier to keep a consistent look across different elements during the design process.
What's more, the Eyedropper Tool isn't limited to use within Illustrator. You can use it to pick colors from external images or designs, bringing inspiration from other sources into your project.
Basic Operation: The Art of Color Picking
The most common use of the Eyedropper Tool is to pick colors. Here's how to do it:
- Select the Eyedropper Tool: Use the shortcut "I" or click the icon in the toolbar.
- Click a Color: Simply click on the color from a target object or image, and the magic happens — the color is instantly applied to your selected object.
- Copy Gradients: If the target object has a gradient, the Eyedropper Tool will copy the entire gradient, not just a single color.
Pro Tips:
- While picking colors, hold down the Shift key to pick multiple colors in a row and save them to your Swatches panel.
- After picking a gradient, use the Gradient Tool (shortcut "G") to adjust the gradient's direction and range.
Advanced Techniques: Hidden Features of the Eyedropper Tool
1. Picking Up Object Attributes
In Adobe Illustrator, the Eyedropper Tool isn't just for picking colors — it can also copy an object's attributes, like stroke, fill, transparency, and more. Here's how to use it:
- Select the Eyedropper Tool: Press the shortcut key "I" or click the Eyedropper icon in the toolbar.
- Click the Target Object: Use the Eyedropper Tool to click on the object you want to sample. The selected object will instantly apply the attributes of the target.
These attributes can include:
- Fill color
- Stroke color and weight
- Transparency
- Character/paragraph styles
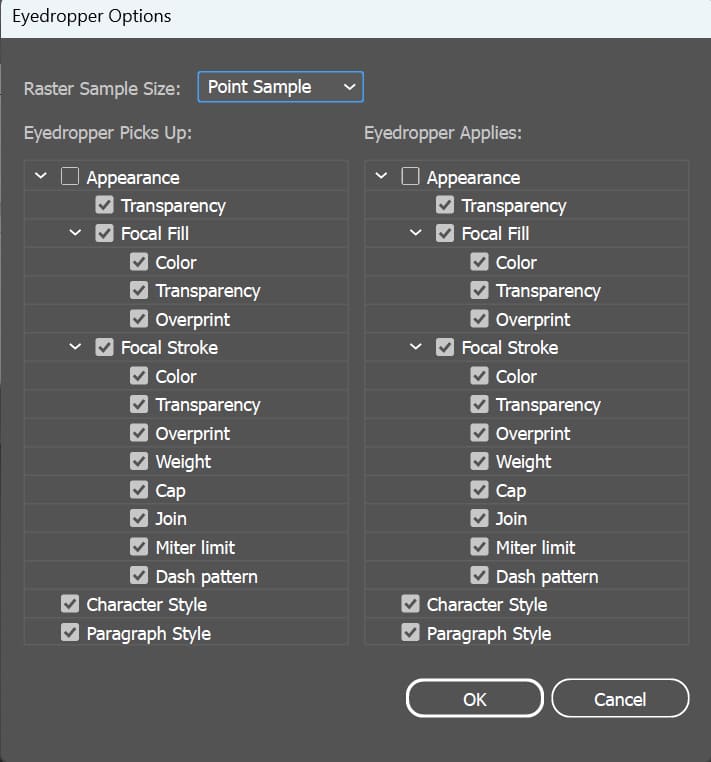
If you want to pick only specific attributes, double-click the Eyedropper Tool icon to open the Eyedropper Options panel. Here, you can check or uncheck the attributes you want to sample, such as picking just the color without copying the stroke.
Once the Eyedropper Tool samples the attributes, the selected object will immediately adopt the new style.
Pro Tips:
- If no object is selected, the Eyedropper Tool will only display the sampled attributes without applying them to anything.
- For more flexibility, use the Appearance Panel (Window > Appearance) to fine-tune or adjust the copied attributes.
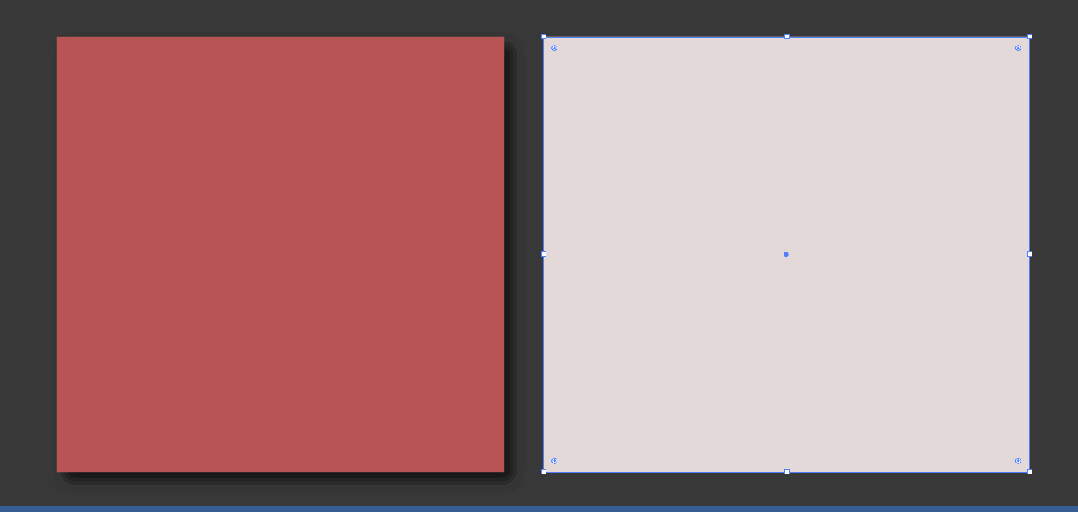
2. Replacing Colors in Bulk
When you need to replace a specific color across multiple objects in your design, the Eyedropper Tool can save you a lot of time:
- Select all the objects that need their color replaced.
- Switch to the Eyedropper Tool and click on the target color. All the selected objects will instantly update to match the new color.
Pro Tip:
If you only want to replace the fill color without changing the stroke, adjust the Eyedropper Tool settings in the Eyedropper Options panel.
3. The Perfect Tool for Cross-Document Color Picking
The Eyedropper Tool isn't limited to colors within the same document — it can also "borrow" colors and styles from other files.
For example, if you open a design file with vibrant colors, you can use the Eyedropper Tool to pick any color and apply it directly to your current project.
If the source file is an image, you can use the Eyedropper Tool along with the Swatches Panel to create your own custom color palette.
Combining the Eyedropper Tool with Other Features
1. Using the Live Paint Bucket Tool
After selecting a color with the Eyedropper Tool, you can pair it with the Live Paint Bucket Tool to quickly fill complex shapes.
For instance, in vector illustrations, you can use the Eyedropper Tool to pick colors from natural scenery and then fill your artwork with the Live Paint Bucket. The result is both natural and efficient.
2. Working with the Swatches Panel
If you need to reuse certain colors often, save them to the Swatches Panel:
- After picking a color, click "Add to Swatches" in the Color Panel.
- Give the swatch a name, like "Brand Colors," to keep your design consistent in future projects.
3. Pairing with the Blend Tool
After picking two colors, use the Blend Tool to create smooth transitions between them. This is perfect for gradient-style designs.
For example, you could pick two colors — like the blue of the sky and the orange of a sunset — and blend them to create a gradient color palette.
Things to Watch Out for with the Eyedropper Tool
- Alignment Issues: When picking colors from gradients or transparent objects, the result may vary depending on where you click. If the color doesn't look right, try clicking in different spots to get the desired result.
- Overwriting Attributes: When using the Eyedropper Tool to copy object attributes, it might overwrite other settings on the selected object. Before sampling, double-check which attributes you want to keep.
- Picking Colors from Pixel Images: When sampling colors from bitmap images, the Eyedropper Tool might be affected by the edges of pixels, causing slight inaccuracies. To avoid this, zoom in on the image or fine-tune the color in the Swatches Panel.
In design projects, the Eyedropper Tool is undoubtedly fast and convenient. However, when you need to frequently switch tools, zoom in to pick colors precisely, or quickly adjust attributes in complex projects, the process can become a bit tedious.
That's where a reliable creative controller can make a big difference. TourBox is designed specifically for designers and creative professionals.

With TourBox's customizable buttons, you can quickly activate the Eyedropper Tool, zoom in on your canvas, and switch between other frequently used tools without constantly clicking through menus or memorizing complicated shortcuts.

If you prefer working and creating on an iPad, consider trying TourBox Elite Plus. It integrates seamlessly into your iPad workflow and takes your design experience to the next level.