How to Add Effects in Premiere Pro?
Premiere Pro offers a diverse range of effects that can simulate various textures, styles, and color grading, making it a favorite among video creators.
By adding effects and adjusting parameters, you can create stunning visual effects to enhance your video presentation.
In this tutorial, we will delve into some key effects in Premiere Pro and their application techniques to help you stand out in video editing. Let's get started!

In this article, you will learn:
- Why Use Premiere Pro Effects?
- Where to Find the Effects & Effect Controls in Premiere Pro?
- How to Add Effects in Premiere Pro?
- Easy-to-Overlook Tips for Premiere Pro Effects
Why Use Premiere Pro Effects?
When creating videos, it's not just about basic editing tasks like adjusting positions or setting zoom levels. Adding appropriate video effects to elements of your clips can make your videos visually more engaging and interesting.
Similarly, besides adjusting the volume of the audio, adding some audio effects can enhance the immersion and atmosphere of the audio.
Where to Find the Effects & Effect Controls in Premiere Pro?
When adding video effects in Premiere Pro, you will primarily use the Effects panel and Effect Controls panel.
If you can't locate these panels in your Premiere Pro interface, simply click on "Window" in the top navigation bar and then check "Effects" and "Effect Controls" to display them.

How to Add Effects in Premiere Pro?
The Effects and Effect Controls are the two panels you'll need to use when applying effects to your videos. Here's what each of these panels does:
- Effects Panel: You can search for or manually find your desired effects.
- Effect Controls Panel: It is primarily used to adjust the parameters of the effect.
Shifting the focus to the Effects panel, Premiere Pro's effects can be categorized into three main types: Standard Effects, Fixed Effects, and Third-Party Effects:
- Standard Effects: These refer to over 100 built-in effects within Premiere Pro, neatly organized in folders in the Effects panel.
- Fixed Effects: By default, the Effect Controls panel includes three video effects - Motion, Opacity, and Time Remapping - which are basic effects present in all video clips. Additionally, three default audio effects are basic effects present in all audio clips.
- Third-Party Effects: As the name suggests, you can also install and use third-party effects, such as Red Giant's Magic Bullet. Once installed, these third-party effects can be found in the Effects panel.
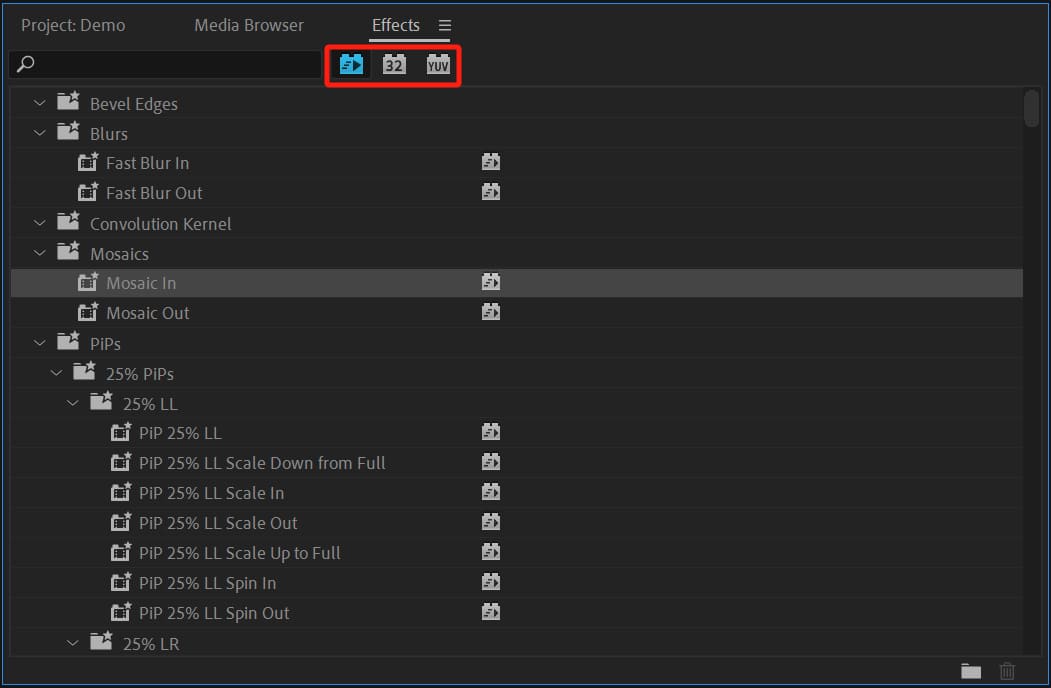
It's easy to notice three small icons next to the search bar in the Effects panel. Within the Effects panel, some effects have these three icons, some have none, and some have 1-2 icons.
So, what do these three small icons represent in terms of the effects' characteristics? Here's the answer:
- Accelerated Effects: Effects that can utilize GPU acceleration for faster processing.
- 32-bit Color: Effects capable of handling high-quality 32-bit color depth per channel, ensuring optimal video quality after rendering.
- YUV Effects: Effects that can process color in the YUV format. During color grading, effects without the YUV icon may lead to inaccurate exposure or color adjustments due to their use of the native RGB color space.
Let's dive into how to add effects in Premiere Pro.
Open Premiere Pro and drag your clip onto the timeline panel. Alternatively, you can manually create a sequence and then import your video clips.
Further Reading:
Locate the Effects panel within the Premiere Pro interface, and use the search bar in the Effects panel to find the effects that suit the needs of your current project.
Once you've found the desired effect in the Effects panel, you can drag that effect onto the clip in the timeline panel to successfully apply it.
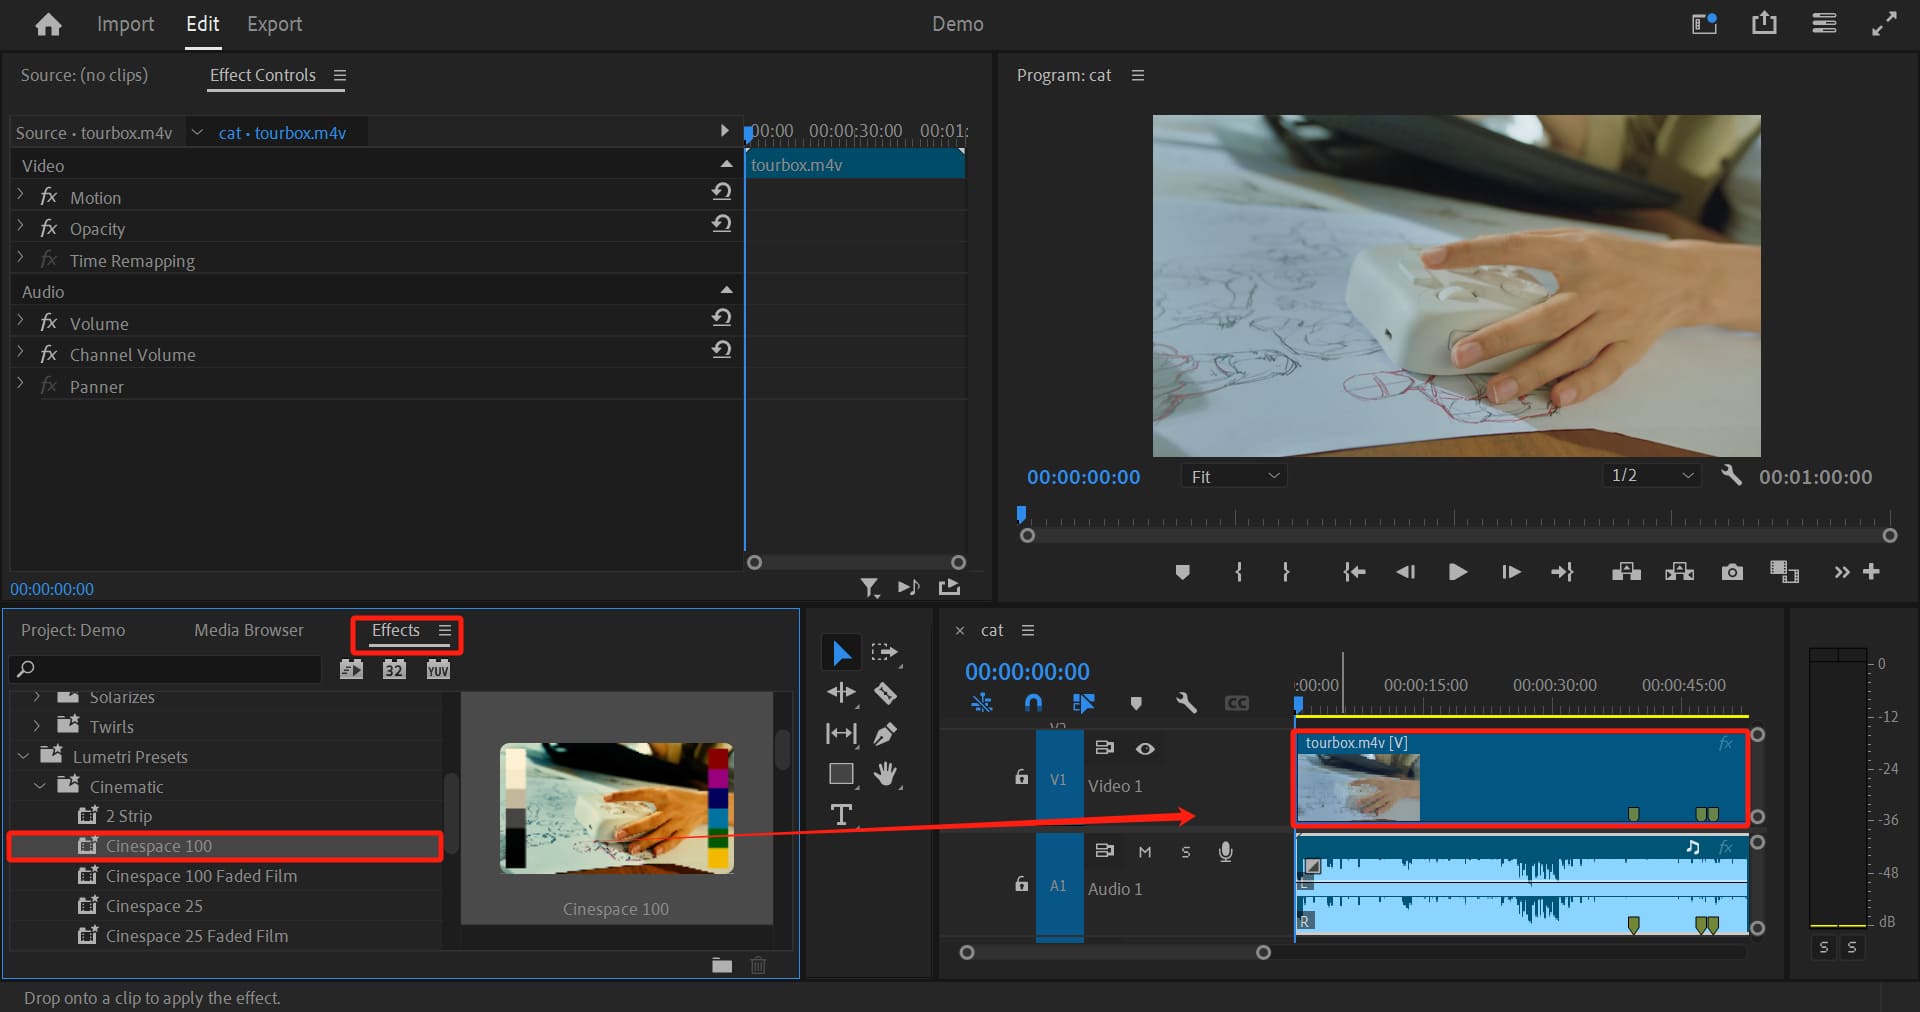
In addition to the method of adding effects to clips mentioned above, Premiere Pro offers two other methods to help you add effects. Let's summarize them briefly:
- Method 1: Drag and drop the effect from the Effects panel onto the clip in the Timeline panel.
- Method 2: Select the clip on the timeline panel, then double-click the name of the effect in the Effects panel.
- Method 3: Drag and drop the effect from the Effects panel onto the Effect Controls panel.
Whichever method you choose, you can swiftly add effects to your clips. Pick the one that suits your preference and workflow best.
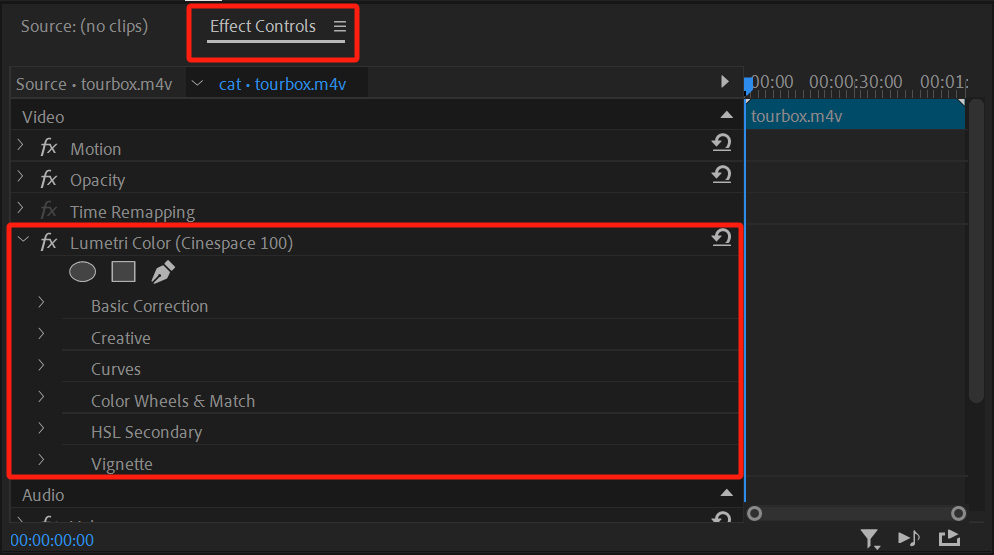
Next, you'll see the parameters for the effect you just added in the Effect Controls panel. You can adjust these parameters to customize the effect.
Because Premiere Pro offers a wide range of effects with various parameters, there isn't a fixed standard for using these effects, and you don't need to memorize specific parameters.
The best approach is to individually adjust each parameter to see how it affects your video, allowing you to deepen your understanding through hands-on experimentation.
Easy-to-Overlook Tips for Premiere Pro Effects
In this article, we've covered how to add effects in Premiere Pro. Towards the end, here are some often overlooked details and tips when using Premiere Pro effects:
1. Order of Effects Layer
Effects in Premiere Pro can be stacked, with each effect in the Effect Controls panel rendering from top to bottom. However, "Fixed Effects" render after "Standard Effects." The order of layering significantly impacts the visual outcome, so pay close attention.
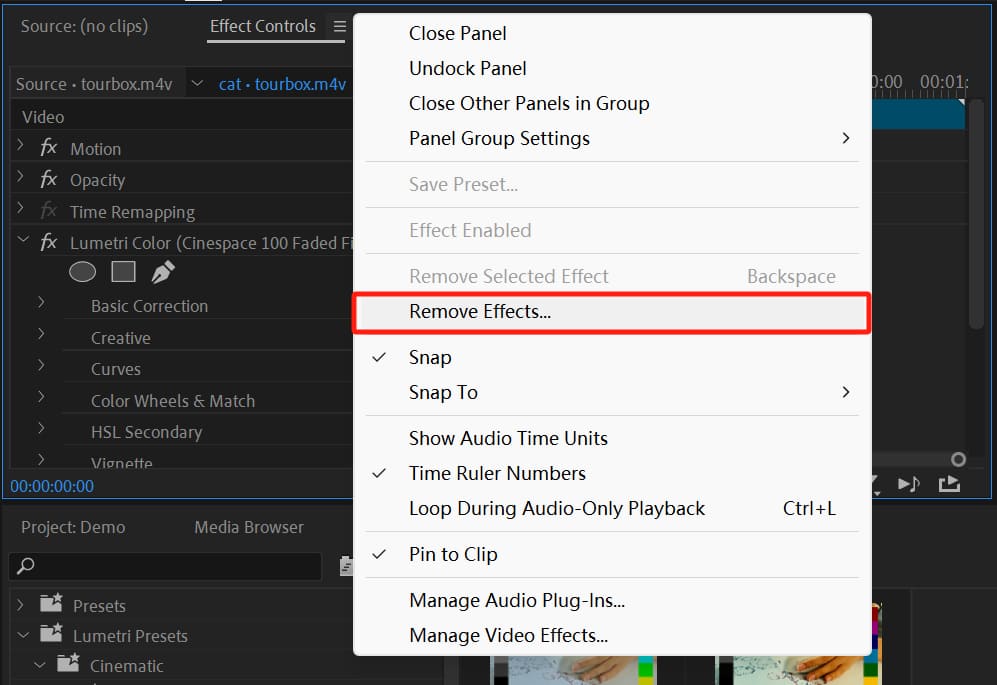
2. Remove Effects
To delete an effect, simply select it in the Effect Controls panel and press the Delete key.
To swiftly remove multiple effects, right-click on the clip after selecting it, then choose "Remove Attributes." Alternatively, go to the Effects Control panel's control menu and select "Remove Effects."
3. Copy and Paste Effects
Right-click on a clip with applied effects, choose "Copy," then select one or more other clips on the timeline, right-click, and select "Paste Attributes."
4. Apply Effects to Multiple Clips
When applying an effect to multiple clips, consider using an adjustment layer. Effects added to an adjustment layer impact all clips below it on the timeline.
Further Reading:
Product Recommendation
Whether you're editing or color grading in Premiere Pro, efficiency and precision are key. That's why we want to introduce TourBox, a creative controller designed to enhance your workflow.

Tailored for digital software, TourBox is beloved by numerous digital artists and creatives. It offers intuitive controls and customization options to streamline your video post-production process.
Imagine using a game controller for editing and color grading in Premiere Pro. TourBox provides a similar experience, with an ergonomic design that ensures comfort even during extended use.

Check out our video editing page to see how TourBox can make your creative process more seamless with fewer actions.