How to Add Subtitles in DaVinci Resolve: A Comprehensive Guide
Subtitles are a vital component of any video production, whether you're creating a film, documentary, or YouTube video. They enhance the viewer's experience by aiding comprehension.
In this tutorial, we will walk you through the process of adding subtitles to your videos using DaVinci Resolve, a powerful and versatile editing software. With its robust set of tools and intuitive interface, DaVinci Resolve makes the task of adding subtitles a breeze.
So, let's dive in and learn how to add professional-looking subtitles to your videos, ensuring your message reaches a wider audience.

In this article, you will learn:
- How to Add Subtitles in DaVinci Resolve?
- How to Add SRT Subtitle Files in DaVinci Resolve?
- Additional Tips About Adding Subtitles in DaVinci Resolve
How to Add Subtitles in DaVinci Resolve?
After editing and color grading your footage in DaVinci Resolve, the final step before exporting your video is usually adding subtitles.
Adding subtitles in DaVinci Resolve is straightforward, and there are two methods to accomplish this. Let's go through them one by one.
Method 1: Adding Subtitles Using the Text Tool
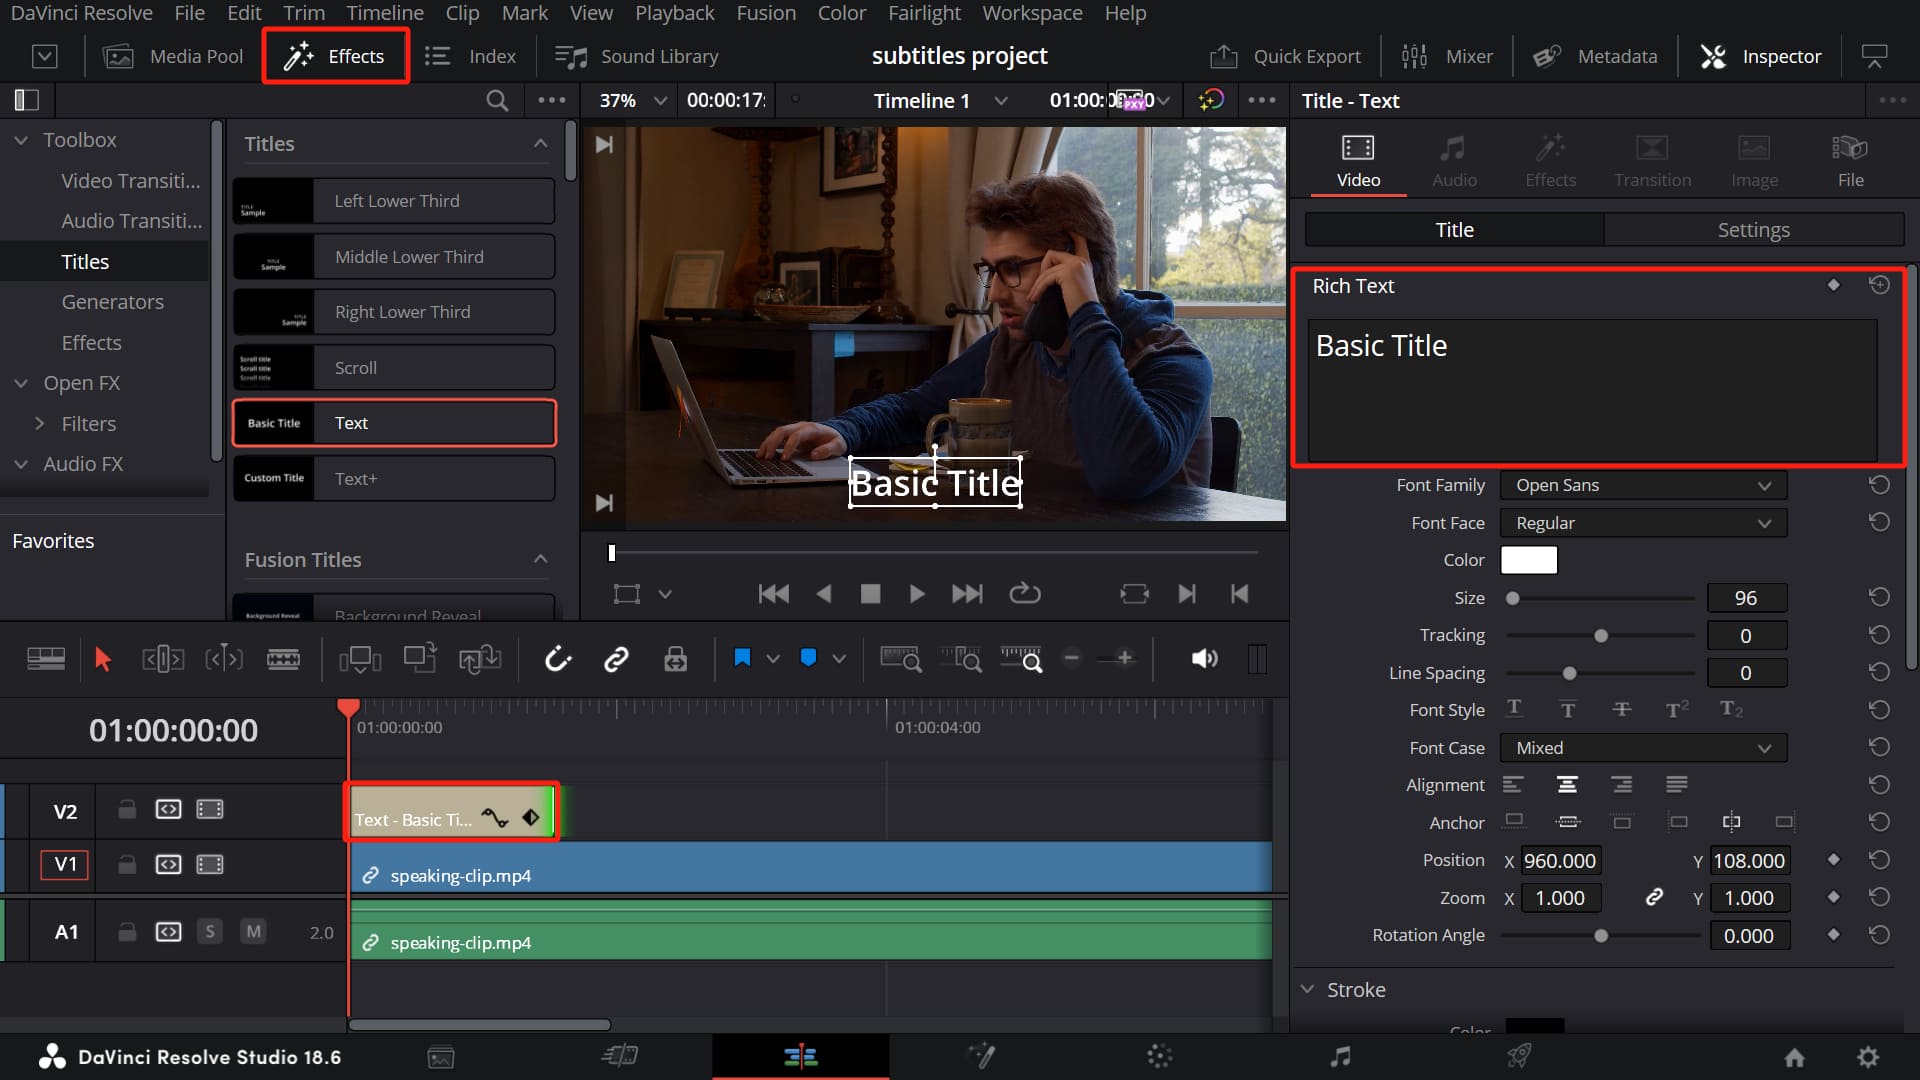
Switch to the Edit page in DaVinci Resolve and locate the Effects panel at the top left of the interface. Under the Toolbox option in the panel, find the Text tool and drag it onto the timeline.
Adjust the position of the text on the Viewer and enter the desired text in the Rich Text input box located in the Inspector panel on the right side. Adjust the duration of the text on the timeline.
Next, select the text segment and hold the "Alt" key on your keyboard (Mac users can make the appropriate adjustments) while dragging to the right on the timeline. This will clone a new text segment, as shown in the video below.
Now, you can modify the rich text for this new text segment. Depending on your preference, you can also make various settings in the Inspector panel on the right, such as font style, size, color, and even apply keyframe animations for special effects.
One drawback of this method is that you have to input the subtitles step by step based on the content of the video. If you're not careful, the subtitle track can become messy, requiring extra effort to tidy up during post-production.
Note:
Avoid using the "Text+" tool with this method, as it can be resource-intensive and may cause your timeline to lag.
Method 2: Adding a Subtitle Track
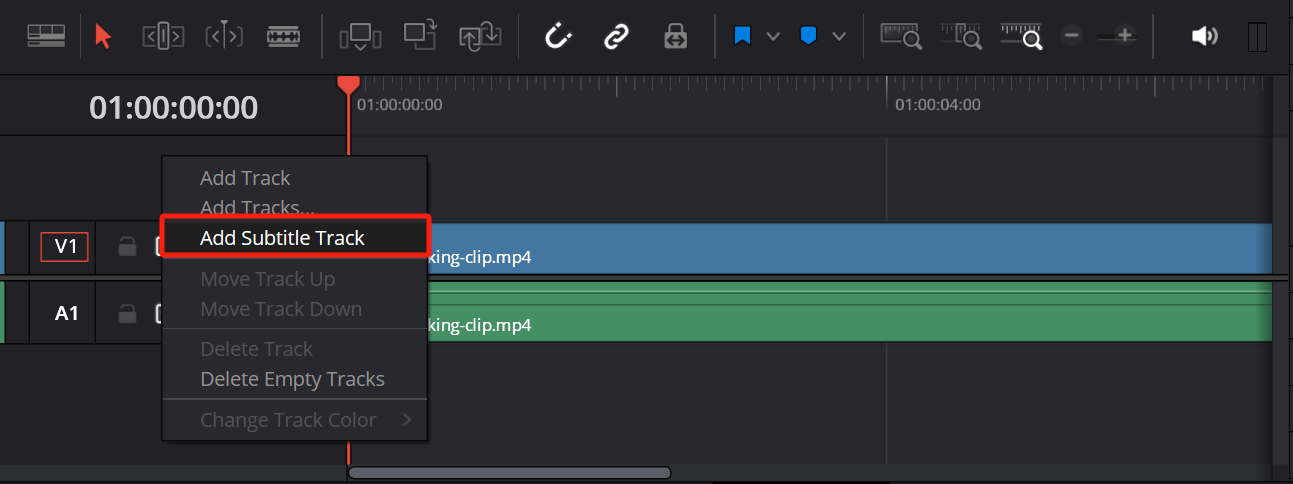
Adding a subtitle track is a more common approach. In the timeline panel of the Edit page, right-click in the header area of the track and select "Add Subtitle Track."
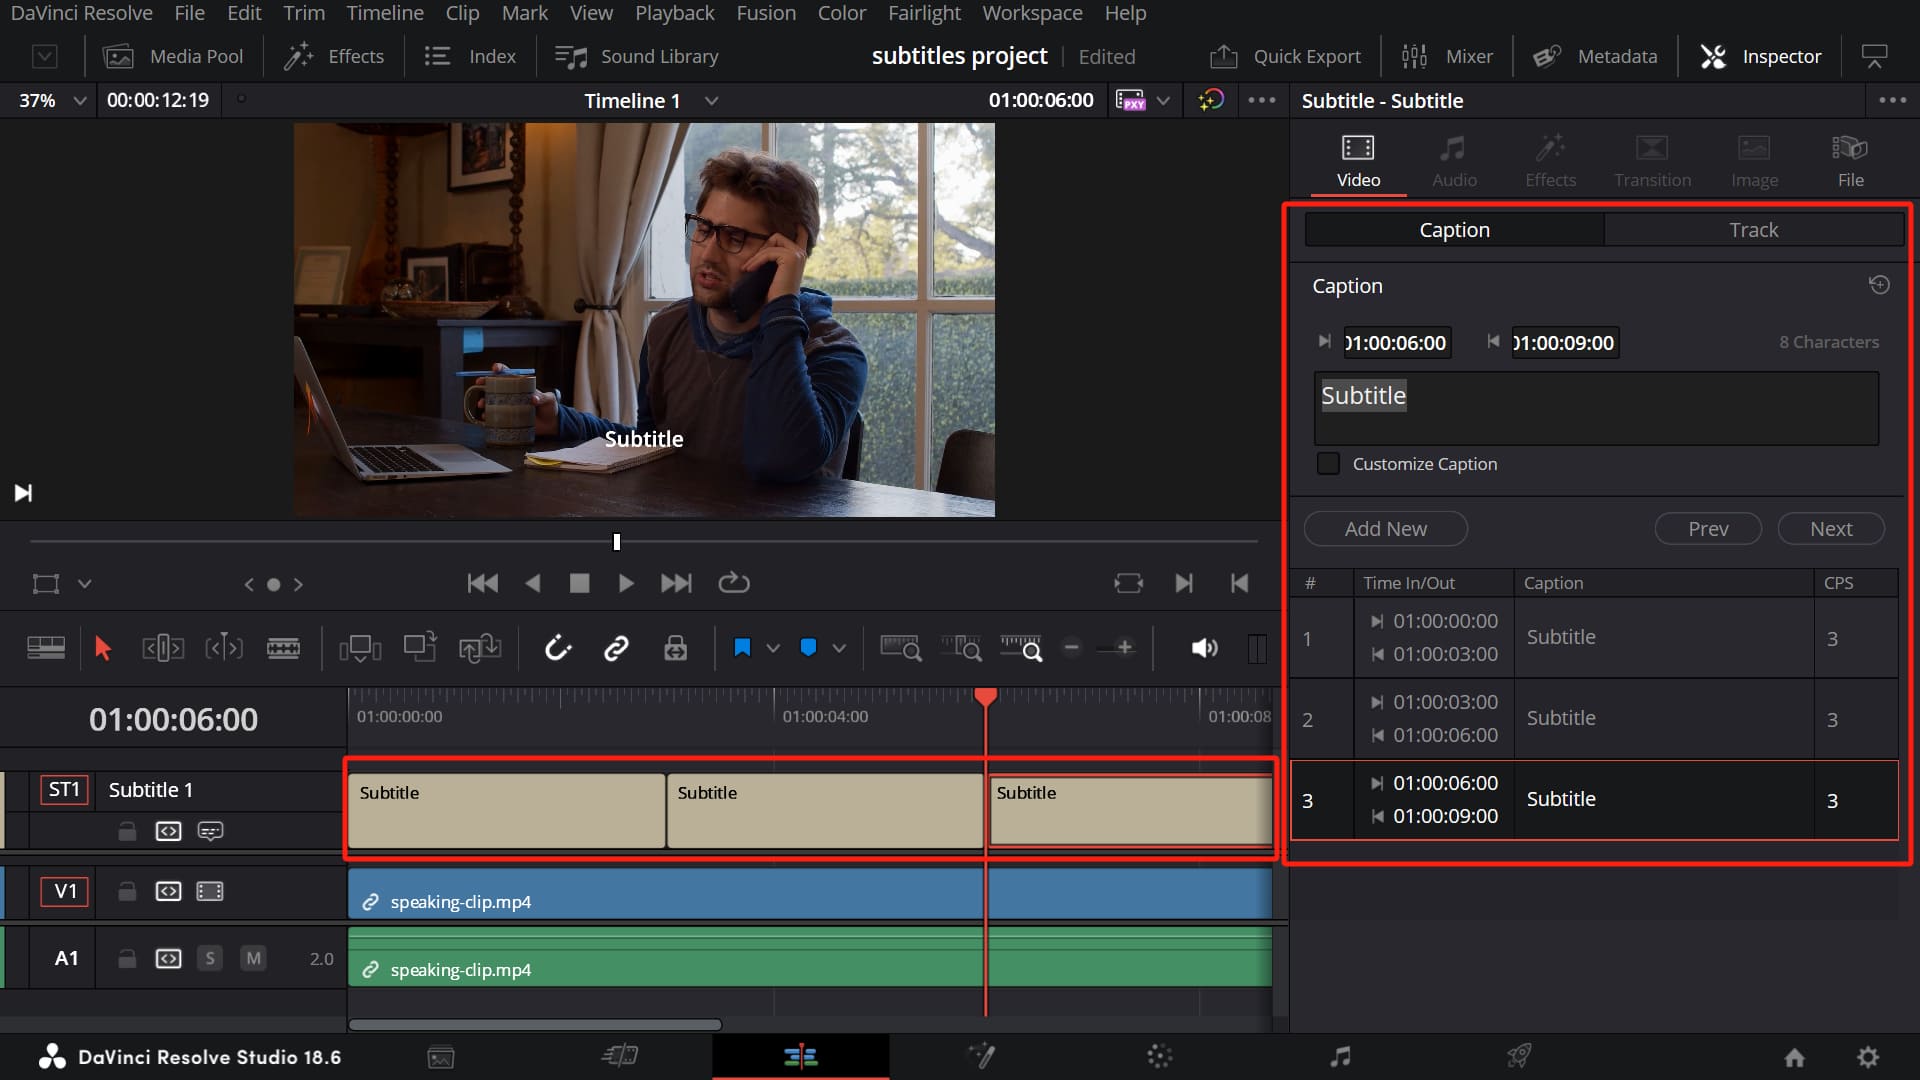
Once you click on the subtitle track, you'll notice that the Inspector panel displays an interface for adding subtitles.
Simply click the "Create Caption" button, and you can start entering your subtitles. After inputting the content for the current subtitle, move the timeline indicator to the end of that subtitle segment and click the "Add New" button to add a new subtitle. It's that simple!
Similarly, you can trim the subtitle on the timeline and adjust its duration.
If you want to change the font and size for the entire subtitle project, you can click the "Track" option in the Inspector panel. This allows you to make style adjustments for the entire subtitle track all at once.

How to Add SRT Subtitle Files in DaVinci Resolve?
In the previous section, we shared two methods for adding subtitles in DaVinci Resolve, which should meet most of your subtitle needs.
If you find that the efficiency is still not high enough, you can try using third-party subtitle software for adding subtitles. These software options can be either paid or free. You can search for reviews and comparisons to find the subtitle software that suits you best.
Here, we highly recommend CapCut, a fast editing software. It has a feature that intelligently recognizes speech and exports corresponding subtitles, making it convenient, practical, and highly accurate.
We have provided a detailed guide on this article: How to Add Subtitles in Premiere Pro?
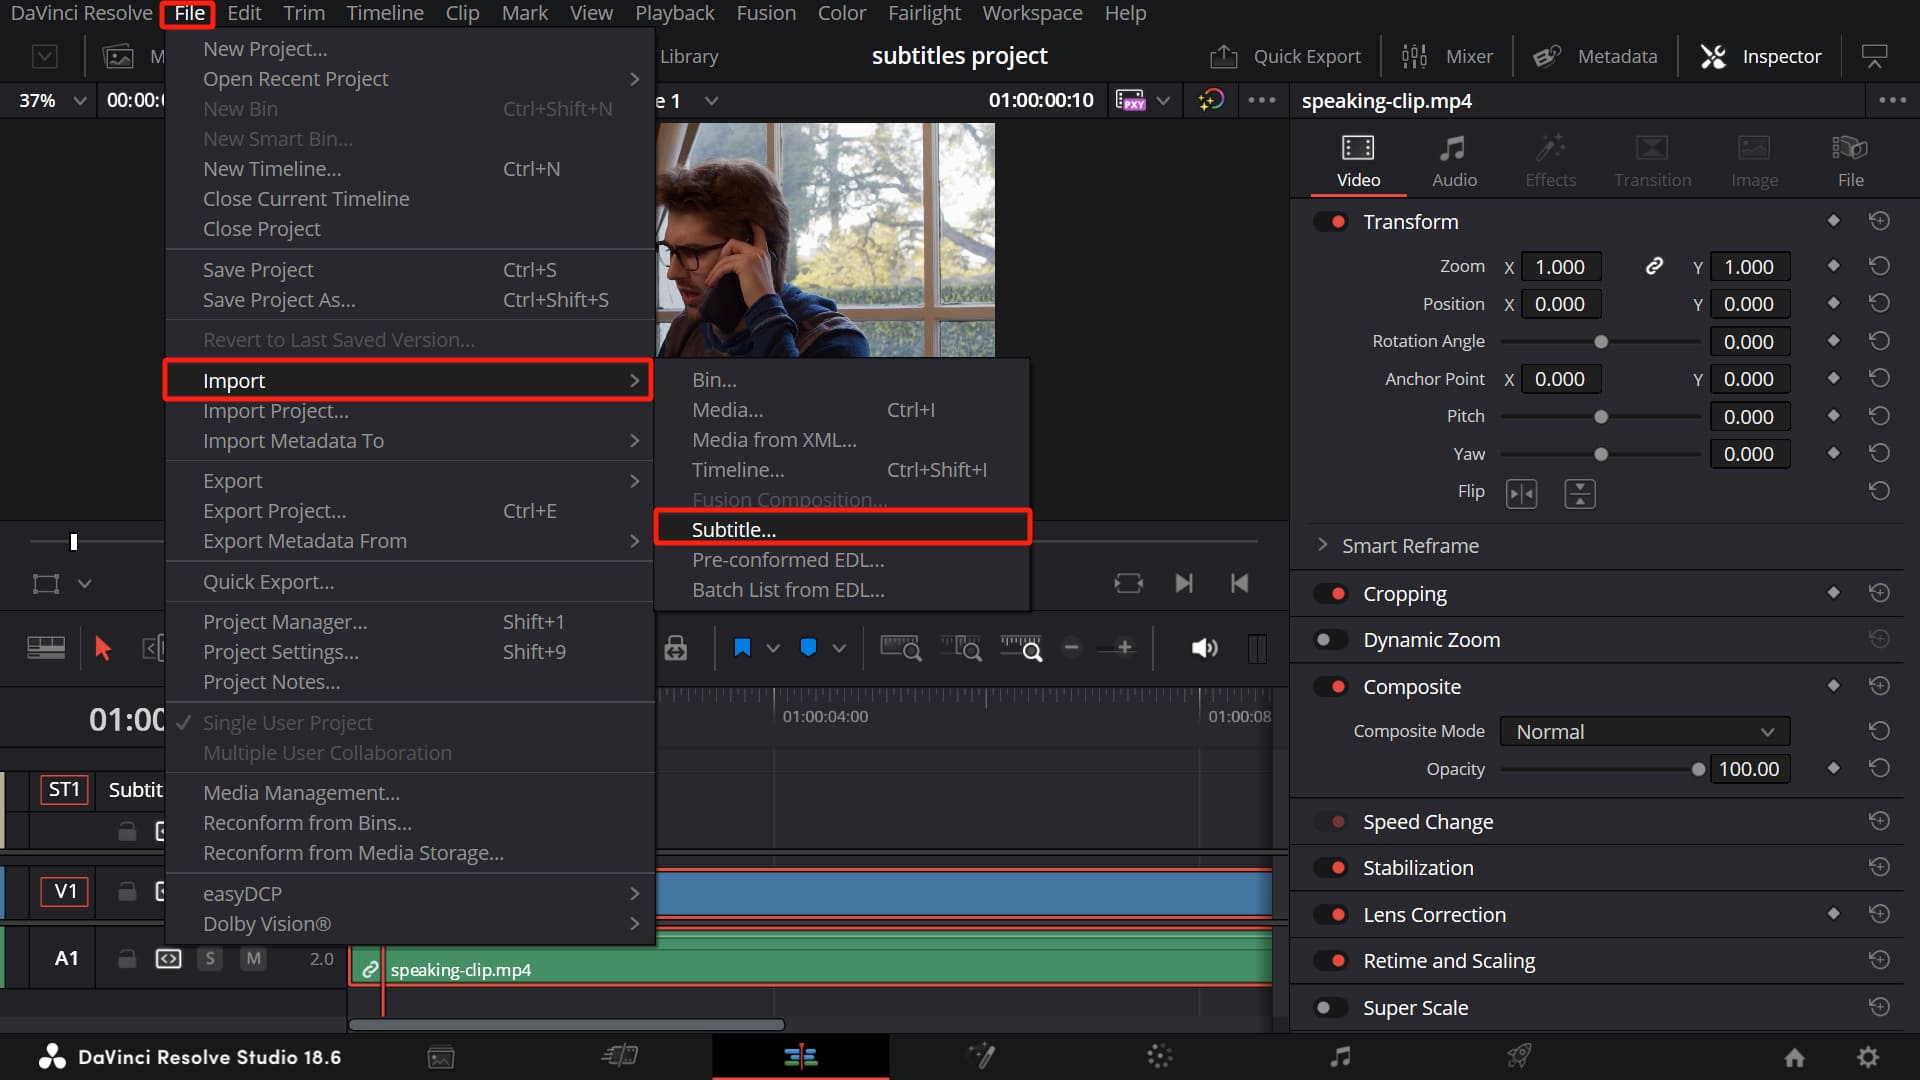
By using these subtitle software options or CapCut, you can export subtitles in the SRT file format. To import an SRT subtitle file into DaVinci Resolve, simply click on the "File" menu at the top, then select "Import" followed by "Subtitle."
Drag and drop the SRT subtitle file into the timeline panel, and it will automatically become a subtitle track. You can continue to modify the style of the subtitles and make any necessary content adjustments.
Additional Tips About Adding Subtitles in DaVinci Resolve
Once you've made all the necessary adjustments to your video in DaVinci Resolve, the final step is to go to the Deliver page to export the video.
At this point, there is one crucial step. In the "Render Settings" panel on the Deliver page, make sure to check the "Export Subtitle" option. Then, select the "Burn into video" option under the format settings.

Product Recommendation:
In this tutorial, we've covered the various methods of adding subtitles in DaVinci Resolve. By now, you should feel confident in your ability to incorporate subtitles seamlessly into your videos.
However, if you're looking for an additional tool to enhance your editing workflow, we have a recommendation for you: TourBox.

The integration of TourBox with DaVinci Resolve provides you with a hands-on experience, allowing you to navigate the software effortlessly.
Its customizable buttons and knobs can be assigned to various functions, such as adjusting timeline settings, modifying color grading parameters, or even controlling the playback of your video. This level of control at your fingertips significantly speeds up your editing process and makes it more enjoyable.
In conclusion, we hope this tutorial has provided you with valuable insights into adding subtitles in DaVinci Resolve. And if you're interested in optimizing your editing process further, we highly recommend considering TourBox as a valuable addition to your toolkit. Happy editing!