Text vs. Text+ | How to Add Text in DaVinci Resolve?
In video making, text isn't just for sharing information. It also helps tell your visual story. DaVinci Resolve is a pro tool that combines editing, color grading, and effects, and its text features are both powerful and flexible.
However, many beginners using DaVinci Resolve find adding text confusing. So, let's discuss some of these common issues together.

In this article, you will learn:
- How to Add Text in DaVinci Resolve?
- What's the Difference Between DaVinci Resolve's Text and Text+?
- How to Add Animation to Text in DaVinci Resolve?
- Should You Use Text or Text+ to Add Text in DaVinci Resolve?
- Conclusion
How to Add Text in DaVinci Resolve?
Adding text in DaVinci Resolve is very simple. It only takes a few easy steps.
First, open your project and switch to the Edit page. On the top left, you will see the Effects tab. Click it to open the Effects panel.

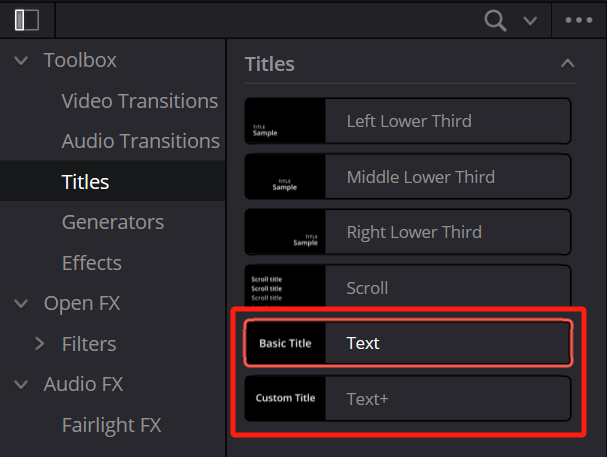
In the Effects panel, look for the "Titles" section. Here you will find several text options, from a basic text generator to more animated titles.
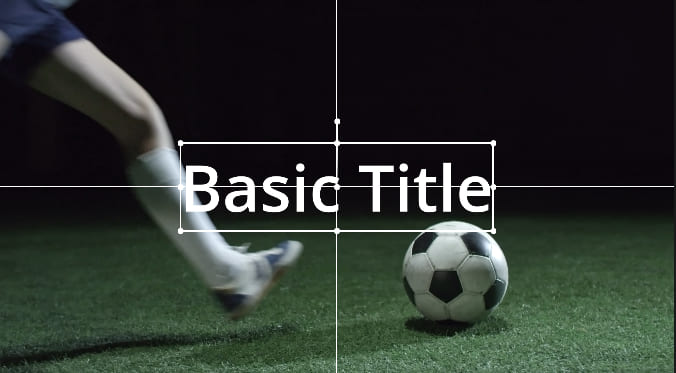
For a simple text overlay, choose the "Text" option. Drag it onto the timeline and place it on a track above your video clips. This makes sure the text shows over your visuals.
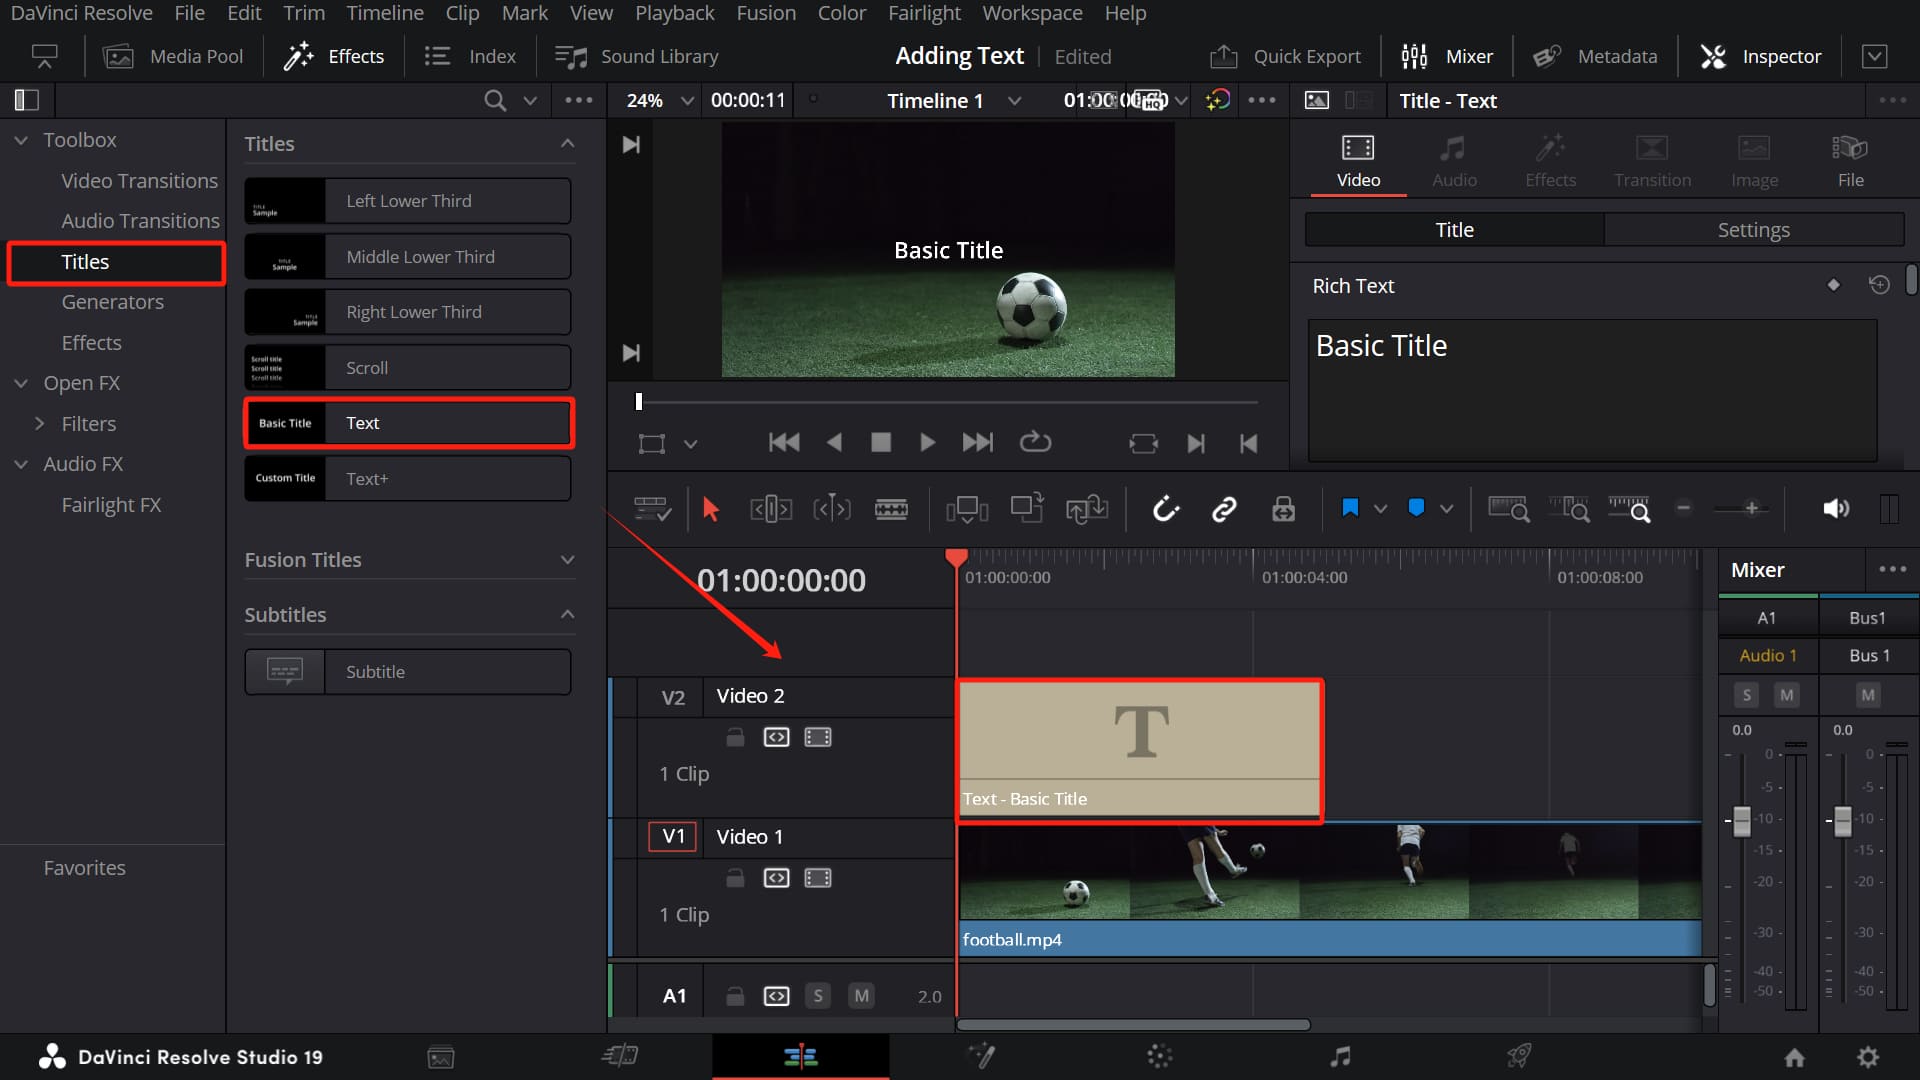
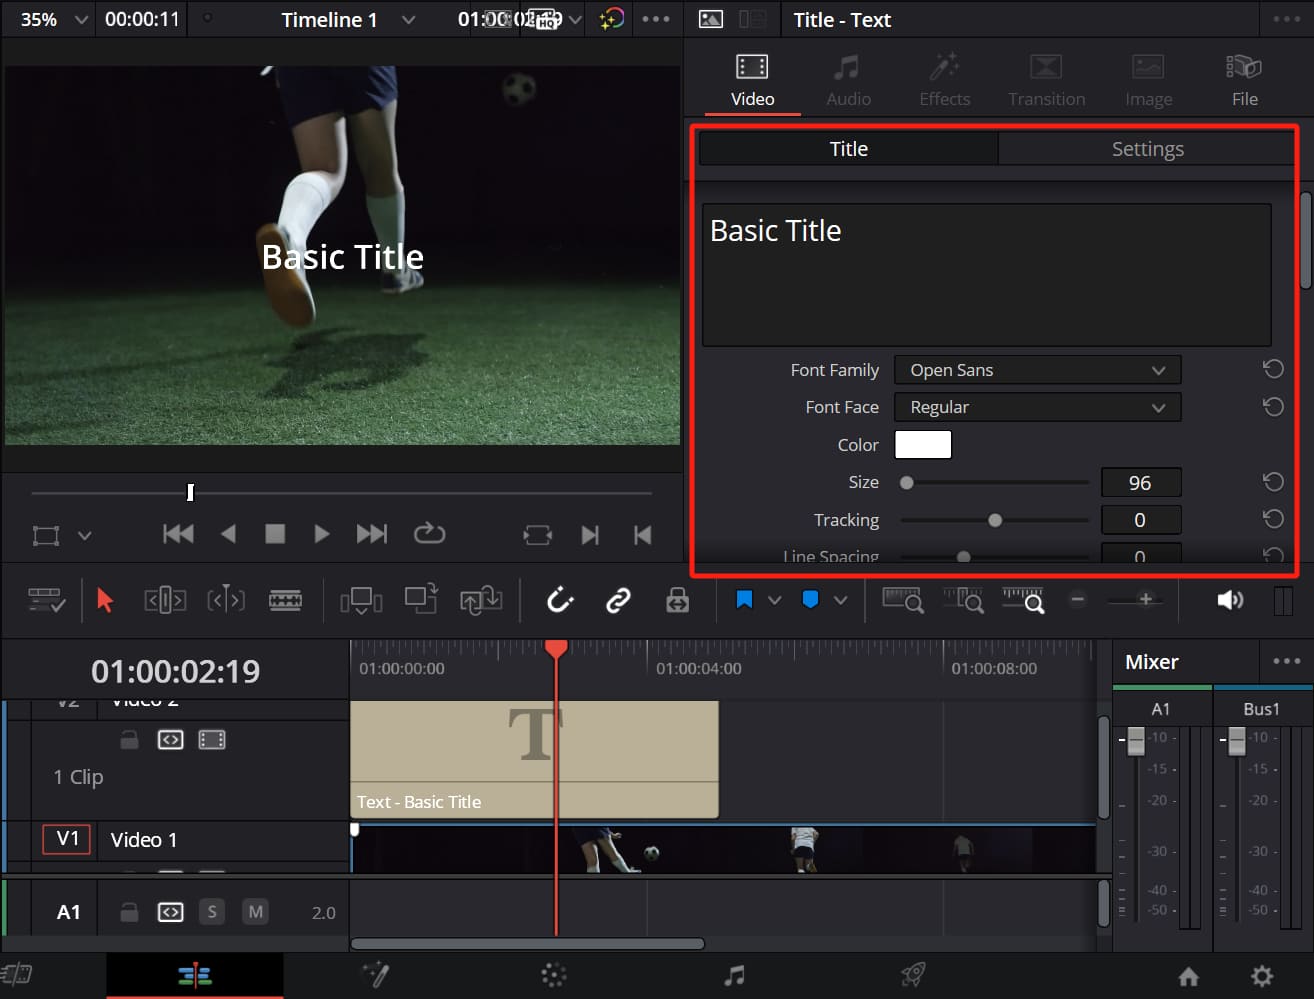
Once the text clip is on the timeline, click it to open its settings in the Inspector panel. Here, you can type your message, pick a font that matches your video, adjust the size, color, and alignment, and even set the opacity.
The interface is very clear. Each setting is well labeled, so you won't feel overwhelmed while you experiment.
If you want your text to do more than just sit there, consider adding simple animations. For example, you can set keyframes for the text's position or opacity to create smooth transitions as it appears or disappears.
With these basic animations, your text will feel more integrated into the video's flow, rather than just being a static element.
Further Reading:
That covers the basic steps for adding text in DaVinci Resolve. It's very simple and straightforward. You follow a few easy actions to get the hang of it.
But does DaVinci Resolve only let you add basic text and simple effects? Of course not.
In the Effects panel, you might notice there's a "Text" option as well as a "Text+" option. What's the difference between the two? This is a common question among new users of DaVinci Resolve. In the next section, we'll take a closer look.
What's the Difference Between DaVinci Resolve's Text and Text+?
The answer actually comes from a bit of history. Fusion started out as its own separate software. Early versions of DaVinci Resolve did not have a Fusion page at all. Later, the Fusion page was added to Resolve.
This led to a strange situation in DaVinci Resolve: there is the native Text option and then there's Text+ from Fusion.
These two tools can easily confuse beginners because both let you add text. However, they are quite different.
Text is a rich text editor, much like a basic word processor. You can work with it directly on the Viewer: move it around, double-click to type, select text, or delete it.
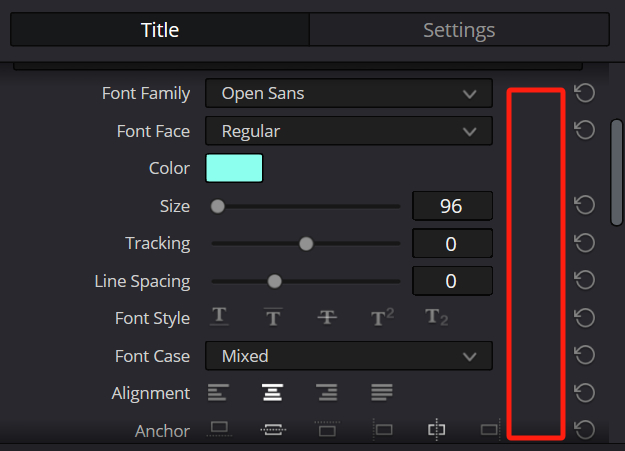
In addition, you can adjust individual characters in the Text settings panel. You can change the font size, add an outline, a shadow, or even a background.

At this point, you might think that Text does a lot and might be all you need instead of Text+.
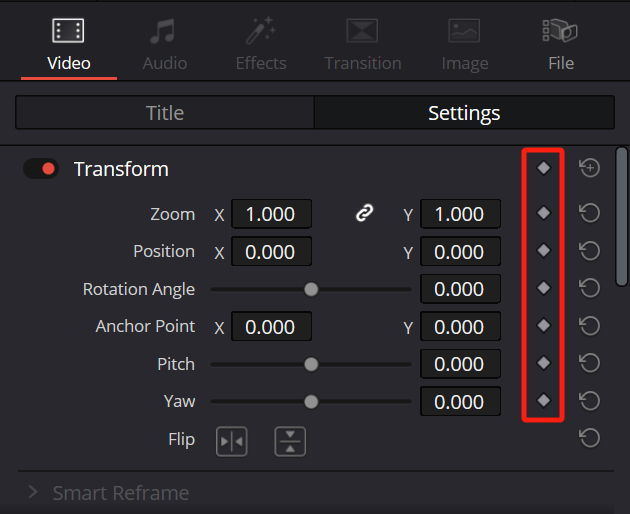
But if you look closely, you'll see that only some properties in the Text tool have a small circle icon (keyframes) next to them. For example, properties like Size and Line Spacing don't have keyframes.
Even when keyframes are available, you may still run into problems. For instance, you can't drag the Zoom slider all the way down to 0, and typing 0 manually won't work either.
These issues aren't really bugs in DaVinci Resolve. They just show that the Text isn't ideal for creating animations.
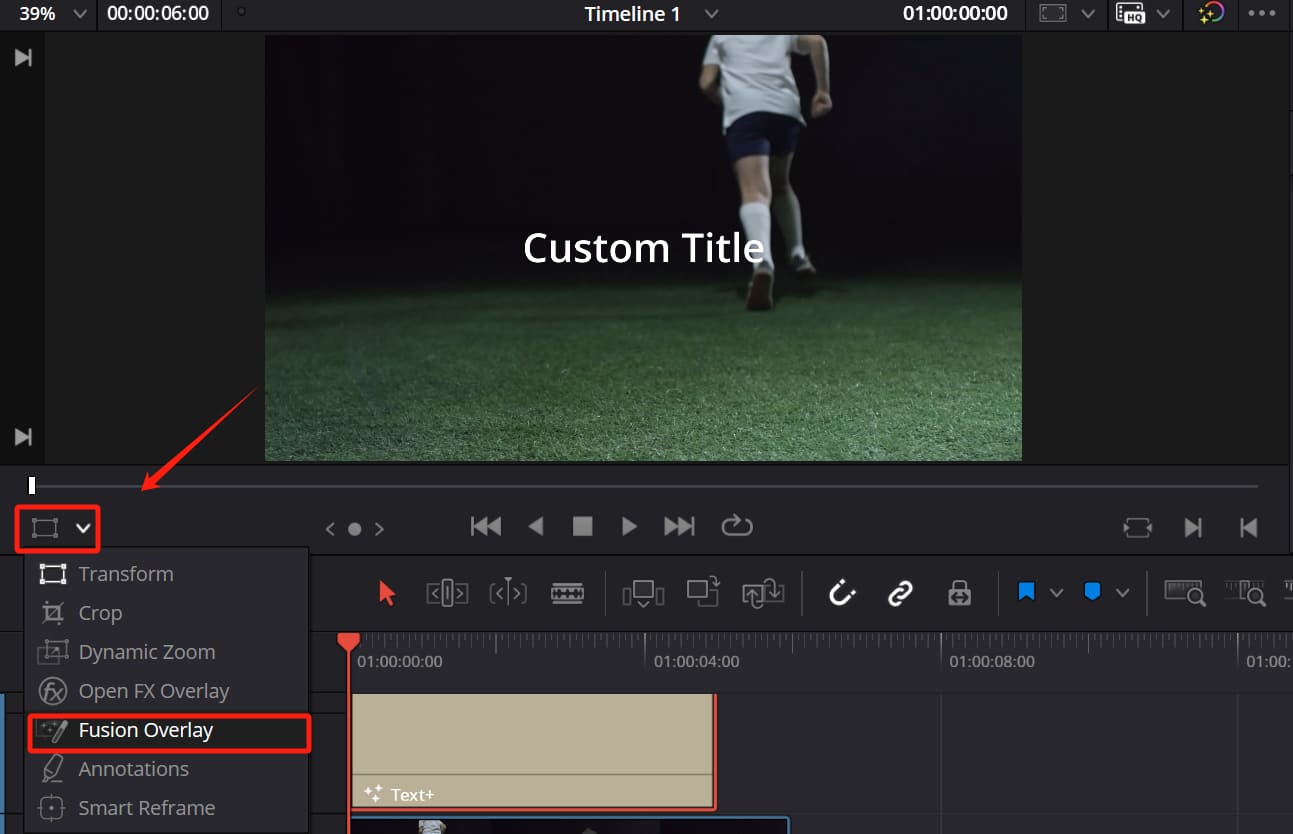
The worst part is that you can't apply any effects, whether Fusion effects or Open FX filters, directly to a text clip on the timeline. That's when Text+ really comes in handy.
First, keep in mind that Text+ is not a rich text editor like Text. You'll notice that you can't drag or modify the text directly in the Viewer.
Instead, click the Fusion Overlay option in the lower left of the Viewer panel. This lets you do basic dragging.
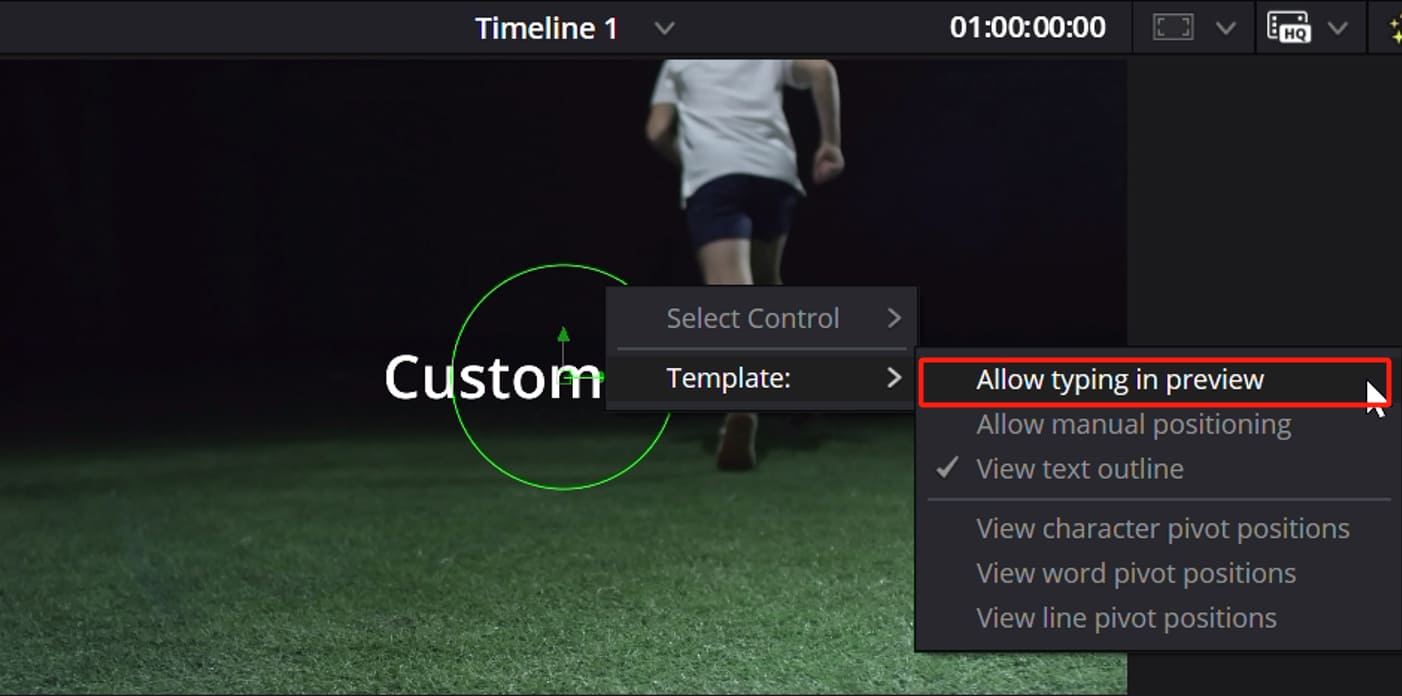
If you want to change the text itself, right-click on the Text+ text in the Viewer, choose Template, and then select "Allow typing in preview." This option lets you type directly in the Viewer.
If you want to adjust the spacing, size, or color of individual letters in Text+ on the Edit page, you can't do that. You must make those changes on the Fusion page.
So, as you can see, every operation with Text+ is a bit more complex than with Text. But that extra complexity brings incredibly powerful features.
Now, how do you use Text+ in DaVinci Resolve to add cool, dynamic text? Let's explore that in the next section.
How to Add Animation to Text in DaVinci Resolve?
As we mentioned earlier, DaVinci Resolve's Text+ is great for creating text animations. In this section, we'll show you how to use Text+ to add cool animation effects to your text.
1. Typewriter Effect
Click on the Text+ clip in your timeline, and then locate the "Write On" option in the top-right panel.
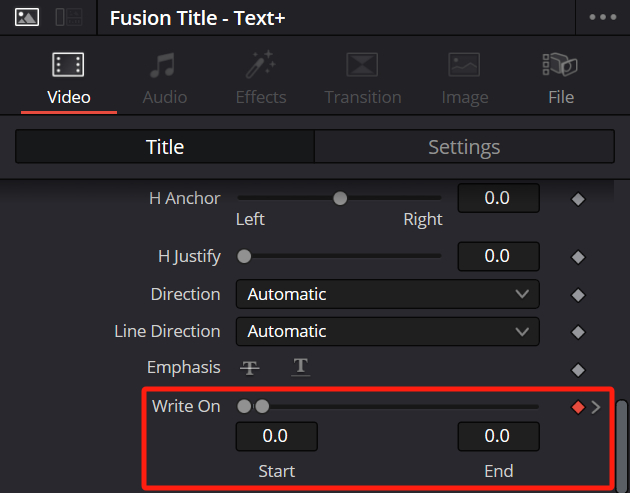
Move the playhead to the beginning of the clip. Drag the "Write On" slider to 0 and set a keyframe.
Next, move the playhead to the end of the clip. Drag the slider to its maximum value and add another keyframe.
Your typewriter effect is now complete.
You can also use the Direction and Line Direction settings to turn large blocks of horizontal text into vertical text. Give it a try, and you might discover many other fun animation effects you can create.
2. Text Slide Effect
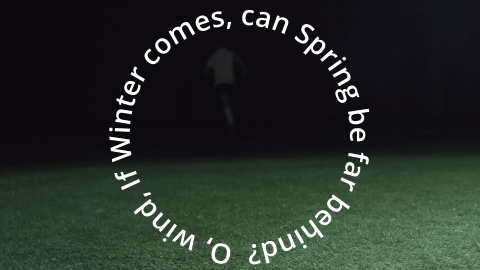
At the top of the Text+ panel, you'll see several tabs you can switch between. For example, click the Layout tab. Under the Type section, change the layout style to Circle.
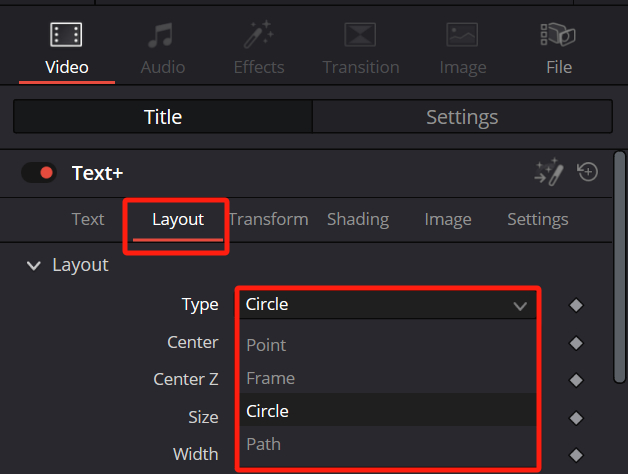
This will make your text form a circle, as shown in the image.
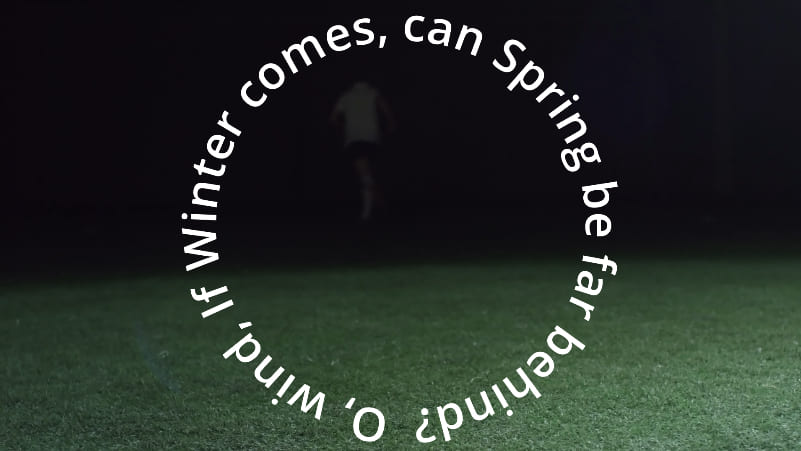
Next, try rotating the text along the X, Y, and Z axes in the Rotation section to create some fun animations.
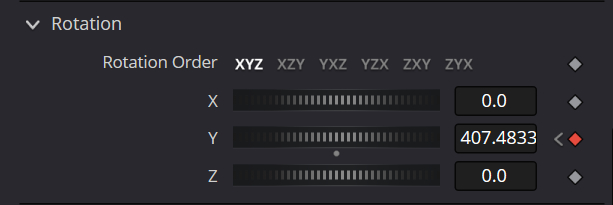
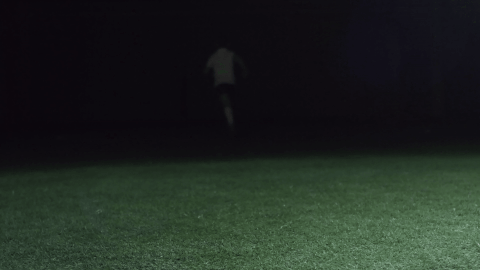
As shown in the GIF below.
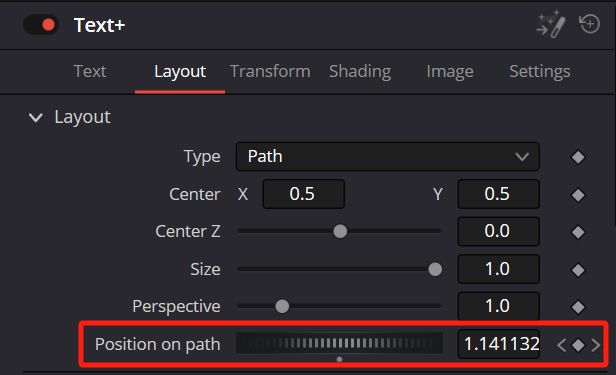
We can also switch the layout to "Path"(make sure Fusion Overlay is on). Then, simply draw any line in the Viewer and the text will follow that path.
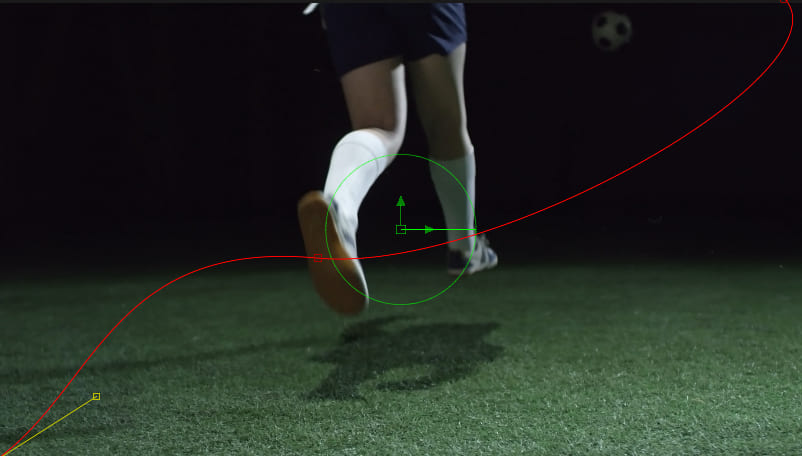
It's really easy. Just set different "Position on Path" values at the start and end of your Text+ clip, add a keyframe at each point, and your animation is done.
Isn't that cool?

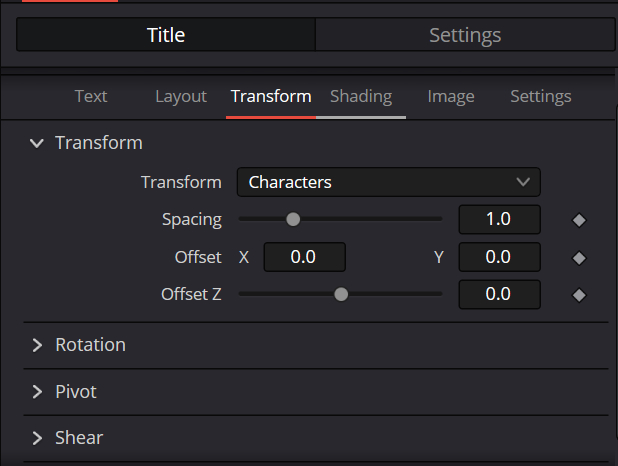
3. Text Spacing and Offset
In the Transform tab, you can set spacing for your text by individual characters or words. You can also mimic italics for fonts that don't have an italic style by adjusting the Shear value.
Those features in the Transform tab are common in text animations, so try!
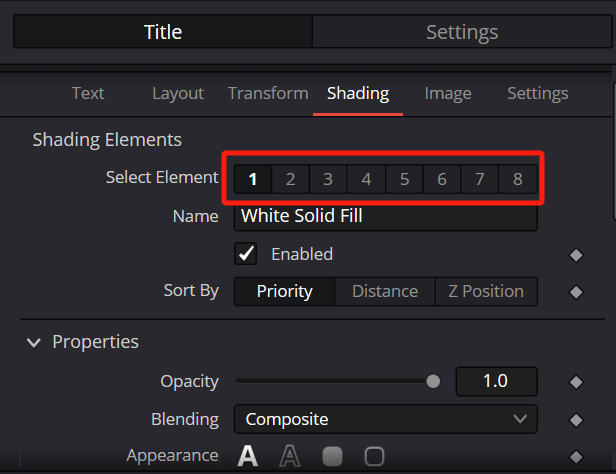
4. Text Style Overlays
Out of all the Text+ tabs, the Shading tab is the most important. Here, you can apply 8 separate style layers to your text. DaVinci Resolve comes with 8 preset styles.
Each number stands for a different style layer. They stack just like layers in Photoshop.
With these 8 layers in Text+, you can create very complex text effects.
Should You Use Text or Text+ to Add Text in DaVinci Resolve?
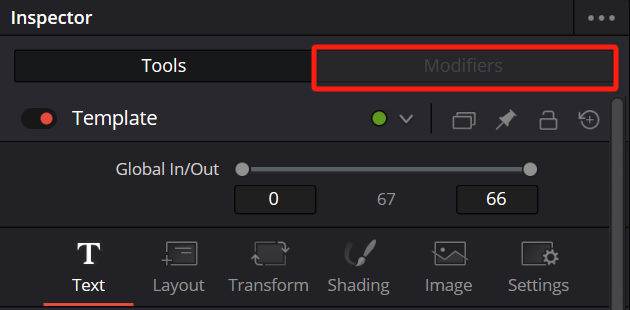
As we've seen, Text+ offers powerful features. However, to access more controls and animation settings, you'll need to use the Fusion page.
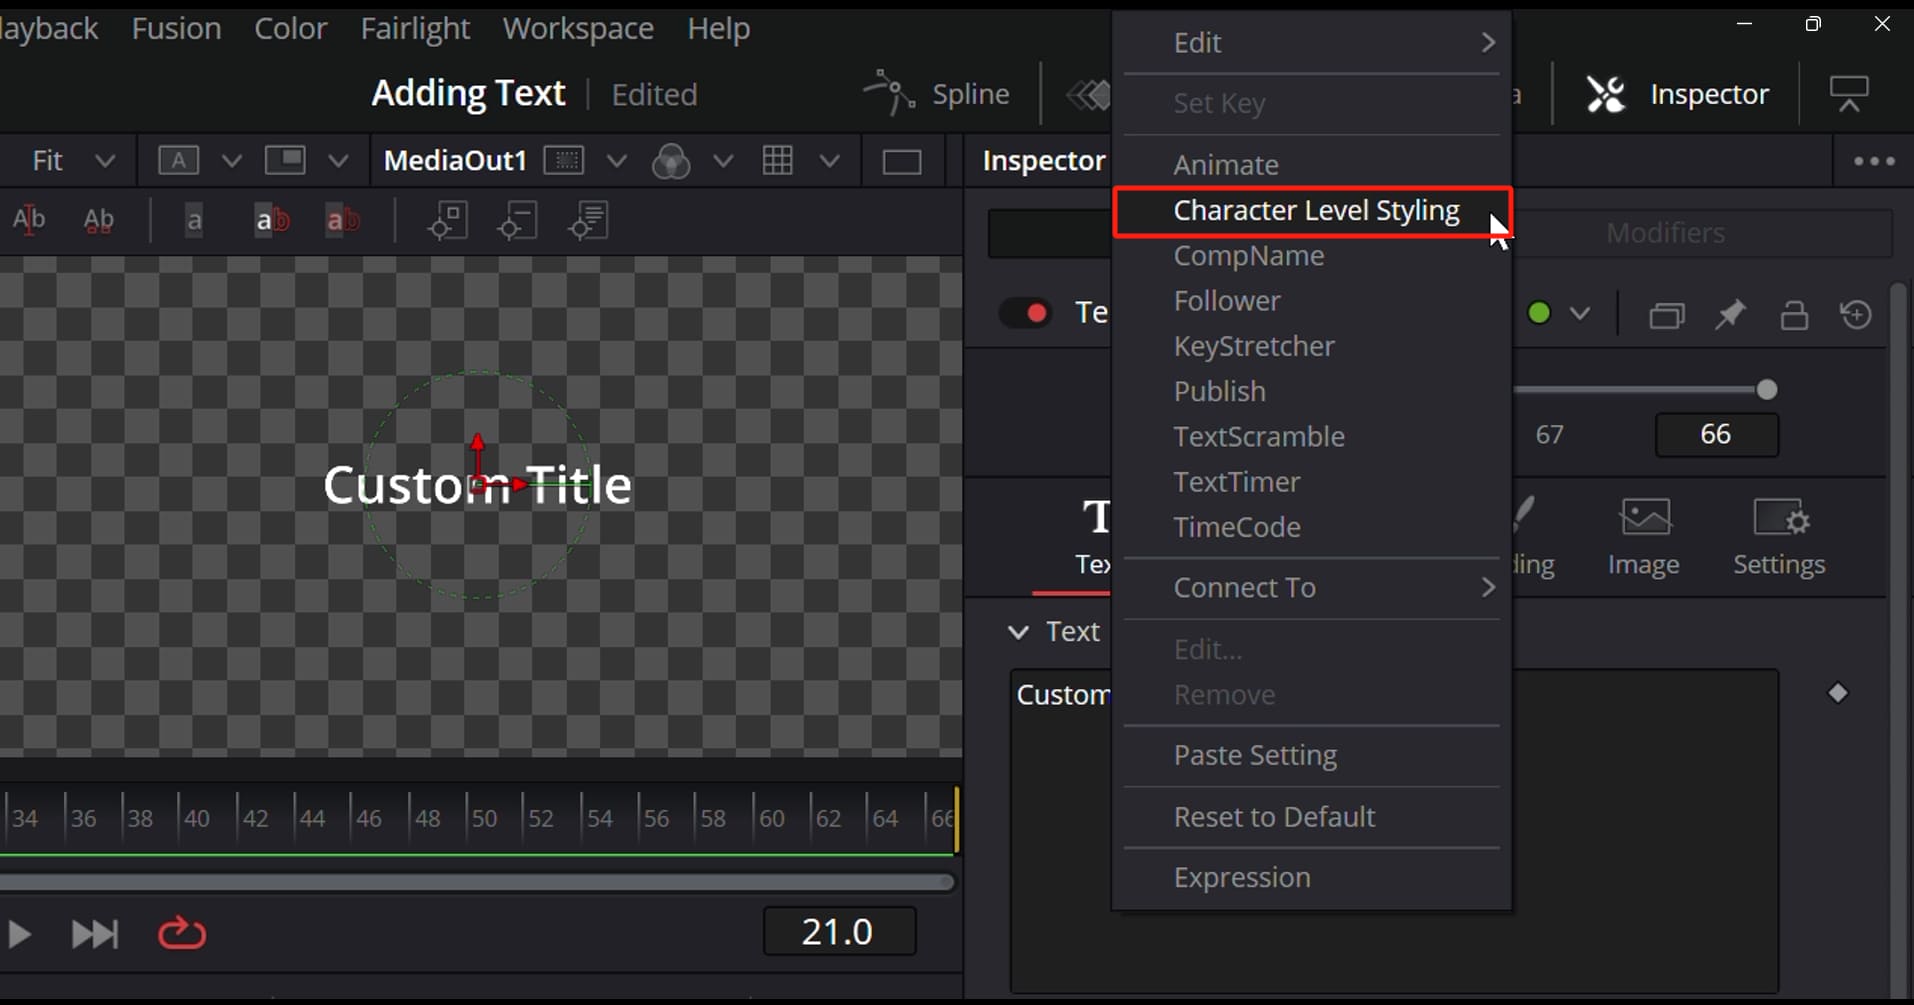
In the Fusion page, you'll notice a "Modifiers" tab at the top right, which is initially inactive.
To activate it, right-click the Text window and select "Character Level Styling." This enables the "Modifiers" tab, allowing you to adjust settings like size, color, and spacing for each character individually, creating interesting effects.
On the Fusion page, you can also use curves to control animations more easily. This lets you fine-tune every animation effect.
By now, you might think that Text+ is far more powerful than Text. So why would you still choose Text over Text+?
The main reason is the difference in rendering efficiency. Text+ is stronger, but it uses more computer power and resources. If your computer isn't very powerful, Text+ might slow things down.
In short, it's not about one being better than the other.
If you just need to add some text for layout and design in DaVinci Resolve, Text is the right choice. But if you want to create fancy text, animations, or use lots of effects, Text+ is the way to go.
Conclusion
At the end of our tutorial about how to add text in DaVinci Resolve, we would like to introduce a handy tool for video editing and color grading: TourBox.

This creative console is designed to be very practical. It makes working in DaVinci Resolve a lot easier by putting common functions right at your fingertips. This cuts down on all the extra mouse clicks and keeps your workflow smooth, whether you're color grading, editing, or adding text.
Once you start using TourBox, you'll quickly see a boost in your work speed and focus. And if you often work on an iPad, you might want to check out our TourBox Elite Plus. It can really improve your productivity on the go.

Whether you're just starting out or have years of experience, give it a try. It could make your creative process smoother and more efficient. To learn more about how TourBox can assist you, please visit our video editing page.