How to Blur on CapCut: Tips for Blurring Objects and Backgrounds
CapCut is a powerful and free video editing software that is perfect for content creators to quickly produce stunning videos.
In this tutorial, we will guide you on applying blur effects in the CapCut PC version and share tips and tricks on using CapCut's tools to enhance your videos.
Whether you want to blur the background, people, or text in your videos, or add dynamic blur effects, CapCut can help you achieve that. So, let's dive in.

In this article, you will learn:
- How to Blur on CapCut?
- How to Blur Something on CapCut?
- How to Blur Background on CapCut?
- Frequently Asked Questions About Blurring on CapCut
How to Blur on CapCut?
In this tutorial, we will use the CapCut PC version to process our videos. To use CapCut on a PC, you first need to download and install it.
You can download the CapCut PC version from the official CapCut website, and it supports both Windows and macOS systems. Once the download is complete, follow the prompts to install it, and then open CapCut on your computer. Click on "New Project" to enter the CapCut editing interface.
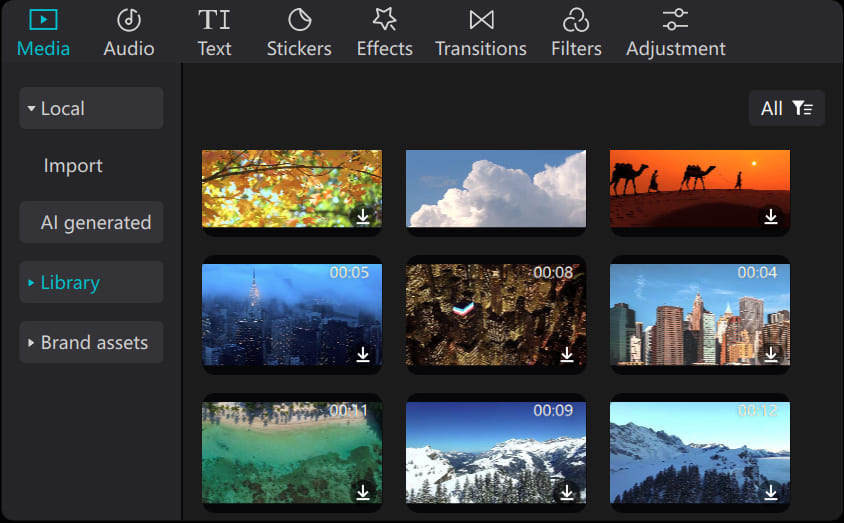
To apply blur effects in CapCut, you need to import the video you want to edit first. Click on the Media button in the top left corner to access the Media panel. Here, you have three options:
- In the "Local" section, choose to import local video, audio, or image files by selecting them or simply dragging and dropping your media files onto the interface.
- In the "AI Generated" section, provide a description and let CapCut generate media based on your description. This AI-generated feature can be incredibly helpful for content creators, so give it a try.
- In the "Library" section, you can use the preloaded assets provided by CapCut, including transitions, animations, and green screens. These assets can be used on TikTok without any copyright issues, but if you plan to publish your videos on other social media platforms, there might be copyright concerns.
You can import videos of any resolution and format into CapCut, as it automatically adjusts to the aspect ratio of your video. Once you have imported your video, you can drag and drop assets from the media library onto the timeline below.
Now, you can see your video clips on the timeline. You can trim the length of the video by dragging the edges of the clips, or use tools like "Split," "Delete left," or "Delete right" in the top left corner of the timeline to make precise edits to your clips.
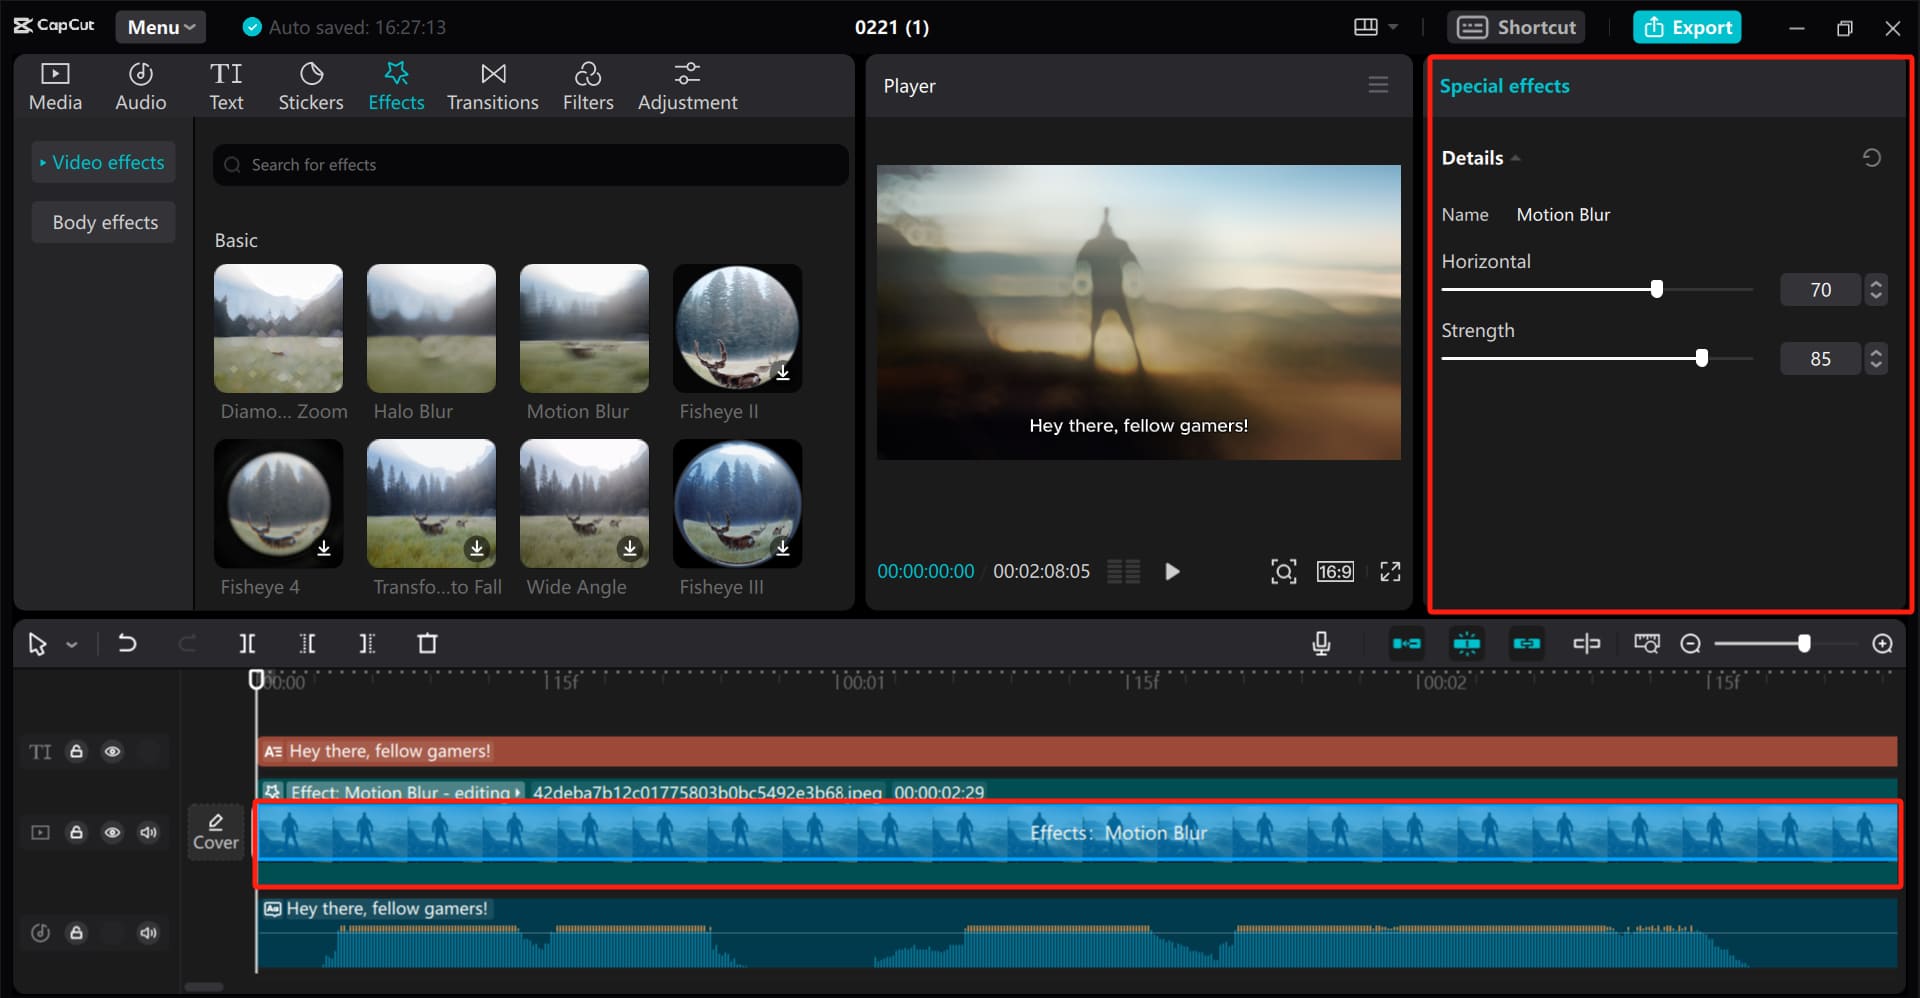
Now it's time to add blur effects to your video. First, select the video clip you want to blur on the timeline. Then, click the "Effects" button in the top left corner. This will open up the Effects library, which offers a variety of different effects.
The Effects library is divided into two main categories: "Video effects" and "Body effects". As the names suggest, these effects can be applied to the entire video clip or specifically to individuals within the clip. Choose the appropriate effect based on your needs.
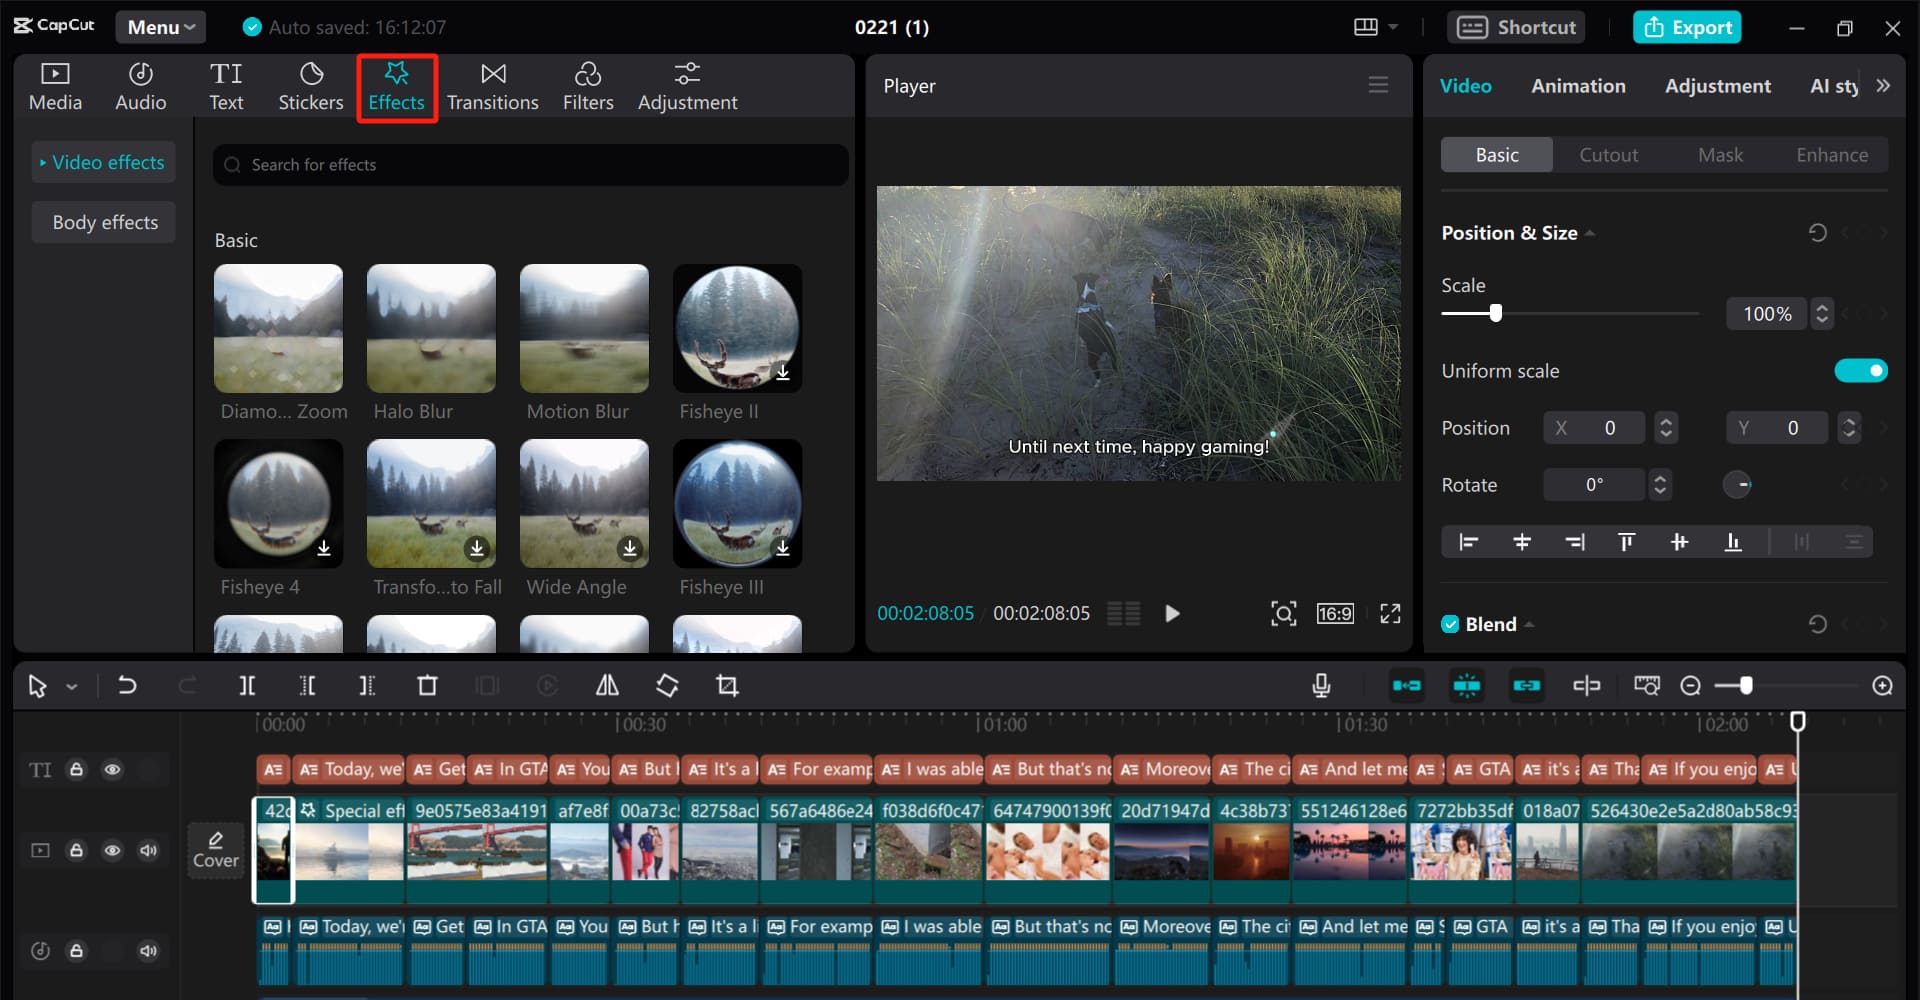
Navigate to the "Basic" category under "Video effects", where you'll find a range of interesting blur effects. Click on any effect and drag it onto the video clip on the timeline to apply it.
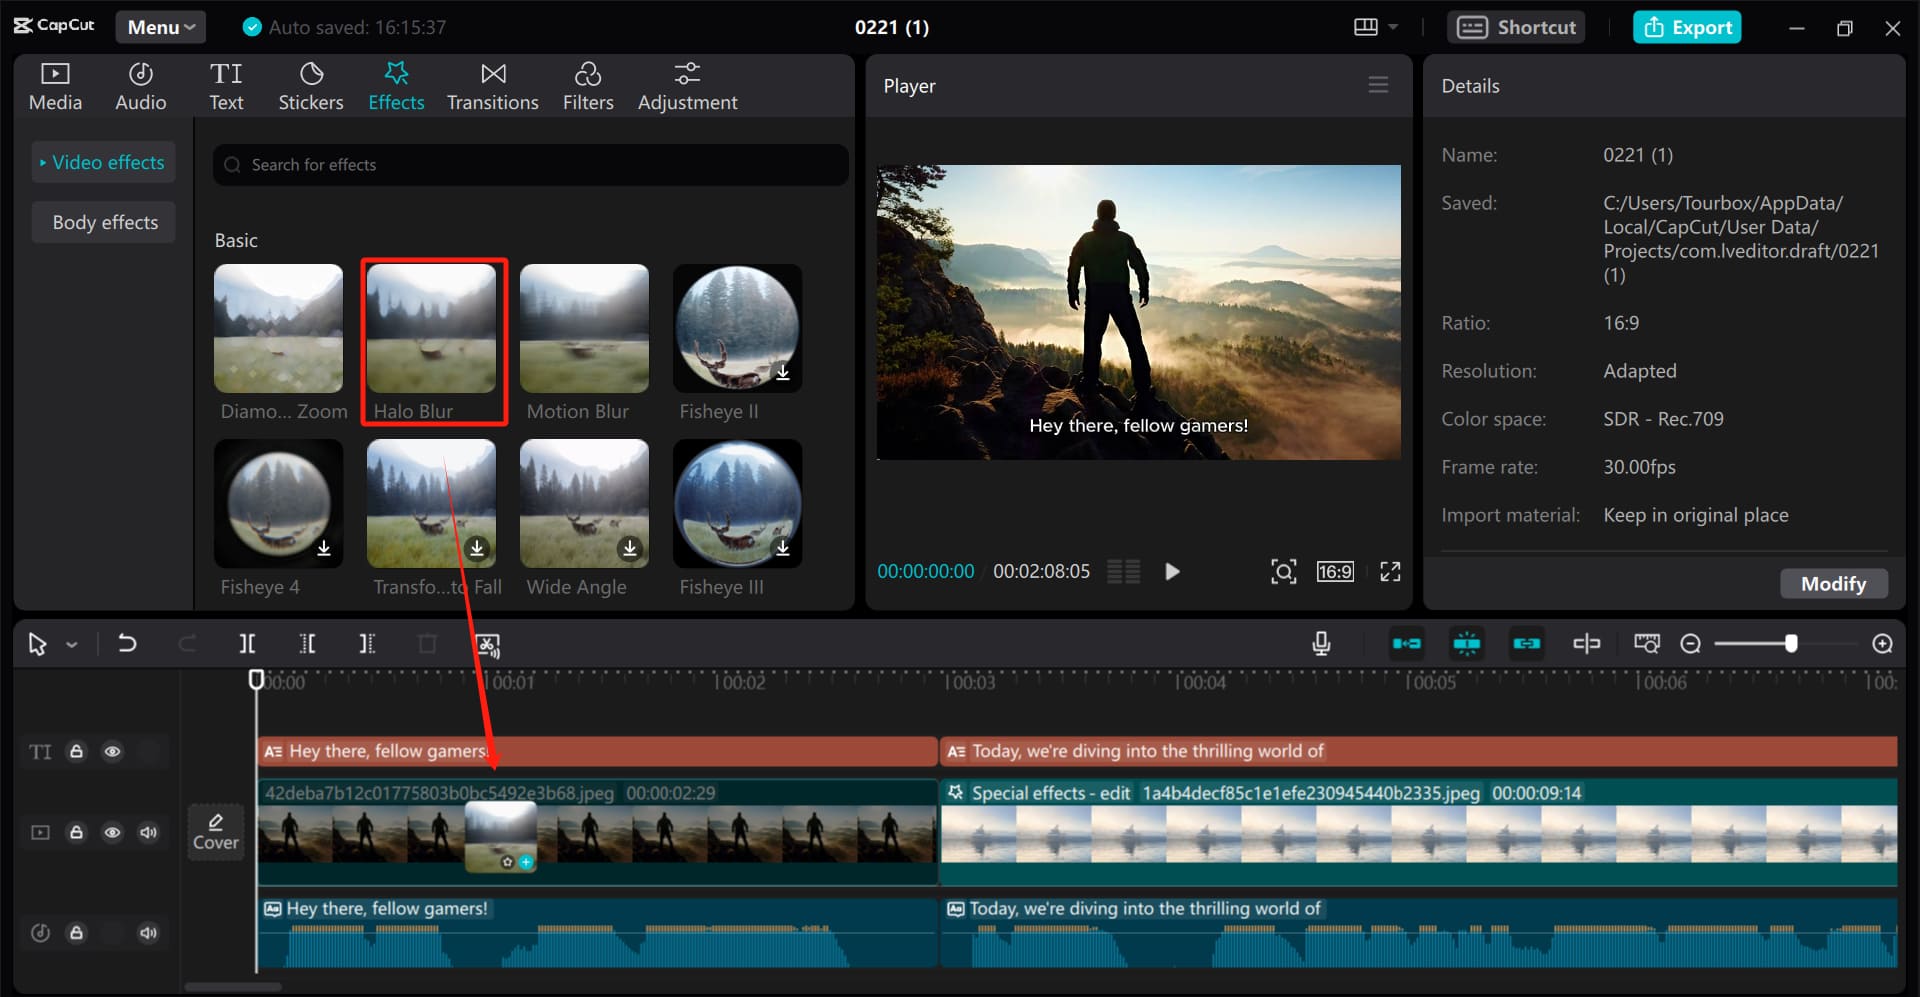
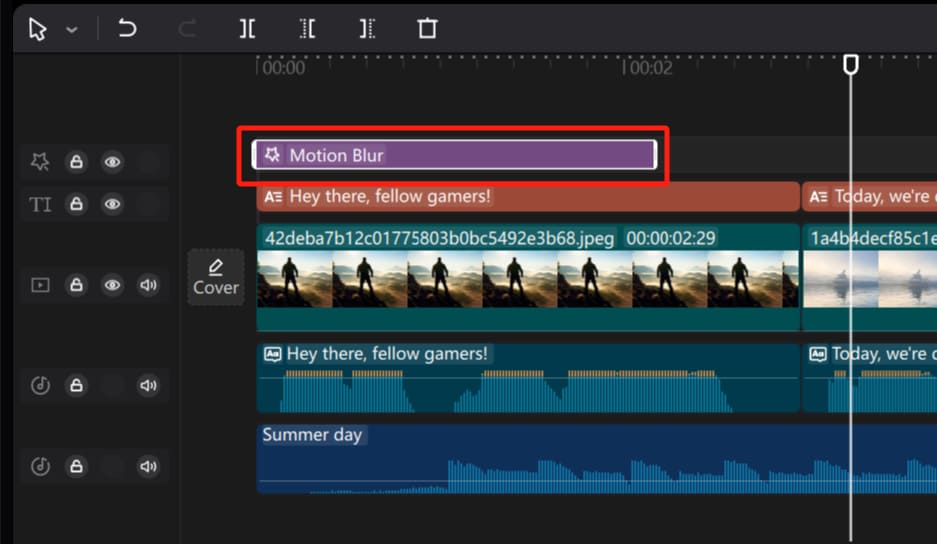
You can apply multiple effects simultaneously by dragging them onto the same video track. To adjust the effects, zoom in on the timeline and click on the "Special effects" button on the video track. This will bring up a menu where you can select the effect layer you want to modify.
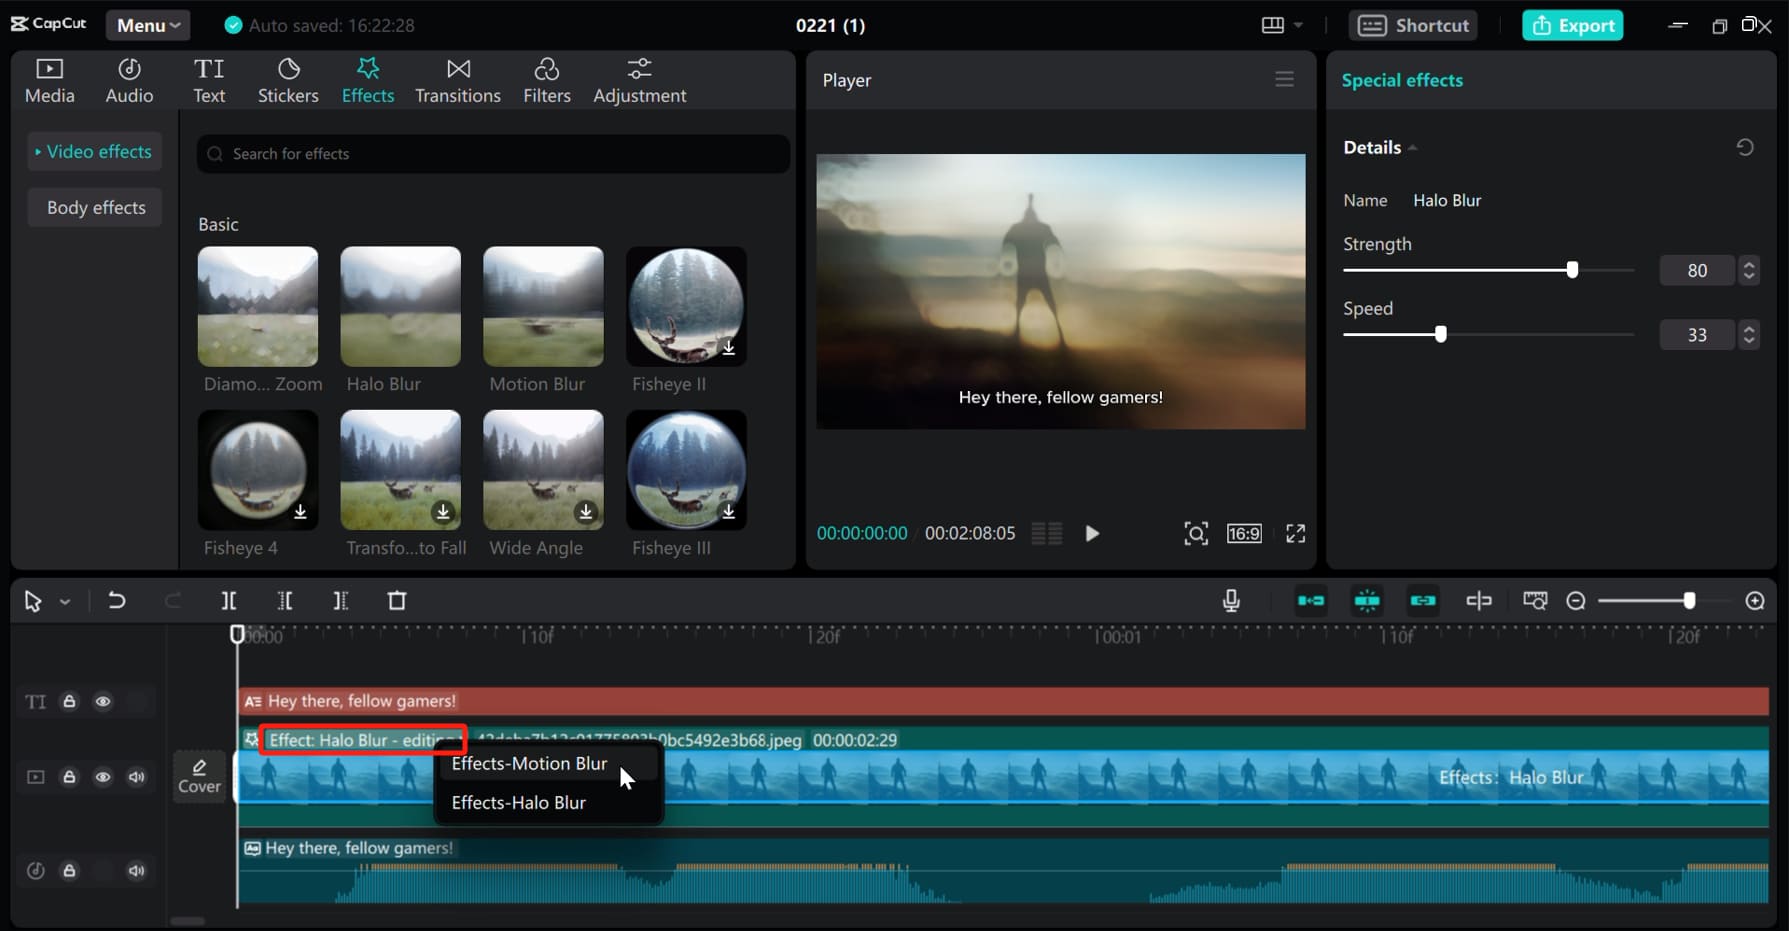
At this point, you'll see a translucent blue mask and the name of the effect on the video track, indicating that the effect layer is selected. Adjust the parameters of the effect, such as blur intensity, position, size, and shape, in the "Special effects" panel on the right.
When working on complex editing projects in CapCut, you'll find that adjusting parameters is a common task.
However, here's the challenge: using the mouse to drag parameter sliders makes it difficult to achieve precise control, and setting parameter values may be tricky in terms of the adjustment range.
This is where TourBox, a creative tool beloved by many editors and content creators, comes in handy.

TourBox's default presets for CapCut include parameter adjustment settings. When you click on a parameter box with your mouse, you can use TourBox's Scroll to make a precise adjustment.
No more painstakingly dragging CapCut's parameter sliders or guessing unknown values. With just one hand operating TourBox, you can focus your attention on the changes in your video clips.
The process of operating TourBox is very intuitive and comfortable, and you're sure to love it. Check out our video editing page to see how TourBox simplifies every step of video editing.
You can also drag a specific blur effect onto a new track, and it will be applied to all video tracks below it. Adjust the length of the effect on the track to control its duration.
Extra Tip:
You can preview your video effects at any time. If you're not satisfied, simply select the effect layer and press the "Delete" key on your keyboard to remove it.
How to Blur Something on CapCut?
You may have noticed the limitation of applying blur effects to an entire video clip or timeline, where the effect affects the entire clip. But what if you only want to blur a specific area within the clip?
Let's explore how to do that using the following video clip. We will use a combination of CapCut's blur effect, masks, and keyframes to blur the license plate of the orange sports car in the video clip.
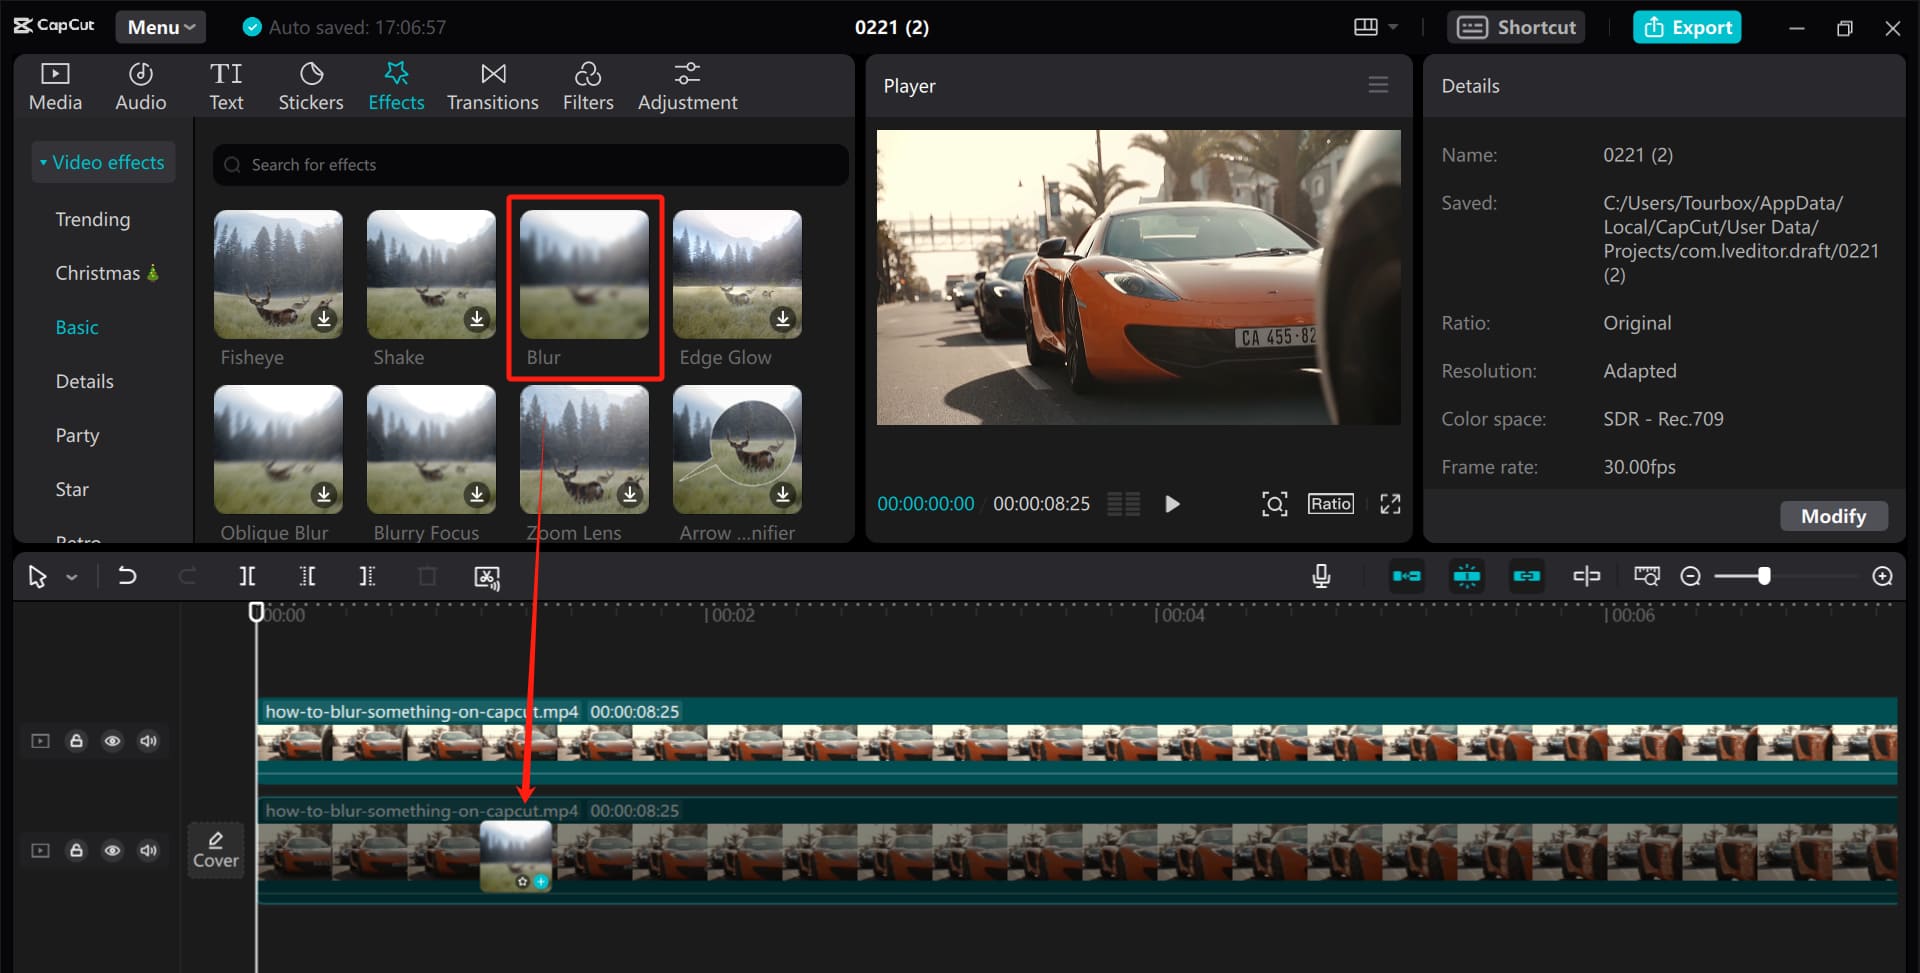
Drag the clip onto the timeline, select the video clip on the timeline, and press "Ctrl + C" to copy it. Then, press "Ctrl + V" to paste it. Now you will see two video tracks on the timeline.
Next, drag the blur effect onto the first video track (the one below), treating it as a background layer with a blurred effect.
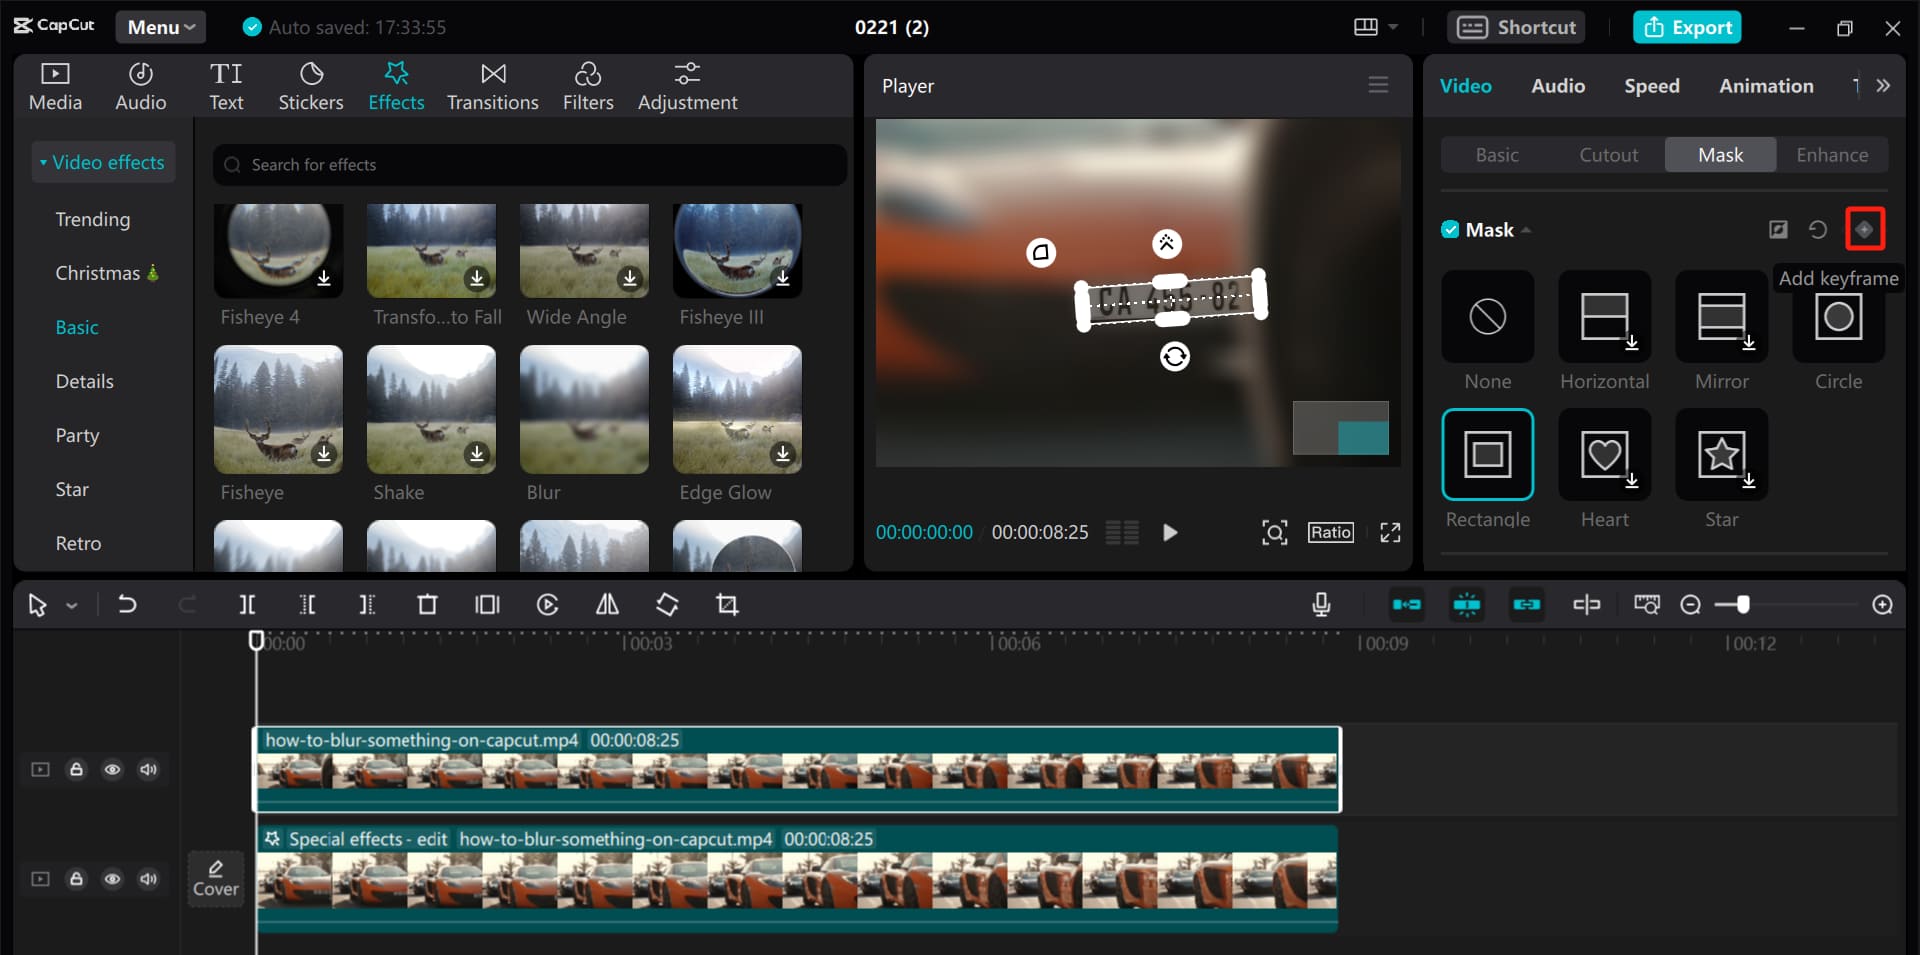
Then, select the second video track above and navigate to the Mask panel under the Video section in the right-hand parameter settings panel. Choose the "Rectangle" mask option.
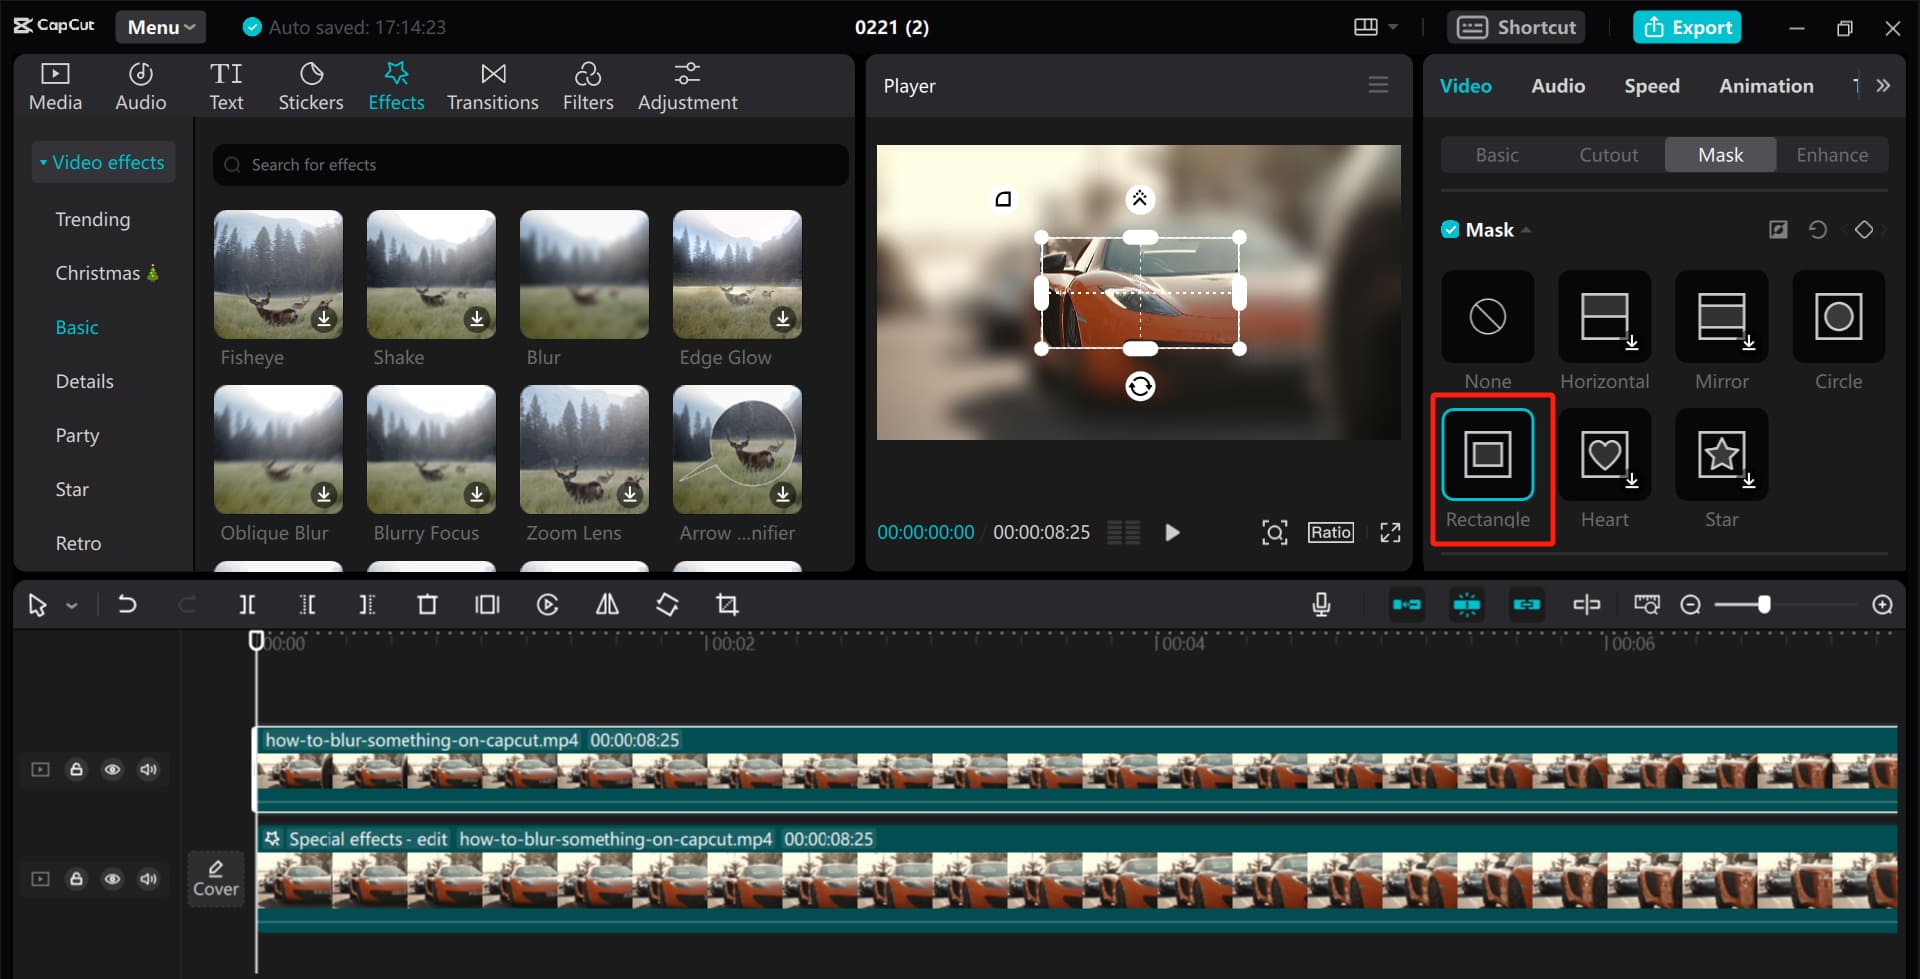
Make sure the playhead is at the beginning of the video clip, at 0 seconds. Then, move the mask and adjust its shape and size to cover the license plate.
Extra Tip:
If the object you want to mask is small and difficult to work within the video frame, you can zoom in and out of the player by holding down the Ctrl key and scrolling the mouse wheel.
Click on the "Add keyframe" button in the top right corner of the mask panel. If you add a keyframe at 0 seconds, CapCut will automatically add keyframes whenever you make any adjustments to the clip in the future.
Move the playhead and adjust the mask position or shape and size accordingly based on the movement of the license plate in the clip. Repeat this process until the license plate is completely covered in the mask for the entire duration of the clip.
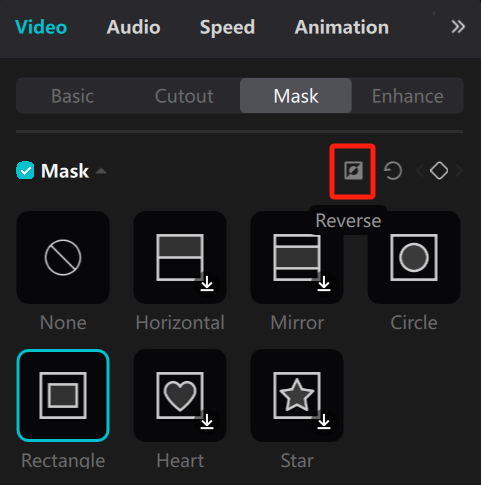
Finally, when you have made all the necessary adjustments to the mask, click the "Reverse" button in the top right corner of the mask panel. This will invert the mask and complete the dynamic blurring effect in CapCut.
You can achieve the effect of blurring something in your video clip using the combination of blur effect, mask, and keyframes in CapCut. Let's take a look at the final result.
How to Blur Background on CapCut?
Blurring the background in CapCut is just as easy. Let's use the following video clip as an example.
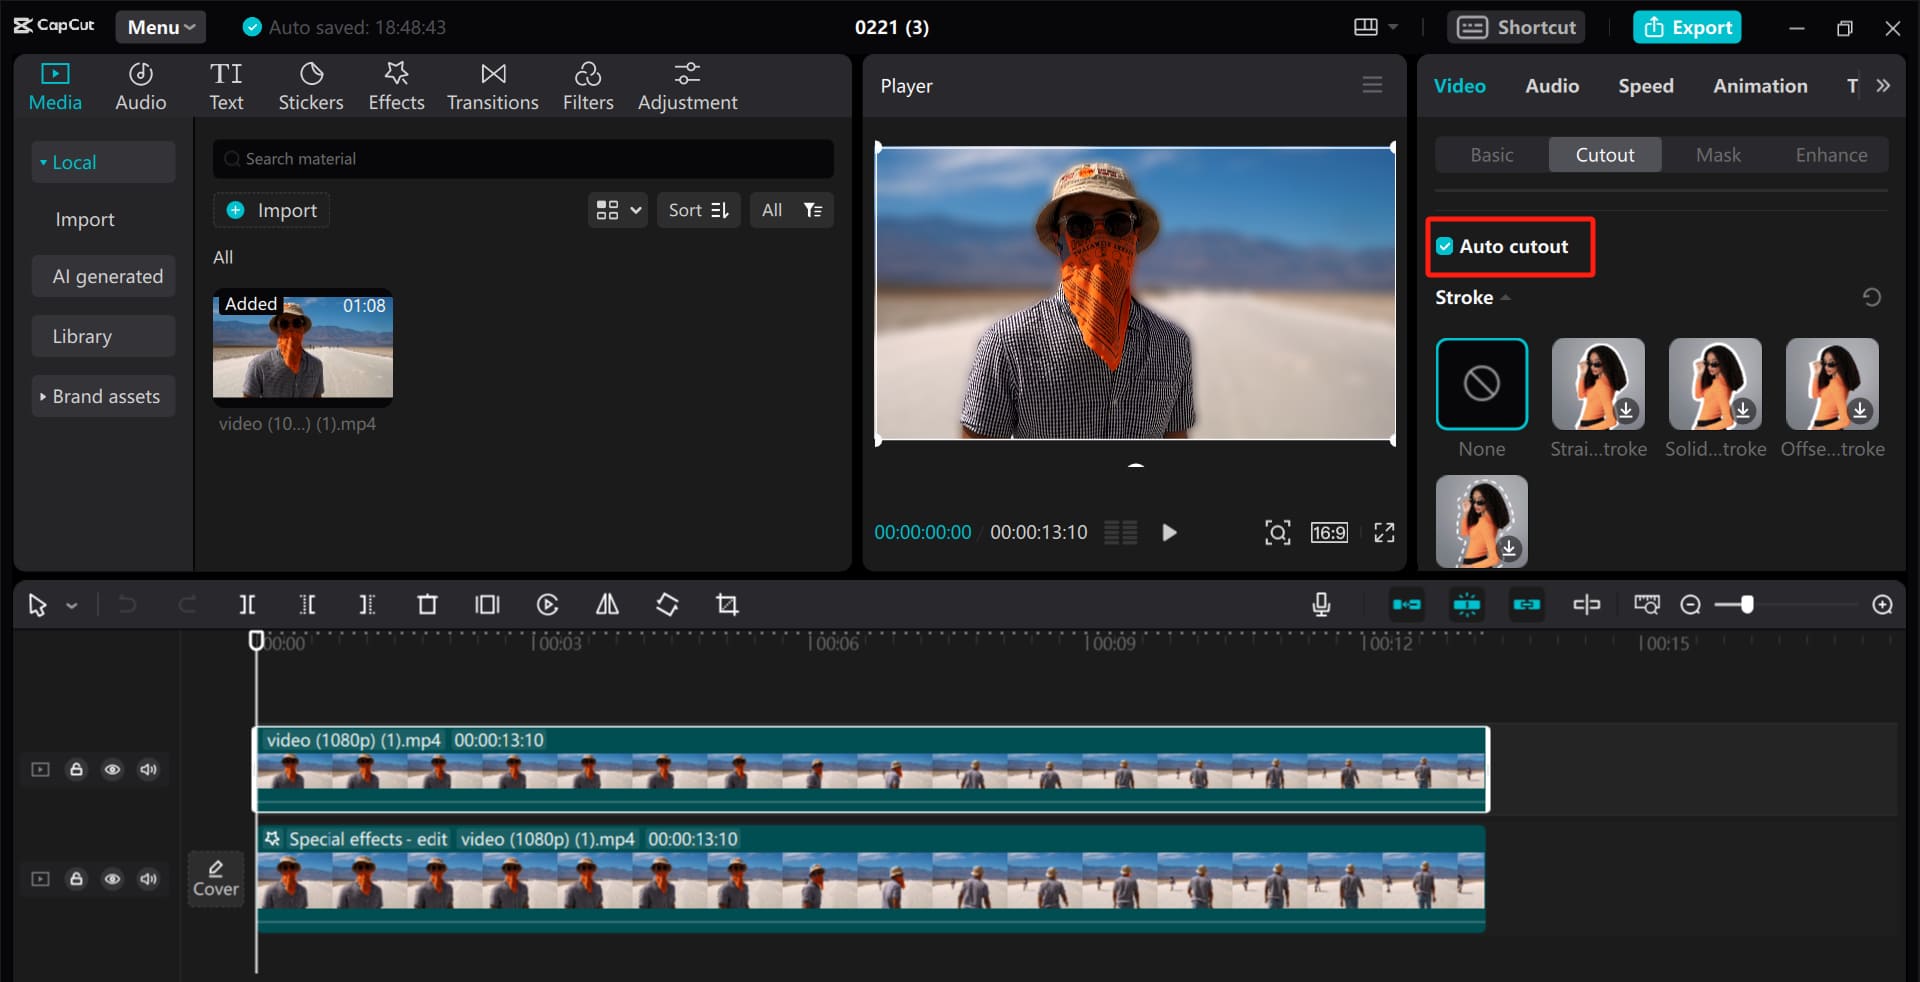
Similarly, start by dragging the clip onto the timeline and duplicate a new video track. Then, drag the blur effect onto the first layer (the bottom layer) and adjust the blur intensity according to your needs.
Next, select the second layer (the one above) and navigate to the Cutout panel under the Video section in the right-hand parameter settings. Check the "Auto cutout" option below, and you're done blurring the background in CapCut.
Of course, if your footage includes a green screen, you can use CapCut's "Chroma key" feature to easily remove the background and then blur the background clip. Finally, place the foreground clip on top of the background clip on the timeline.
For more information, you can read our guide on "How to Use Green Screen on CapCut".
Let's take a look at the blurring effect on the background on CapCut.
Frequently Asked Questions About Blurring on CapCut
Question: How to Cancel or Delete the Blur Effect on CapCut?
To cancel or delete the blur effect in CapCut, you need to first select the video clip with the blur effect you want to remove. Then, click the "Special effects" button on the timeline to select the effect you want to delete. Finally, press the Delete key on your keyboard to cancel or remove the effect.
However, it is recommended to duplicate the clip layer before adding the blur effect.
Question: How to Add Multiple Blur Effects on CapCut?
To add multiple blur effects in CapCut, you need to select the video clip where you want to add the effects. Then, in the Effects Library, choose the desired blur effect, click on it, and drag it onto the video clip on the timeline to apply the effect. You can repeat this process to add more blur effects.
You can adjust the start and end time of each blur effect on the timeline or adjust the parameters of each effect in the properties panel on the right side. You can customize the settings based on your creative vision.
Question: How to Bookmark the Blur Effects on CapCut?
You can find your favorite effects in the Effects Library. Click on the star icon below the effect you like, and CapCut will automatically add a "Favorites" section in the Effects Library to save your bookmarked effects there.
Product Recommendation:
If you're looking to enhance your editing experience and take full control of CapCut, we highly recommend checking out the newest TourBox series - TourBox Lite.

Designed with beginners in mind, TourBox Lite offers an incredibly affordable solution to quickly master the TourBox controller. Don't miss out on this incredible controller that will take your editing skills to the next level.
And that concludes our tutorial on how to blur on CapCut. We believe this comprehensive guide has addressed all your questions regarding blurring in CapCut. Go ahead and give it a try on CapCut!