3 Methods: How to Change Resolution in DaVinci Resolve?
If you want to enhance the quality of a video you shot by upgrading its resolution from 720p to 1080p, how can you quickly achieve this in DaVinci Resolve?
In this tutorial, we will walk you through three methods for changing the resolution in DaVinci Resolve. Let's dive in and get started!

In this article, you will learn:
- What Are the Main Video Resolutions?
- How to Change Resolution in DaVinci Resolve?
- FAQ About Changing Resolution in DaVinci Resolve
What Are the Main Video Resolutions?
Video resolution refers to the number of pixels within a specific video area. Generally, higher resolutions result in clearer details within the video.
Here's an overview and comparison of some common resolutions:
- Standard Definition (SD): Typically refers to 480p resolution, with specific resolutions possibly being 640x480. This is the standard resolution for older or lower-quality videos.
- High Definition (HD): Comes in 720p and 1080p variants. 720p resolution is usually 1280x720, while 1080p is 1920x1080, also known as Full HD (FHD).
- Ultra High Definition (UHD): Includes 4K and 8K resolutions. 4K resolution commonly stands for 3840x2160 (sometimes referred to as 2160p), while 8K is 7680x4320. 4K provides finer image quality compared to 1080p, while 8K further enhances details and clarity.
- 2K: This term can be confusing as it can refer to various resolutions. In the film industry, 2K typically means 2048x1080. However, in consumer electronics, 2K is sometimes used broadly to indicate resolutions close to or around 2000 horizontal pixels, slightly higher than 1080p but lower than 4K.
- 1080p: A form of high-definition video with a resolution of 1920x1080, offering good picture quality suitable for most home entertainment systems.
Higher resolutions result in clearer images. 4K offers higher quality than 1080p, with 8K being the current pinnacle of resolution standards. However, this is contingent upon the display device supporting the respective resolution.
Further Reading:
How to Change Resolution in DaVinci Resolve?
Launch DaVinci Resolve and create a new project.
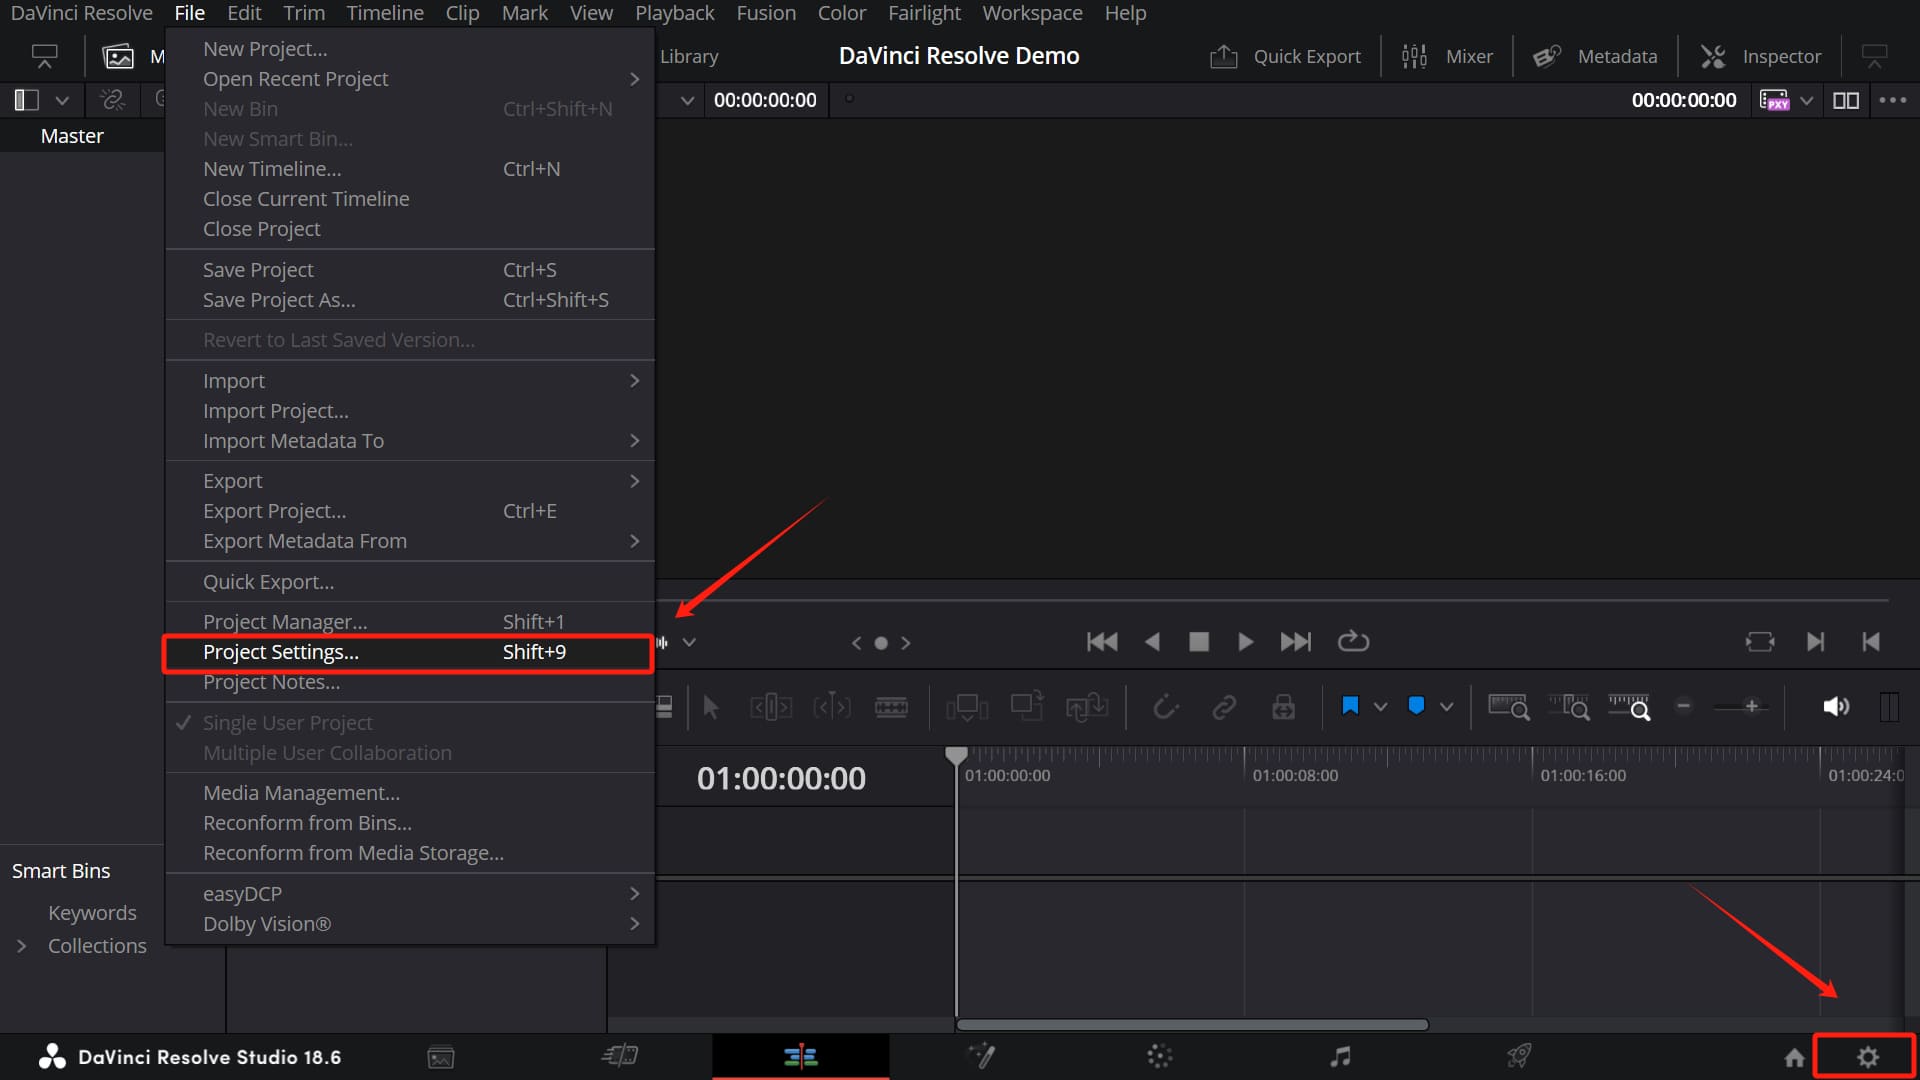
Click on the "Project Settings" under the "File" menu at the top of the DaVinci Resolve interface, or you can also click on the "Project Settings" button at the bottom right of the DaVinci Resolve page to access the project settings panel.
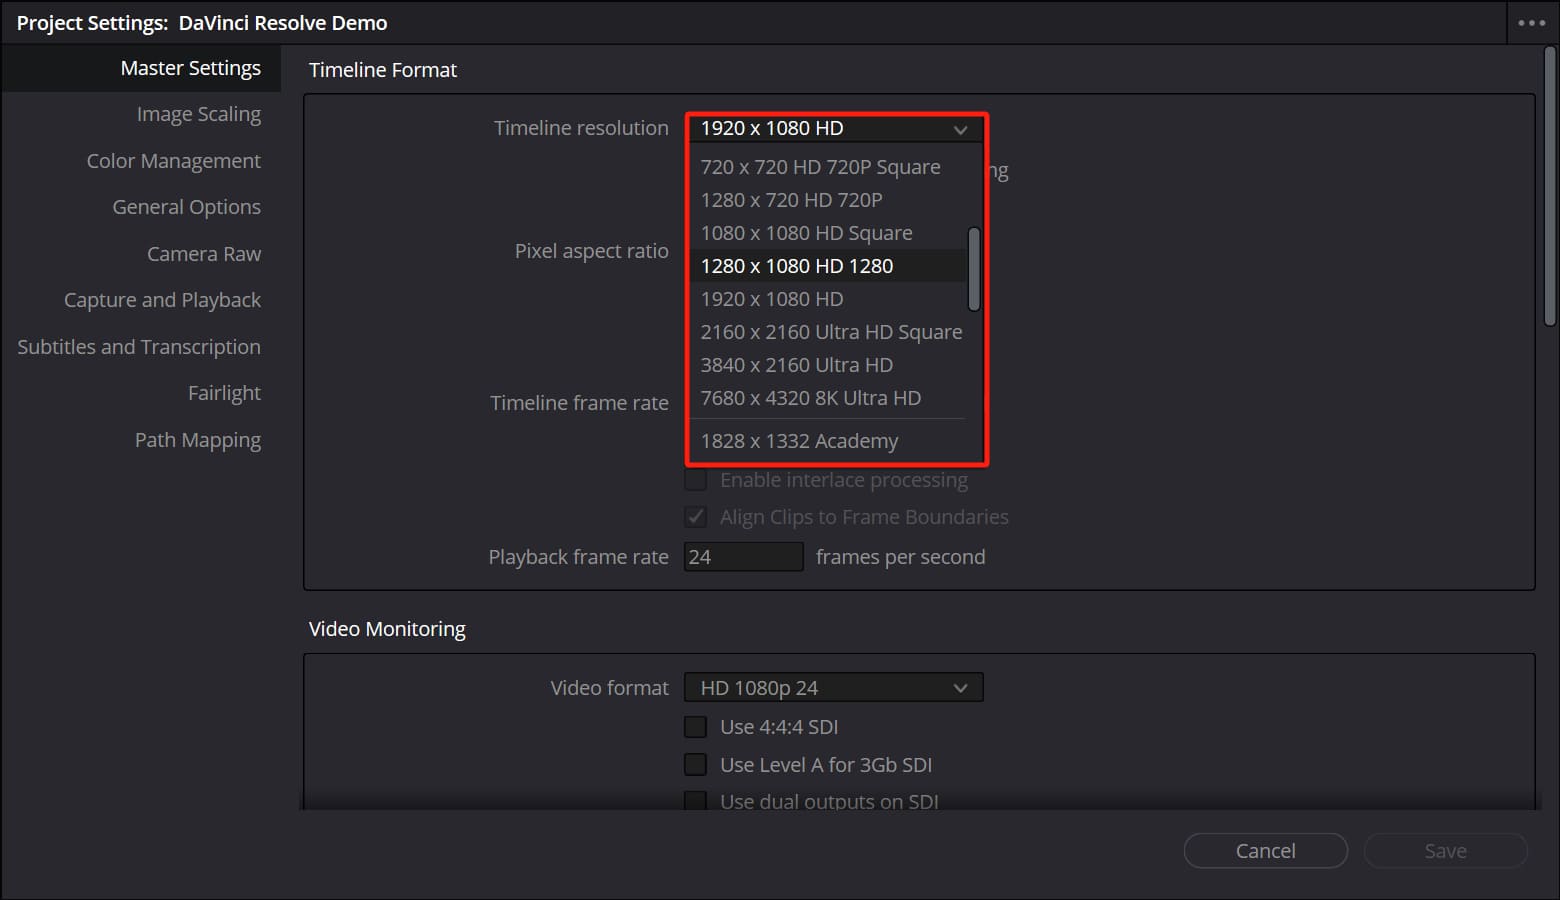
In the "Master Settings" section of the project settings panel, you will see that the default timeline resolution in DaVinci Resolve is set to 1920x1080 HD with a frame rate of 24 frames per second.

Method 1: Change Project Timeline Resolution
The simplest and most direct way is to first adjust the default timeline resolution in the project panel to the resolution you want. Then, import the video you want to change the resolution of into the timeline and export it directly.
If you haven't modified the timeline resolution in the Timeline Settings panel before, you can change the project timeline resolution anytime after importing the video into the timeline.
The resolution of the video you export will match the project timeline resolution set in your project panel.
Method 2: Change Timeline Resolution
In the Edit page of DaVinci Resolve, click on the "File" menu at the top and select "New Timeline," or simply press "Ctrl/Command + N" to create a new timeline.
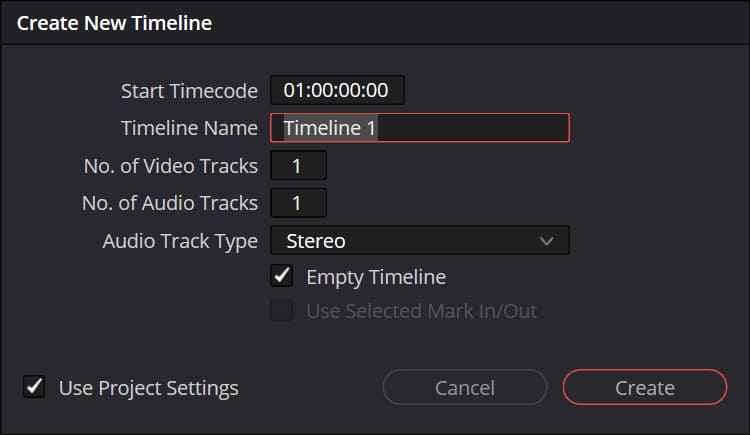
In the Create New Timeline panel that appears, uncheck "Use Project Settings." You will notice that you are redirected to a new panel page.
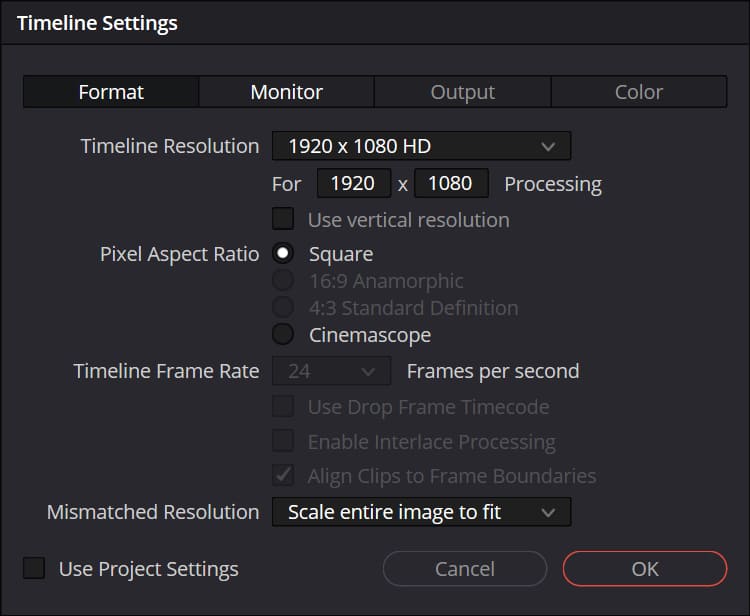
Switch to the "Format" tab at the top of the new panel. Here, you can now set the resolution, frame rate, and other options for this newly created timeline separately.
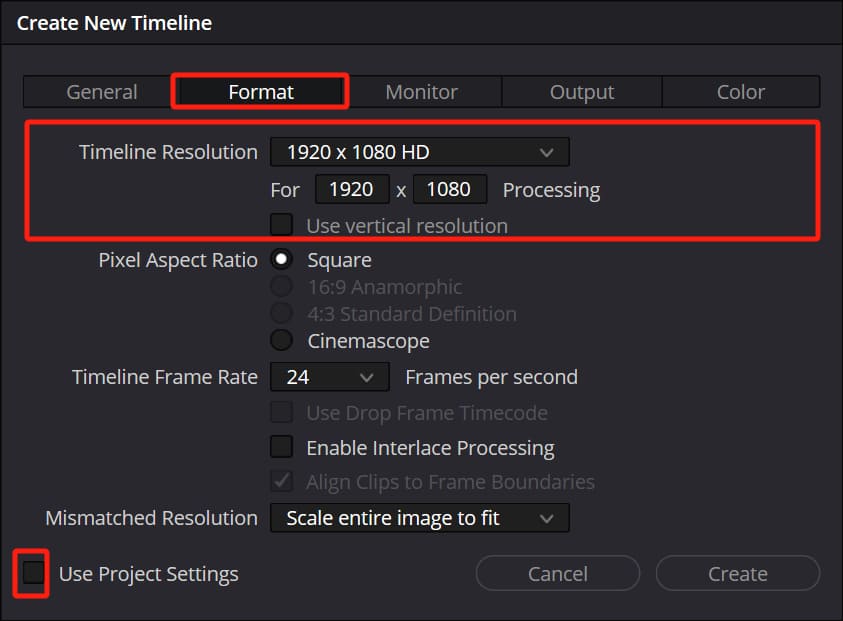
One important detail to note is that when your clip dimensions do not match the resolution of the new timeline, you can choose how DaVinci Resolve scales the video frame in the "Mismatched Resolution" section:
- Center Crop with No Resizing: Maintains the original clip size without scaling. If the clip resolution is larger than the timeline resolution (frame size), the excess parts will be cropped.
- Scale Full Frame with Crop: Proportionally scales the shorter side of the clip to match the short side of the project resolution, potentially cropping some of the longer side. Useful when dealing with multiple clips, eliminating the need to adjust frame sizes individually.
- Scale Entire Image to Fit: This is the default option. It scales the longer side of the clip to match the long side of the timeline resolution, potentially leaving blank space on the shorter side.
- Stretch Frame to All Corners: Non-proportional stretching of the clip size to completely fit the timeline resolution, which may distort the image.
DaVinci Resolve will add this new "timeline" to the Media Pool, where you can now add your media clips to this timeline.

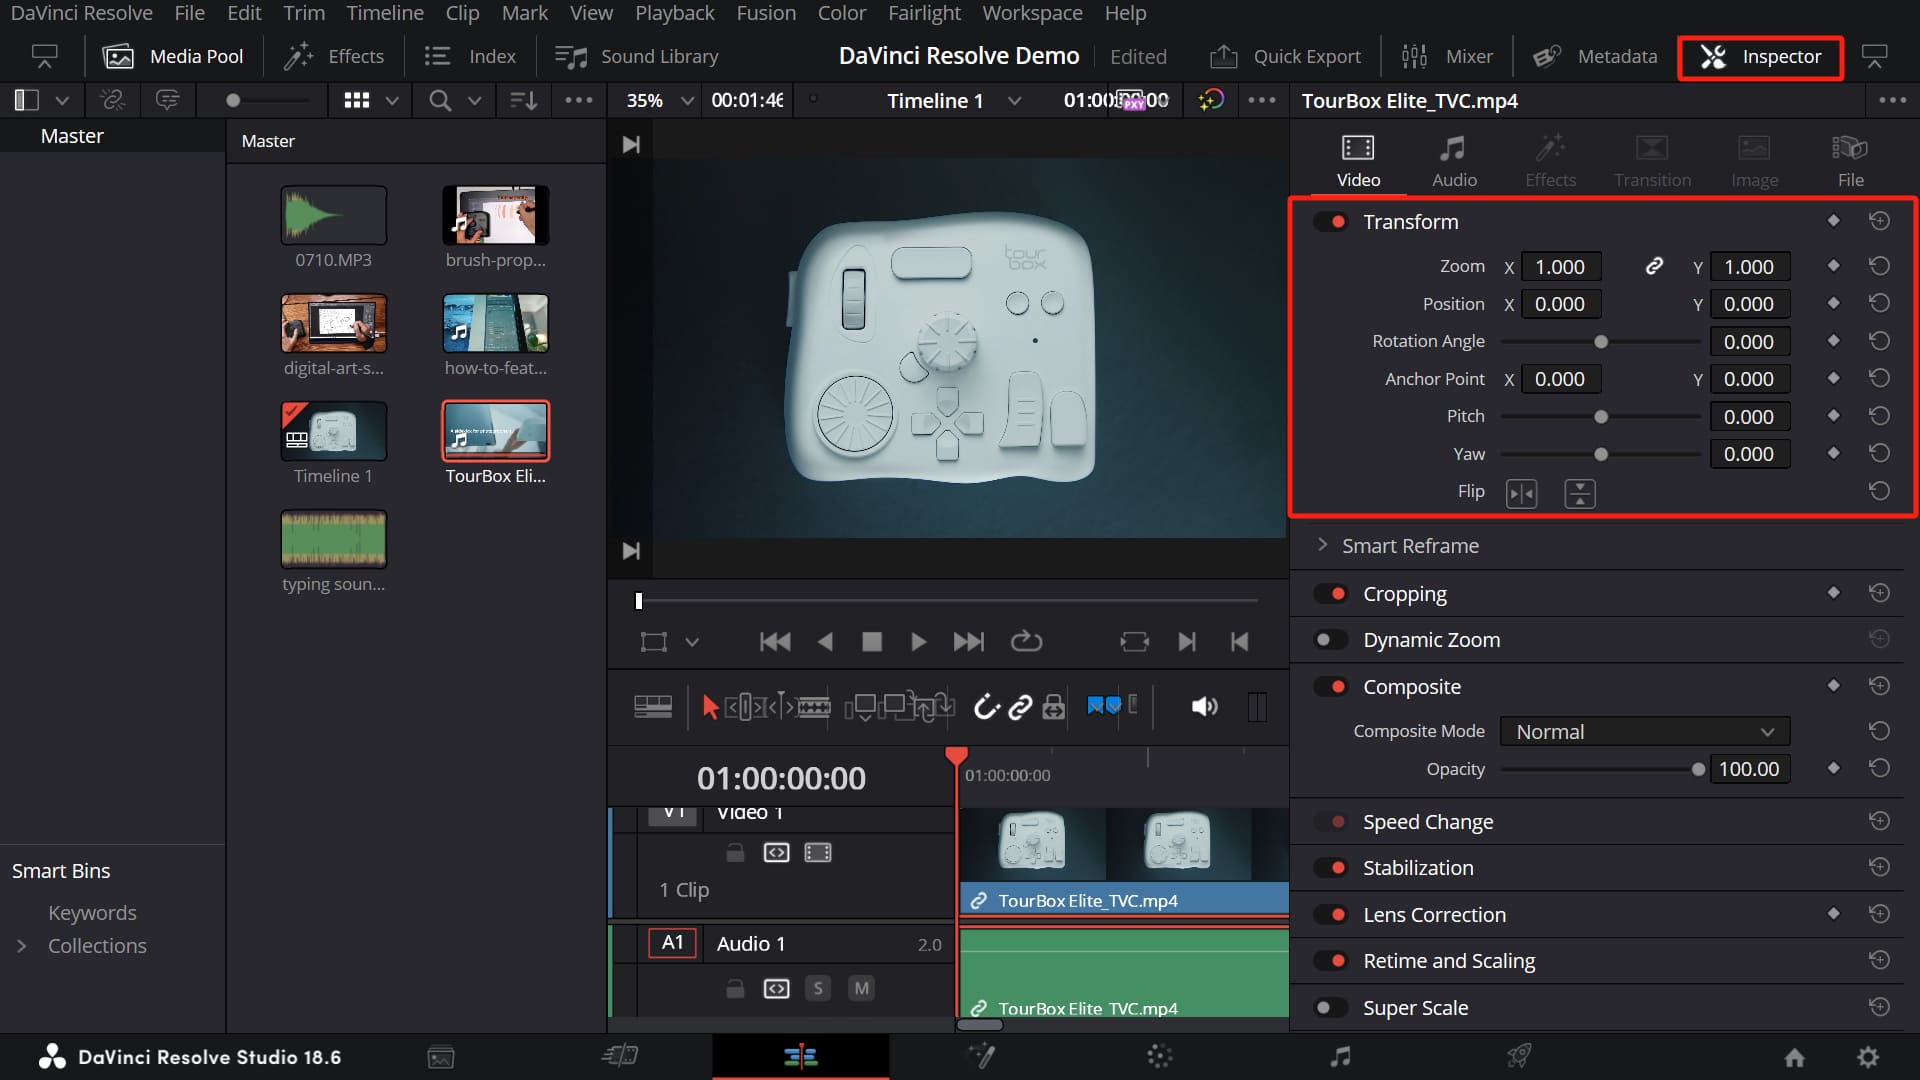
Additionally, in the Inspector panel, you can adjust properties like position, scale, rotation, etc., to compose the video frame more aesthetically and according to your needs.
You can always adjust the resolution of this timeline as needed. Right-click on the timeline in the Media Pool, then click on Timelines > Timeline Settings in the menu that appears.
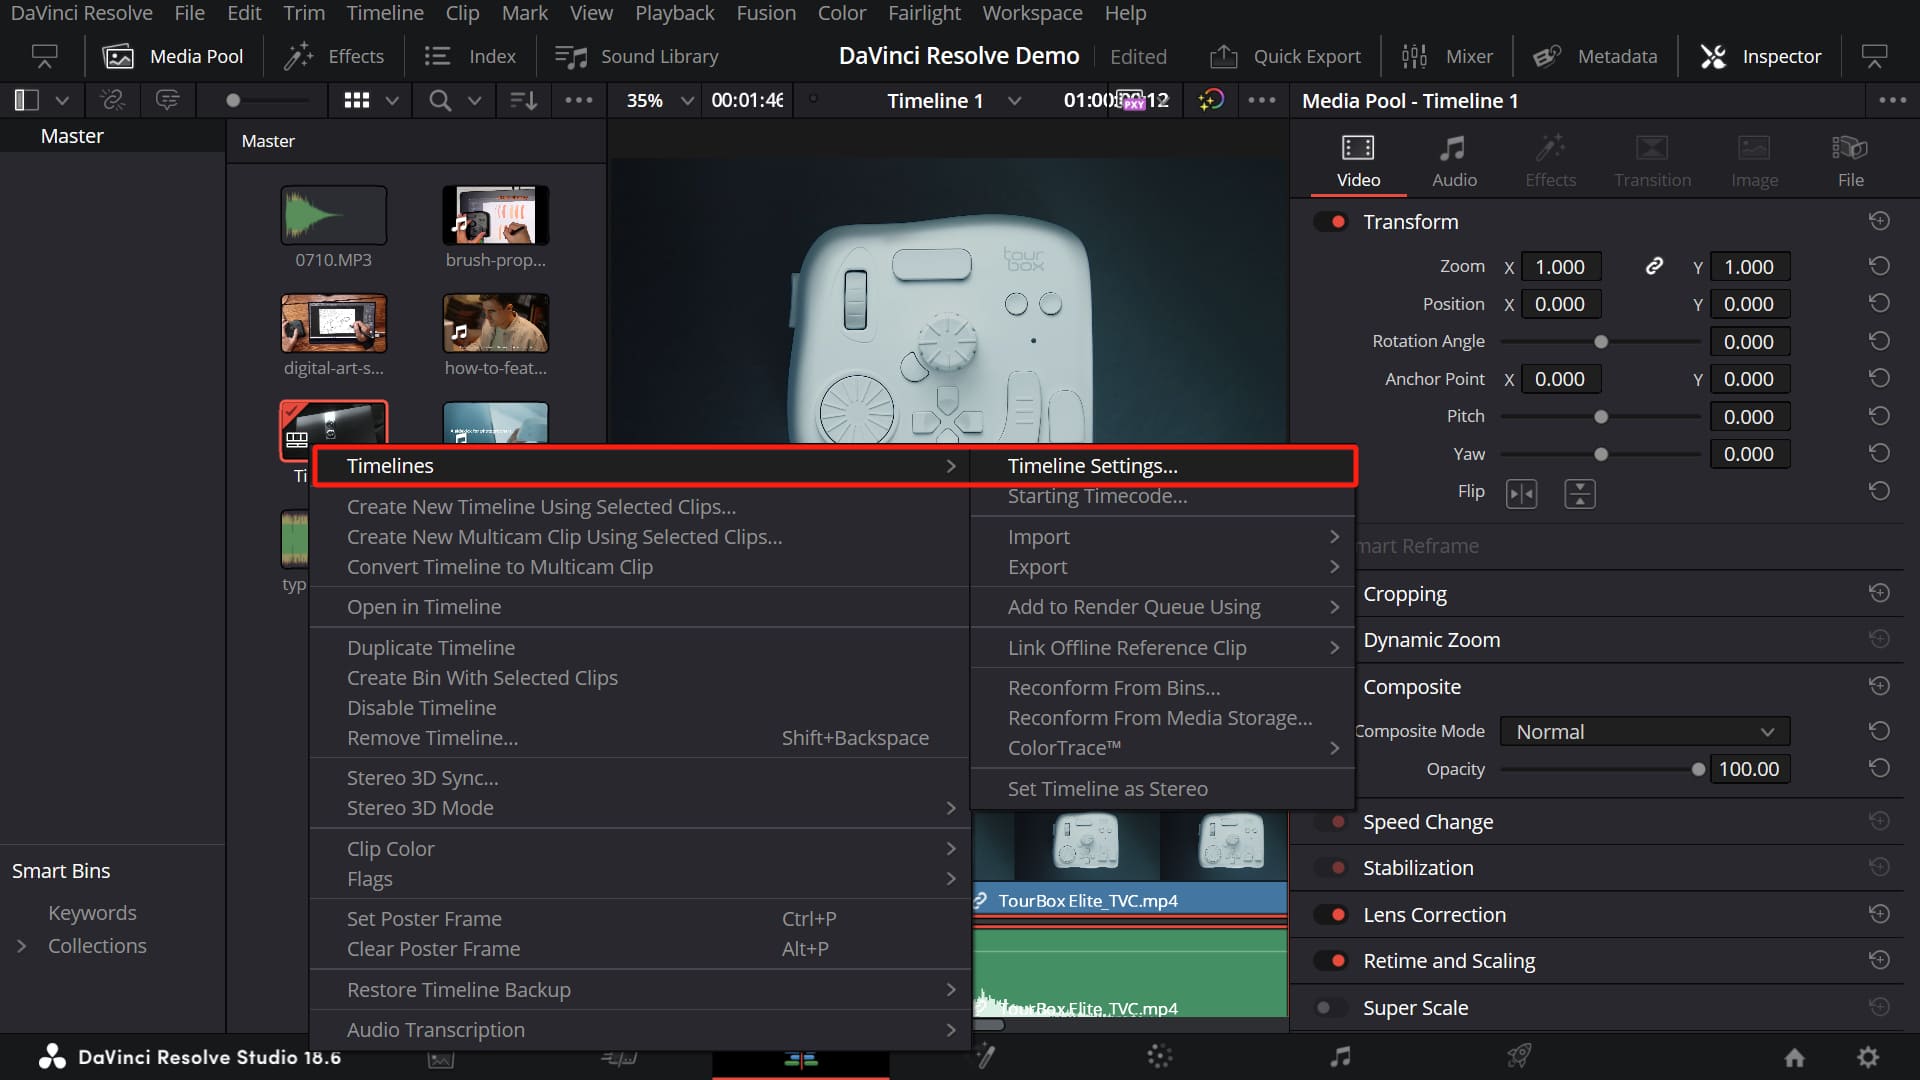
In the Timeline Settings panel, you can make changes to the resolution of this timeline.
Extra Tip:
When your project resolution and timeline resolution differ, the timeline resolution takes precedence. In other words, the timeline resolution has the highest priority.
Method 3: Change Timeline Resolution in the Cut Page
Is there a more direct and efficient way to change the video resolution?
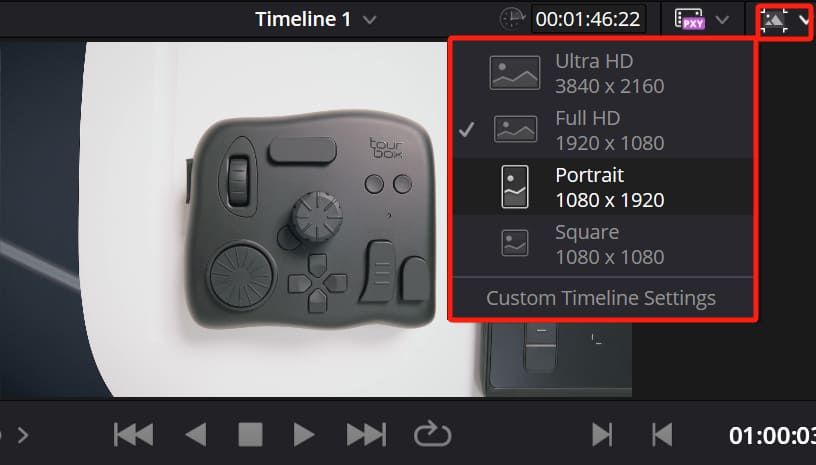
Yes, there is. Switch to the Cut page. In the top right corner of the page, there is a "Timeline Resolution" button.
Click on this button, and a dropdown menu will appear with four preset resolutions: 3840x2160, 1920x1080, 1080x1920, and 1080x1080. Simply select one, and a new timeline will be created.
Alternatively, you can click on "Custom Timeline Settings" to access the Timeline Settings panel. Did you notice? Changing the timeline resolution in the Cut page is essentially the same as in the Edit page, just with a different interface logic.
FAQ About Changing Resolution in DaVinci Resolve
Question: After Changing the Resolution, Will the Existing Clips Be Affected?
Yes, after changing the resolution, existing clips may need to be readjusted in terms of position and size to fit the new resolution.
Question: How to Set a Custom Resolution in DaVinci Resolve?
In the project settings panel, you can manually input the desired width and height values to set a custom project resolution.
In the timeline settings panel, you need to uncheck "Use Project Settings" first before customizing the resolution.
Question: Why Does the Video Look Distorted After Changing the Resolution?
This could be due to a mismatch between the original resolution of the video and the new resolution. You can try using scaling and cropping tools to adjust the video frame.
Product Recommendation:
When handling complex projects in DaVinci Resolve, faced with long timelines and numerous clips, have you ever felt overwhelmed? Whether you're using a mouse or keyboard shortcuts, sometimes it's challenging to precisely control each frame smoothly.
This is where you might find the TourBox, a creative controller beloved by many digital artists, incredibly useful.

Imagine being able to organize your media clips, adjust the timeline, mark in and out points, edit videos, color grade... All of these tasks can be accomplished with fewer actions using TourBox. Moreover, TourBox enables you to have precise control over each frame of your video.
TourBox offers you the most intuitive and optimal operating experience. You can navigate through video editing tasks as if you're handling a game controller, and prolonged use won't leave you feeling fatigued.
Check out our video editing page to see how TourBox simplifies your workflow.
This concludes our tutorial on how to change resolutions in DaVinci Resolve. We hope this has been helpful to you.