How to Curve Text in Photoshop?
When you're creating a badge, poster, or any other design in Photoshop and need to curve text, Photoshop offers a few simple, practical methods. This article shows three ways to curve text in Photoshop so you can pick the one that best fits your design needs. Let's get started.

In this article, you will learn:
- Method 1: Use the Warp Text Tool to Curve Text
- Method 2: Use the Shape Tool to Curve Text
- Method 3: Use the Pen Tool to Curve Text
- When to Use Each Method?
- Frequently Asked Questions & Fixes
- Conclusion
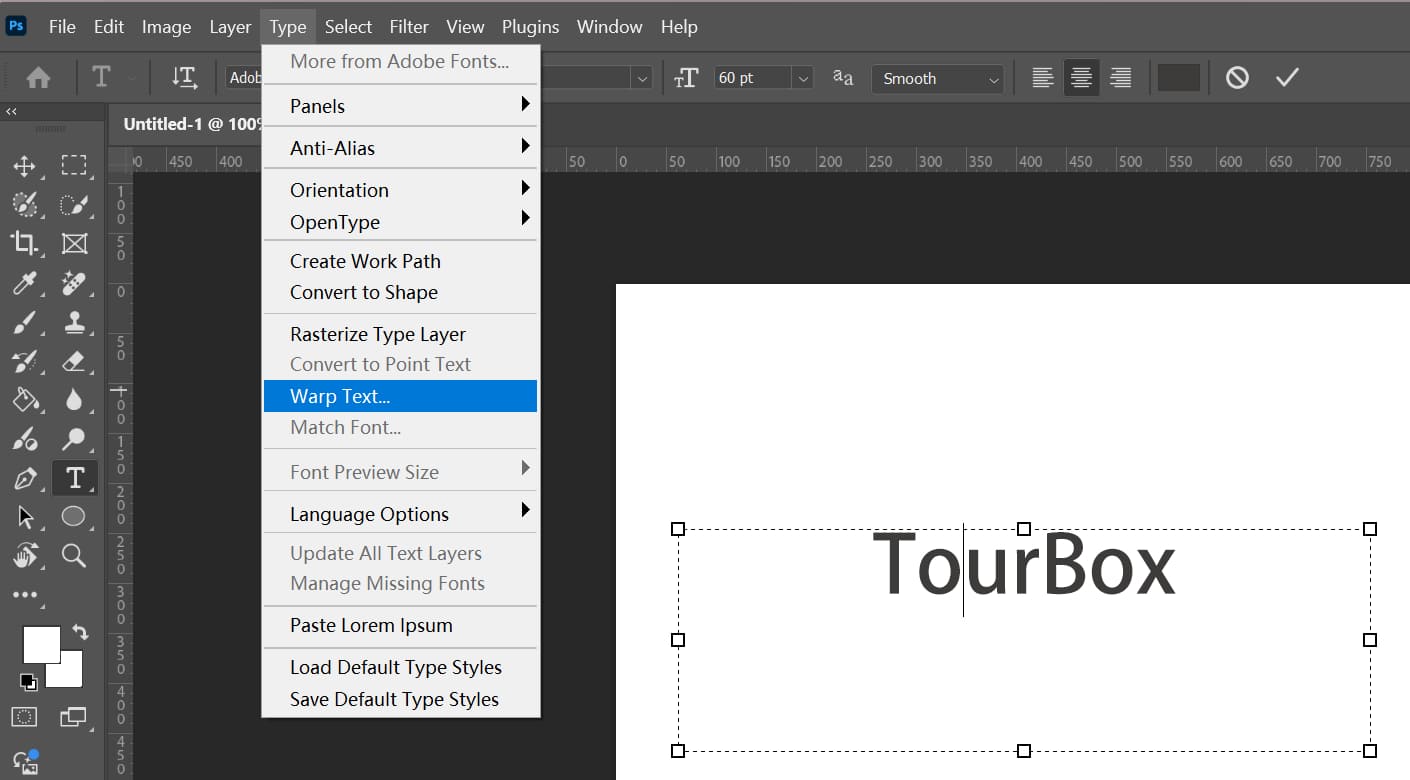
Method 1: Use the Warp Text Tool to Curve Text
Photoshop's built-in Warp Text feature can quickly bend text into a range of preset shapes. First, type your text with the Type tool. Then open the dialog via the menu: Type > Warp Text....
In the dialog, you can pick different bend types, such as Arc, Arc Lower, Arc Upper, Arch, and Bulge.
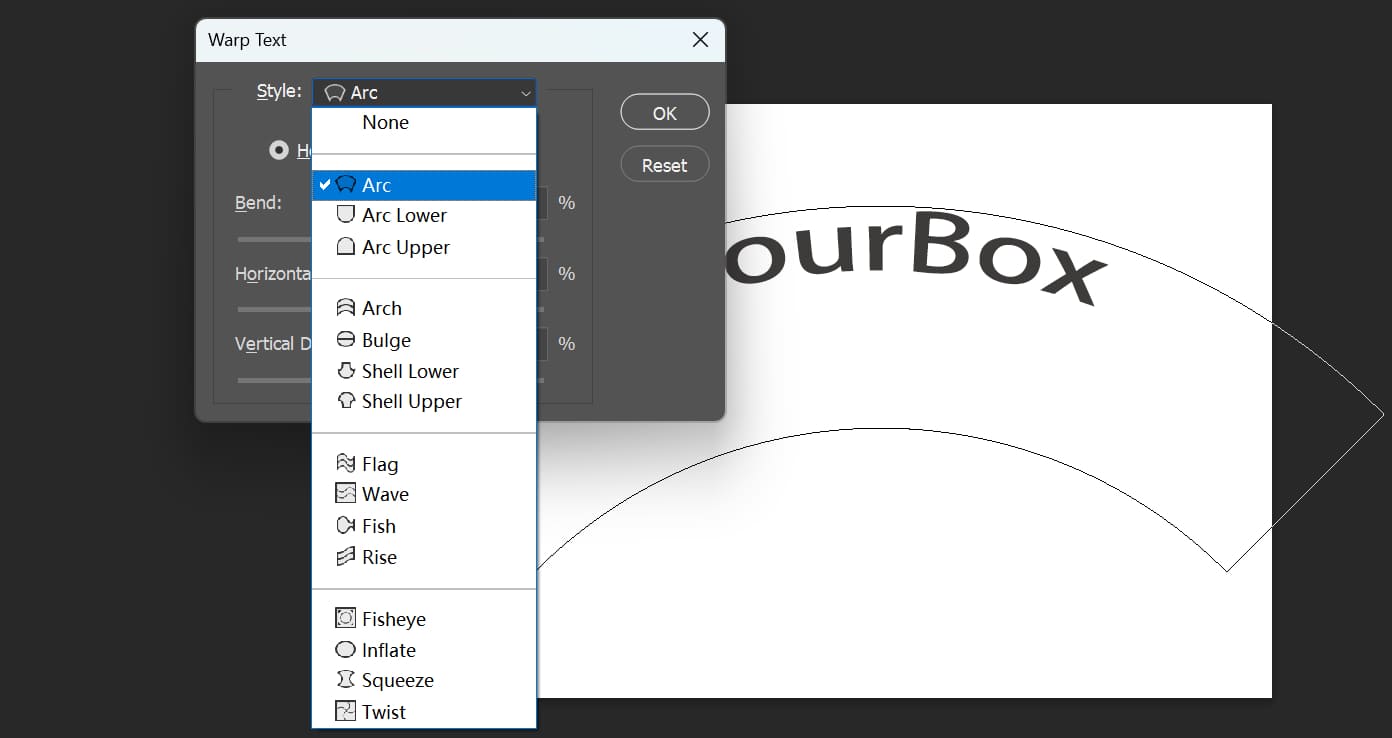
Use the Bend slider to control how strong the curve is. Higher values make the curve more pronounced. Unlike normal layer transforms, warped text stays fully editable. You can change the wording or text style later without losing the effect.

This method is fast and easy. It's great for making symmetrical arcs or simple wave-like text. But the presets are limited. You can't place text along a custom path, and extreme warping can sometimes distort the letter shapes.
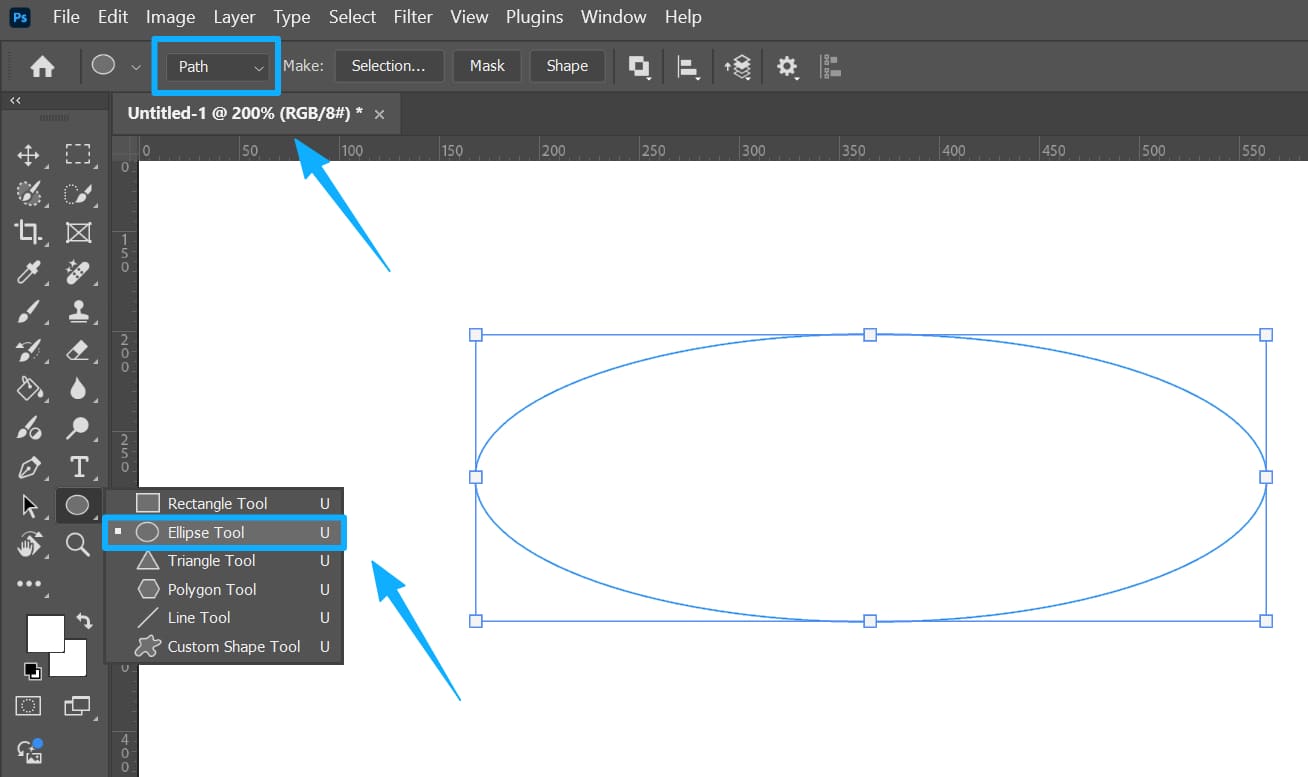
Method 2: Use the Shape Tool to Curve Text
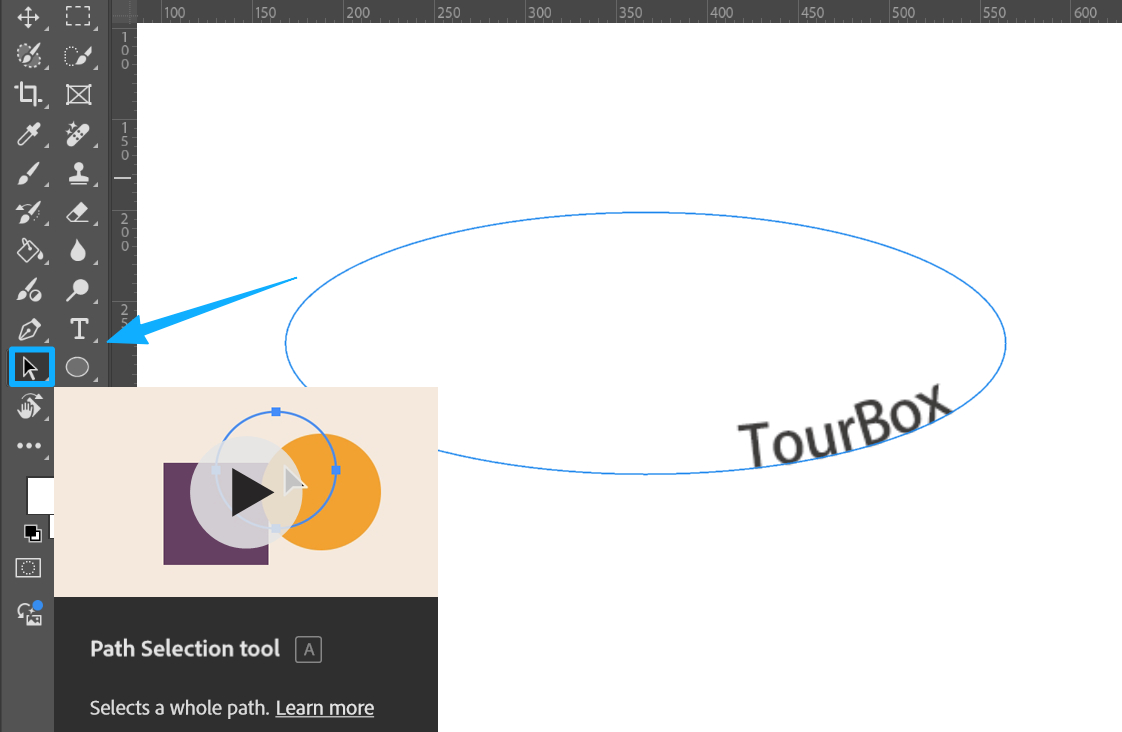
To make text follow a specific path, first draw the path with a shape tool. For example, pick the Ellipse Tool and set its mode to Path in the options bar, then draw a circle on the canvas.
Next, choose the Type tool and move the cursor over the path. When the cursor shows a text icon with a wavy line, click to start typing on the path. When you finish typing, confirm by clicking the Commit button in the options bar or pressing Enter. The text will follow the path.
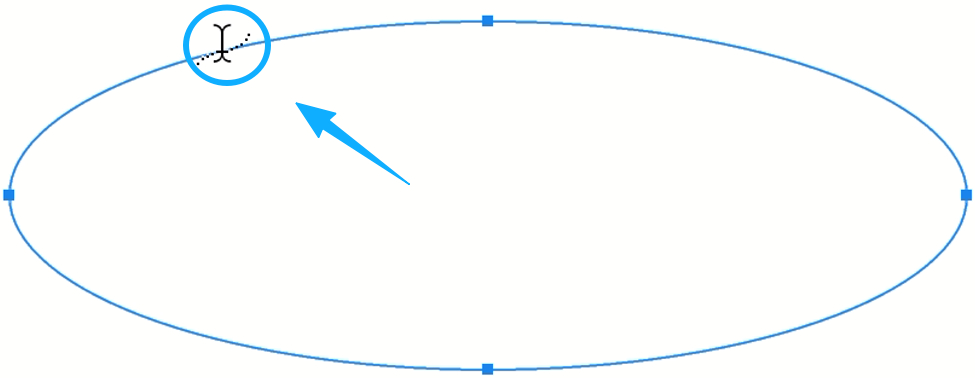
By default, the text sits on one side of the path (on a circle, it usually appears outside). To move the text to the other side, use the Path Selection tool (the black arrow) and drag the text to the opposite side of the path.
This method works great for standard shapes like circles, ovals, and wavy lines. It's ideal for circular text or text that hugs a shape's edge. One important tip: make sure you draw the shape in Path mode. If you draw it in Shape mode instead, Photoshop creates a shape layer and the text will fill inside the shape rather than flow along a path.
Method 3: Use the Pen Tool to Curve Text
For any shape or a complex curve, use the Pen Tool to draw a custom path. First, pick the Pen Tool and click on the canvas to add anchor points. Press Esc when you're done. You'll have a continuous curved path.
Next, choose the Type Tool and move the cursor over the path. When the cursor changes to a text icon with a wavy line, click to start typing on the path. The text will automatically follow the path's direction. When you finish typing, confirm by clicking the checkmark (Commit) or pressing Enter.
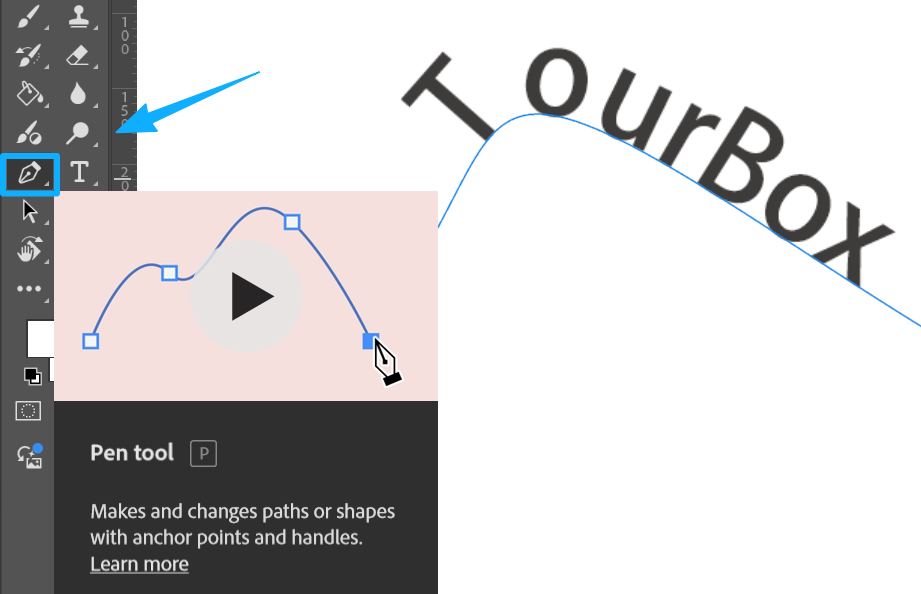
Both the path and the text stay editable. Use the Direct Selection Tool (white arrow) or the Path Selection Tool (black arrow) to adjust anchor points or move the text along the path. For example, you can drag the text to the other side of the path or drag anchor points to change the curve.
This method gives the most freedom. You can place text along almost any curve, which is great for creative layouts. But it's more complex for beginners — you'll want to spend some time learning the Pen Tool and path editing.
When to Use Each Method?
The Warp Text tool is good for quickly making simple arced or wavy text. It has many presets and is easy to use. You don't need to draw a path first. Once your text is set, you can apply the bend right away, which saves time.
However, Warp Text only uses the built-in styles. It can't place text along a custom shape like the path methods can. With extreme bends, the letter shapes may stretch and lose their original proportions.
Path-based methods (whether a shape path or a Pen Tool path) give more flexibility. The text keeps its original shape and simply follows the path, so the font does not get warped. This is very useful for complex curves and creative layouts. But drawing and editing paths takes more steps and some practice.
Simple path tools like the Ellipse Tool work well for standard effects such as circular text. The Pen Tool is better for asymmetric or finely detailed freeform paths.
In short, Warp Text is fast and editable for simple curves. Path methods let you precisely place text along any curve. Each method has trade-offs, so pick the one that fits your design needs.
Quick ad break: If you often get pulled away by repeated tweaks, consider handing those common commands to a dedicated controller like TourBox. It puts knobs, buttons, and shortcuts within reach so you don't have to switch tools when you adjust text curves or fine-tune effects. That helps you keep your focus on the creative work.

Like a game controller for video games, TourBox makes your workflow easier and faster. If you're curious, click our link to learn more.

Frequently Asked Questions & Fixes
Question: Warp Command Won't Work
If Type > Warp Text... is grayed out, your text may have Faux Bold or Faux Italic applied. Open the Character panel and turn off those options, then try again. If you need a more complex warp, convert the text layer to a Smart Object, then use Edit > Transform > Warp. That gives you the warp you want and keeps the text editable.
Question: Part of the Text on a Path Is Missing
If your text is longer than the path, the extra characters might not show. Choose the Direct Selection Tool (white arrow). Hold Ctrl and move the cursor to the path's end until it becomes a black triangle, then drag to extend the path so all text appears.
Question: Text Is on the Wrong Side of the Path
Text usually sits on one side of a path (for a circle, it often appears outside). To move it to the other side, use the Path Selection Tool (black arrow) and drag the text along the path to flip it. You can also drag the path's start or end points to change where the text begins.
Question: Text Doesn't Appear After Typing
After you type, click the Commit button in the options bar or press Enter to commit the text. If you don't commit, the text stays in edit mode and won't be placed on the canvas.
Conclusion
With the methods and tips above, even if you're new to Photoshop, you can pick the best way to curve text and avoid common mistakes. You'll be able to create a wide range of cool curved-text effects.