How to Denoise Footage in DaVinci Resolve?
DaVinci Resolve is a user-friendly video editing tool. However, dealing with noise in video footage can be challenging for novices.
Noise typically results from filming in poor lighting conditions or using a high ISO. It can make your video look grainy and unprofessional.
Removing unwanted noise can be a significant challenge in video editing. Luckily, DaVinci Resolve has a robust noise reduction feature that can enhance your footage and give it a professional touch.
In this tutorial, we'll guide you on how to denoise footage in DaVinci Resolve.

In this article, you will learn:
- How to Denoise Footage in DaVinci Resolve?
- Best Workflow for Denoise Footage in DaVinci Resolve
- Apply Noise Reduction With OpenFX in DaVinci Resolve
- Final Thoughts About How to Denoise Footage in DaVinci Resolve
How to Denoise Footage in DaVinci Resolve?
If you're looking to reduce noise in your footage using DaVinci Resolve, Motion Effects is a powerful tool that can help.
Here's a step-by-step guide on how to use Motion Effects to reduce noise in your footage:
Step 1: Open the Motion Effects Panel
Before you start applying noise reduction, make sure you select the correct node. This is important because noise reduction is applied to the active node.
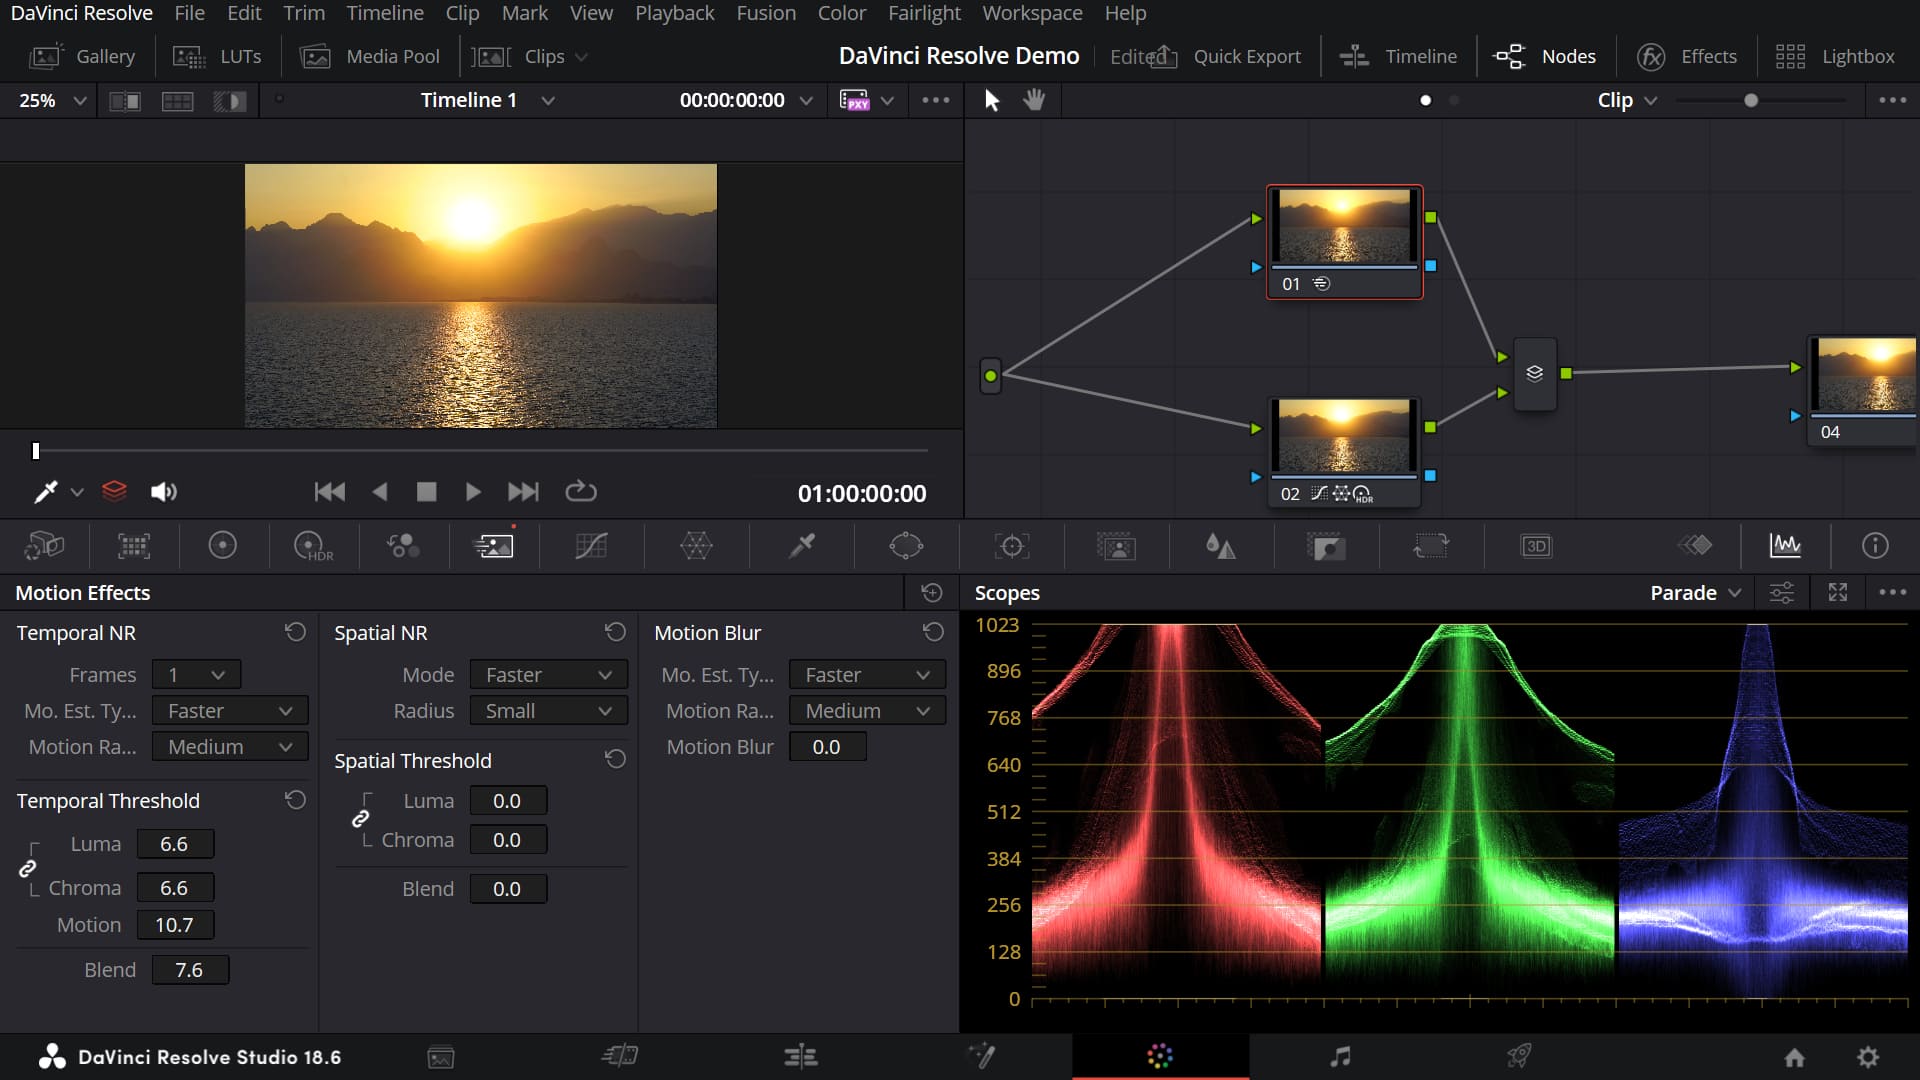
Locate the 'Motion Effects' panel in the "Color" interface.
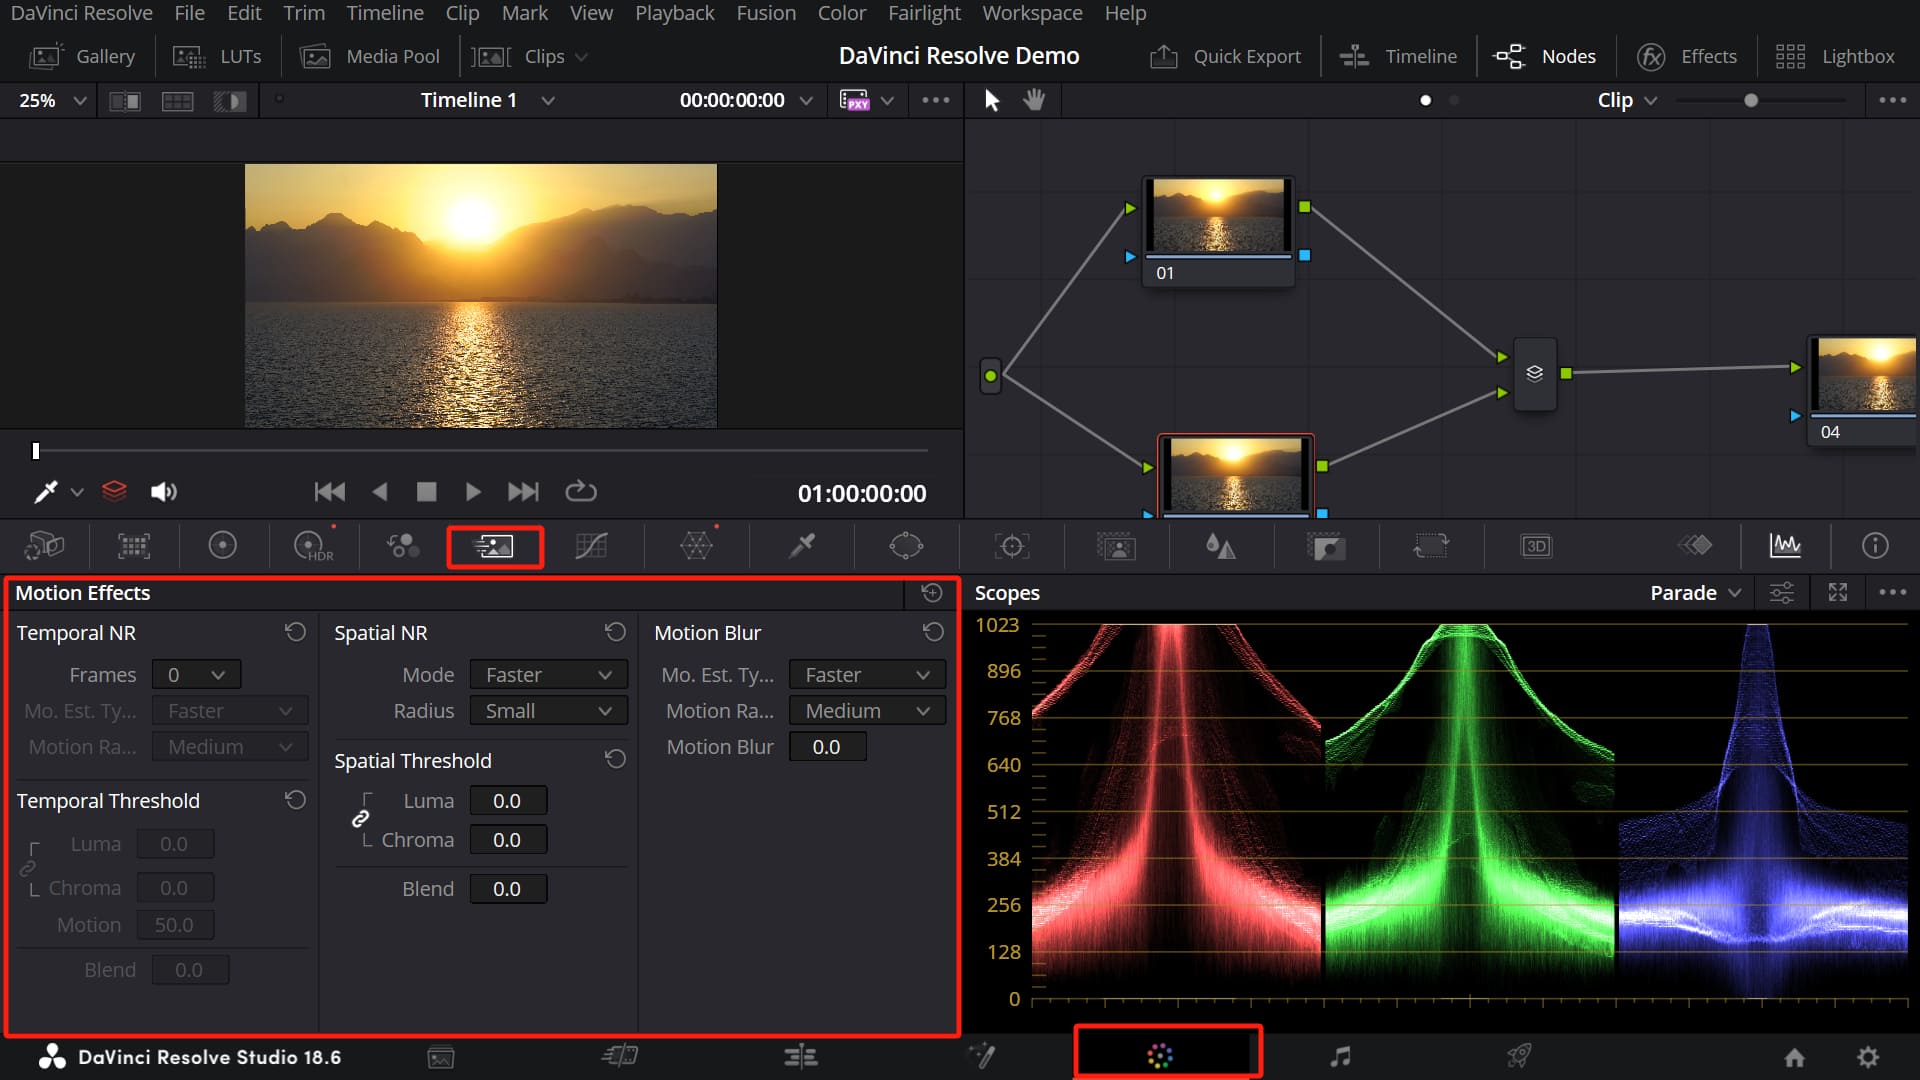
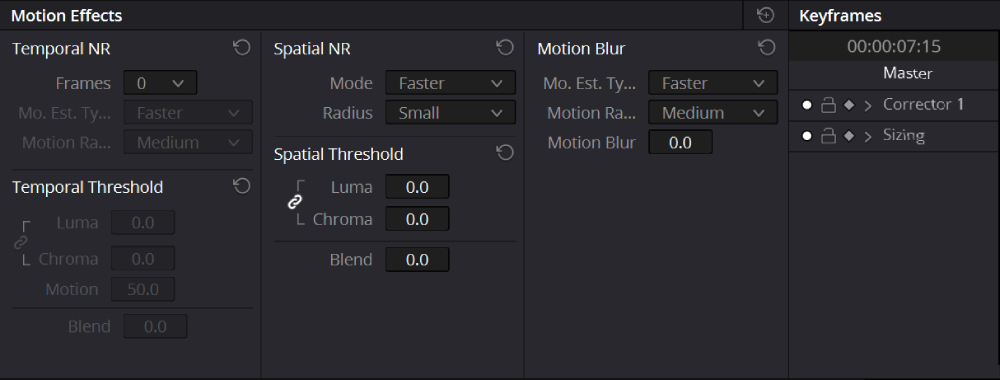
Open the Motion Effects panel by selecting the clip you want to work on and then clicking on the Motion Effects button in the toolbar. The panel is divided into five areas:
- Temporal NR
- Temporal Threshold
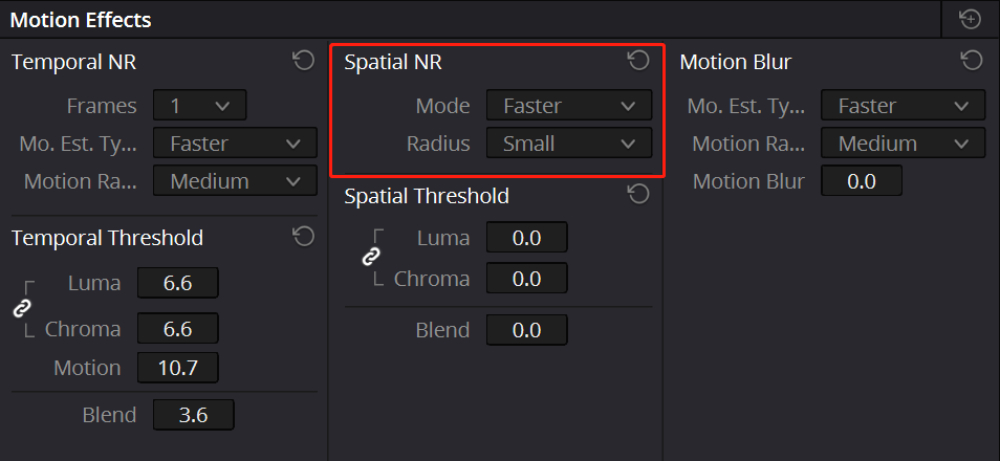
- Spatial NR
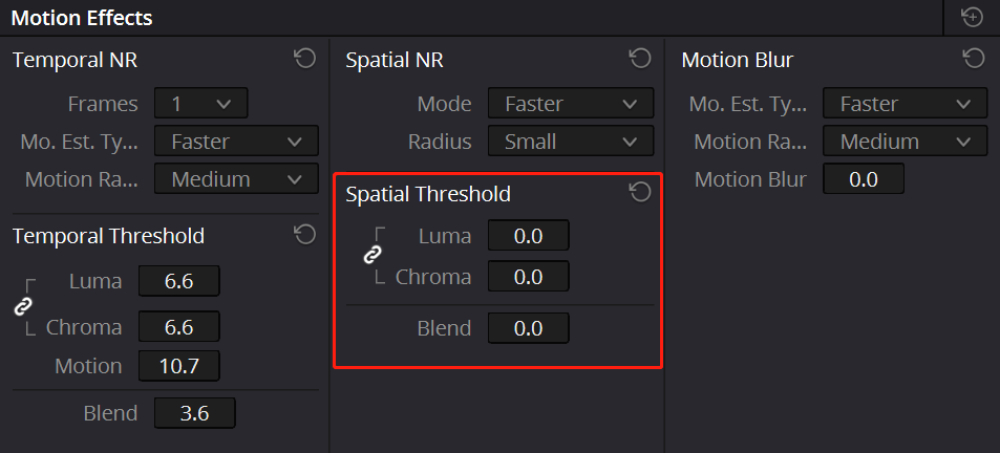
- Spatial Threshold
- Motion Blur
NR stands for Noise Reduction. We skip this area of motion blur because it is the function of adding artificial blur to the shot, which is not relevant to the subject we are talking about.
Now that leaves Temporal NR (temporal noise reduction) and Spatial NR (spatial noise reduction). These two noise reduction methods identify and eliminate noise in different ways.
You can use both functions to suppress noise as needed:
- Temporal noise reduction targets moving images by sampling and analyzing frames before and after the current one. However, excessive noise reduction may cause ghosting effects from previous and subsequent frames, and a certain amount of detail may be lost.
- Spatial noise reduction, on the other hand, targets still images by analyzing a single frame. It aims to retain details and prevent the softening of the image. However, overdoing spatial noise reduction can result in color blocking.
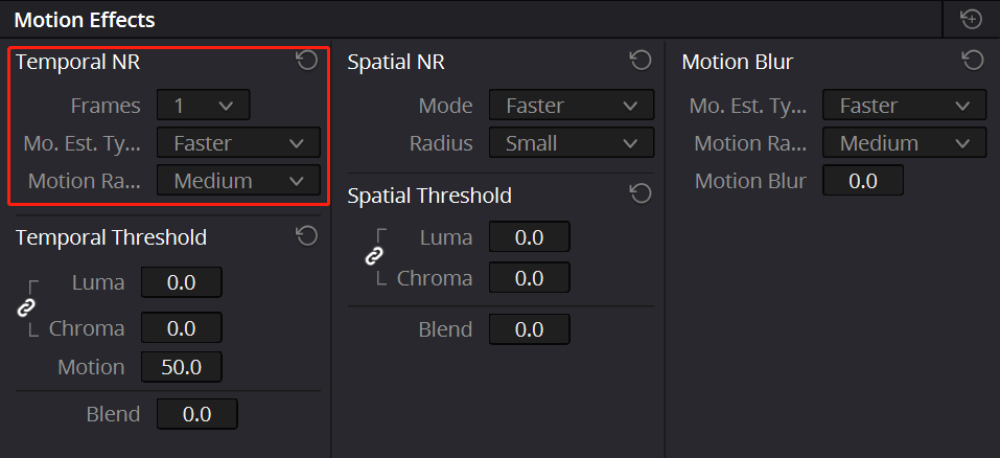
Step 2: Apply Temporal Noise Reduction
The first noise reduction method to try is temporal noise reduction. This method involves isolating elements of the image from one frame to the next and distinguishing them from any extraneous noise.
In the Temporal NR section, choose the number of frames you want to use for noise reduction.
If you have a lot of moving elements in your footage, adjust the Mo. Est. Type and Motion Range sliders to avoid unwanted motion shadows.
Here are explanations for three Temporal NR parameters:
1. Frame Count
This parameter determines the number of frames you want DaVinci to average in order to separate the detail from the noise in these frames.
You can choose a value between 0 and 5 frames. Selecting 0 means that an average of 0 frames is applied, and a higher value means a higher number of average frames applied.
The higher the value you use, the more intensive the calculations your computer will need to perform.
Additionally, while a higher frame count setting may provide better analysis, it may also produce unwanted artifacts if there are parts of the image with fast motion.
A value of 1 usually generates better results for quickly moving images.
2. Mo. Est. Type
This allows you to select the method DaVinci uses to detect motion in the image. The default "Faster" option uses less processor power but is less accurate.
The "Better" option can more accurately and effectively exclude moving objects, but it also consumes more processor resources.
The "Off" option completely disables the motion estimation feature, applying temporal noise reduction across the entire image.
3. Motion Range
There are three settings - Small, Medium, and Large - to set the speed of motion that the motion estimation feature should exclude.
The "Small" setting is used for slow-moving objects where motion blur is minimal or non-existent, allowing temporal noise reduction to affect a greater range of the image under a given "Motion Threshold" setting.
The "Large" setting assumes that fast-moving objects with blur effects occupy a larger area of the image, thus excluding more of the image from temporal noise reduction under the same motion threshold setting.
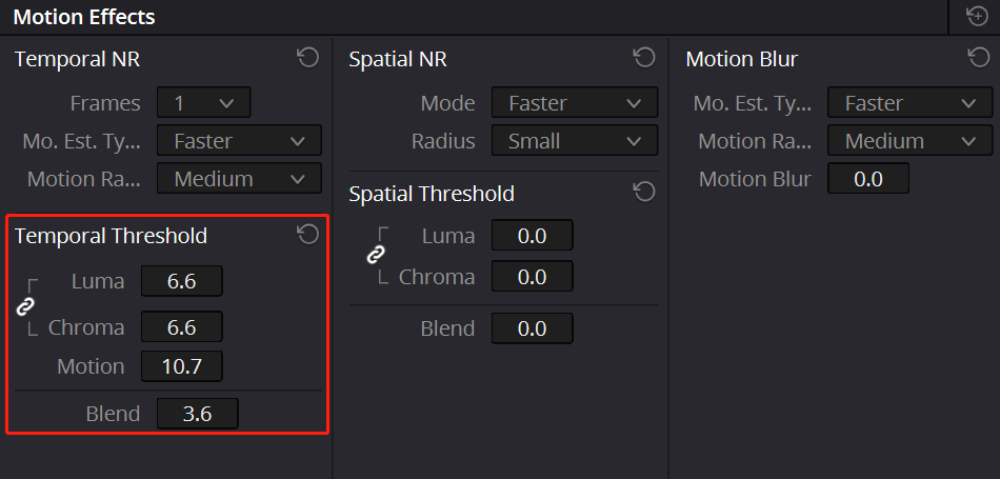
Step 3: Adjust Temporal Thresholds
After applying Temporal Noise Reduction, we further adjust the Temporal Threshold. Here's an explanation of the specific parameter settings:
1. Luma
This determines the amount of temporal noise reduction applied to the luminance component of the image.
The adjustment range is 0-100, with 0 meaning no noise reduction is applied, and 100 representing the maximum amount of noise reduction.
Setting this too high may eliminate details in the image.
2. Chroma
This determines the amount of temporal noise reduction applied to the chroma (color) component of the image.
The adjustment range is 0-100, with 0 meaning no noise reduction is applied, and 100 representing the maximum amount of noise reduction.
While increasing the chroma threshold above the luminance threshold can reduce artifacts, excessively high settings could remove color details in the image.
3. Motion
This defines the threshold used to distinguish between moving pixels that are in motion (above this threshold) and stationary pixels (below this threshold).
When using the "Motion" feature, Temporal NR processing will not be applied to the image range above this threshold.
You can select a value between 0 and 100, with 0 indicating no temporal noise reduction is applied to the pixels, and 100 means temporal noise reduction is applied to all pixels.
4. Blend
This is used to blend between the image affected by the temporal noise reduction parameters (value 0.0) and the image without noise reduction (value 100.0).
When using a significant amount of temporal noise reduction, this parameter can easily make a compromise.
Extra Tip
Typically, the luminance and chroma threshold parameters are linked together, so adjusting one will change both thresholds.
However, you can click on the chain icon to the left of Luma and Chroma to unlink these two parameters.
Step 4: Apply Spatial Noise Reduction
If you still have noise in your footage after applying Temporal Noise Reduction, try using Spatial Noise Reduction.
This method looks at the details in nearby pixels to find noise and then smooths the high-frequency noise areas within that area frame by frame.
Here are some explanations of the Spatial Noise Reduction parameters:
1. Mode
You can switch between different algorithms for Spatial Noise through the Mode:
- The "Faster" option uses existing noise reduction methods, suitable for lower settings, but may cause artifacts when higher values are applied.
- The "Better" option switches spatial noise reduction to use a higher quality algorithm, resulting in better outcomes, but requiring more processing power during rendering.
Both modes utilize identical controls, allowing you to toggle between them with the same configurations to evaluate outcomes. Of course, you can also choose "None", i.e., not to use Spatial Noise Reduction.
2. Radius
Options include "Large", "Medium", and "Small". A smaller radius provides better real-time performance and good processing quality when using low luminance and chroma thresholds.
However, when using low noise reduction thresholds, you might see more aliasing distortion in areas of image detail.
Step 5: Adjust Spatial Thresholds
The adjustment of the Spatial Thresholds and Temporal Thresholds parameters is generally the same. Here are the specific parameter explanations:
1. Luma
This determines the amount of noise reduction applied to the luminance component of the image.
The adjustment range is 0-100, with 0 indicating no noise reduction is applied, and 100 representing the maximum amount of noise reduction.
Setting this too high may eliminate details in the image.
2. Chroma
This determines the amount of noise reduction applied to the chroma (color) component of the image.
It allows for smoothing areas with frequent noise while preserving the sharpness of important edge details in the image.
The adjustment range is 0-100, with 0 indicating no noise reduction is applied, and 100 representing the maximum amount of noise reduction.
3.Blend
This is used to blend the image affected by the spatial noise reduction parameters (value at 0.0) and the image without noise reduction (value at 100.0).
When using a significant amount of spatial noise reduction, this parameter can easily manage a compromise.
Step 6: Render Your Footage
As you apply noise reduction, it's important to preview your footage to see how it looks. Use the Play button in the Viewer panel to preview your footage.
If you're not happy with the results, adjust the noise reduction settings as needed.
Once you're happy with the noise reduction settings, it's time to render your footage. To do this, click on the Deliver tab and select your output settings. Then, click on the Add to Render Queue button and click Start Render.
Improve video quality by reducing noise in your footage with the Motion Effects panel in DaVinci Resolve. By following these simple steps, you can achieve cleaner, clearer footage that's free from unwanted noise.
Check out this YouTube video (made by DanVinci) about how to remove noise in DaVinci Resolve 18 Studio:
Best Workflow for Denoise Footage in DaVinci Resolve
In the previous section, we delved into denoising footage in DaVinci Resolve. However, the complex and daunting parameters may have left you feeling overwhelmed.
This section will break down the best workflow for denoising footage in DaVinci Resolve. So, let's get started:
- Enable Temporal NR: Choose between 1 to 5 frames from the "Frames" dropdown menu. More frames mean longer render times, which won't necessarily improve the final output. You'll need to experiment to find what works best for your footage.
- Set Motion Estimation: Depending on the amount of motion in your footage, select the appropriate options from the "Mo. Est. Type" and "Motion Range" dropdowns. More motion? Go for "Better" and "Larger". Less motion? Lower settings should suffice.
- Adjust Luma and Chroma Thresholds: With "Luma" and "Chroma Thresholds" linked, gradually increase one until you see noise reduction in the non-moving parts of the image. Fine-tune to determine the maximum amount of temporal noise reduction you can add without creating motion artifacts or over-softening your desired image details.
- Handle Chroma Noise: If your footage has more chroma noise than luma noise, unlink the "Luma/Chroma" function after you've adjusted the luma noise to a satisfactory level. Then, increase the "Chroma Threshold" to apply more temporal noise reduction and tackle the color blotches in your image.
- Adjust Motion Thresholds: Lower it to exclude more moving content from the noise reduction, or raise it to include more. If you're still not satisfied, try improving the "Mo. Est. Type" and "Motion Range" settings. Remember, the strength of temporal noise reduction is reducing noise in the static areas of an image.
- Enable Spatial Noise Reduction: To further eliminate noise in the remaining areas of the image, activate spatial noise reduction by increasing the "Luma" or "Chroma Threshold" parameters. Strive for a balance between noise elimination and image softening.
- Select Spatial Noise Reduction Mode: Choose the "Better" option for superior results, but be aware that this might require more processing power. If you need better real-time performance, switch to the "Faster" mode and compare the results.
- Address Excessive Chroma Noise: Again, if chroma noise is more visible than luma noise, unlink the "Luma/Chroma" function after the luma noise is suitably reduced. Increase the "Chroma Threshold" to apply more spatial noise reduction and deal with color blotches.
- Adjust Radius: With high luma or chroma threshold settings in spatial noise reduction, you might need to select a larger option from the "Radius" dropdown menu to enable a more thorough scene analysis. This will improve the visual quality but will also demand more processing power.
- Blend Noise Reduction: If your noise reduction settings are suitable, but the results seem overdone, try increasing the "Blend" parameters for both temporal and spatial noise reduction. This smoothens the transition between the noise-reduced image and the original footage, preventing an over-processed look.
Remember to save your project often to avoid losing any progress. Practice will improve your noise reduction skills, so keep trying until you achieve the results you desire.
Apply Noise Reduction With OpenFX in DaVinci Resolve
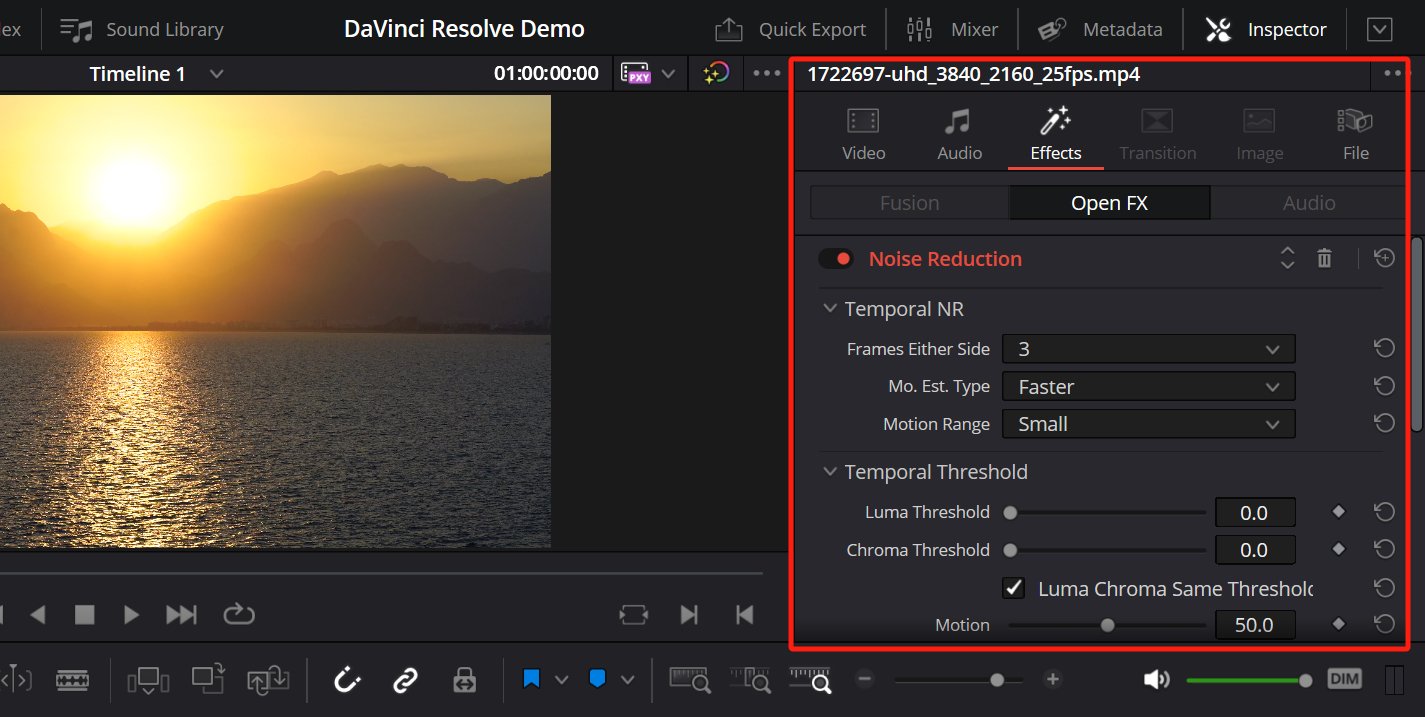
In addition to the Noise Reduction feature in the "Motion Effects" section, you can also find a "Noise Reduction" function within the Open FX library, but it is currently available only in the paid Studio version.
OpenFX is an open-source standard for visual effects plug-ins, and DaVinci Resolve fully supports this platform. Among the array of effects available in the Open FX library, the Noise Reduction tool is particularly powerful for cleaning up footage.
Step 1: Access the Open FX Library
Navigate to the "Edit" workspace located at the bottom of the interface. At the top left corner of the "Edit" page, click on the "Effects" tab to find the Open FX library.
Step 2: Locate the Noise Reduction Tool
Scroll down the list of available effects within the Open FX library until you find "Noise Reduction". It's located under the "ResolveFX Revival" category.

Step 3: Apply Noise Reduction
Drag and drop the "Noise Reduction" effect onto the video clip in your timeline that you wish to edit. The clip will now appear in the Node Editor.
Step 4: Adjust Noise Reduction Parameters
Activate the Inspector located in the top right corner of the DaVinci Resolve operation page. Here, you will find the Noise Reduction parameters.
You can perform both Temporal and Spatial noise reduction in this section, which operate on the same principles as the Noise Reduction tool in the Motion Effects.
Final Thoughts About How to Denoise Footage in DaVinci Resolve
And that concludes our tutorial on how to denoise in DaVinci Resolve. In this tutorial, we introduced two methods for denoising in DaVinci Resolve, and you can choose the one that suits your specific project or personal preference.
We'd also like to recommend TourBox, a creative tool beloved by many digital artists and editors. TourBox can simplify every step of your video editing process, and you're sure to love the changes it brings.

Whether it's timeline adjustments, clip editing, media management, or color grading, you can control TourBox with just one hand, completing various complex operations with fewer actions.
If you have a lot of tedious editing tasks, you'll find how TourBox significantly enhances your work efficiency and user experience. Check out our video editing page for more information.

By using TourBox to quickly and easily make adjustments, you can save time and be more productive. If you want to improve your video editing workflow, consider using TourBox.