How to Draw a Face Step by Step?
Each character has unique facial features. In art, we often use these external traits – like facial contours, features, expressions, hairstyles, etc. – to depict a person's age, identity, personality, and more.
Therefore, even though the figures in a painting don't speak like real people, they can still convey a vivid sense of life.
So, how can we accurately portray facial features in art? In this article, we'll share some tips on how to draw a face, and we hope they will be helpful to you.

In this article, you will learn:
- How to Draw Facial Features?
- Optimal Proportions of Facial Features
- How to Draw Faces from Different Angles Step by Step?
- Final Thoughts About Drawing a Face
How to Draw Facial Features?
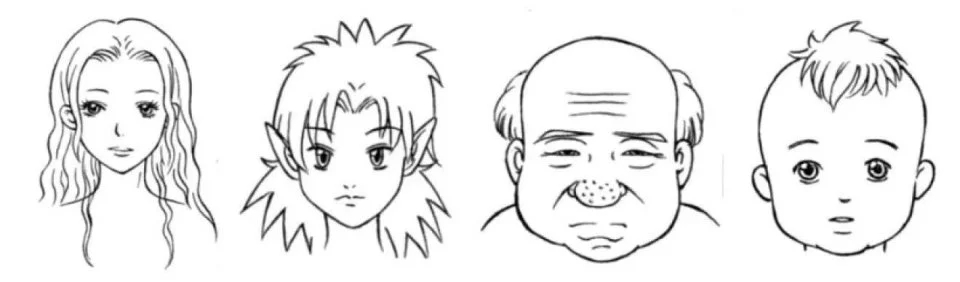
Facial features include eyebrows, eyes, nose, mouth, and ears. Everyone has these features and greets them in the mirror every day, but many beginner artists may not truly understand their structural characteristics.
As shown in the image below, facial features vary for individuals of different ages, genders, and identities.
1. Eyes
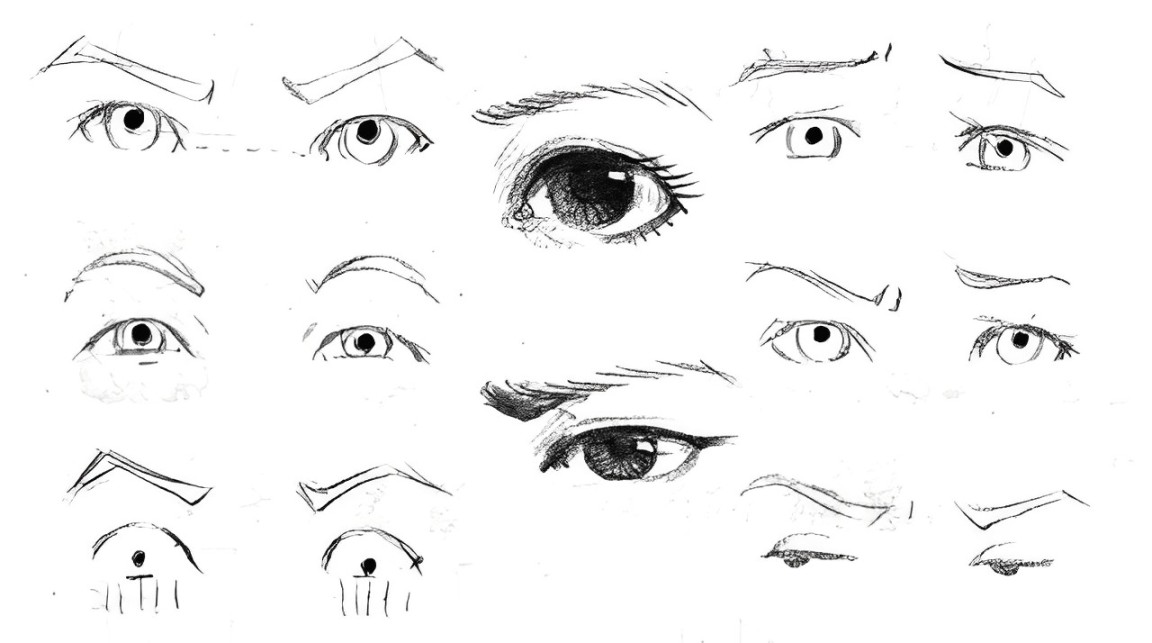
The shape of the eyes changes with the character's perspective and emotions. Eyes can convey a character's personality and emotions, making them the most crucial aspect of drawing facial features.
Eyes, resembling spheres, alter shape with the character's viewpoint, as shown in the image below.
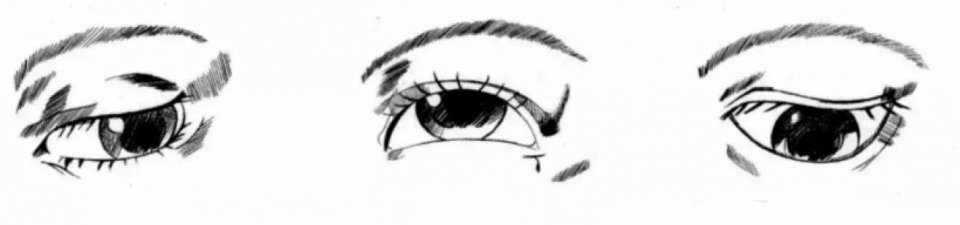
In addition to the perspective, the shape of the eyes also changes when characters express emotions like joy, anger, grief, or happiness.

Variations in eyebrows, the area between the eyebrows, eye corners, and pupils can create various interesting expressions.
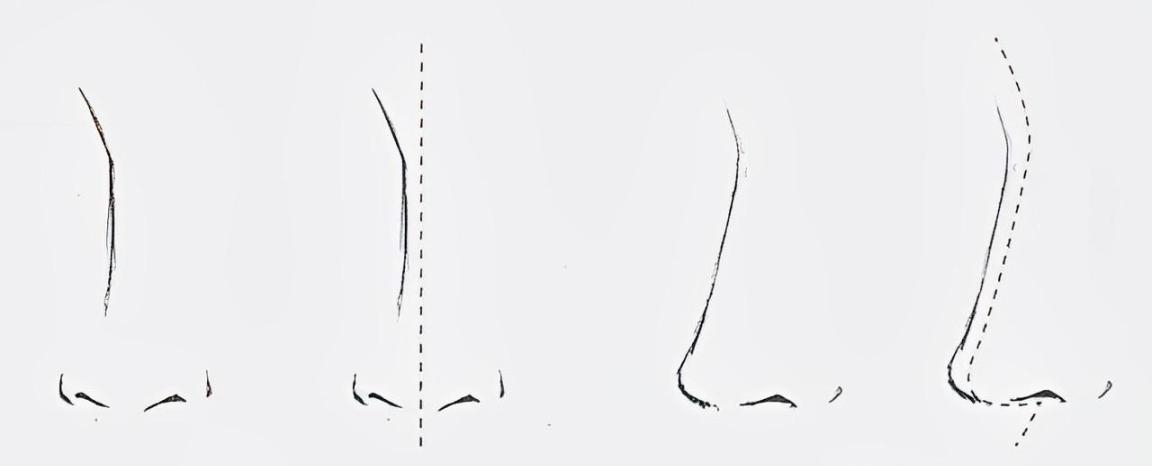
2. Nose
When drawing the nose, the key focus is on the nostrils and the bridge of the nose, as they help determine the face's direction. In real life, a good-looking nose significantly impacts whether the facial features appear attractive.
However, the use of the nose varies slightly in different styles of artwork. For instance, in cartoons, a character's nose can be simply represented by lightly drawing two dots for the nostrils.
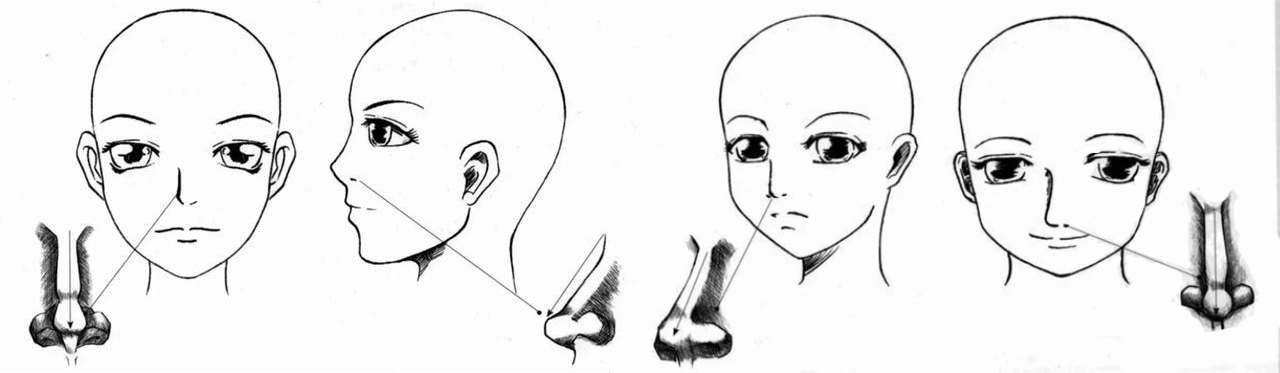
This doesn't mean the nose isn't important. Before drawing the nose, it's essential to understand its structural characteristics. For example:
- When drawing a nose in a front view, pay attention to its structure, and include the philtrum.
- When drawing a nose in a profile view, focus on the outline and the tip of the nose.
- In a three-quarter view, only a part of the nose is visible. When drawing, consider the position of the bridge of the nose to determine the overall nose structure.
- In a bird's-eye view, the base of the nose is obscured by the tip, so the root of the nose is not visible.
When drawing the nose, many beginners often overlook the nasal bridge, only focusing on the nostrils and shading of the nose.
It's crucial to pay attention to this detail. You can use guidelines and start drawing from the center of the face to ensure accuracy.
3. Mouth
The mouth serves as a crucial indicator of a character's emotions. When drawing, the focus is on the changes in the corners of the mouth and the upper and lower lips.
In realistic styles, the mouth tends to have a three-dimensional quality, with the lips exhibiting a certain thickness.

On the other hand, in comics mouths are often simplified.

Similar to the eyes, the mouth is a vital organ for expressing a character's emotions. Therefore, when drawing the mouth, consider the emotions it conveys.
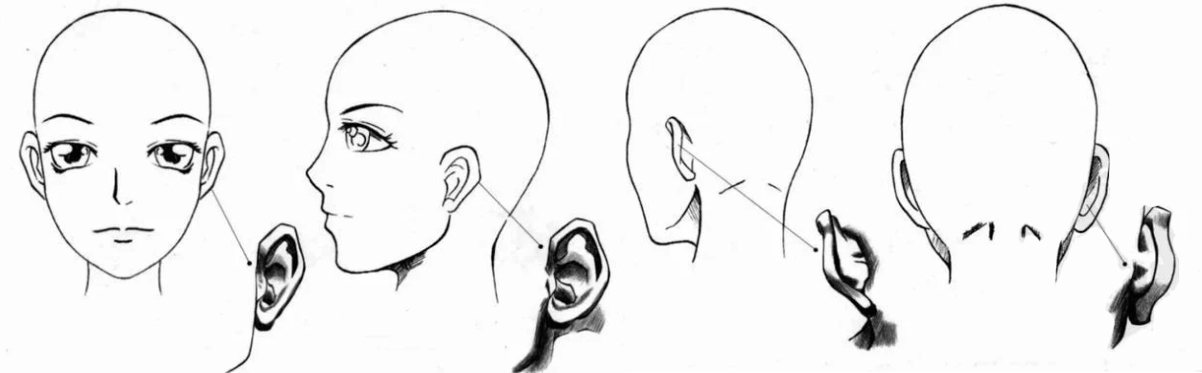
4. Ears
Ears are often not meticulously detailed but mainly assist in depicting the position of the head, such as tilting or lowering.
From different angles, ears are drawn differently. Here's a rough summary:
- Front View: The outline of the ear slightly flips outward, resembling a triangle shape.
- Profile View: In a side view, the ear's outline is like that of a front view, showing the complete structure of the ear.
- Three-Quarter View: When the head is turned at an angle, we can see the base of the ear, and at this point, the thickness of the earlobe also needs to be added.
- Back View: Ears appear protruded, which can be depicted using shaded lines to show this feature.
Optimal Proportions of Facial Features
In the previous discussion, we roughly analyzed the structural characteristics of facial features. However, in practical drawing, these features do not exist in isolation but are interconnected.
This is why some individuals have attractive features when viewed separately but don't stand out when combined. It underscores the significance of the positions and proportions of facial features.
So, what proportions make for an appealing face? The best proportions are illustrated below: a person's face width should be about as wide as five eyes, and the height should be about as high as three foreheads.
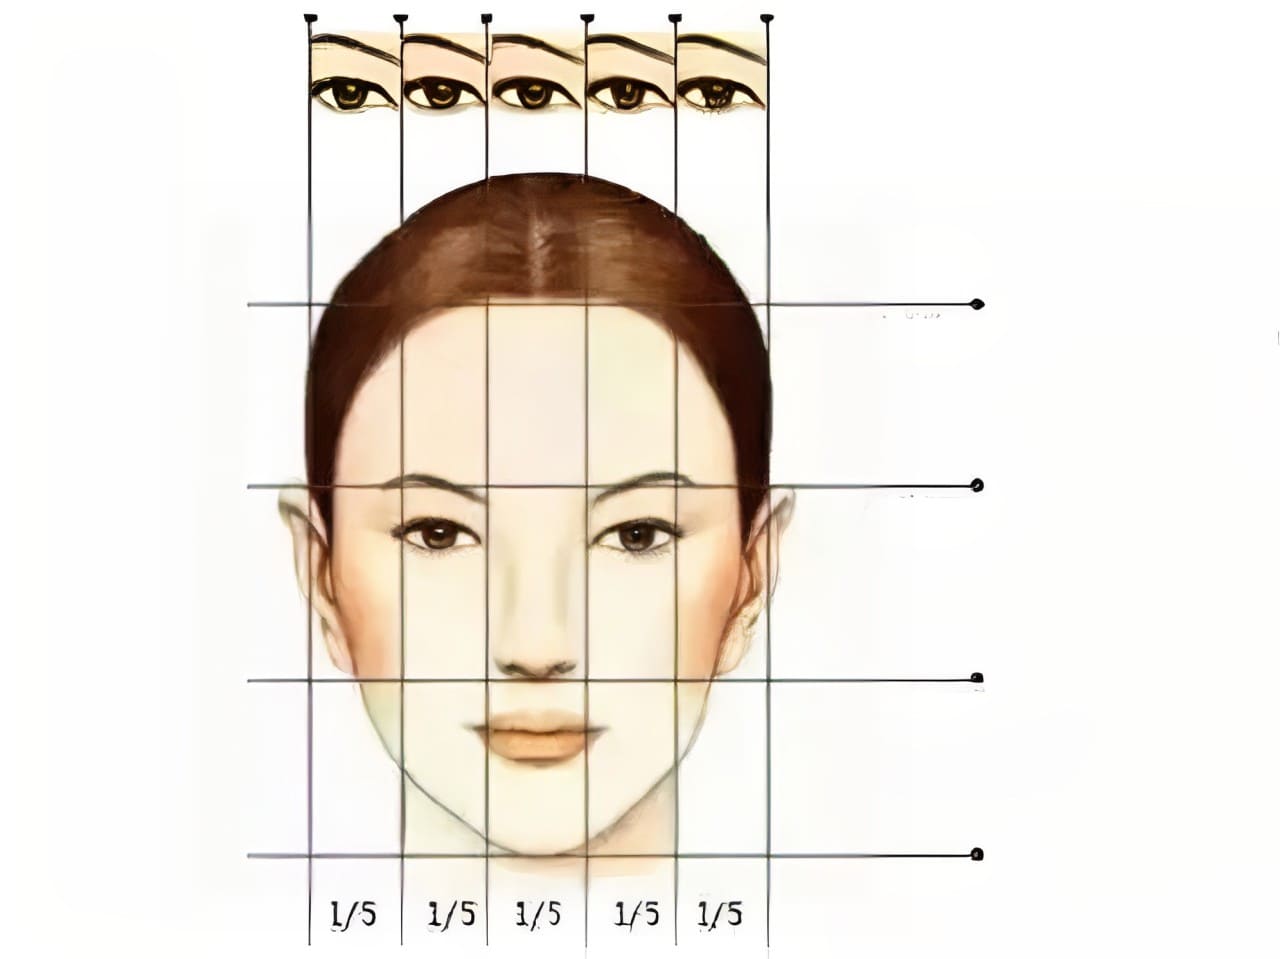
When drawing a face, you can visualize the entire face as a "+" sign structure. Place the eyes along the horizontal line and use the vertical line as a guide for drawing the nose and mouth, ensuring the features do not stray too far from the center point.
How to Draw Faces from Different Angles Step by Step?
Typically, drawing a person's face straight-on is relatively easy. What can be tricky is capturing faces from various angles, which requires mastering some perspective techniques.
One useful tip is to envision the head as a cubic spatial form. This helps make the different proportional and perspective relationships clear.
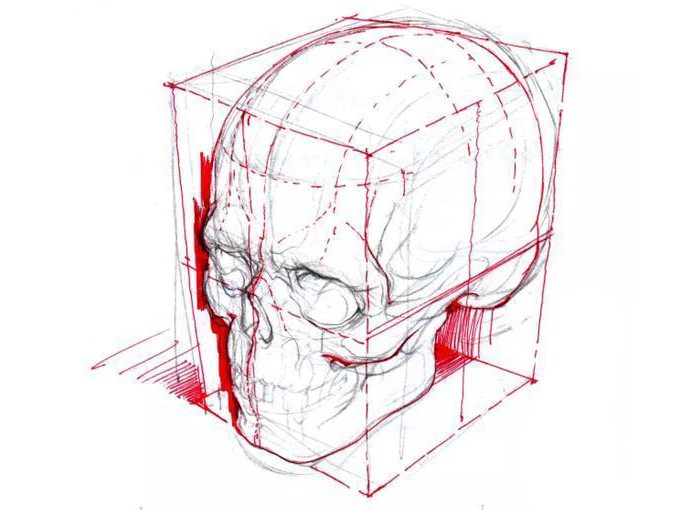
Aside from understanding perspective, a key aspect is handling the relationship between the head and neck. Many beginner artists struggle with creating faces at angles that may feel odd because those angles are often physically impossible in reality.
While drawing, you can even gently move your neck, feel the pull of the muscles, and assess whether the angles you're drawing are feasible in real life.
As the head tilts, facial features naturally change. So, what are some common techniques for depicting different facial angles in digital art creation?
Next, we will share step-by-step guides for drawing faces from different angles:
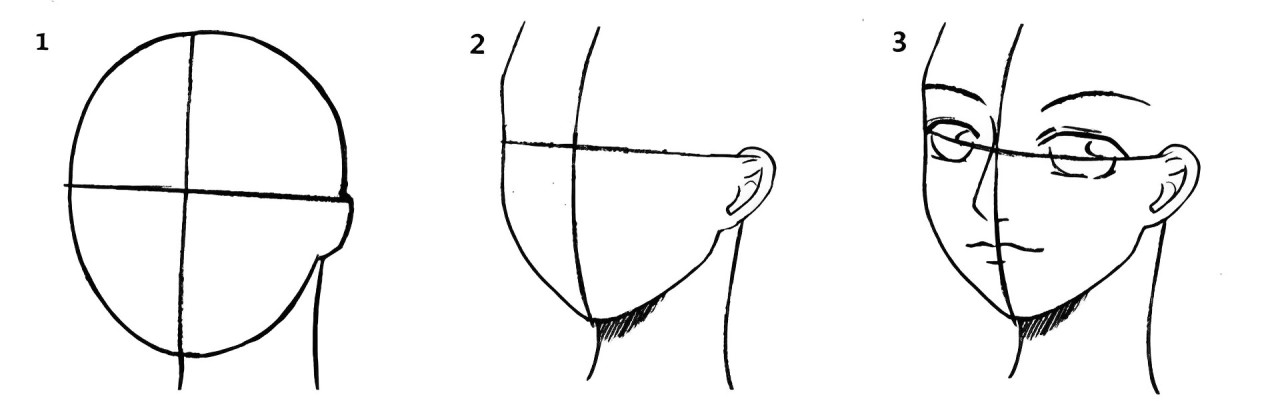
1. Draw a Face in a Three-Quarter View
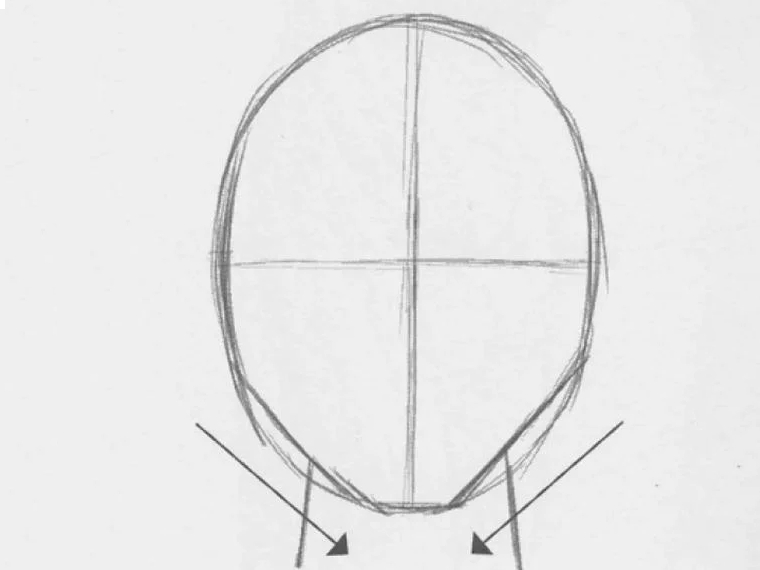
- Begin with a circle and a cross to establish the proportions of the head, then outline the face shape.
- Use the cross to position the facial features and sketch the outline of the ear.
- Draw the pupils to bring life to the eyes.
- Add a hairstyle to the character.
- Clean up the lines to complete the drawing.
2. Draw a Face in Profile View
- Start with a circle to determine the height and width of the head. Draw a vertical line on top to mark the position of the eyes.
- Outline the profile, paying attention to the curves of the lines.
- Sketch the eyes based on the horizontal line. Add pupils and detail the ear.
- Include the hairstyle, focusing on its flow.
- Refine the lines to finish the artwork.
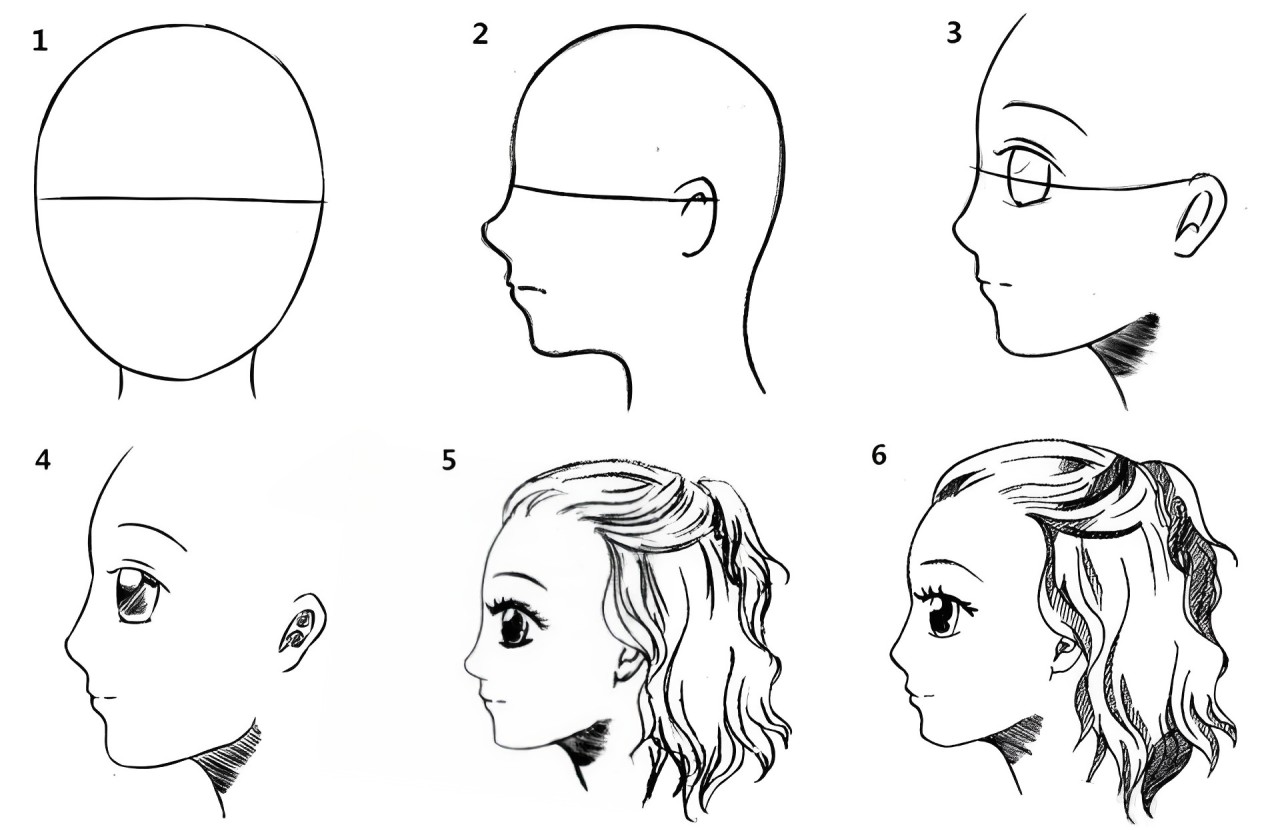
Extra Tip:
When drawing a face in profile view, you can divide the head into two parts: the face in front of the ear and the back of the head behind the ear for better accuracy.
3. Draw a Face in Worm's-Eye View
- Start by drawing a circle and a cross to outline the approximate proportions of the head.
- Define the contours of the face to capture the dynamic effect of the worm's-eye view.
- Use the cross as a guide to sketch the facial features, paying attention to their positions.
- Add appropriate pupils to the character.
- Depict the general look of the hair, focusing on the layers of strands.
- Clean up the lines to finalize the drawing.

Extra Tip:
When a character is viewed from a worm's-eye perspective, you can mark the position of the ears using auxiliary lines. The highest point of the ear should align with the middle section between the eyes and eyebrows.
Final Thoughts About Drawing a Face
In this tutorial, we've covered how to draw facial features and faces from different angles. To enhance your digital art creation process with these techniques, we recommend using TourBox.

TourBox is a controller tailored for digital artists and painters, designed to significantly improve your drawing workflow.
For instance, when working on intricate expressions or different facial angles, TourBox allows you to swiftly switch between brushes and tools, easily adjust settings, saving time while achieving higher precision.

TourBox is the ideal choice for your digital art journey, empowering you to reach new heights in digital art creation. Check out our digital painting page to see how TourBox can become your reliable companion on your artistic journey!