How to Draw a Head: See How Stan Lee Did It
Are you still struggling with how to draw a head in digital art? In this tutorial, we'll explore how Stan Lee illustrated the heads of Marvel characters.
Whether you're a beginner in digital art or an enthusiast looking to improve your skills, this tutorial will provide you with some practical tips and creative inspiration.
Are you ready to kick off this creative journey? Let's dive into the world of superheroes together!

In this article, you will learn:
- Stan Lee's Drawing Tutorial
- How to Draw a Head?
- How to Add Expressions to a Character's Head?
- Final Thoughts About Drawing a Head
Stan Lee's Drawing Tutorial
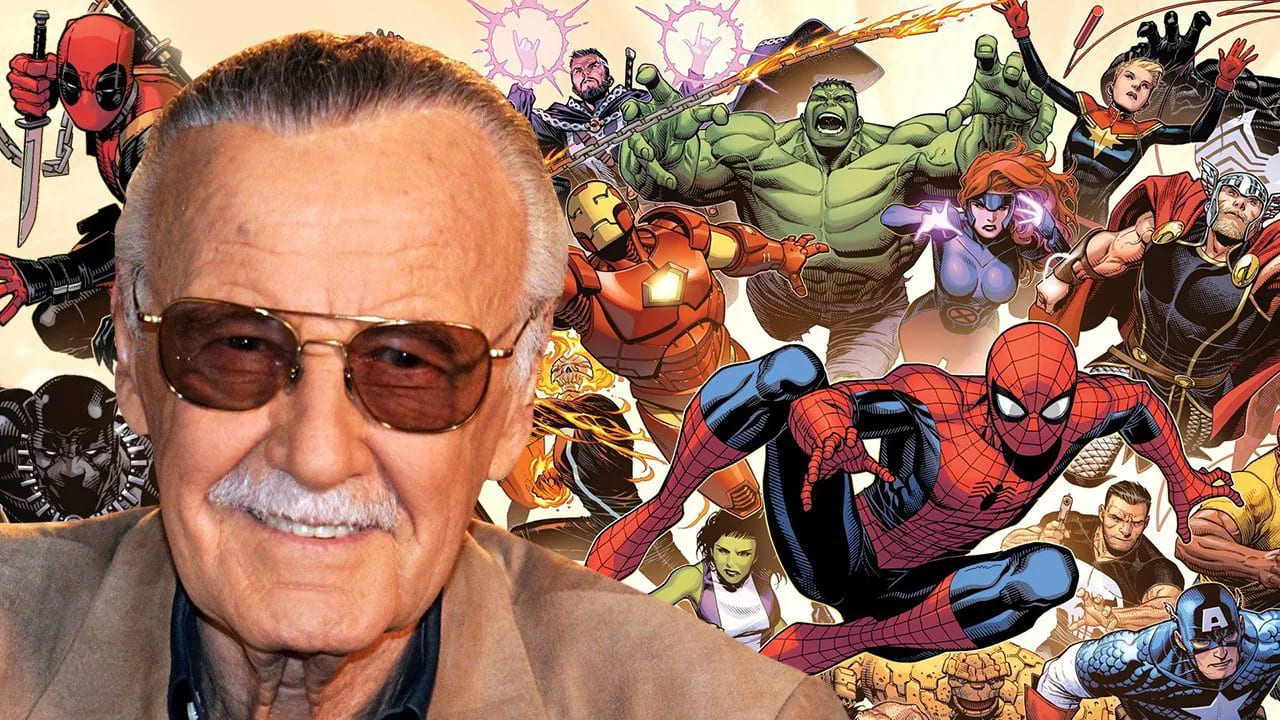
If you're a Marvel fan, you've definitely heard of Stan Lee.
He created most of Marvel's iconic superheroes and is known as the "Father of Marvel." His creations include Spider-Man, the Fantastic Four, the X-Men, the Avengers, and more. Even if you're not a die-hard Marvel fan, these names are probably familiar.
Stan Lee once published a book titled "How To Draw Comics The Marvel Way," which is a very enjoyable and foundational comic drawing tutorial.
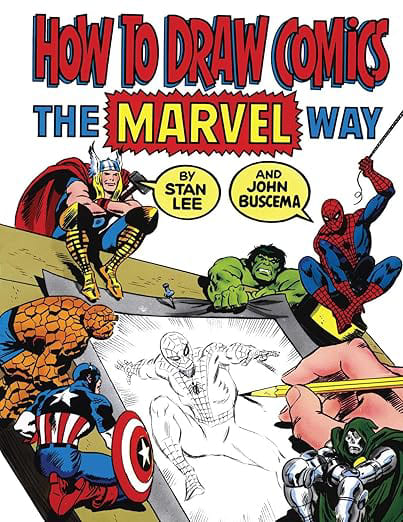
The book is narrated by Stan Lee in a very conversational style, making it easy and engaging to read. It's not dry at all; it feels like he's speaking directly to you.
So, if you're interested in comic book art, consider picking up this book for some inspiration—it's sure to spark your creativity.
How to Draw a Head?
In Stan Lee's comic tutorial, he shares how to draw the front view of a comic character's head.
He breaks down the process into 6 steps for drawing the character's head. But don't worry, each step is fun, and the best part is, they're all very simple!
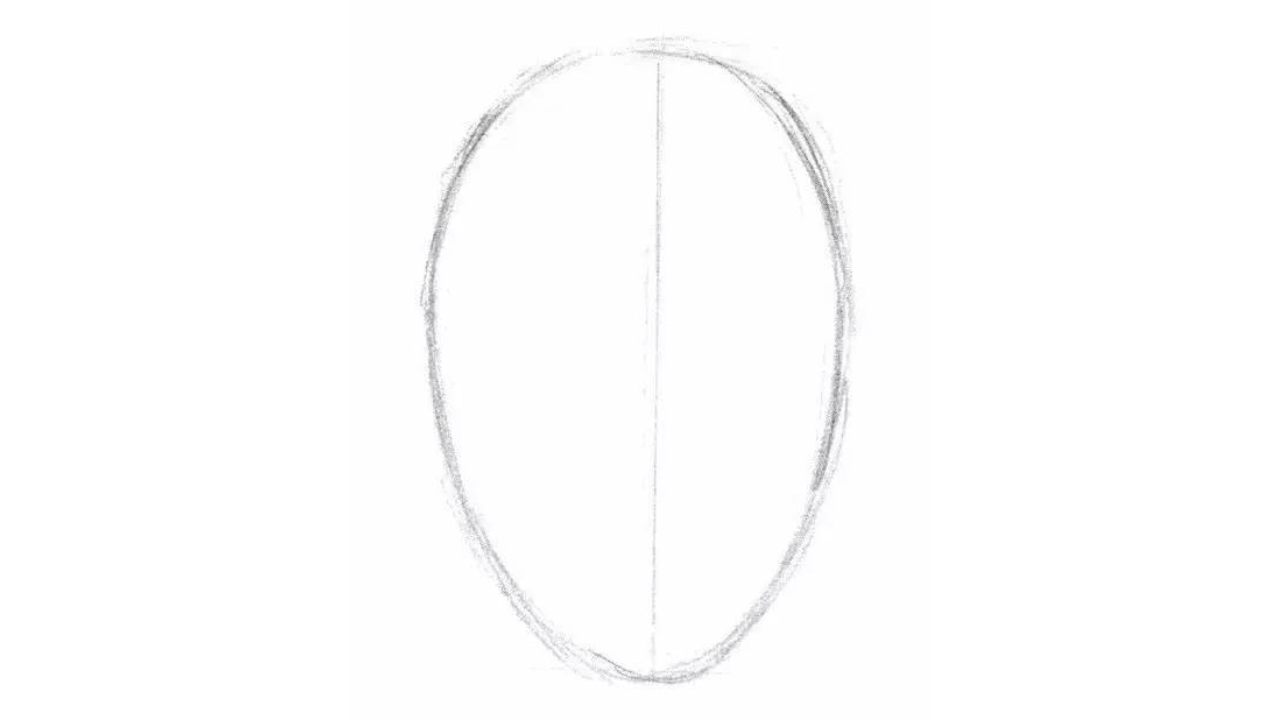
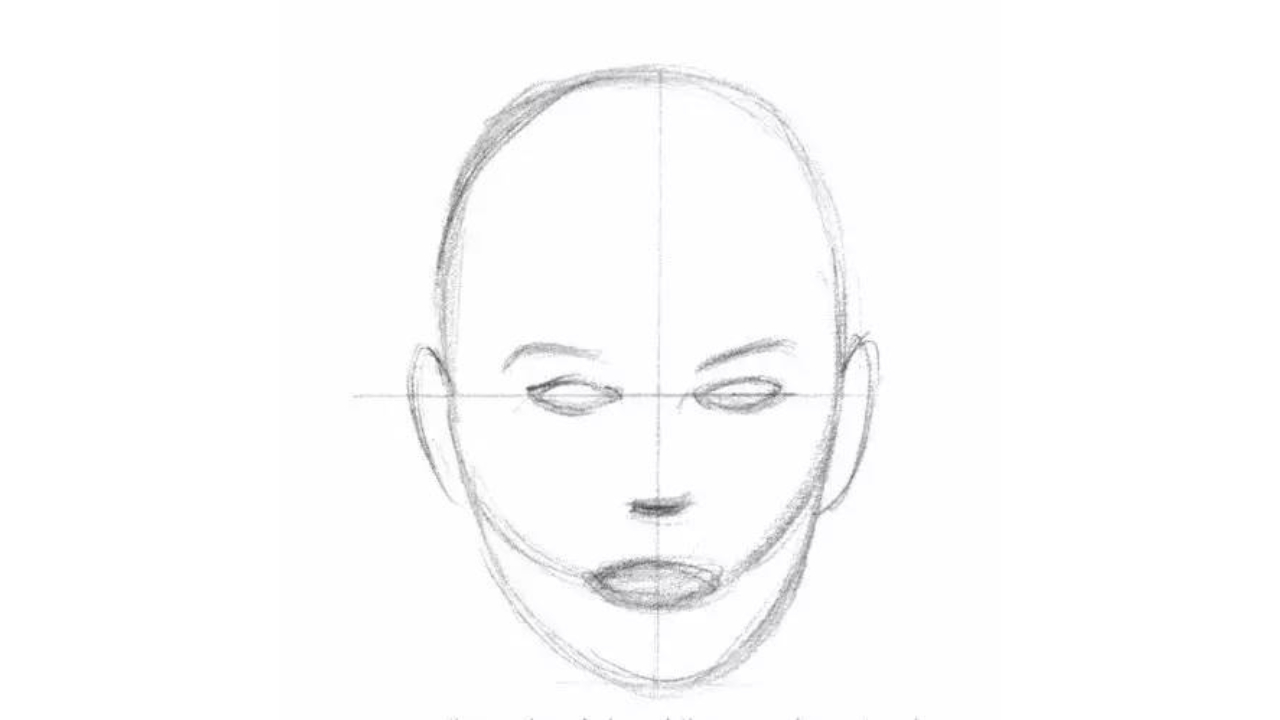
Step 1
Start by sketching an egg-shaped outline that is proportionate, serving as the foundation of the head.
You can also draw a cross to assist you in the next steps. Horizontal and vertical lines can help you determine the direction and placement of the face.
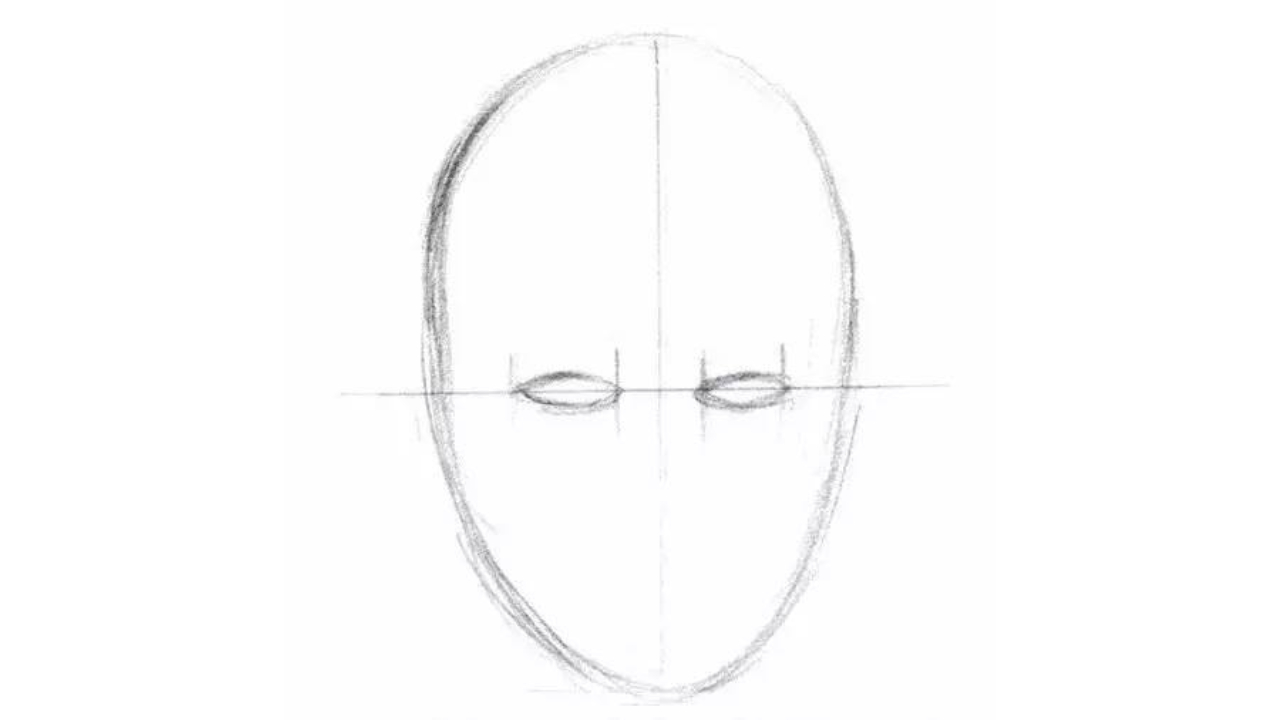
Step 2
Locate the position of the eyes in the middle of the head and roughly outline the eyes of the character.
A handy rule of thumb: the head is about 5 eye-widths wide.
Step 3
Draw an equilateral triangle from the outer edge of the eyes to the center line of the head (each side of the triangle should be of equal length).
Sketch lines to indicate the cheeks and outline the area where the mouth will be placed.
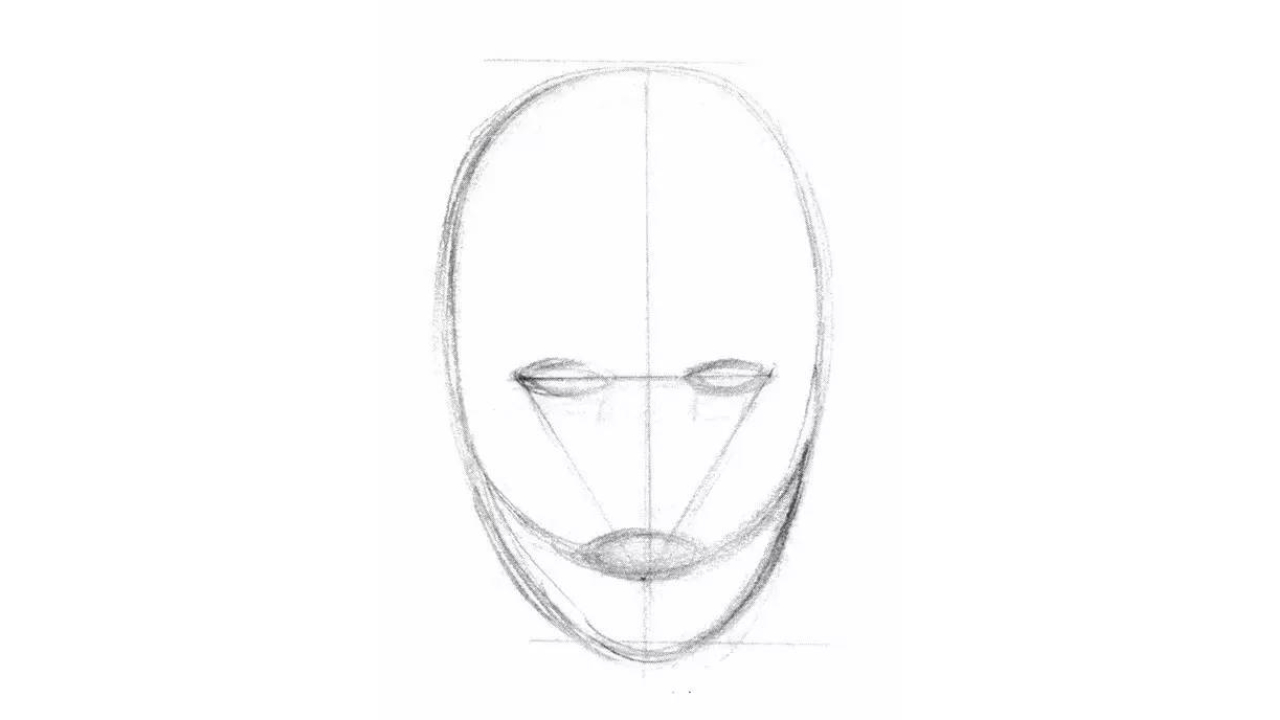
Step 4
One-third of the distance from the top edge of the lips to the line representing the eyes is where the nose should be placed. Simply sketch out the position of the nose.
Next, above the eyes, add the character's eyebrows, and then roughly outline the ears.
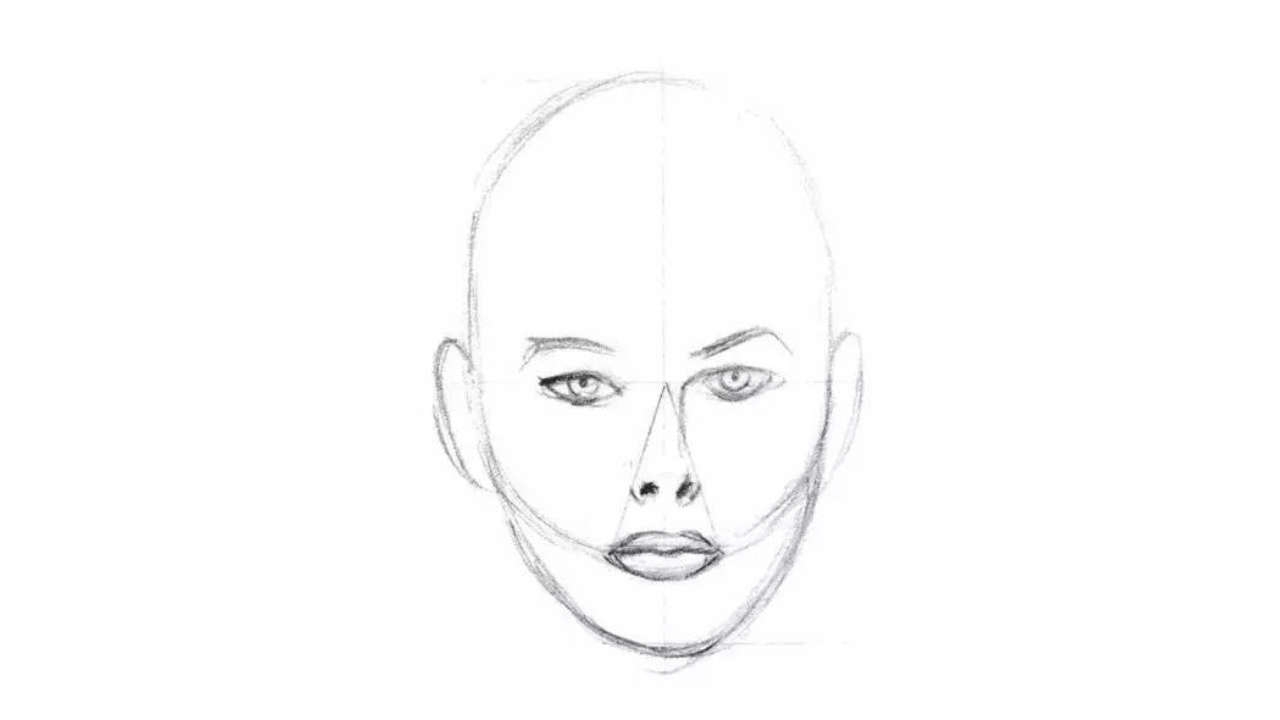
Step 5
Now it's time to dive into the real drawing! There are no shortcuts in this step.
You must truly capture the character's nose. At the beginning, try your best to mimic the way professional artists draw noses.
Specifically, aim to make the nose slightly narrower than one eye width and ensure it curves upwards.
Draw two lines from the tip of the nose, passing through the nostrils and down, to determine the width of the mouth.
At this point, you have enough guidelines to sketch out the mouth. With the cheek guidelines in place, draw the positions of the upper and lower lips on either side of this line.
Refer to the image below for a more visual guide.
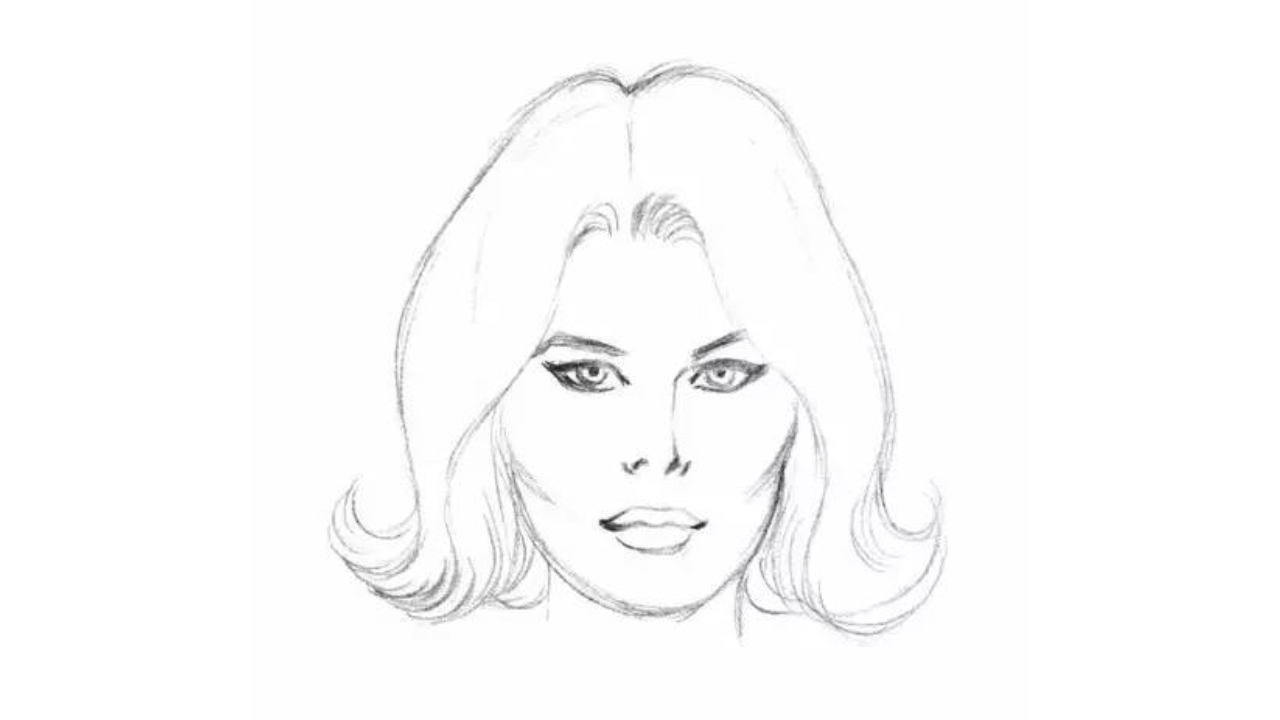
Step 6
The final step is to add the hair and erase the guidelines.
A little tip: draw the eyelashes as a single unit, with the outer corner of the eye slightly higher than the inner corner.
How to Add Expressions to a Character's Head?
So, the character's head is all drawn now—pretty straightforward, right?
But when we look at this face, it's just a plain expressionless face. It lacks emotion.
To bring the head to life, you need to add various interesting expressions to the face. The method is simple: slight changes in the eyebrows, eyes, and mouth can convey a range of emotions like happiness, anger, sadness, or joy.
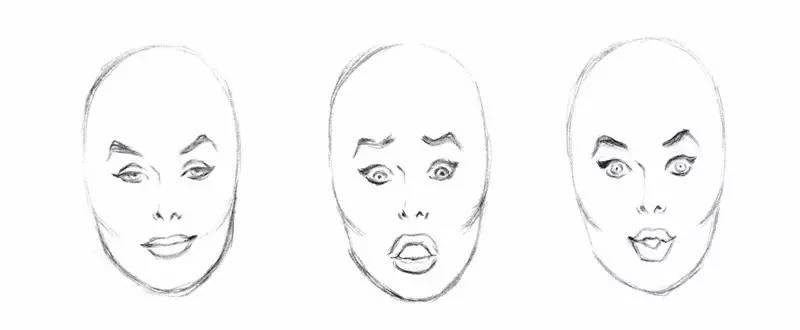
In reality, you don't need many lines to show or change an expression. Keep the expressions simple and subtle as much as possible.
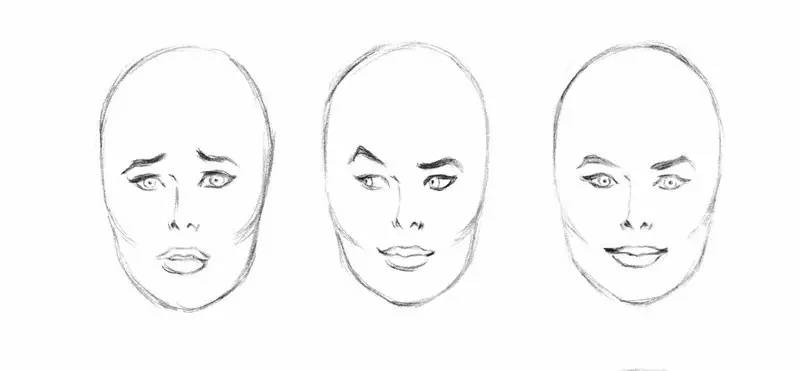
What you need to do is keep the features simple. Just by making small changes to the mouth, eyes, and eyebrows, you can easily switch between different expressions for the character.
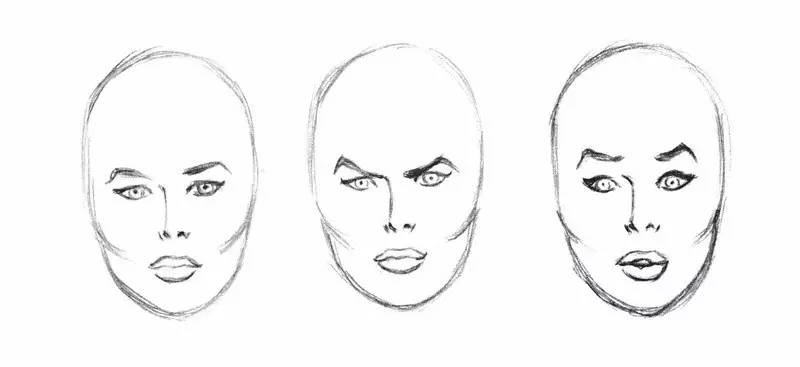
A great practice is to study your own face in a mirror. Practice making different expressions and observe how your face changes.
Most artists are their best models—and the only equipment you need is a mirror. Understand the patterns of facial expressions, then apply these patterns to various characters you want to draw.
Final Thoughts About Drawing a Head
In this tutorial, we've shared Stan Lee's techniques for drawing character heads. If you're looking to dive into comic art, the book "How To Draw Comics The Marvel Way" will be incredibly helpful.
While this book showcases traditional comic art techniques, these skills are far from outdated and still hold great value for digital art enthusiasts.
If you're new to digital art or interested in it, having a helpful tool alongside learning drawing techniques can make your artistic journey smoother.
At the end of this article, we want to recommend TourBox, a controller beloved by many digital artists and painters. TourBox can significantly streamline your drawing process, and from our tests, it can boost your productivity by up to 270%.

Tasks like creating layers, adjusting brush sizes/properties, rotating the canvas, and other intricate operations can be effortlessly handled using TourBox. Its efficient and straightforward workflow feels like using a game controller to play video games.

Check out our digital painting page to see how TourBox can revolutionize your artistry.