How to Draw Light in Digital Art?
Many beginner artists hit the same wall when painting light: even after following the logic of form and structure, the result still does not feel right. The problem is often that they are adding light in a way that does not actually help the image.
To make lighting work, we first need to know what the light is supposed to express. In this article, we will look at the best uses for different kinds of light, and then walk through a simple example to see how to add light to a painting.

In this article, you will learn:
What Are the Different Types of Light?
When we paint light, the first thing we need to understand is what we want to show in the image. The purpose of lighting is to help the viewer clearly see the subject, the mood, and the story we want to tell.
1. Front Light
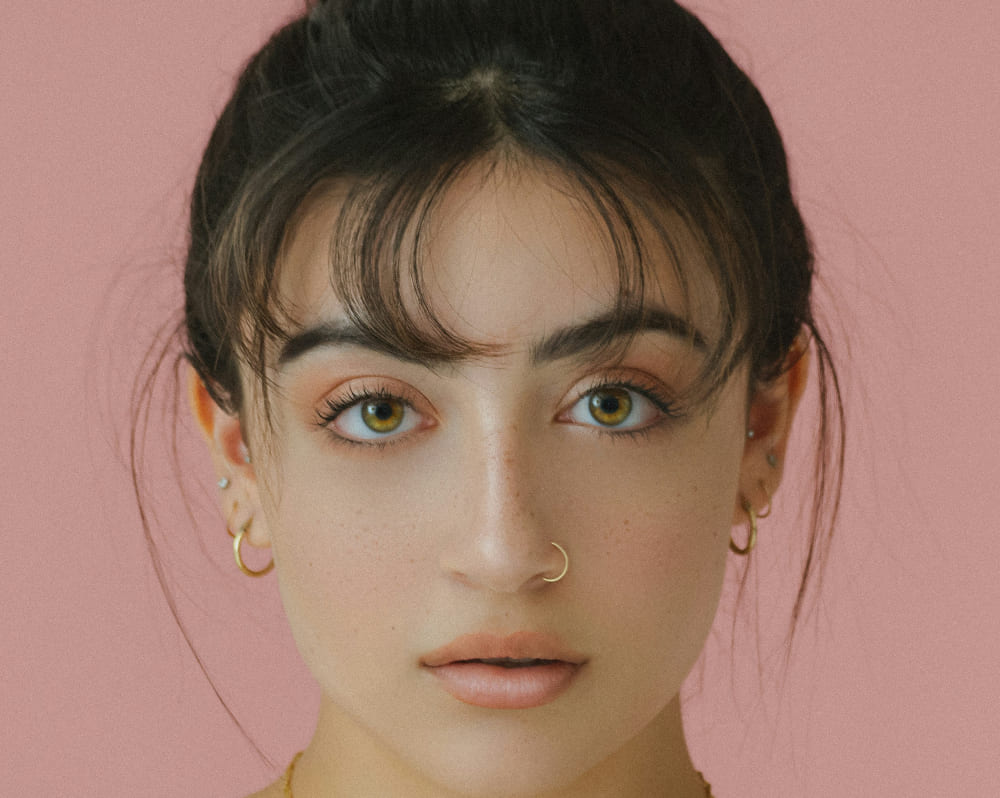
The front light comes from almost the same direction as the camera. It can light up the scene very quickly, but it also makes the face look flatter because there is less light and shadow contrast. It is usually not the best choice for painting a character directly, since it can feel stiff and two-dimensional.
This is the kind of lighting often used in ID photos or professional headshots. The main goal is to show facial features clearly. But in character art, you can balance the weakness of front light by changing the pose, expression, or mood.
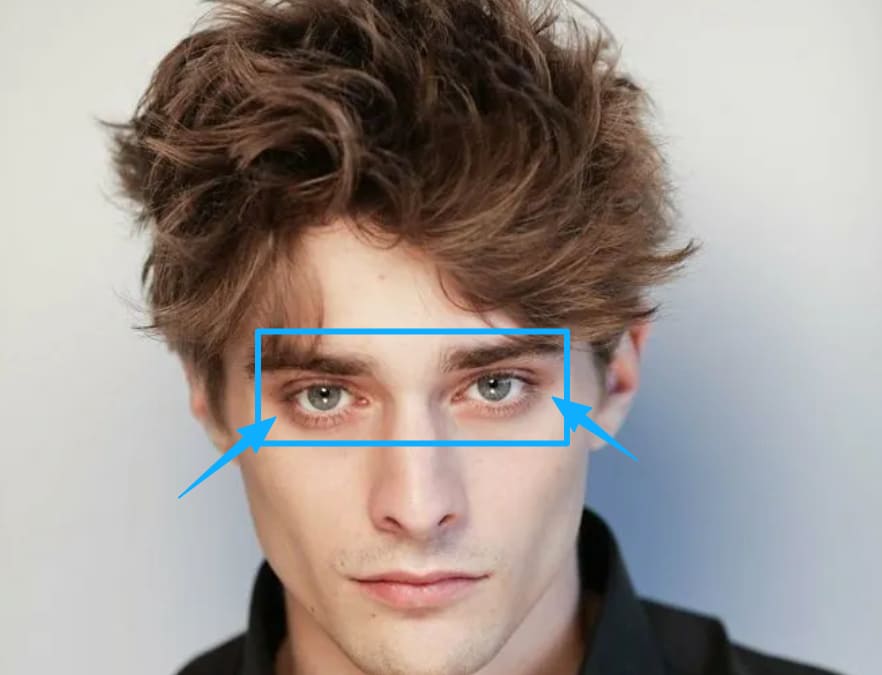
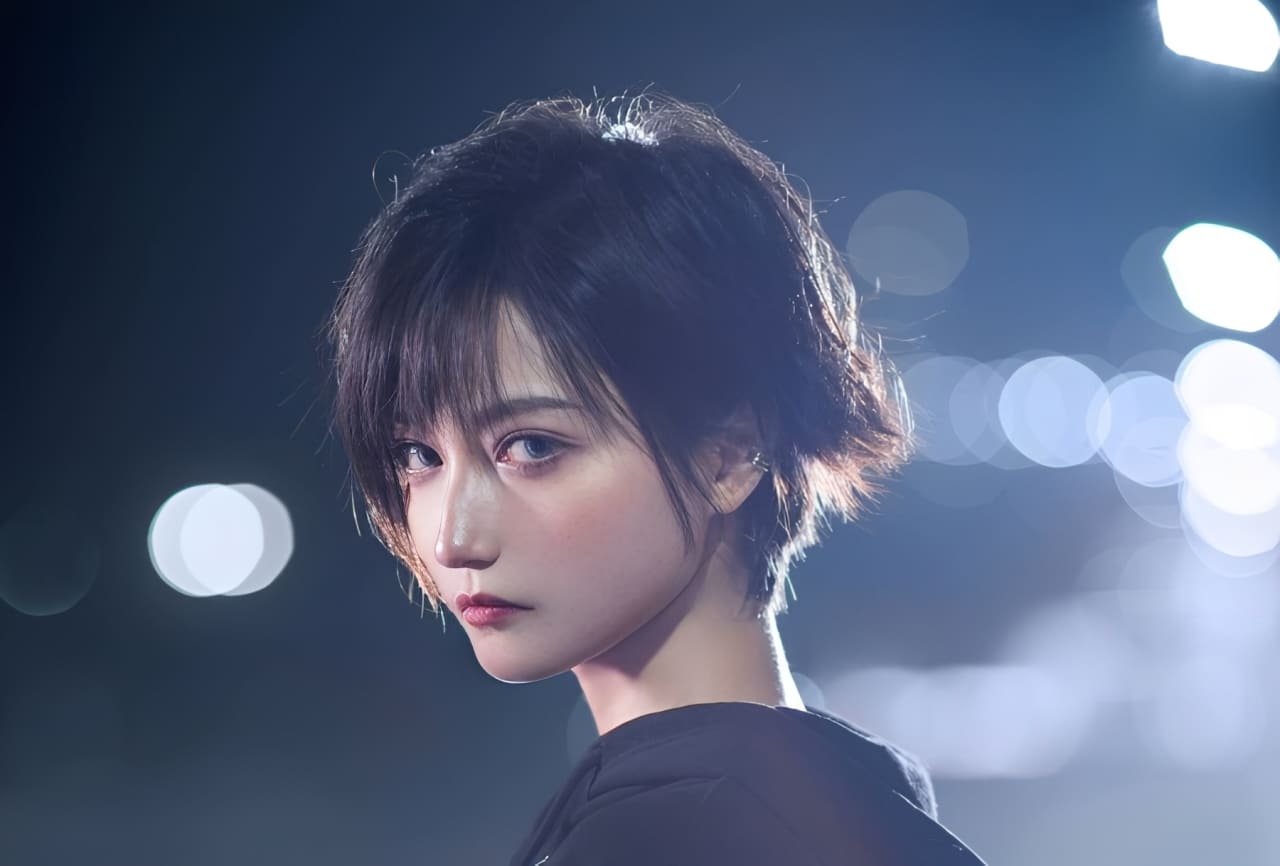
2. Paramount Light
When the light is raised to about a 45-degree angle, the face starts to show more shadow changes. This is called Paramount lighting, and it is also known as butterfly lighting.
It often creates two small triangle-shaped shadows around the brow and eyes, forming a butterfly-like shape. It also adds shadows on the cheeks and around the eye sockets, which makes the face feel richer and more dimensional.
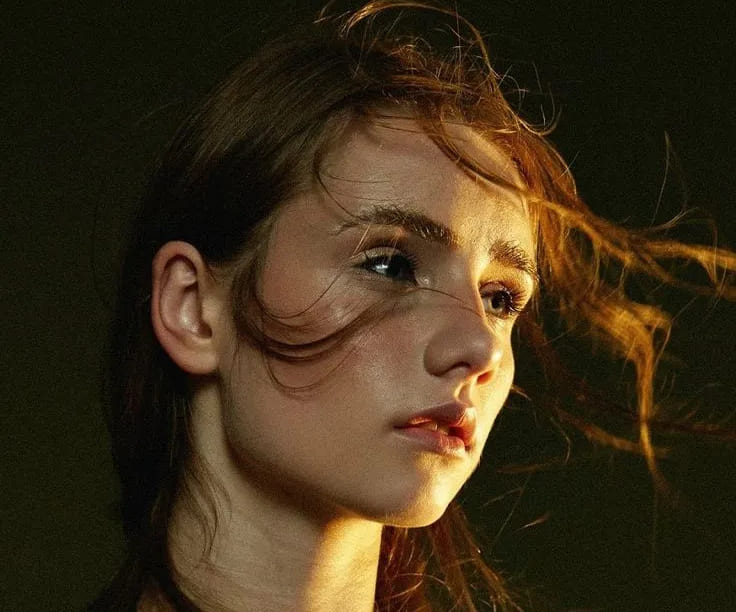
3. Side Light
Side light hits the subject from the side. It creates strong contrast between light and shadow, which gives the image a dramatic feel. This kind of lighting can strengthen the sense of volume and show the structure and details of the subject more clearly.
One thing to keep in mind: lighting only half of the character's face is usually not recommended, because it can make the face feel too dark and lose detail. That said, it can work well for storytelling, especially when you want to show a character's moral conflict, or the balance between light and dark.
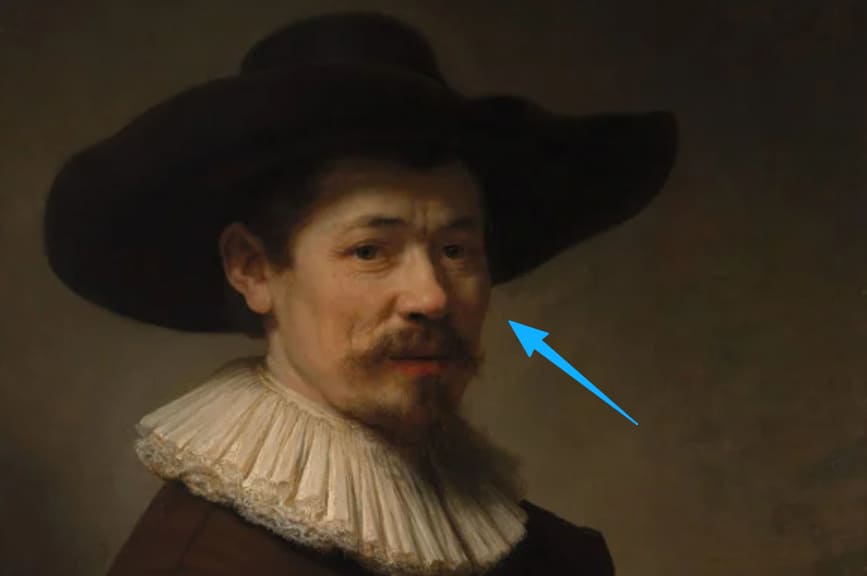
4. Rembrandt Light
Rembrandt lighting comes from about a 45-degree angle above the subject. It leaves a small lit area in the shadow side of the face. This helps show the form and volume even in the darker parts of the image.
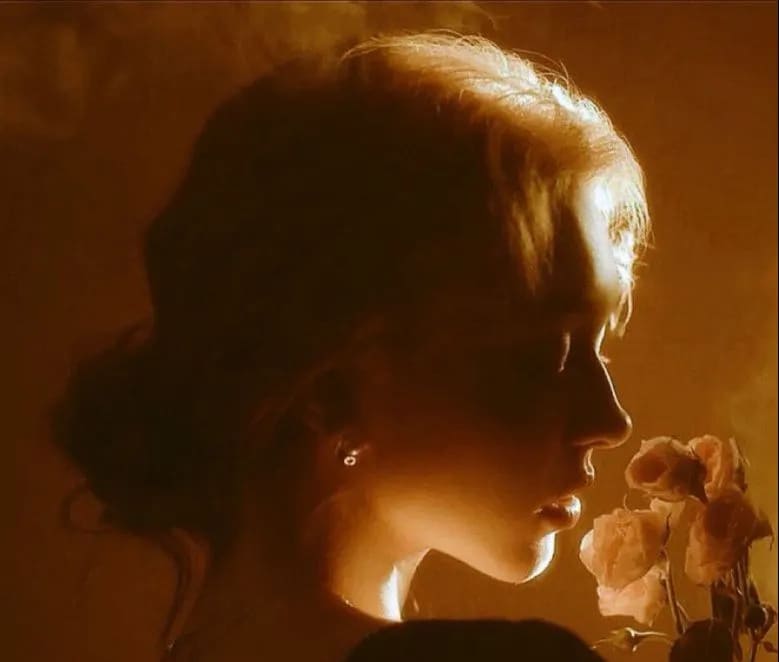
5. Back-Side Light
This light comes from about 135 degrees behind the subject. It leaves much of the body in shadow and makes the edges of the figure stand out more clearly.
6. Back Light
Back light is often used when a character enters the scene, because it helps build atmosphere. It is also commonly used as rim light to separate the subject from the background.
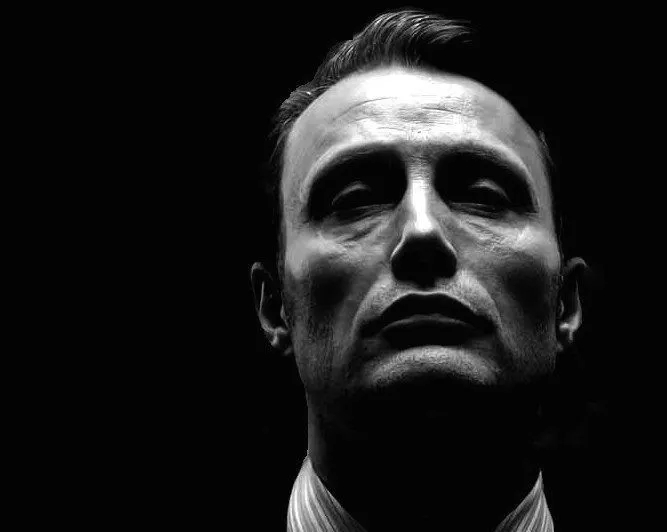
7. Top Light
Top light shines straight down from above. It is also called skull light. This kind of light makes raised areas brighter, so the eyes and the area under the nose often cast strong shadows. In film and art, it is often used to create a feeling of pressure or tension.
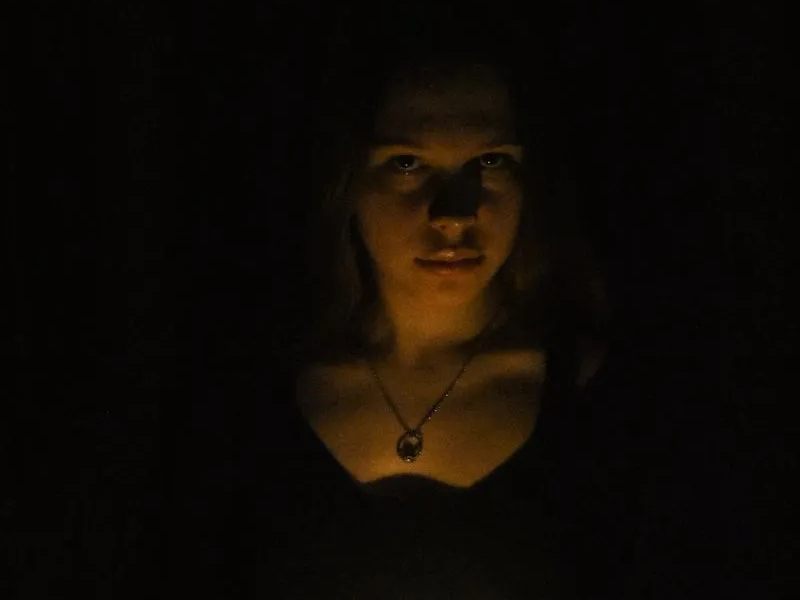
8. Bottom Light
Bottom light is often seen in horror movies because it creates a scary and unnatural look.
9. Combined Lighting
When we look at many reference images, we can see that the light is often not coming from just one source. That is right. We can combine different main and secondary lights to build a stronger sense of form.
For example, in photography, the most basic setup is the three-point lighting system. It combines the key light, fill light, and rim light. As shown below, this setup creates a very clear lighting result.
How to Draw Light?
We've covered the different types of light, but when you are painting, you do not need to get too caught up in what kind of light it is. What matters more is what the light is trying to say.
While showing the right idea or mood, we also need to make the light feel natural, so the viewer feels like the light just happens to hit the right spot and reveal the most beautiful part of the image.
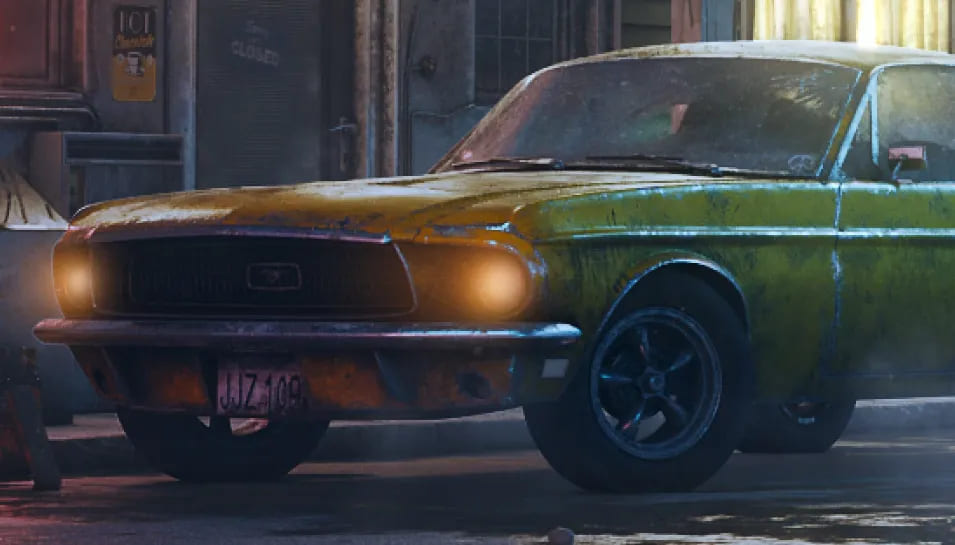
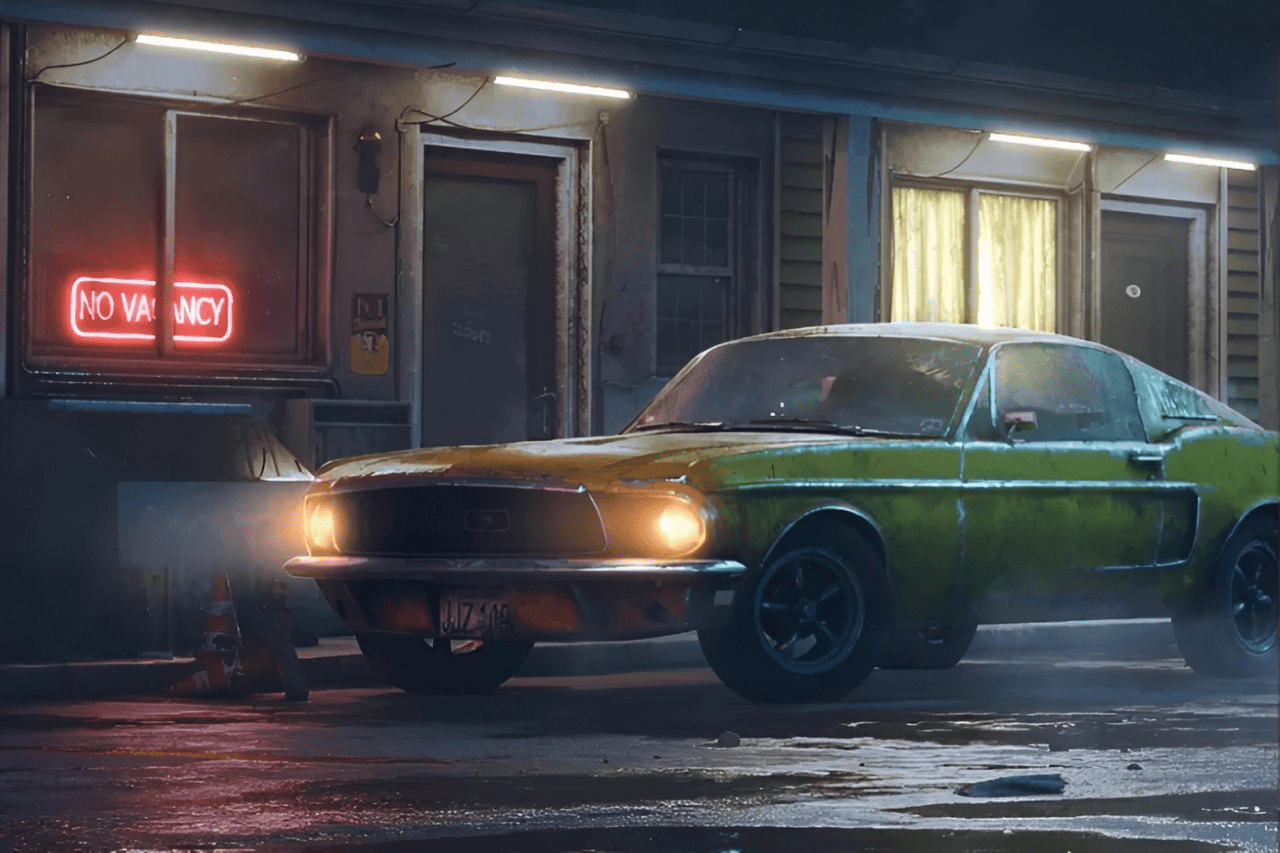
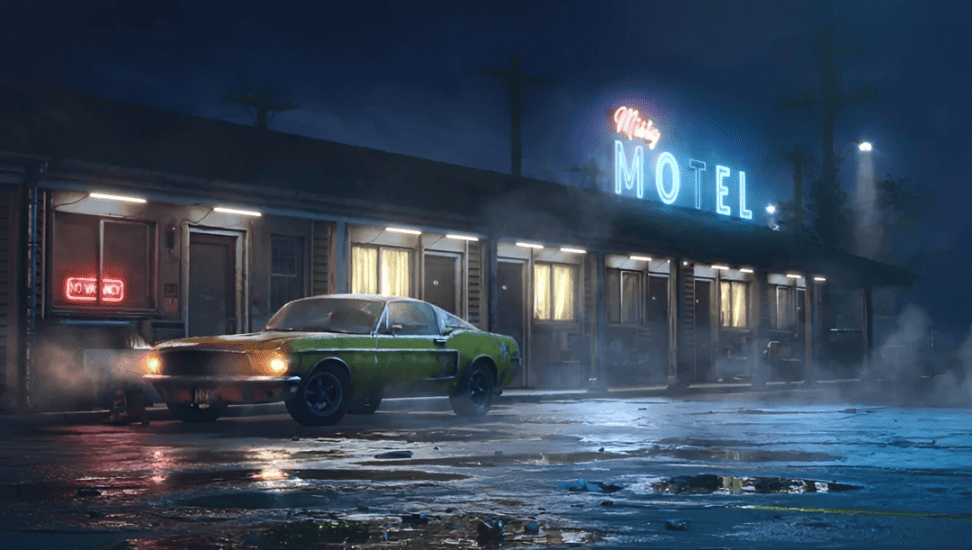
Next, let's use the example below to walk through the process and see how to paint light in digital art, step by step.
First, drag the reference into Photoshop. Create a new layer, and set the blend mode to Screen.
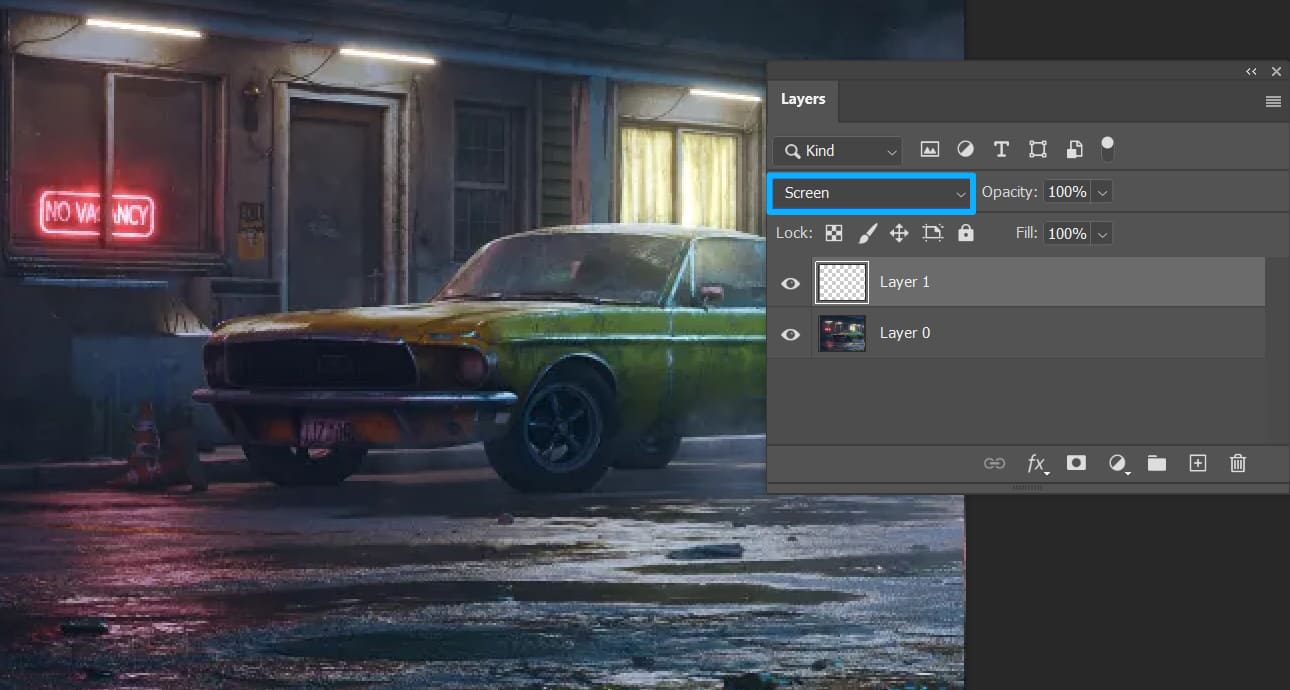
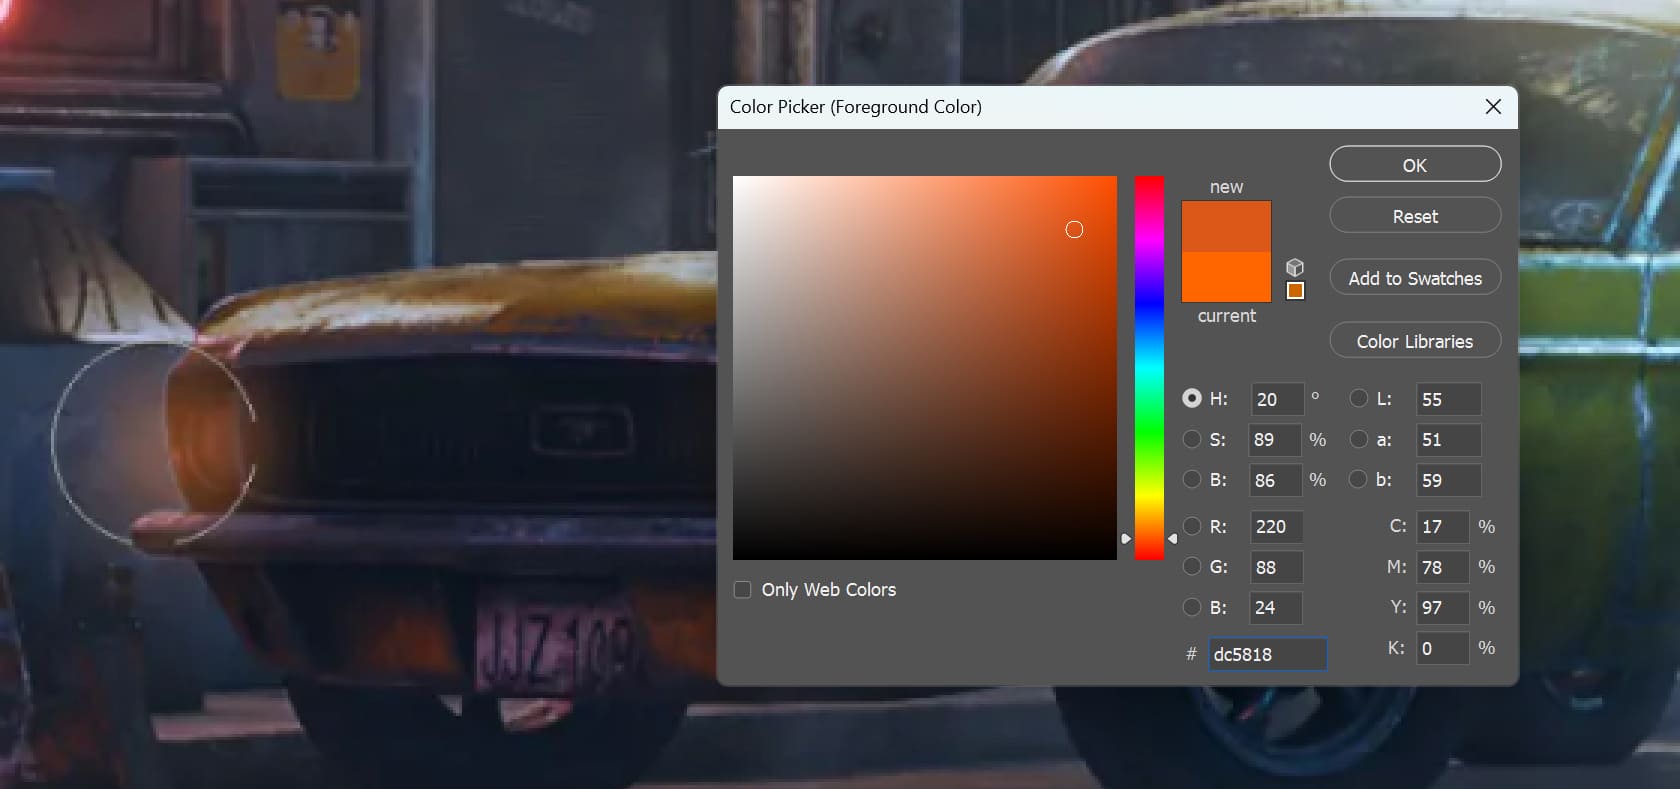
Since the overall image has a cool blue-green tone, we choose a warmer orange color for the light source.
Lightly paint a base layer on the car light area. You can lower the brush opacity or flow while painting.
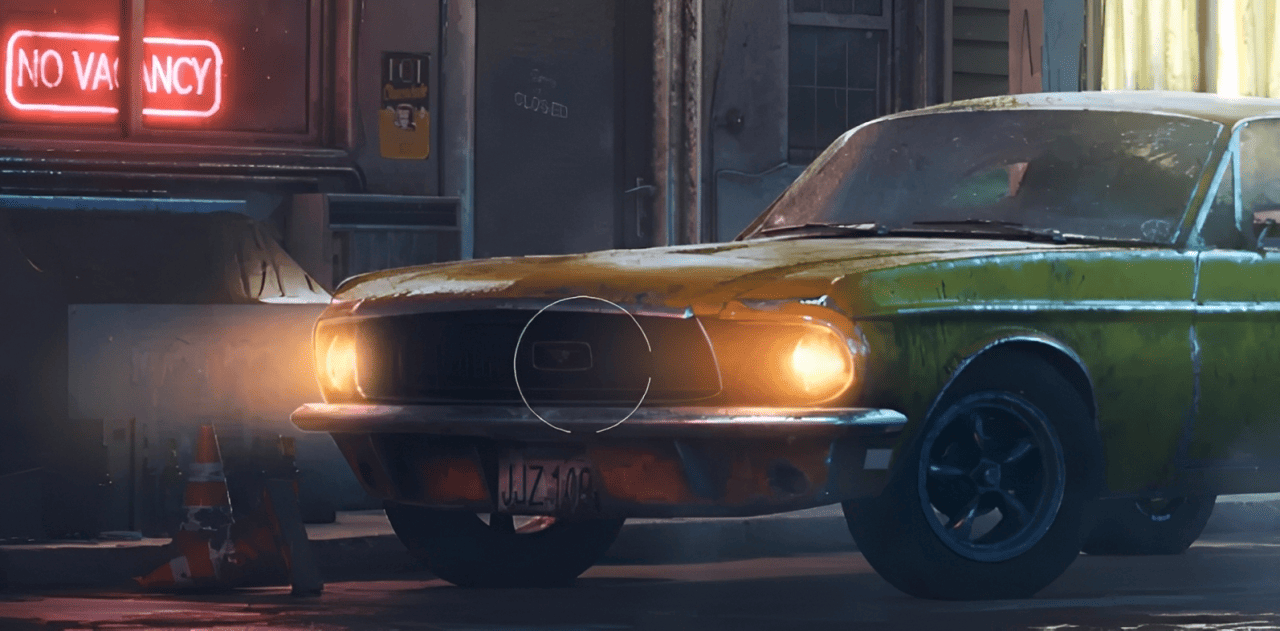
After the base layer is in place, shift the hue slightly toward yellow and start painting the second layer of light.
Use a smaller brush and strengthen the center of the car light to create a soft light gradient.
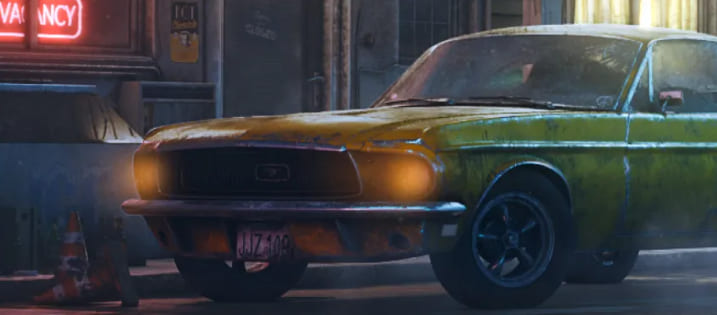
Finally, lower the saturation and use a white brush to further brighten the center of the light, bringing back the high-value effect of the light source.
After the first pass, the light may still feel not bright enough and not clear enough. It may also look a little hazy. So how do we make it brighter? Create another new layer and set the blend mode to Linear Dodge (Add).
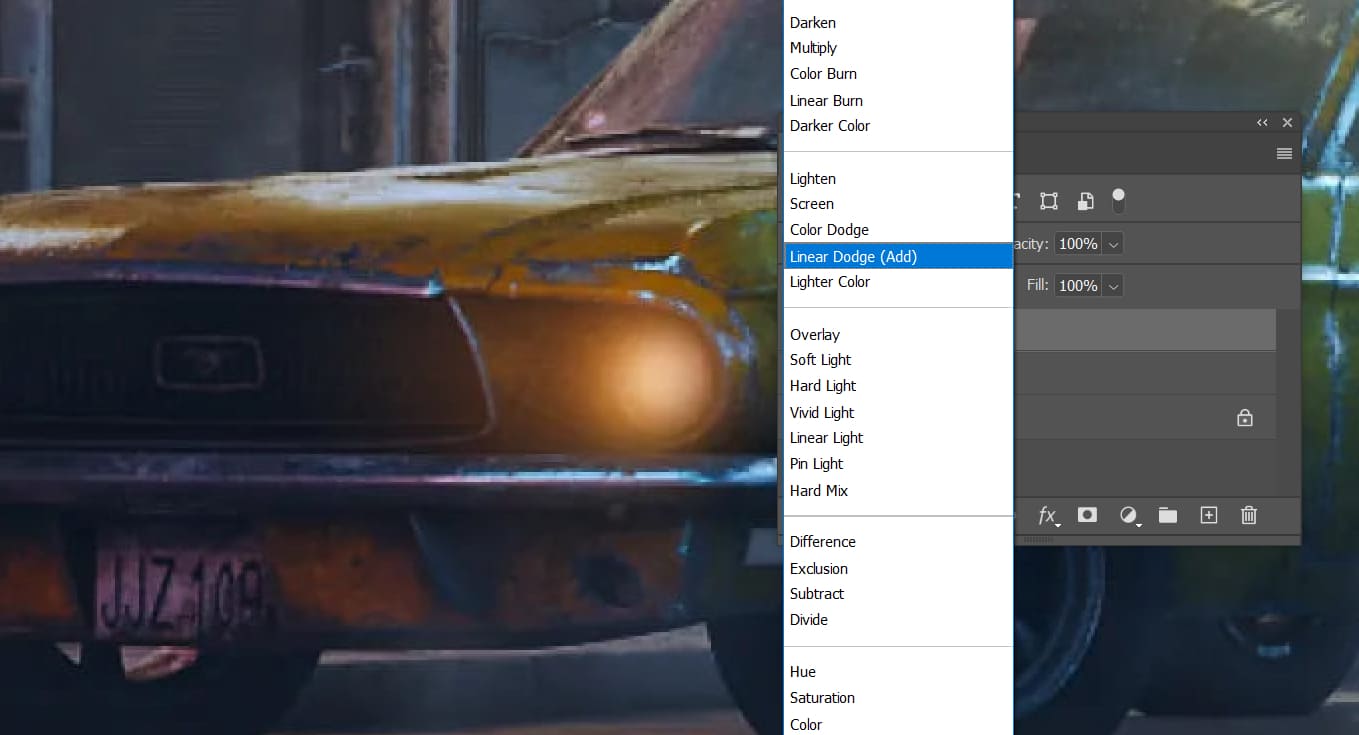
Slightly increase the saturation and build on top of the first lighting layer.
That solves the brightness problem. But what about the haze? Create one more new layer and set the blend mode to Color Dodge.
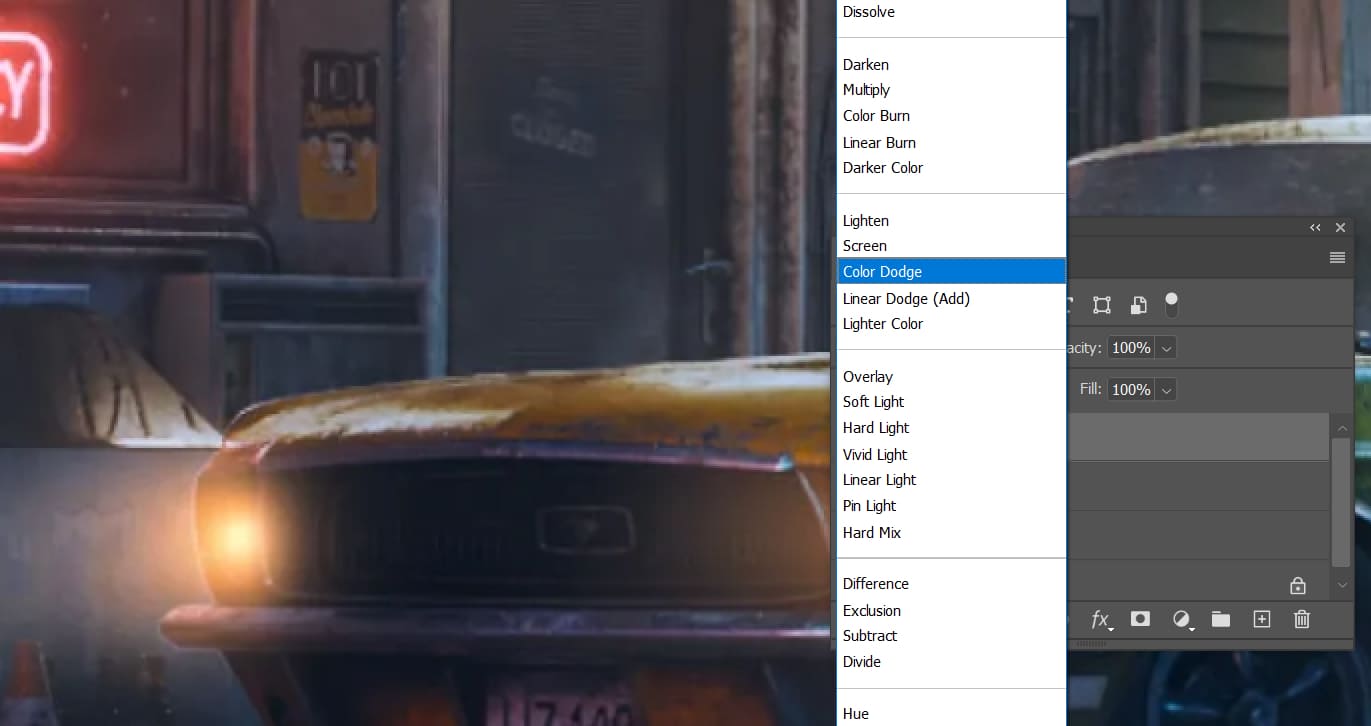
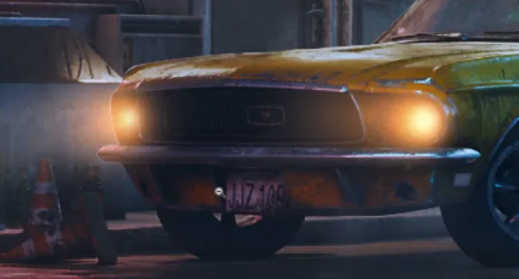
Lower the saturation a little and raise the brightness. Use a smaller brush to add fine strokes along the edges of the car outline.
With this setup, the details in the headlights will look much better.
After finishing the overall lighting, if you still want to adjust the color a bit, such as pushing it more toward orange, create another new layer and set the blend mode to Overlay.
Shift the hue toward red and increase the saturation.
Use a large brush to paint over the light source and strengthen the overall color feel of the light.
At this point, the main lighting is basically done. But if you want even more detail and realism, there is one more advanced step.
When we walk outside at night and turn on a phone flashlight, we can usually see dust and mist in the air very clearly.
First, under the Linear Dodge (Add) layer mode, use a smoke or cloud brush to paint in the mist around the light beam.
After the mist is in place, create another Screen layer. Use a smaller brush and add some dust into the haze.
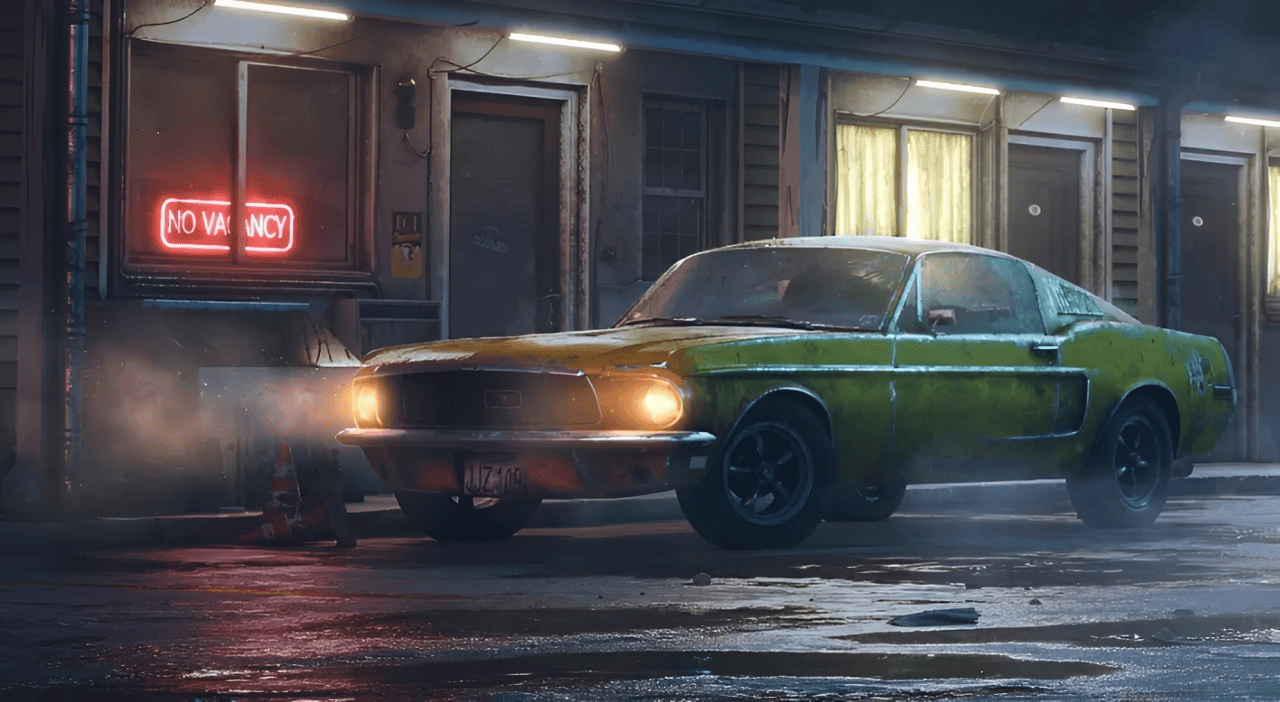
These tiny details may not stand out unless you zoom in, but that is exactly how small differences build up and make the artwork feel more real and more polished.
So is the light finished now? Not yet. If the ground is slightly wet, the light will also reflect on it more clearly.
Just like with the car light, we only need to add a touch of color to the ground area.
And that is it. Compared with the neon light next to it, it blends in naturally, right?
Conclusion
In this tutorial, we covered the different types of light and showed, through a simple project, how to paint a realistic light in digital art. If you want to learn more about painting light, you can also check out Color and Light by James Gurney. It includes many more tips on how to paint light and shadow.
In this lighting drawing demo, we had to create new layers often, switch brushes, change brush size, and rotate the canvas. In larger projects, these repeated steps can take up a lot of time and break your creative flow.

If you have a TourBox, you can simplify these tedious but necessary actions with physical dials and buttons, much like using a game controller. This makes your workflow smoother and more efficient.

If you are interested in TourBox, visit our Digital Painting page to learn more.