How to Draw Old People in Digital Painting?
In this post, we'll share some simple tips for drawing an old person. We'll use one example: turning an adult man into a dignified older man. No long intro — let's get started.

In this article, you will learn:
How to Draw Old People?
We'll focus on three main features of aged faces. We'll use a portrait of the well-known actor Peter Cushing as our example.
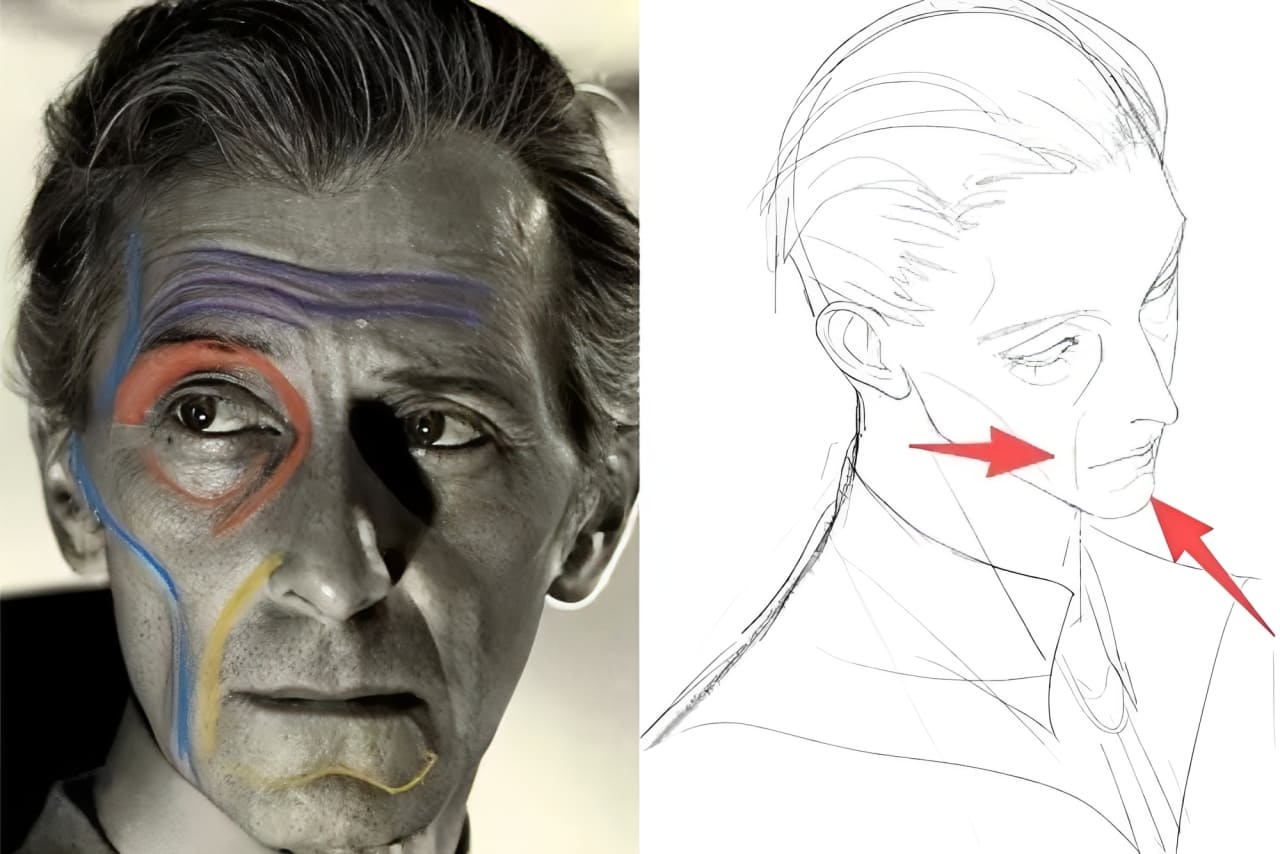
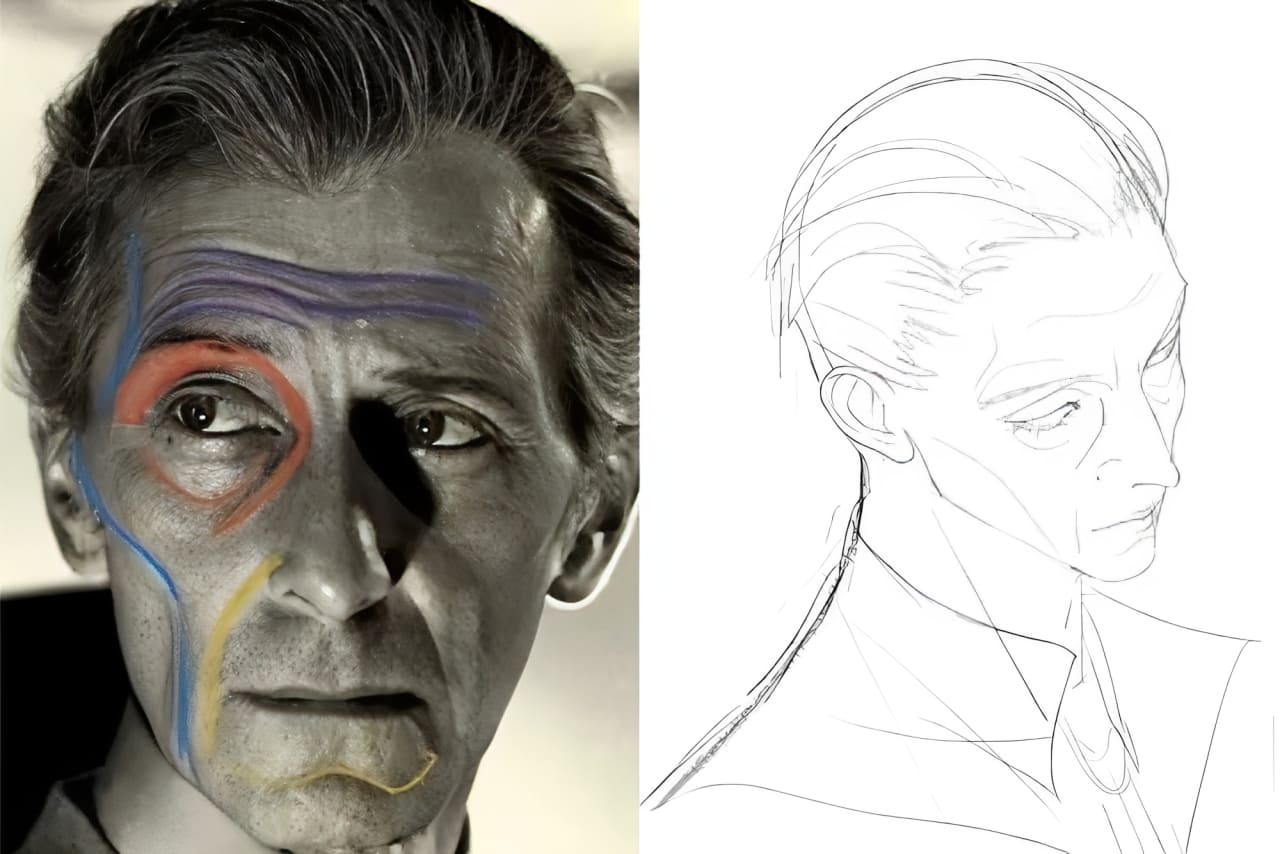
1. Face Shape
Start with the face shape. Look at the left reference in the image: the skin looks a bit "draped" over the bone. Cheekbones stick out, and the cheeks are sunken.
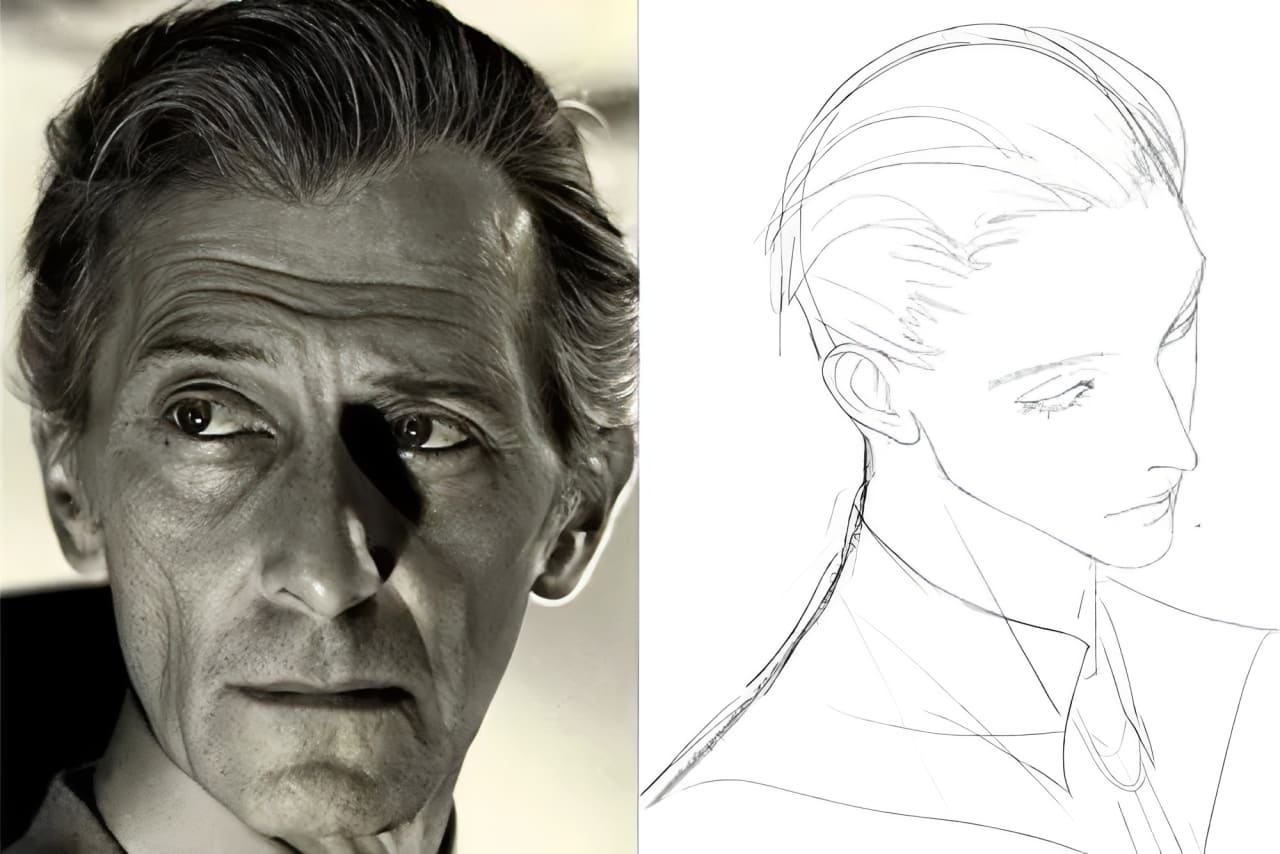
How to show that in your drawing: draw a light structural line from the top of the forehead, over the cheekbone, and down to the jaw. Keep it subtle — just enough to suggest the bone under the skin.
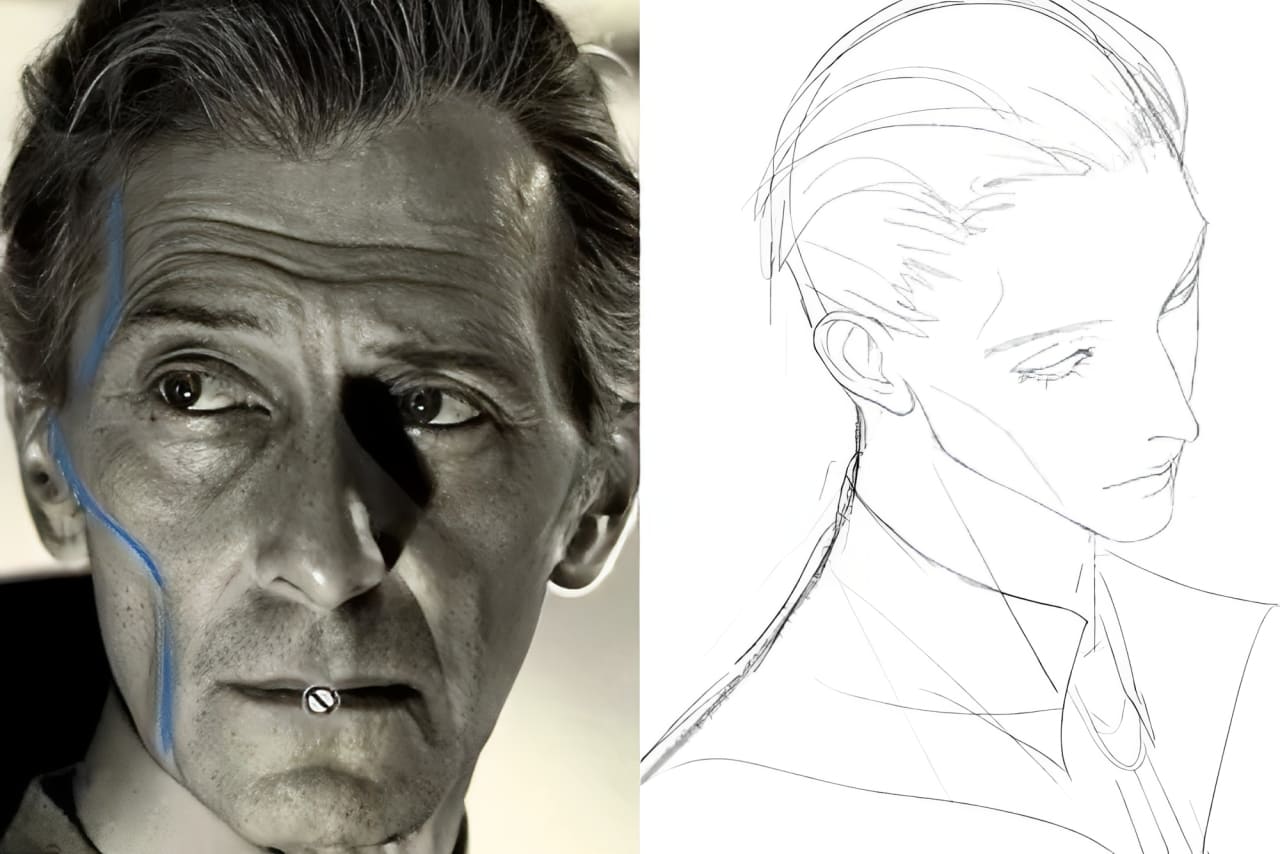
2. Eye Area
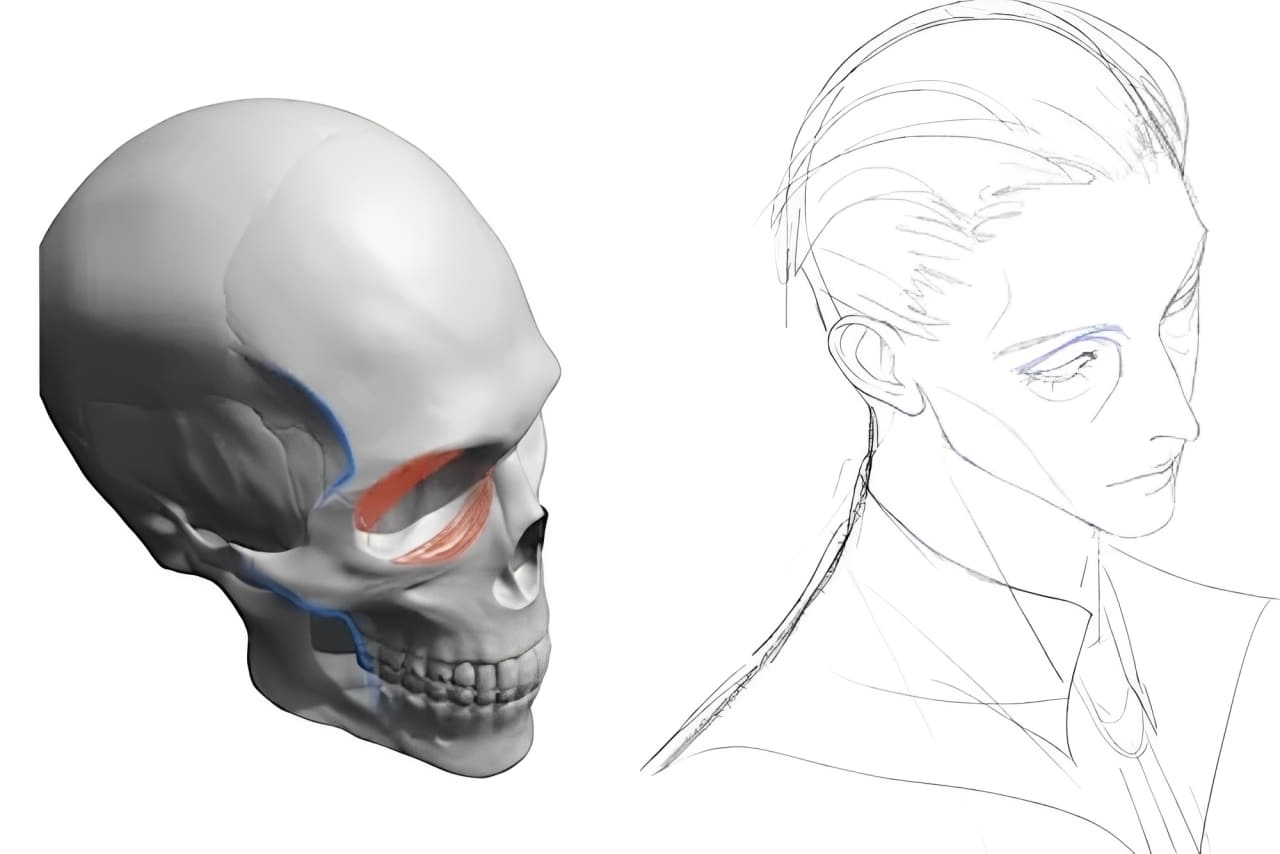
The bone structure around the eye is very important. Draw a structural line that shows the eye socket and the position of the eyeball.
If you study photos of older people, you'll see this structure very clearly. Adding that structure to your character makes the eyes look deeper set and more hollow.
You can also bring out the eye bags a little. To make the whole area look more aged, emphasize the brow ridge (the area above the eye). Simple crossing lines can show how skin sits over bone.
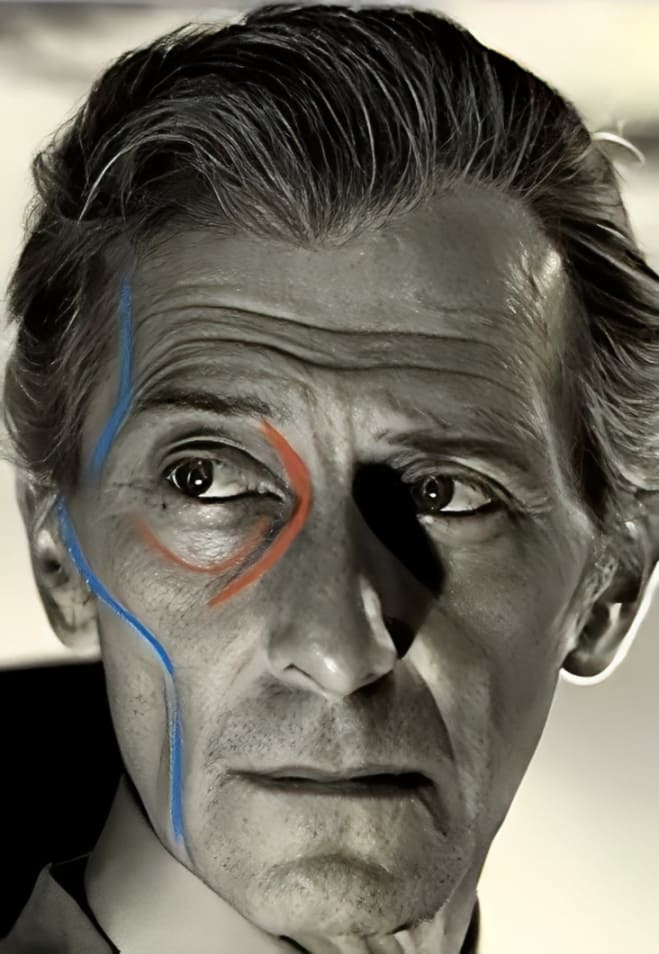
3. Mouth Area (Lips and Surrounding Muscles)
Around the mouth, show nasolabial folds (smile lines) and a little of the orbicularis oris (the circular muscle around the mouth).
You can also add a few forehead lines too, like faint horizontal creases.
4. Summary
Compare before and after. With just a few careful strokes, you can change a young male face into an older one. A simple line sketch that combines the skull structure and main wrinkle lines will already read as older.
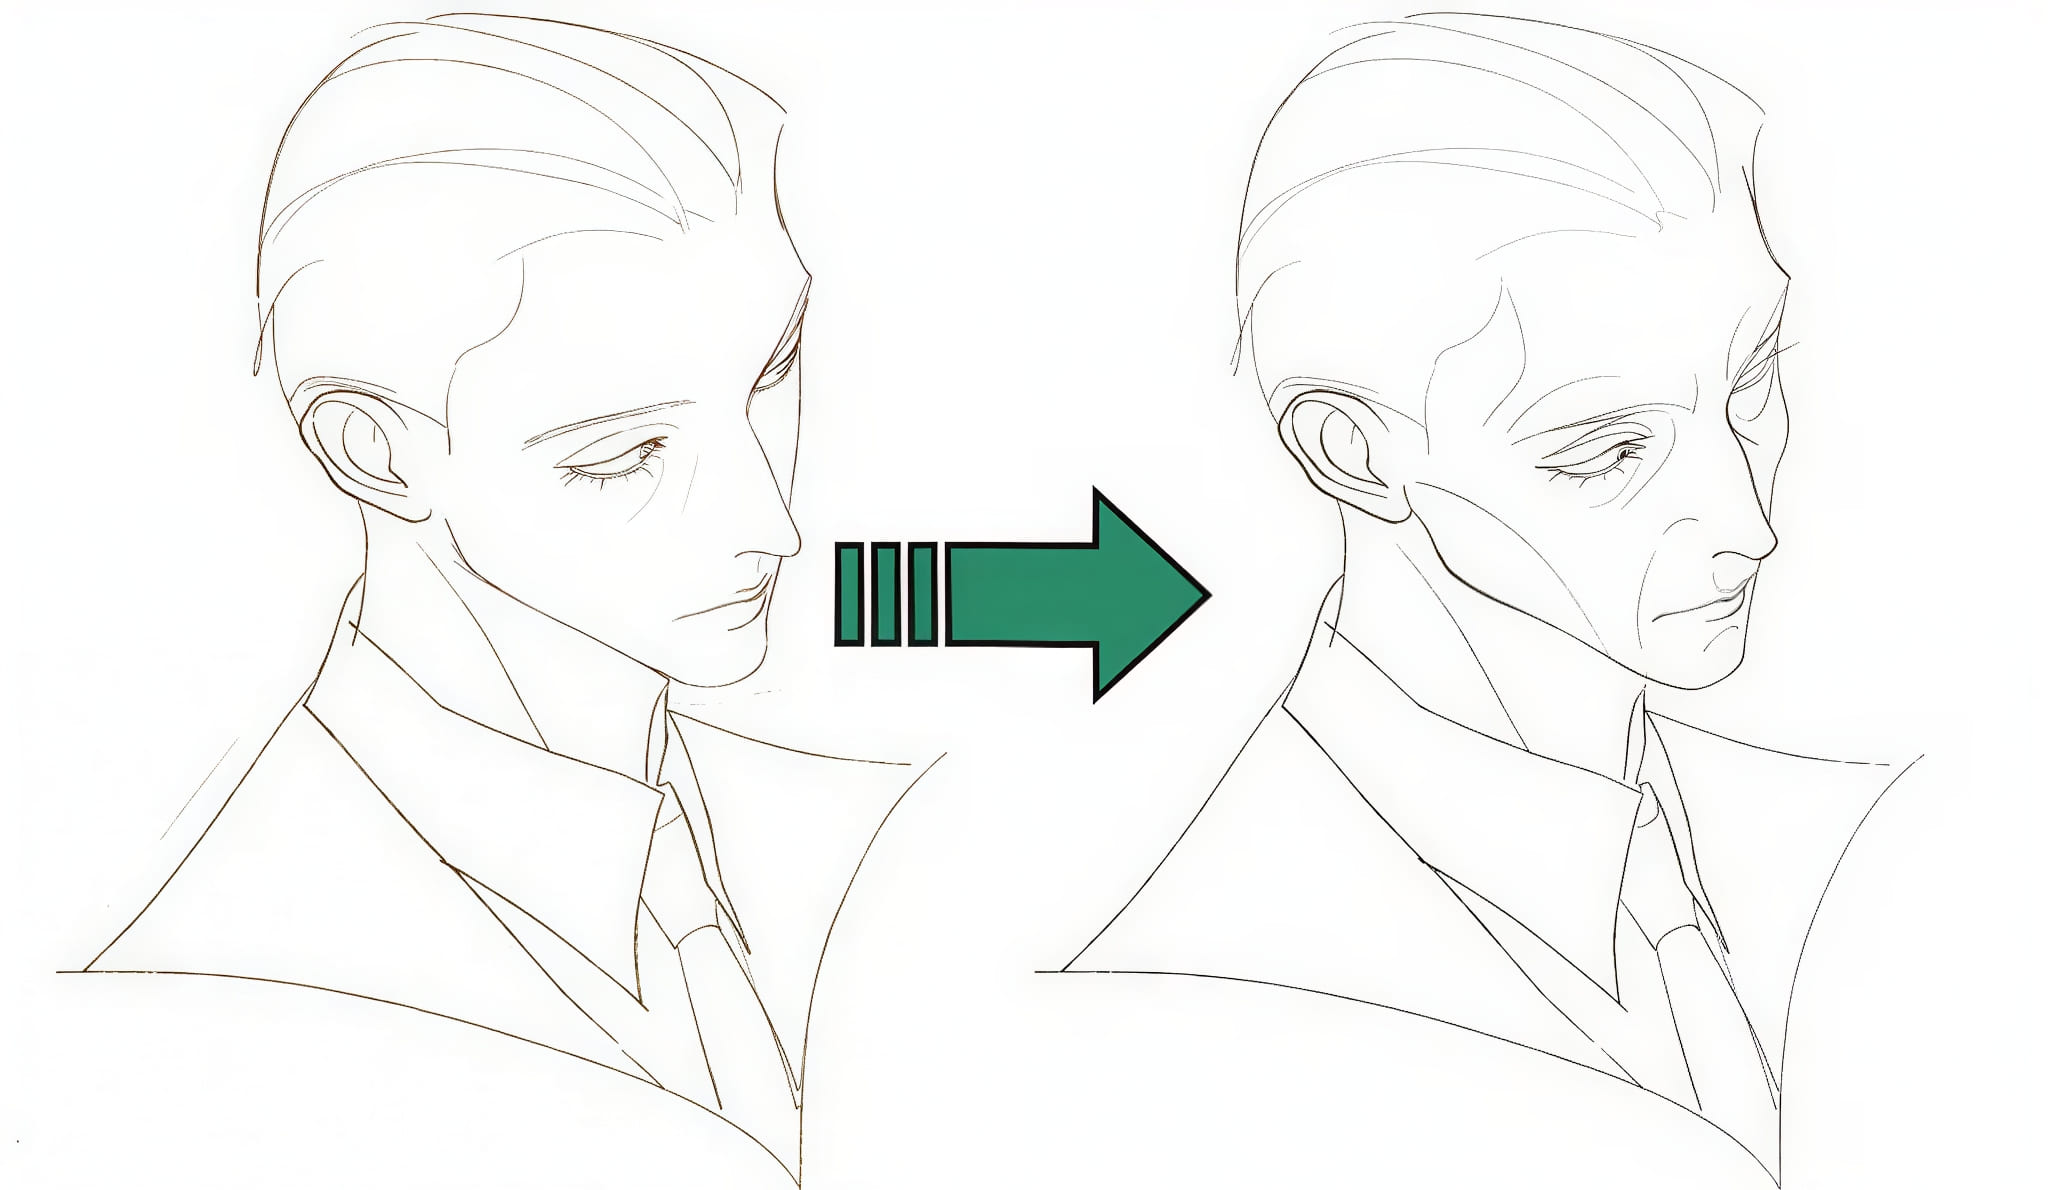
Key features to remember:
- Face shape: narrower, bone structure visible, sunken cheeks, pronounced cheekbones.
- Eye area: deep-set, obvious eye bags.
- Mouth area: thinner lips, possible downward corners, visible orbicularis oris (can be emphasized on male faces).
- Wrinkles: around the eyes, nasolabial folds, and forehead lines.
How to Color It?
Before you start painting, grab a photo or model of your character from the same angle. Use it to study the light and shadow.
Once you've blocked in the base skin color on the line art, add an Overlay layer to paint the face's temperature zones.
- Paint the chin with a blue-green (teal/cyan). For men, push this a bit stronger — facial stubble often reads in that cool, slightly greenish tone.
- Paint the mid-face (cheeks and nose area) with warm red tones.
- Paint the upper face (forehead) with warm yellow.
Around the eyes, especially on the eye bags, add subtle purple or blue. Older skin is thin, so veins and cooler tones can show through.

Next, create a Multiply layer to deepen shadows and sculpt the planes of the face. Use smudging or soft brushing to blend those colors and build the sense of hollows and form.
In our example, we used red tones for two reasons: the character’s overall skin should feel warmer, and the shadow areas on his face were a bit too cool. The warm reds help neutralize that coolness and bring the face together.

Practical tips:
- Work with low-opacity brushes and build color slowly.
- Keep temperature changes subtle — small shifts read better than big patches.
- Use separate layers for temperature, shadow (Multiply), and final details so you can tweak them independently.
Next, keep using color to show the face's structure. If the image looks a bit gray or muddy, push some stronger colors. Lower your brush brightness/value and paint over the areas that need more punch. That will help correct the overall tone.
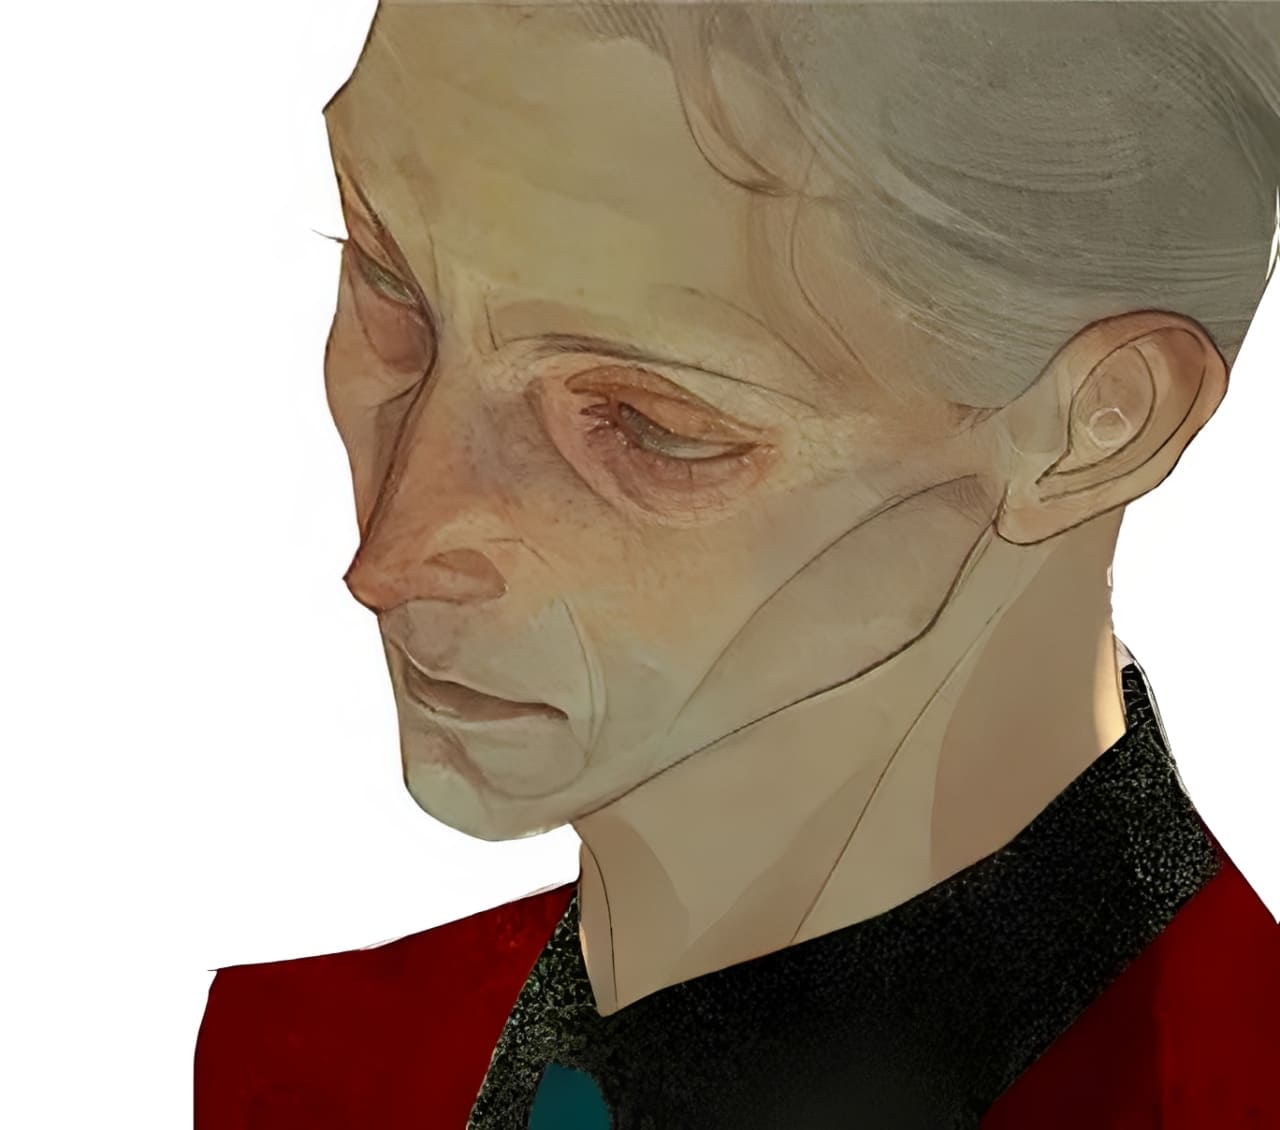
Finally, if you want a bounce light coming from below, add a layer set to Overlay and paint a soft, subtle light under the chin and on the lower planes of the face. That will lift the shadows and make the lighting feel more three-dimensional.
Now let's look at the final result.
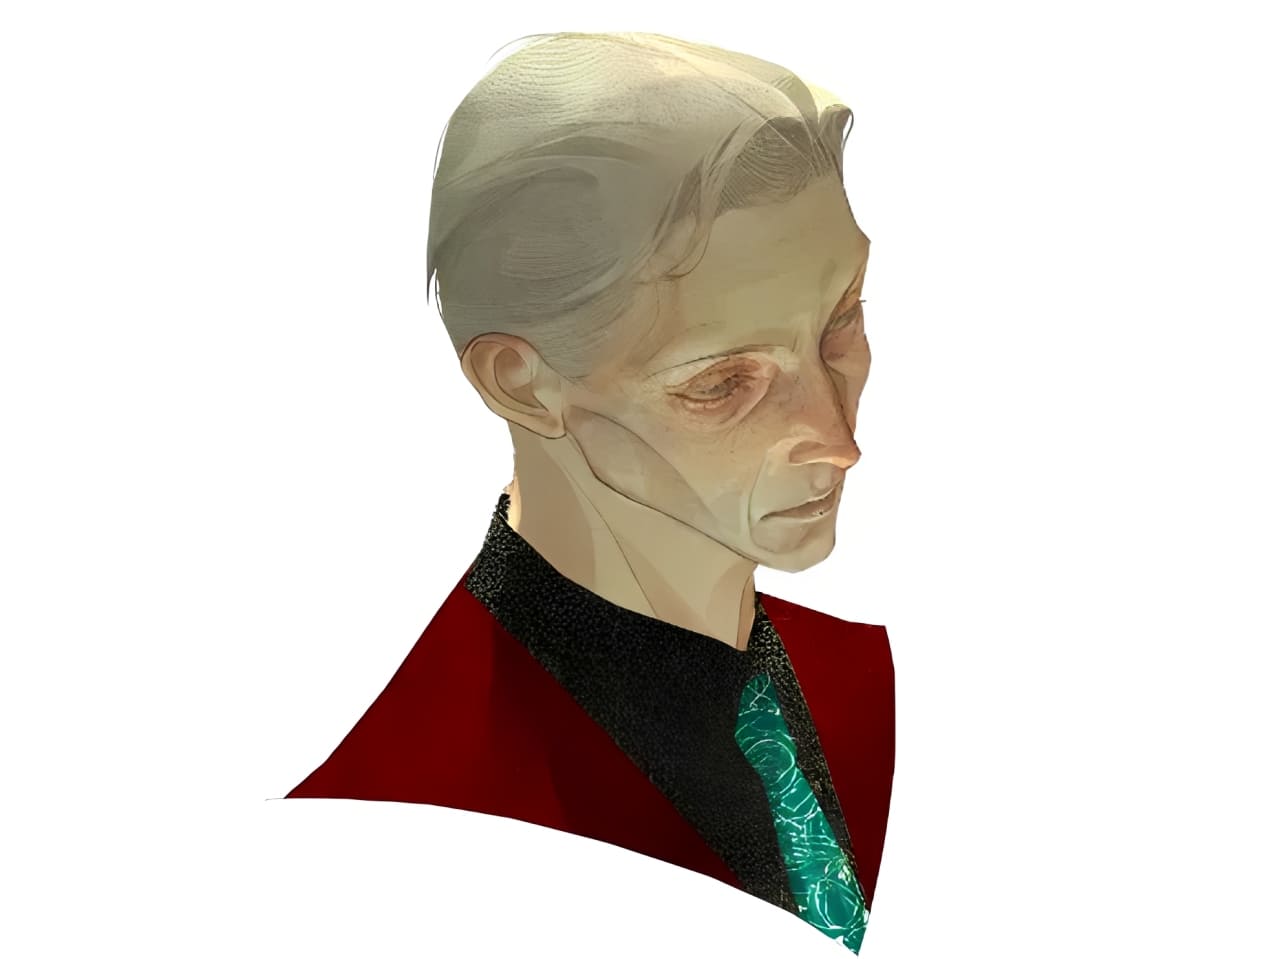
Conclusion
In this article, we shared tips for drawing older people in digital painting. We covered two main steps: linework and coloring. Try these techniques in your own work and see how they help.
We'd also like to recommend a controller that can greatly speed up and smooth your digital art workflow: TourBox. Digital painting is different from traditional painting because you often have to stop and do things like switch layers, change brushes, or rotate the canvas. Who doesn't want a smooth, uninterrupted flow while creating?

With a TourBox, you can map those shortcuts to physical buttons and knobs. It feels a bit like using a game controller — you get more control and less fumbling with menus.

If you create on both a desktop and a tablet, our Elite Plus model is a great fit. Please visit our Digital Painting page to learn more.