The Ultimate Guide to Exporting Videos in DaVinci Resolve
There are two methods for exporting videos in DaVinci Resolve:
- Quick Export: This is suitable for users who want to quickly publish their videos to platforms like YouTube, Vimeo, or Twitter, or for those who simply need a standard H.264 video file.
- Custom Export: This is for users who want more control over video formats, codecs, resolution, frame rate, quality, and other parameters.
In this tutorial, we will walk you through both methods of exporting videos from DaVinci Resolve. So, let's get started!

In this article, you will learn:
- Method 1: Quick Export Video in DaVinci Resolve
- Method 2: Export Video in DaVinci Resolve Deliver Page
- Frequently Asked Questions About Exporting Video in DaVinci Resolve
Method 1: Quick Export Video in DaVinci Resolve
Quick Export is the simplest method for exporting videos in DaVinci Resolve, requiring just a few steps to complete.
In the top-left menu bar of the DaVinci Resolve screen, click on the "File" option and select "Quick Export."
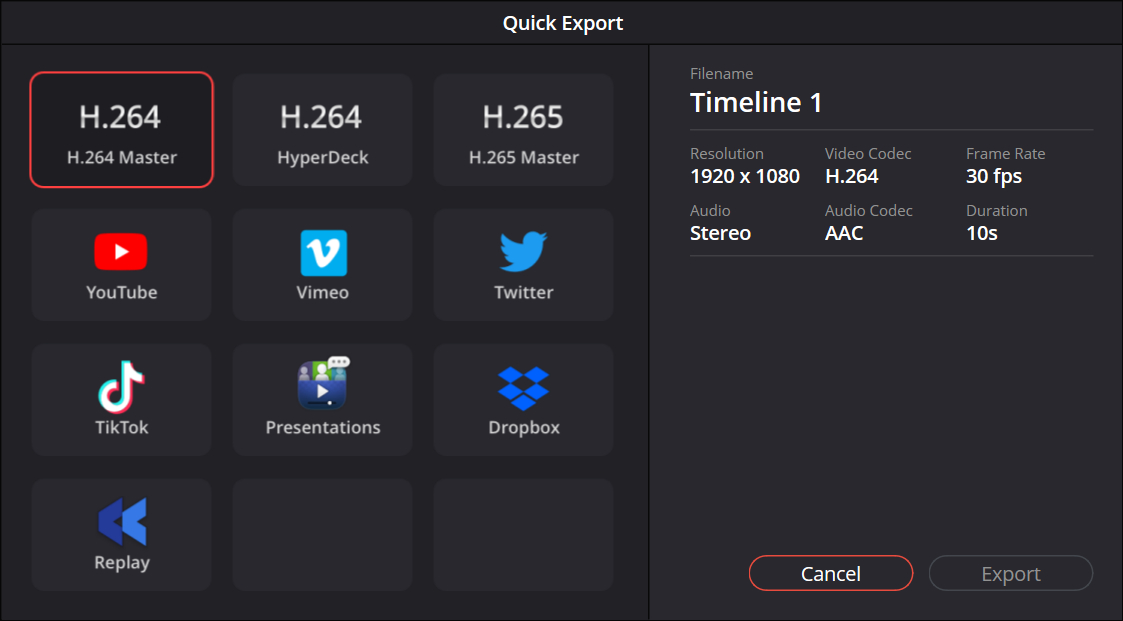
In the Quick Export settings window, choose the format in which you want to export your video. The default options for quick export video codecs include H.264 Master, H.264 HyperDeck, and H.265 Master.
We have a detailed explanation of the differences between H.264 and H.265 video codecs in this article if you're interested: "H.264 vs H.265: What's the Difference?"
Extra Tip:
H.264 HyperDeck is an export option optimized for HyperDeck Studio devices. It limits the bitrate to 100 Mbps to ensure compatibility with the device. If you want to export a video file suitable for HyperDeck Studio, you can choose H.264 HyperDeck.
Additionally, you'll see icons for YouTube, Vimeo, and Twitter. These options come with settings optimized for each platform. If you want to specifically publish to a particular platform, select the corresponding option.
If you want a video format suitable for online playback but are unsure where to publish or don't know the difference between H.264 and H.265, simply choose H.264 Master as the default option.
Click the Export button, select the location where you want to save the exported file and click "Save." Now, your video will be saved to the chosen location after rendering completes.
Extra Tip:
Apart from the quick export option in the menu bar, you can also directly click the Quick Export button at the top right corner of the Cut Page and Edit Page for video export.
Method 2: Export Video in DaVinci Resolve Deliver Page
DaVinci Resolve has a dedicated page for exporting projects called the "Deliver" page. To access this page, simply click on the rocket icon at the bottom of the DaVinci Resolve interface. This icon is usually the last one in a row of buttons.
The Deliver page is divided into four main sections:
- Render Settings: This is where you configure all the export settings that determine the final outcome of your video.
- Timeline: On the Deliver page, you can only view your project and cannot make any edits like you can on the Edit page. You can see the playhead (time marker) moving along the timeline, indicating the section that is currently being encoded. So, if you encounter any issues, you'll know which segment is causing the problem.
- Timeline Viewer: Similar to the timeline viewer on other pages, this section provides real-time playback of the section currently being rendered/encoded. However, it doesn't have any editing capabilities.
- Render Queue: This is where your project appears before the encoding process begins. You can make some adjustments here. It's called a queue because you can render multiple versions of your project simultaneously.
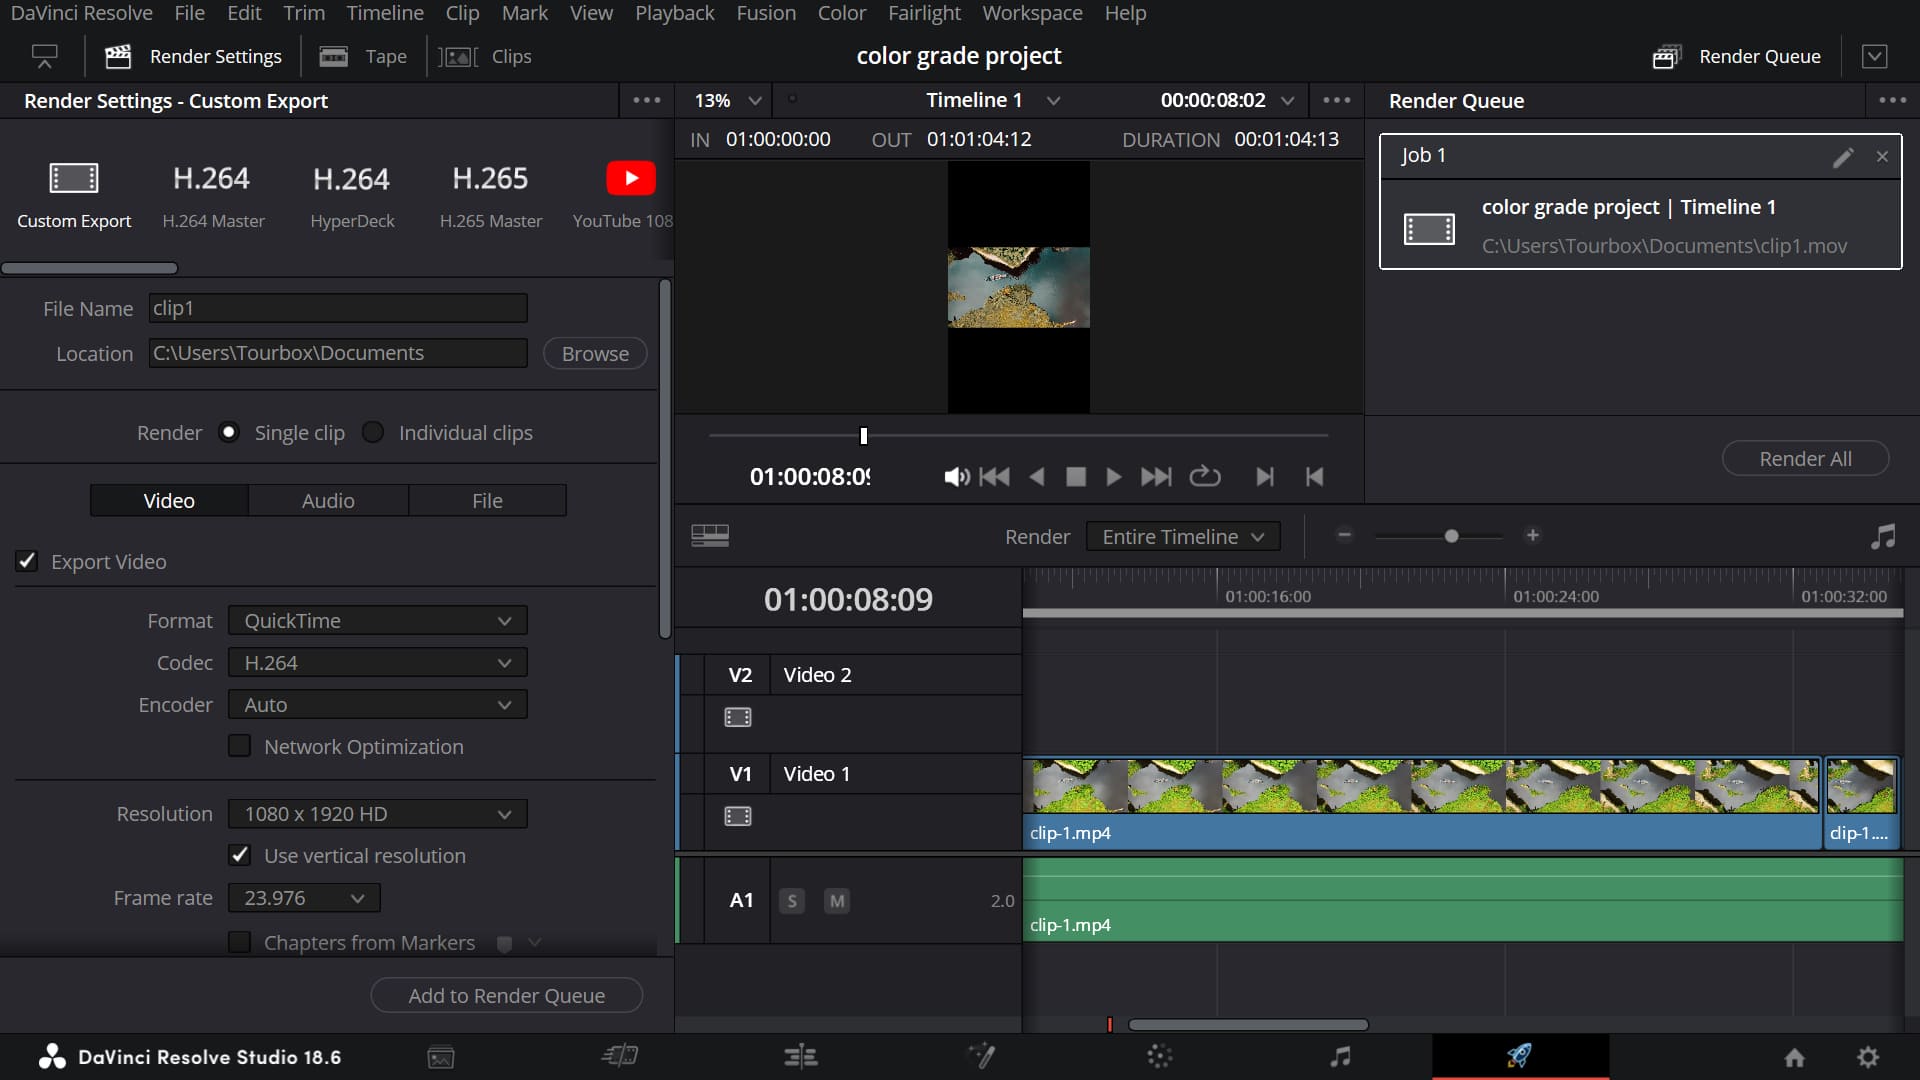
On the left side of the Deliver page, you'll find the "Render Settings" panel for exporting videos.
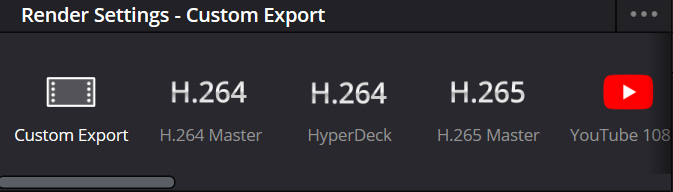
At the top of the Render Settings panel, you'll see icons similar to those in Quick Export. Essentially, DaVinci Resolve provides export presets to quickly export videos.
If you want to use custom export settings, select the "Custom Export" option, give your video file a "File Name," and set the export location.
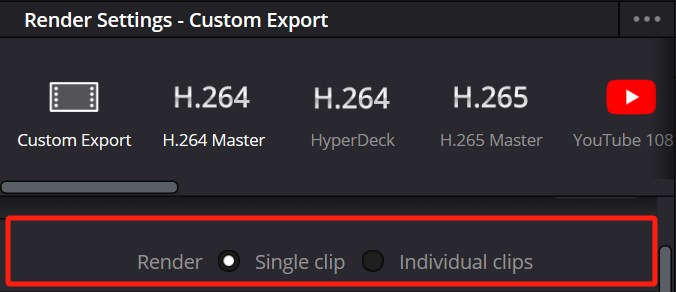
When you select Custom Export and enter the Custom Export settings panel, the first thing you'll see is the Render settings. Here, you can choose between Single Clip and Individual Clips to control whether your output file is a single video file or multiple video files for each clip on the timeline.
If you choose Single Clip, your output file will be a complete video that includes all the clips and transitions on your timeline. This option is suitable for exporting the final product or uploading it to social media platforms.
If you choose Individual Clips, your output files will be multiple video files, with each file corresponding to a clip on your timeline. This option is useful when you need to further edit or process individual clips or when you want to export them to other software.
If you don't have any specific requirements, it's usually best to default to Single Clip and export a complete video file.
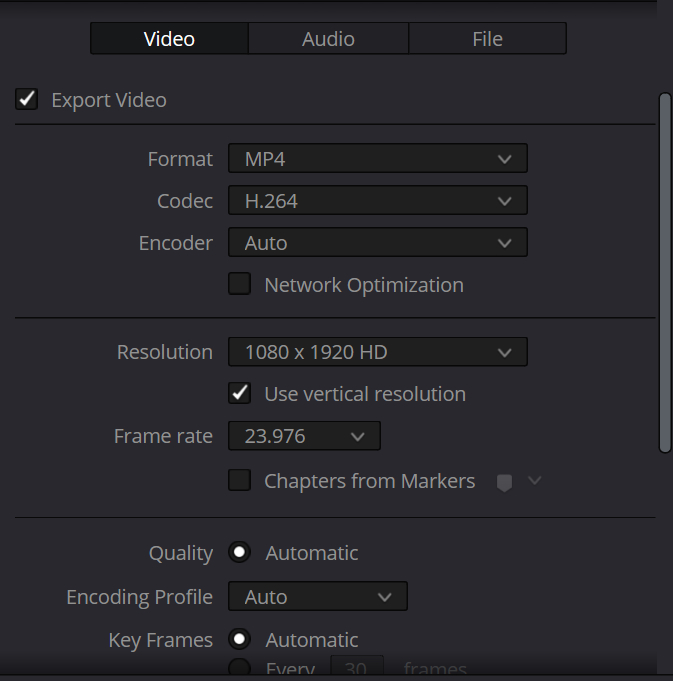
Then, you will see three tabs: Video, Audio, and File.
Here are some important parameters in the Video tab:
- Format: This refers to the container or file format in which your video will be exported. Options include MP4, QuickTime, MXF, and more.
- Codec: This setting determines how your video is compressed. Some options, like H.264, are suitable for general purposes, while others, like Apple ProRes or DNxHD/DNxHR, provide higher quality but larger file sizes.
- Resolution: Select the size of your video.
In general, selecting the MP4 format, H.264 codec, and a default resolution should suffice. You can also adjust other settings like frame rate, quality, keyframe interval, and more based on your needs.
Extra Tip:
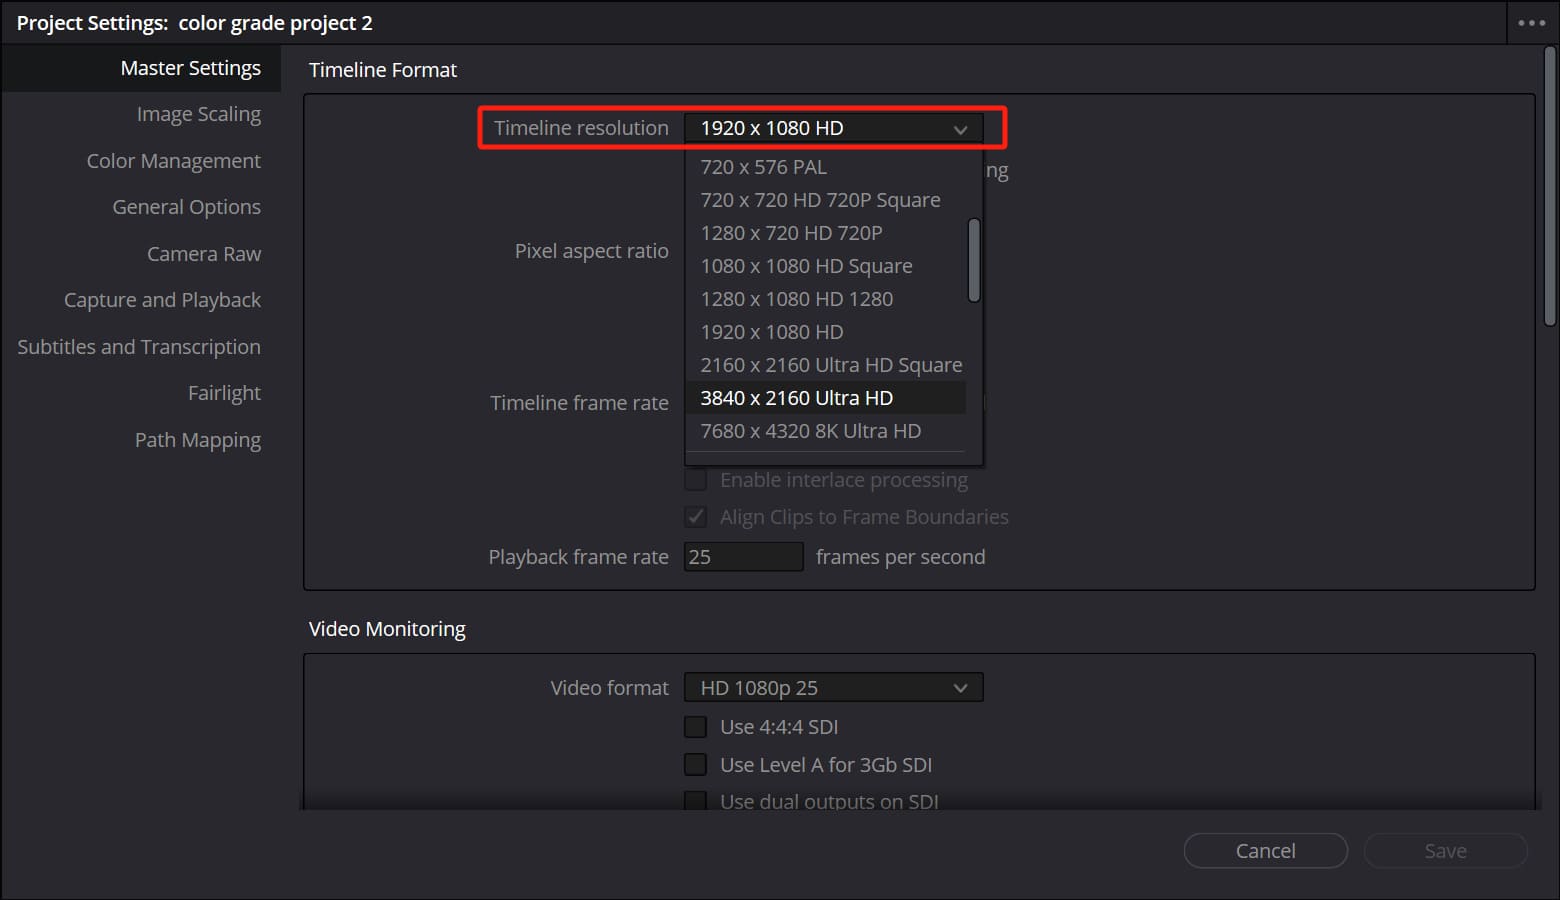
Usually, the project resolution in the render settings matches the resolution of your project. However, if your project is set to 1080p (1920 x 1080) resolution and you want to export in 4K (3840 x 2160) resolution, it is important to first change the Timeline Resolution in the Project Settings to 4K.
Otherwise, if you export a 4K project with a timeline resolution of 1080p, the quality will be significantly lower because it will be using the 1080p samples instead of true 4K samples.
Next are the Audio and File tabs:
- The Audio tab is used to set the audio format, codec, sample rate, and other parameters for the exported video's audio.
- The File tab is used to set the file name, location, and other parameters for the exported video.
If you don't have any specific requirements, it's generally fine to keep the default settings.
Now that you have set all the export parameters, you can click on "Add to Render Queue" and then click on "Render All" in the Render Queue panel to start exporting your video.
Frequently Asked Questions About Exporting Video in DaVinci Resolve
Question: Why Are Subtitles Not Appearing in the Exported Video?
You need to make sure to enable the "Export Subtitles" option in the Video tab at the bottom of the Render Settings panel on the Deliver page. Then, choose the "Burn into video" option under the Format Settings.
Question: Why Do Exported Videos From DaVinci Resolve Have Jagged Edges?
This issue may be related to the sampling. You can go to the Advanced Settings in the Video tab of the Render Settings panel on the Deliver page and check the "Force sizing to highest quality" option under Data burn-in.
Question: Why Do the Colors in the Exported Video Differ From What You See in DaVinci Resolve?
This issue is more common on Mac computers and involves DaVinci Resolve's color settings.
If you are a Mac user, you need to click on the DaVinci Resolve Preferences in the menu bar and check the "Use Mac display color profile for viewers" option.
Regardless of whether you are a Mac or Windows user, you need to go to the Color Management section in the Project Settings panel and select "Rec.709-A" as the Timeline color space. Then, make sure that the Color Space Tag and Gamma Tag in the Advanced Settings of the Render Settings panel match the project settings.
These settings are generally applicable for sharing videos on various internet platforms.
Question: How to Export Davinci Resolve As Mp4?
- After editing your video, click on the Deliver button at the bottom of DaVinci Resolve to enter the Deliver page.
- In the Render Settings tab, choose "Custom Export" for the export options, and then select MP4 from the Format dropdown menu.
- Click on Add to Render Queue, and then in the Render Queue panel, click on Render All to start exporting your video. Wait for the export process to complete.
Product Recommendation:
As we wrap up this tutorial on how to export videos from DaVinci Resolve, we want to introduce you to a tool that can take your editing experience to the next level: TourBox.

TourBox is a game-changing device designed specifically for creative professionals like you. With its intuitive controls and customizable buttons, TourBox allows you to streamline your editing process and increase your efficiency.

By integrating TourBox into your DaVinci Resolve workflow, you can easily adjust settings, navigate timelines, and perform various editing tasks with just a few clicks and twists. Its ergonomic design ensures comfort during long editing sessions, while its seamless integration with DaVinci Resolve offers a smooth and intuitive user experience.
TourBox also includes built-in features like HoverAdjust that give you the feel of a professional color-grading console. It's also a great value.
Incorporate TourBox into your DaVinci Resolve setup and experience a new level of control and efficiency in your video editing endeavors. It's time to elevate your creative process with TourBox.