How to Export Video from Premiere Pro?
Exporting videos is a crucial step when editing in Adobe Premiere Pro. While the process itself is pretty straightforward, the export settings you choose can directly impact the video's quality, file size, and whether it's ready for uploading to different platforms.
In this guide, we'll walk you through how to export videos in Premiere Pro and share some handy tips and things to watch out for.

In this article, you will learn:
- Why Are Export Settings So Important?
- How to Export a Video: Basic Steps
- What to Watch Out for When Exporting Videos?
- How to Quickly Export a Video in Premiere Pro?
- Verify Your Video After Export
- Conclusion
Why Are Export Settings So Important?
A great video isn't just about good editing — export quality matters just as much. The format, resolution, bitrate, and other settings you choose during export can directly affect how your video looks in the end.
For example, if you're uploading to YouTube, you'll need to pick a format that's compatible with the platform. On the other hand, if the video is for archiving, you'll want the highest quality settings to preserve every detail of the original footage.
That's why it's essential to understand what each export setting does and how it impacts your video before you hit that export button.
How to Export a Video: Basic Steps
Here are the basic steps to export a video in Adobe Premiere Pro:
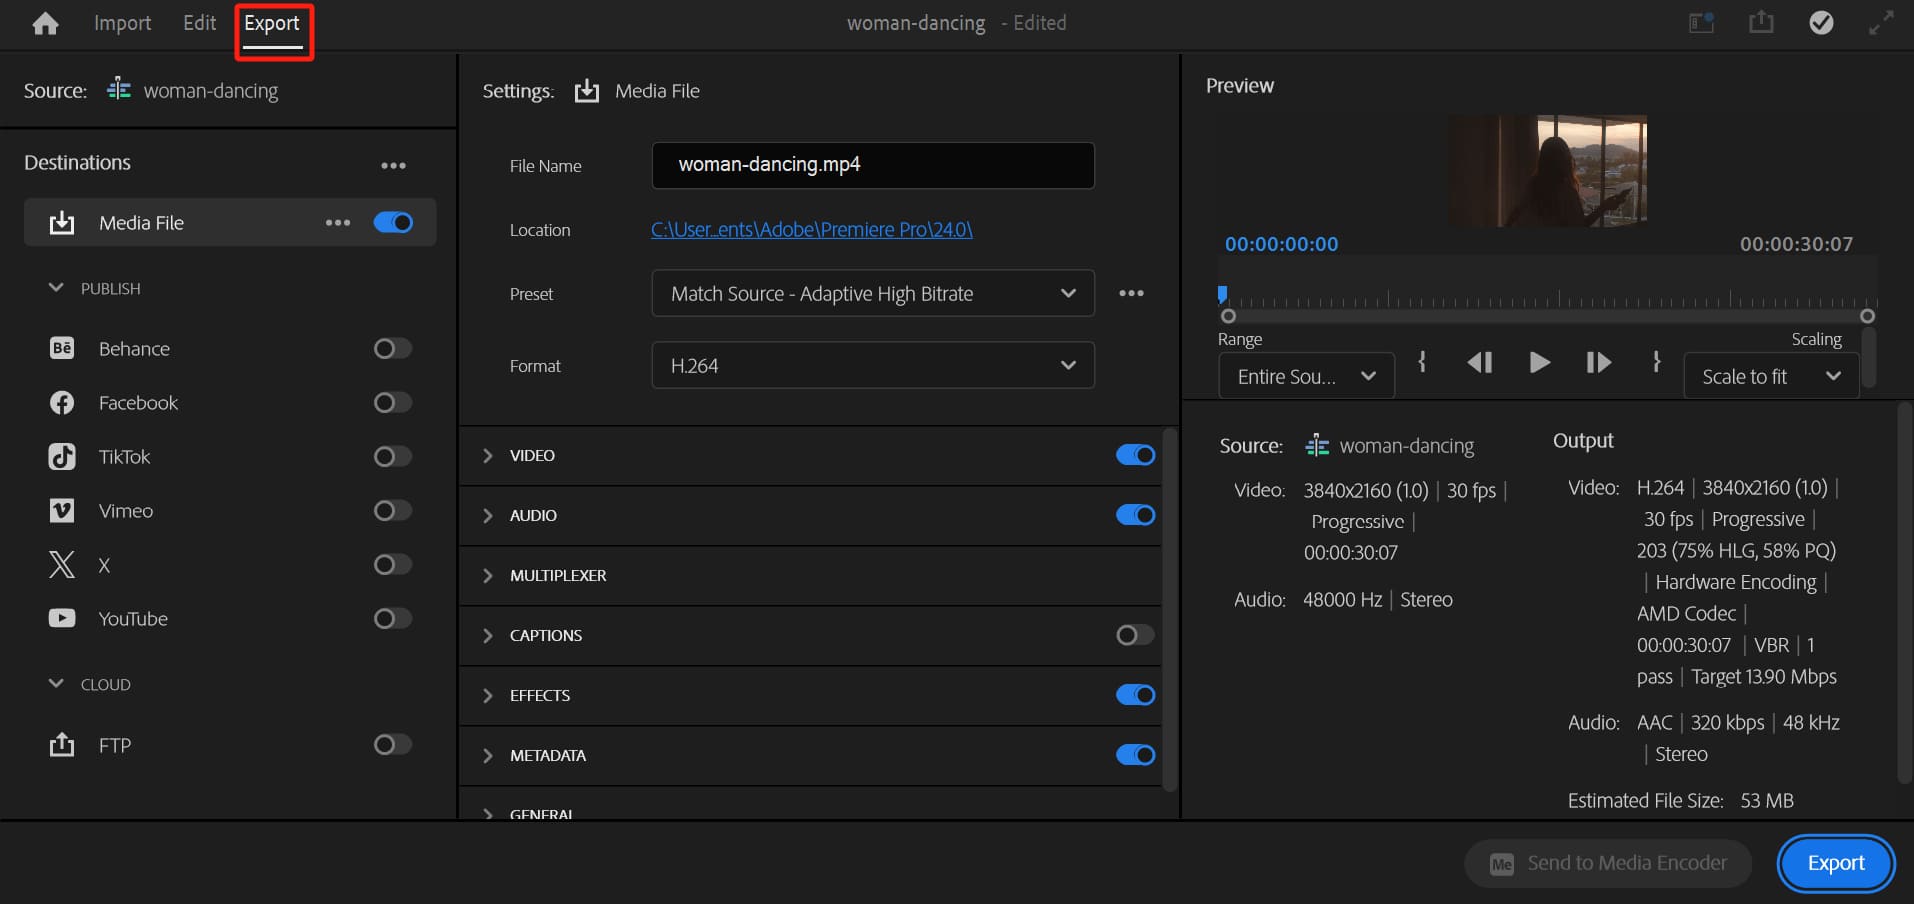
Step 1: Open the Export Window
After finishing all your edits and adjustments, go to the top menu and click File > Export > Media to open the Export panel.
You can also quickly access the Export panel by clicking the Export button in the top-left corner of the Premiere Pro interface.
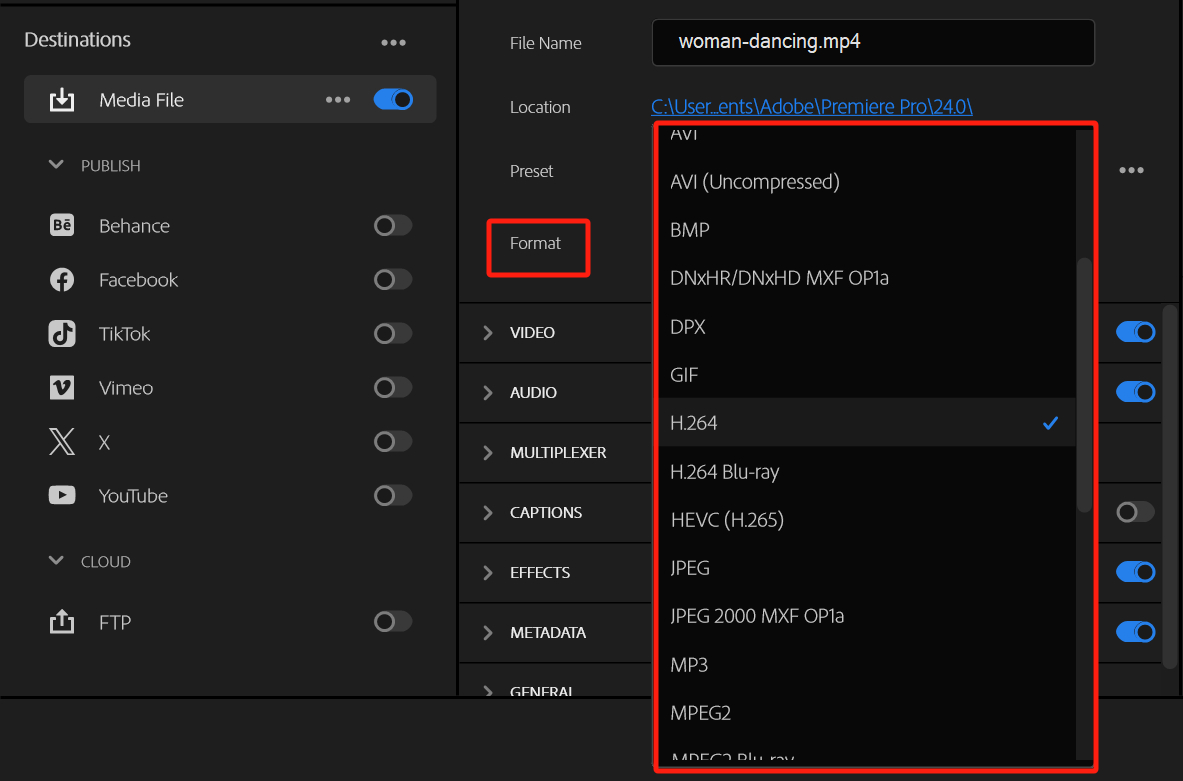
Step 2: Choose an Export Format
Premiere Pro offers several export formats to meet different needs. Always consider the recommended settings for your target platform. For example, YouTube suggests using the H.264 format with an MP4 container and a resolution of 1920x1080 or higher.
Here are some of the most common options and their uses:
H.264
- What it's for: This is the most popular format, perfect for most online platforms like YouTube and Vimeo. It delivers high-quality video in a smaller file size, making it great for sharing online.
- Best for: Uploading to social media, video-sharing sites, or sharing via email.
- Advantages: Small file size, excellent balance of quality and efficiency, compatible with almost all devices.
QuickTime
- What it's for: Ideal for high-quality videos that need further processing, such as adding visual effects or additional editing. It's widely used in Apple's ecosystem.
- Best for: Projects requiring post-production or as a master file for high-quality storage.
- Advantages: Supports lossless compression and delivers exceptional quality.
AVI
- What it's for: Suitable for broadcast-level projects or when lossless compression is needed. However, the file size can be quite large.
- Best for: Broadcast industry needs or projects requiring the highest quality output.
- Advantages: Extremely high quality with no compression loss.
HEVC (H.265)
- What it's for: A more efficient codec than H.264, it produces smaller files while maintaining the same quality, though it requires hardware support for decoding.
- Best for: High-end projects where storage space is limited but quality is critical.
- Advantages: High compression efficiency, supports 4K and higher resolutions.
Further Reading:
Other Formats
Premiere Pro also supports formats like MPEG2 and Windows Media, which are typically used for specific playback environments or platforms.
Step 3: Choose a Preset
In the export panel, you can use the Preset dropdown menu to pick a setting that suits your needs.

Presets are pre-configured options created by Adobe for common use cases, saving you the trouble of adjusting settings manually.
When you open the dropdown menu, you can also click More Presets to access the Preset Manager. This panel offers a wide range of presets to choose from.
For example:
- If you're uploading to YouTube, just type "YouTube" in the search bar and select YouTube 1080p Full HD. This preset is optimized for YouTube uploads, offering great quality with a manageable file size.
- Similarly, for Vimeo, type "Vimeo" in the search bar and choose Vimeo 1080p Full HD, which is tailored to Vimeo's platform requirements.
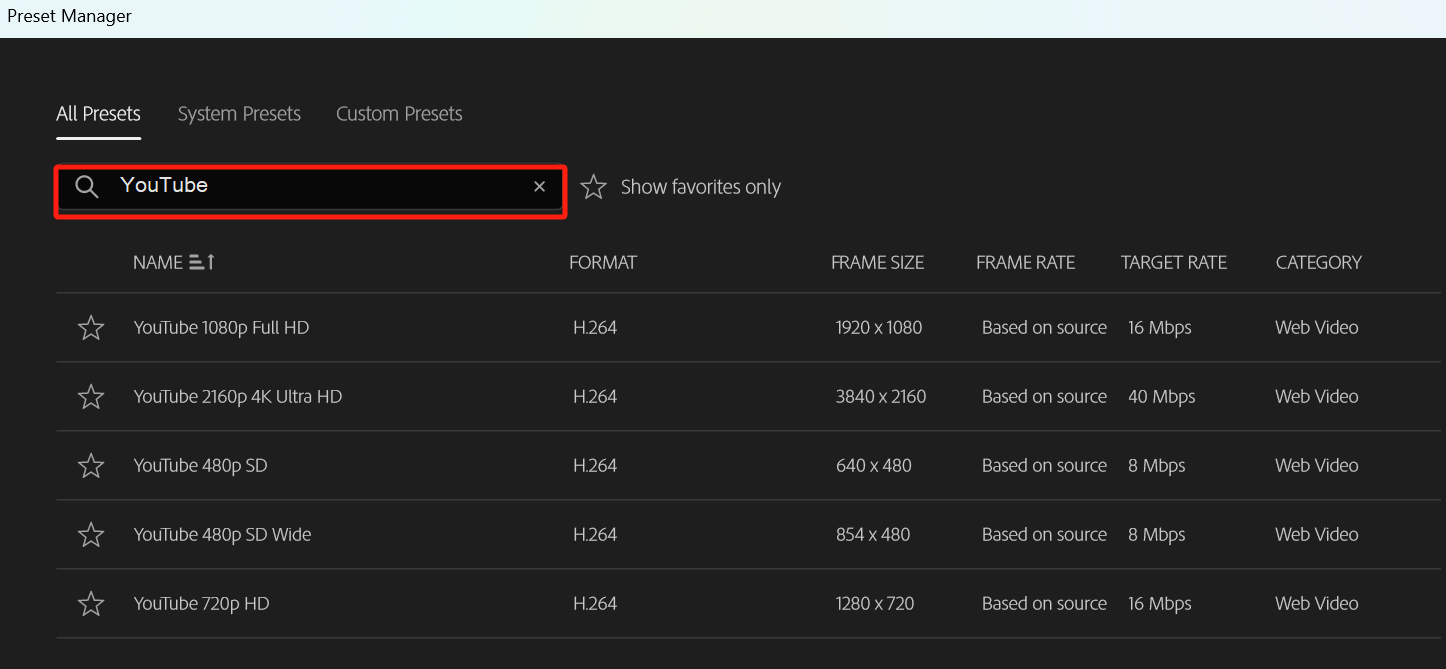
For beginners, using a preset that matches your goal is the easiest way to avoid issues caused by complex manual adjustments.
Step 4: Set the File Name and Save Location
In the export panel, click the File Name at the top of the settings section. Here, you can rename your file and choose where to save it.
It's a good idea to use a clear, recognizable file name and save it in an easily accessible folder.
Step 5: Check Video and Audio Export Options
Make sure the Export Video and Export Audio boxes are checked. If you only need a silent video or just the audio, you can uncheck the respective option.
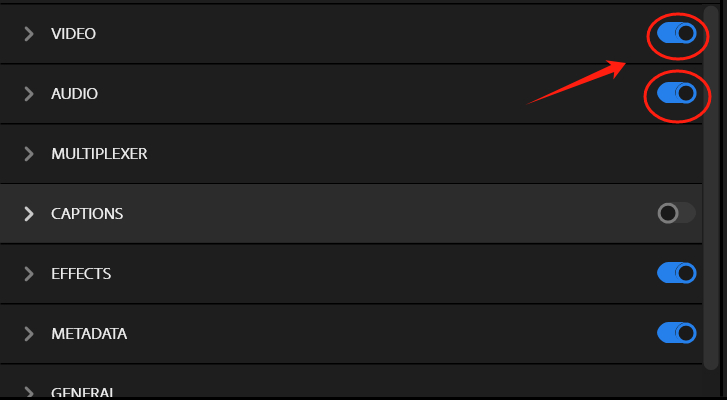
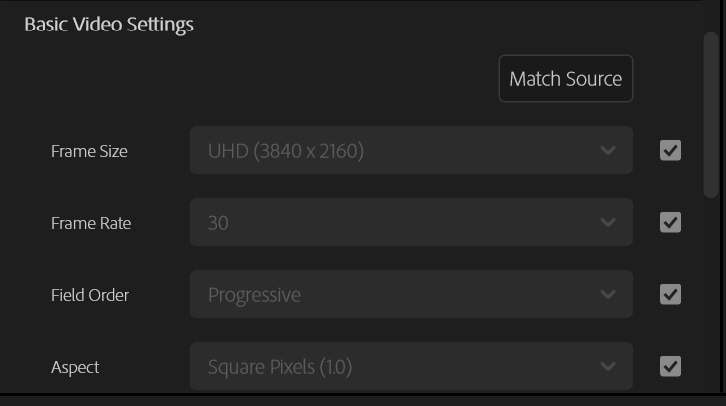
Step 6: Adjust Advanced Settings (Optional)
If you have specific requirements for bitrate, resolution, or frame rate, expand the Video or Audio tabs to customize these settings.
Step 7: Export or Queue
- Export Directly: Click the Export button to start the process immediately.
- Queue the Export: Click [Send to Media Encoder] button to send the task to Adobe Media Encoder, which is useful if you're exporting multiple files at once.
What to Watch Out for When Exporting Videos?
1. Platform Compatibility
Each platform may have different requirements for video format and specs. Before exporting, make sure the format you choose is compatible with your target platform. For example, YouTube recommends using the H.264 format with a resolution of 1920x1080 or higher.
2. Audio Settings
By default, an audio bitrate of 320 kbps works well for most needs. If audio quality is crucial, you can choose a higher bitrate, but keep in mind that this will increase the file size.
3. Final Check Before Exporting
Before hitting export, double-check your timeline to make sure all edits are complete. This helps avoid exporting clips with unfinished edits or mistakes.
4. Hardware Performance Affects Export Speed
Exporting is a resource-heavy process. If it feels slow, try closing unnecessary programs running in the background. For faster exports, consider upgrading your hardware, such as your graphics card or RAM.
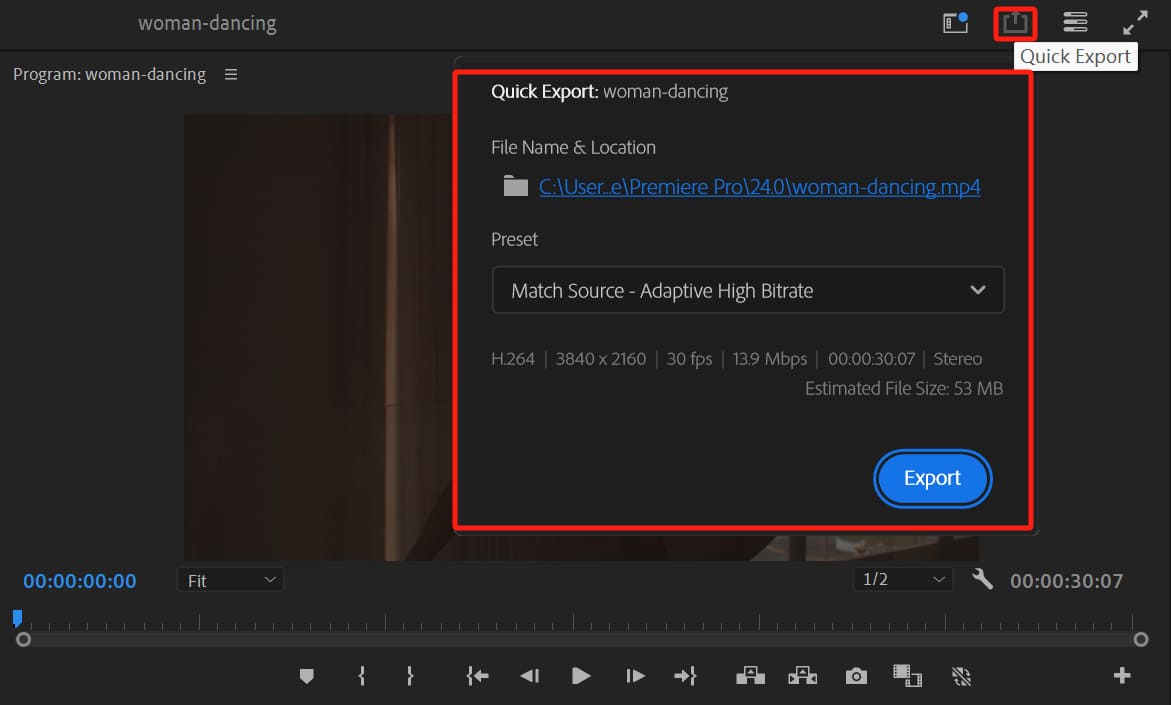
How to Quickly Export a Video in Premiere Pro?
Premiere Pro offers a quick export feature to save time. This feature is perfect for simple exports when you don't need to tweak advanced. Here's how you can use it:
- Click the Quick Export Button: In the top-right corner of the Premiere Pro interface, click the Quick Export button (a box with an arrow pointing outward).
- Choose a Preset: A panel will appear with several export presets, such as High-Quality 1080p or YouTube 1080p Full HD. Select the one that fits your needs.
- Set the File Name and Location: Click the file name in the panel to rename your video and choose where to save it.
- Export: Once everything is set, click Export to start the process.
Verify Your Video After Export
Once the export is complete, be sure to play the exported video file and check the following:
- Video Quality: Ensure the video is clear and free of compression artifacts or glitches.
- Audio: Confirm the audio is working properly and is in sync with the video.
- File Functionality: Test if the file uploads correctly to the target platform or plays smoothly on your device.
If you notice any issues, adjust the export settings as needed and export the video again.
Conclusion
Exporting a video might be the final step in your Premiere Pro workflow, but it's just as important as the editing process.
By selecting the right export format, preset, and advanced settings, you can ensure your video looks its best across different platforms. Paying attention to small details such as the save location and audio-video sync can also save time and help you avoid mistakes.
Using the right tools throughout your editing and exporting process can greatly improve your efficiency. For instance, TourBox, a compact and powerful creative console, can speed up tasks like editing, color grading, and timeline navigation.

With its customizable Knob, Scroll, and buttons, TourBox can replace complex keyboard shortcuts, making it a great fit for editors who frequently adjust settings.
Whether you're refining the details or setting up your export, TourBox makes your workflow smoother and more convenient.

We hope this article helps you navigate video exports in Premiere Pro. If you're curious about TourBox, check out our video editing page to learn how it can enhance your editing experience!