How to Flip a Video in Premiere Pro?
In video editing, flipping a video means turning the footage either horizontally (for a mirror effect) or vertically. Flipping can fix shooting mistakes, create mirror effects, or add special effects.
Next, we'll show you how to flip a video in Premiere Pro with clear, step-by-step instructions and useful tips for both beginners and advanced users.

In this article, you will learn:
- Method 1: Horizontal/Vertical Flip
- Method 2: Transform Effect
- Method 3: Mirror Effect
- FAQs & Troubleshooting
- Conclusion
Method 1: Horizontal/Vertical Flip
In Premiere Pro, you can easily add a horizontal or vertical flip to your clips to quickly create a mirror image.
This is a simple process. It works by reversing the order of pixels without changing the original file.
Here's how to do it:
1. Add the Flip Effect
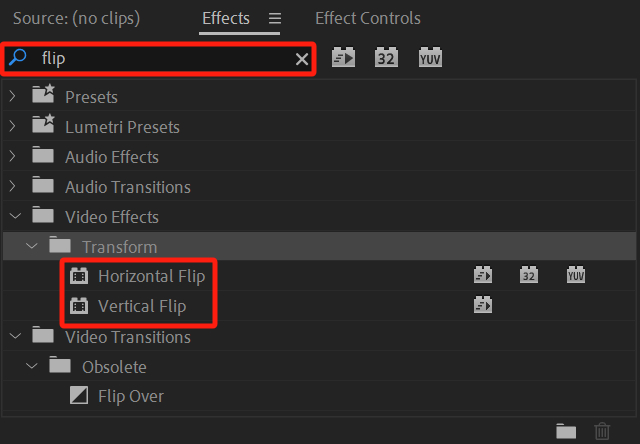
In the Effects panel, search for "Horizontal Flip" or "Vertical Flip" (Path: Effects > Video Effects > Transform).
Drag the effect onto your clip in the timeline. (Or add an adjustment layer first and drag the effect onto that.)
2. Fine-Tune the Effect
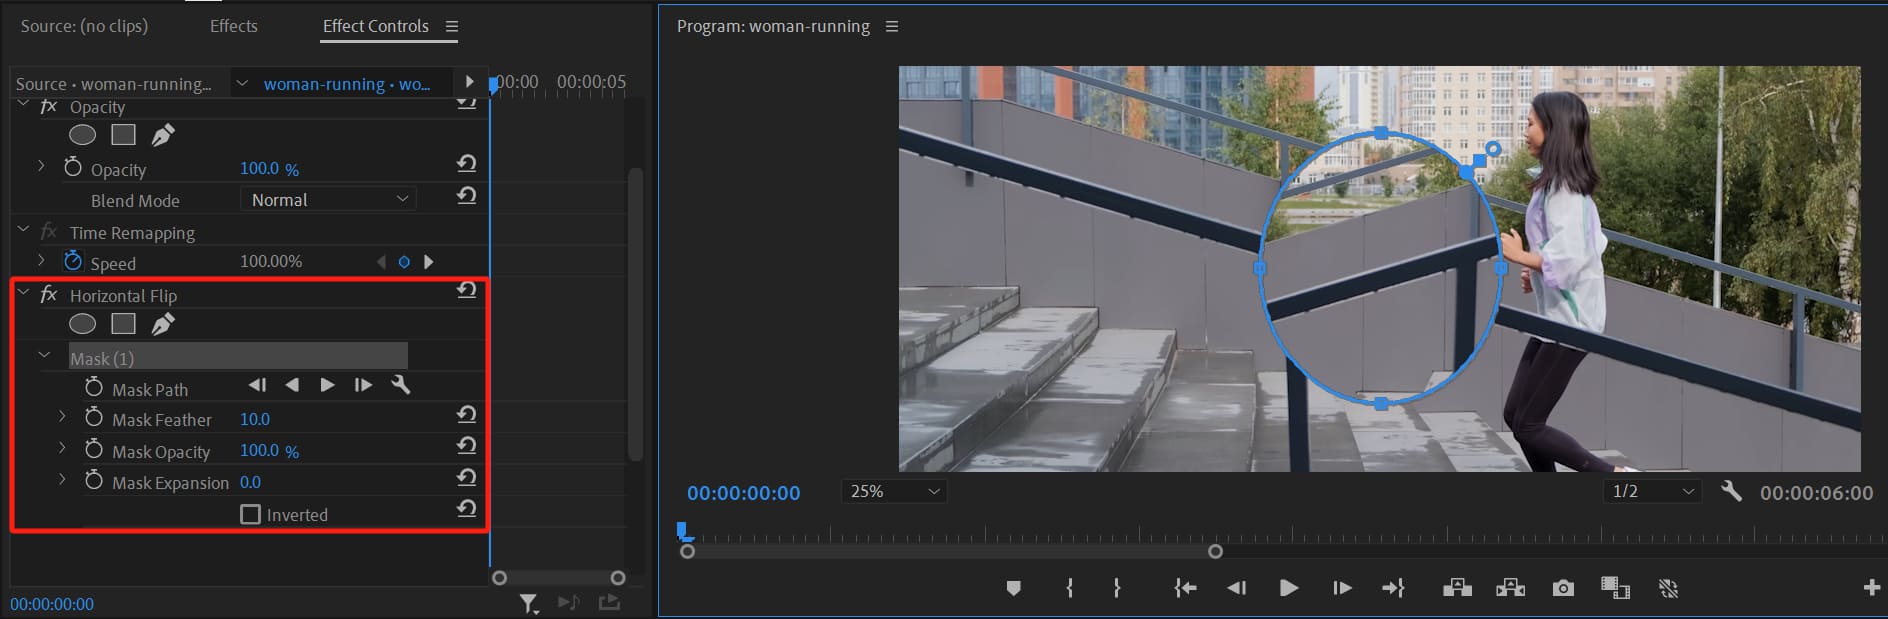
After adding the flip effect, select your clip in the timeline and open the Effect Controls panel.
Find the "Horizontal Flip" or "Vertical Flip" option. Then, create a mask to flip only a specific area of the video while keeping the rest unchanged.
Method 2: Transform Effect
If you need more control or want to add extra visual effects when flipping, try using the "Transform" effect.
Here's how to flip a video using Transform:
1. Add the Effect
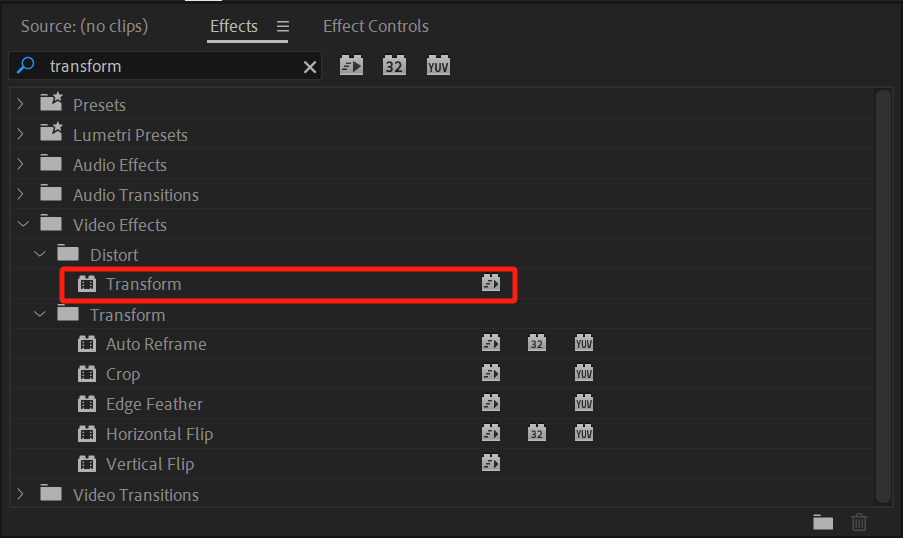
Open the Effects panel, search for "Transform," (Path: Effects > Video Effects > Distort), and drag it onto the clip you want to flip on the timeline.
2. Adjust the Settings
Go to the Effect Controls panel and find the Transform effect.
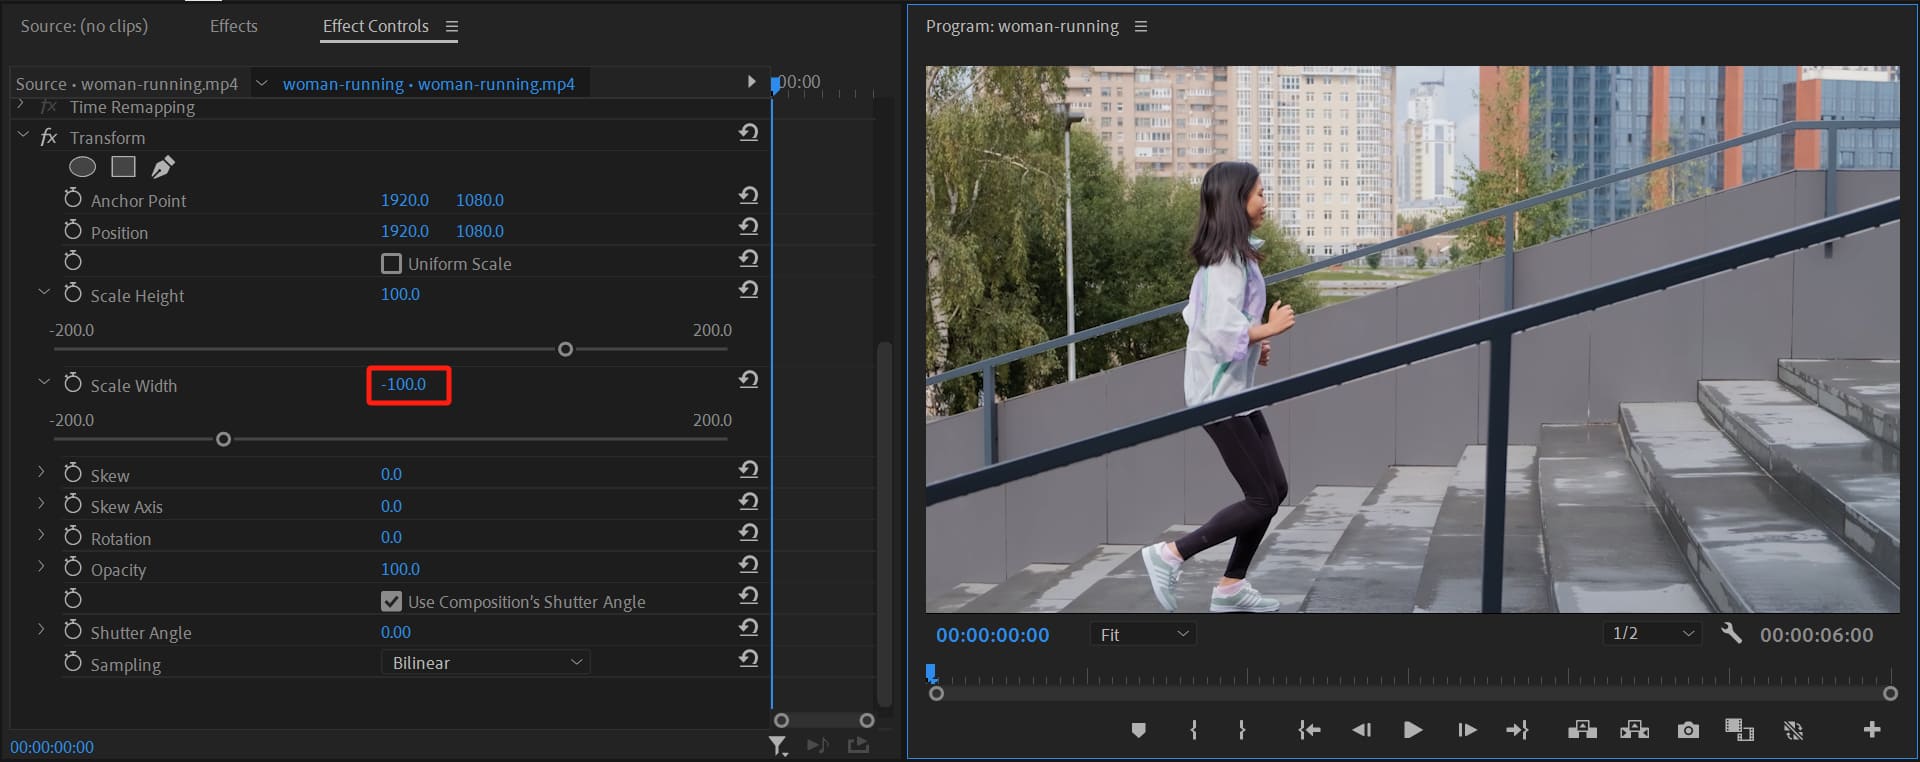
If you only want to flip one way, first uncheck the "Uniform Scale" option.
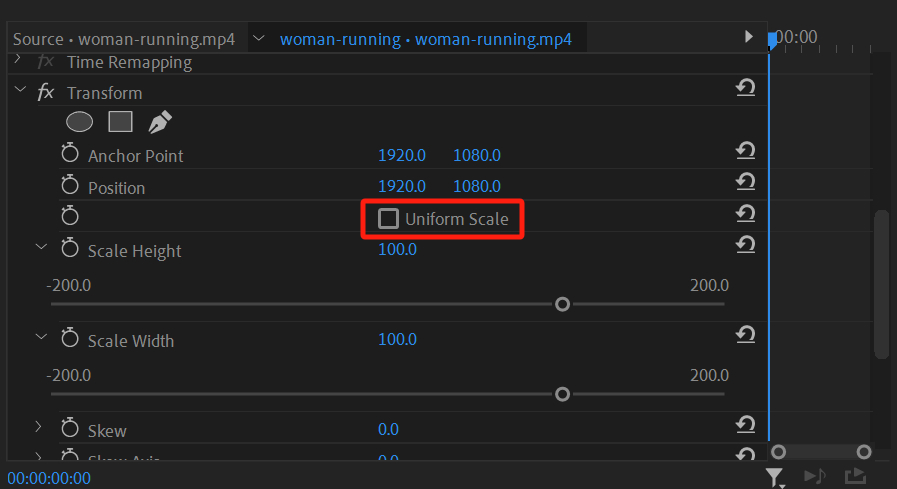
Then, set "Scale Width" or "Scale Height" to -100 to flip horizontally or vertically. For example:
- Horizontal Flip: Set Scale Width to -100 (Scale Height remains 100).
- Vertical Flip: Set Scale Height to -100 (Scale Width remains 100).
Let's first take a look at the image below to see what the original video looks like.

When we set the Transform effect's Scale Width to -100 in the Effect Controls, the video flipped horizontally in no time.
After scaling, preview your video to check that the flip looks right. If you see black edges or the frame isn't fully filled, adjust the scale settings to enlarge the clip and cover any gaps.
Since you can customize the settings with the Transform effect, you can also experiment with different options to create various cool effects.
Method 3: Mirror Effect
Strictly speaking, the mirror effect is not meant for flipping videos. But it can give your video a similar look.
The steps are simple:
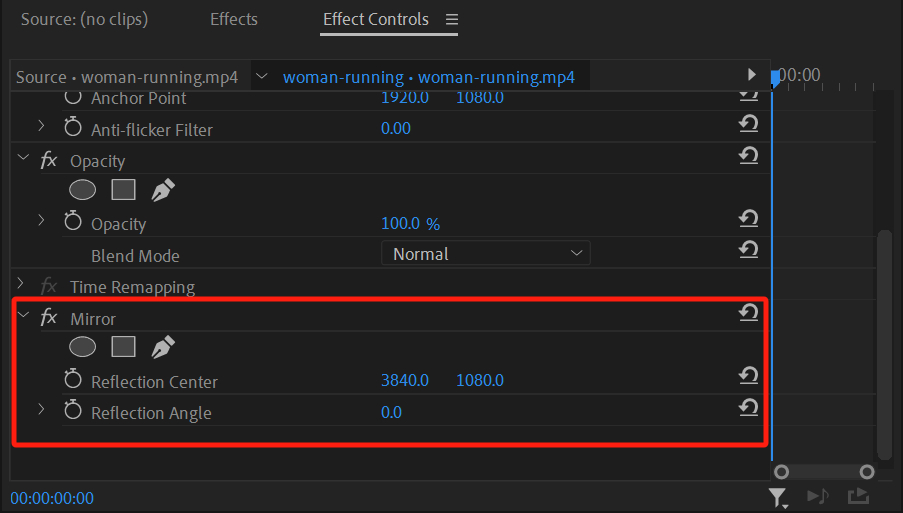
- Open the Effects panel, search for the "Mirror" effect, and drag it onto your clip on the timeline.
- In the Effect Controls panel, find the Mirror effect. Adjust settings like "Reflection Center" and "Reflection Angle" until you get the look you want.
For example, in our case, we simply tweaked the mirror settings and got an effect similar to the one in the movie Inception. If you want to flip your video for that kind of look, give it a try.
FAQs & Troubleshooting
Q1: Why do black borders appear after flipping?
A: The original clip dimensions might not fill the sequence frame after flipping. Adjust the scale or crop the video to resolve this.
Q2: How can I flip only a portion of the video?
A: Use the Razor Tool to split the clip and apply the flip effect only to the desired segment.
Q3: How do other effects interact with the flip?
A: Other effects (e.g., Position, Rotation) might be affected. It's best to review all settings after applying the flip.
Conclusion
Whether you need to fix your shooting angle, add special effects, or meet social media needs, mastering video flipping opens up more possibilities for your editing.
When you're working in Premiere Pro, you might face lots of tedious tasks like zooming the timeline, trimming clips, or browsing media. Using a mouse and keyboard for these tasks isn't very smooth or efficient.
We want to recommend TourBox, a creative controller loved by video editors and content creators. You can map common Premiere Pro actions to this controller, much like using a game controller. This not only makes your workflow more enjoyable but also boosts your efficiency.

If you're interested in TourBox, click on our video editing page to learn more about its benefits. And if you prefer working on an iPad, click the link below to check out our TourBox Elite Plus.

We hope this tutorial helps you learn how to flip videos in Premiere Pro.