How to Freeze Frame in DaVinci Resolve?
Freeze frames add drama and emphasis to your edits, and DaVinci Resolve makes them easy to create. This step-by-step guide shows how to freeze a frame in DaVinci Resolve so you can quickly add that cinematic pause to music videos, promos, short films, or any project. So, let's dive in!

In this article, you will learn:
How to Freeze Frame in DaVinci Resolve?
Step 1: Create a New Timeline
Import the video clip you want to edit into DaVinci Resolve by dragging and dropping it into the Media Pool.
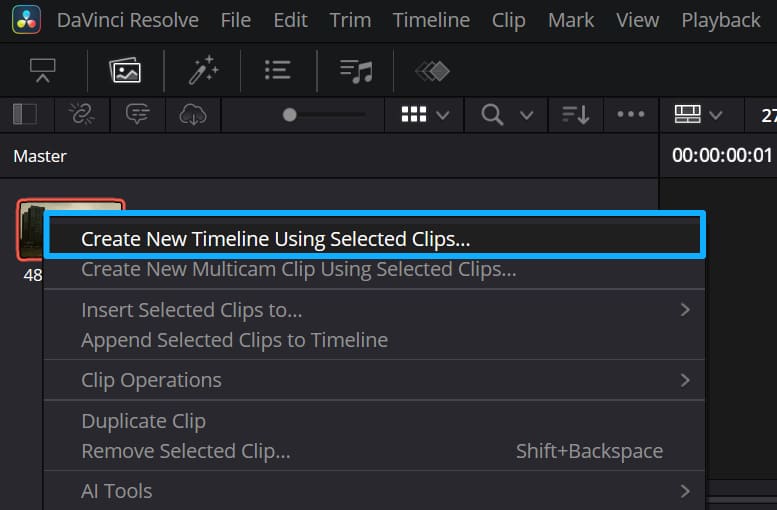
In the Media Pool, right-click your clip and choose Create New Timeline Using Selected Clip — Resolve will make a timeline and place that clip on it. (You can also drag a clip onto the timeline to create one.)
Step 2: Find the Exact Frame
Use the playback controls or the spacebar to play your clip and stop where you want the freeze.
Use the frame-step buttons (Previous Frame / Next Frame) to arrive at the exact frame you want to freeze.
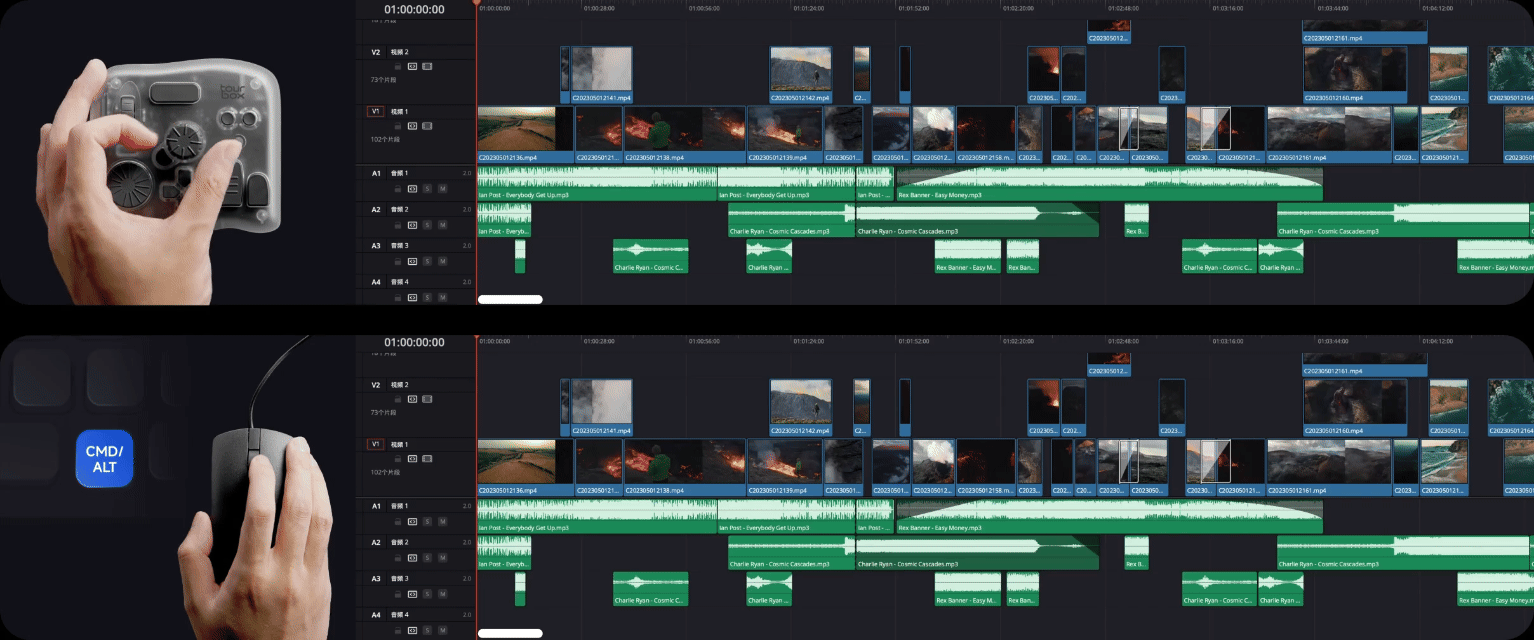
You don't need to make things so complicated. If you have a TourBox, a quick swipe of its physical dial can replace all those mouse clicks, drags, and tricky keyboard shortcuts. It makes previewing the timeline simple and smooth.

Beyond making editing and color work in DaVinci Resolve more accurate and faster, the TourBox gives you a whole new feel. Your fingertips notice every tiny adjustment — it's like using a game controller. That kind of tactile control is something a mouse and keyboard can't match.
If you're interested in the TourBox, click our DaVinci Resolve page to learn more.
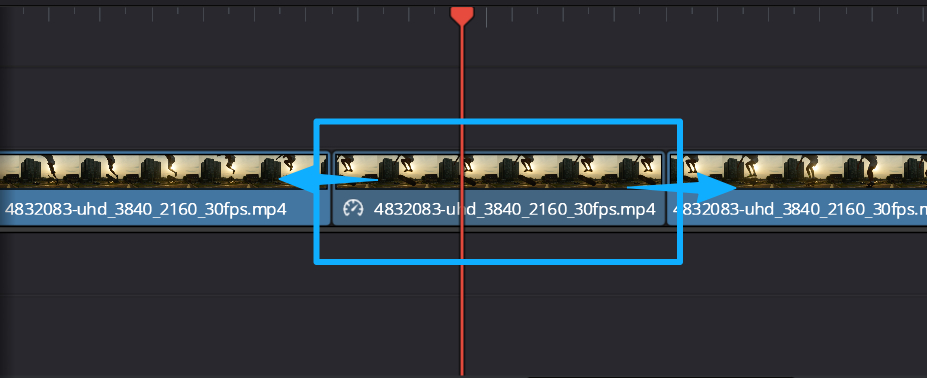
Step 3: Split the Clip at That Frame
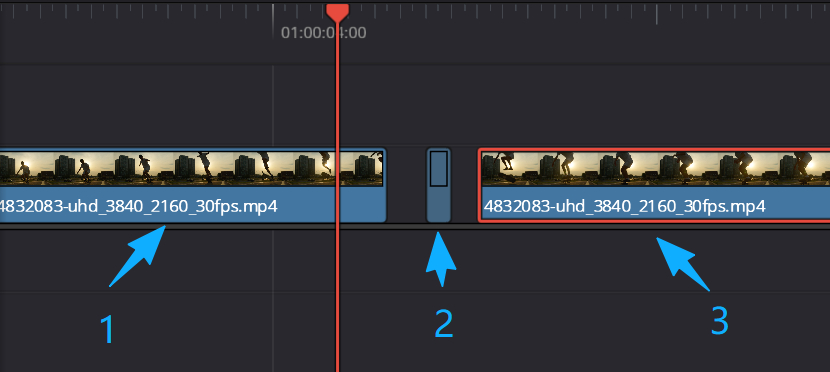
Move the playhead (the vertical line) to that frame. Click the clip in the timeline to select it. Press Ctrl+B (Windows) or Cmd+B (Mac) to cut the clip at the playhead. Then cut the clip again at the end of that frame (the start of the next frame).
You should now have three clips: the part before the freeze frame, the freeze-frame clip itself, and the part after it. Now freeze the middle clip — that middle clip is the frame you want to hold.
Step 4: Turn the Second Clip into a Freeze Frame
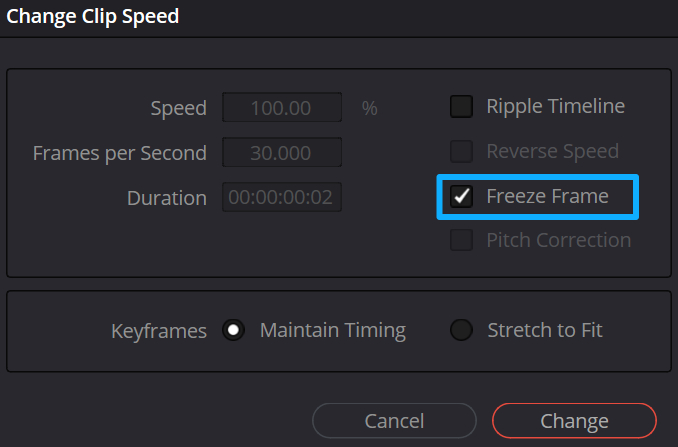
Right-click the second clip and choose Change Clip Speed.
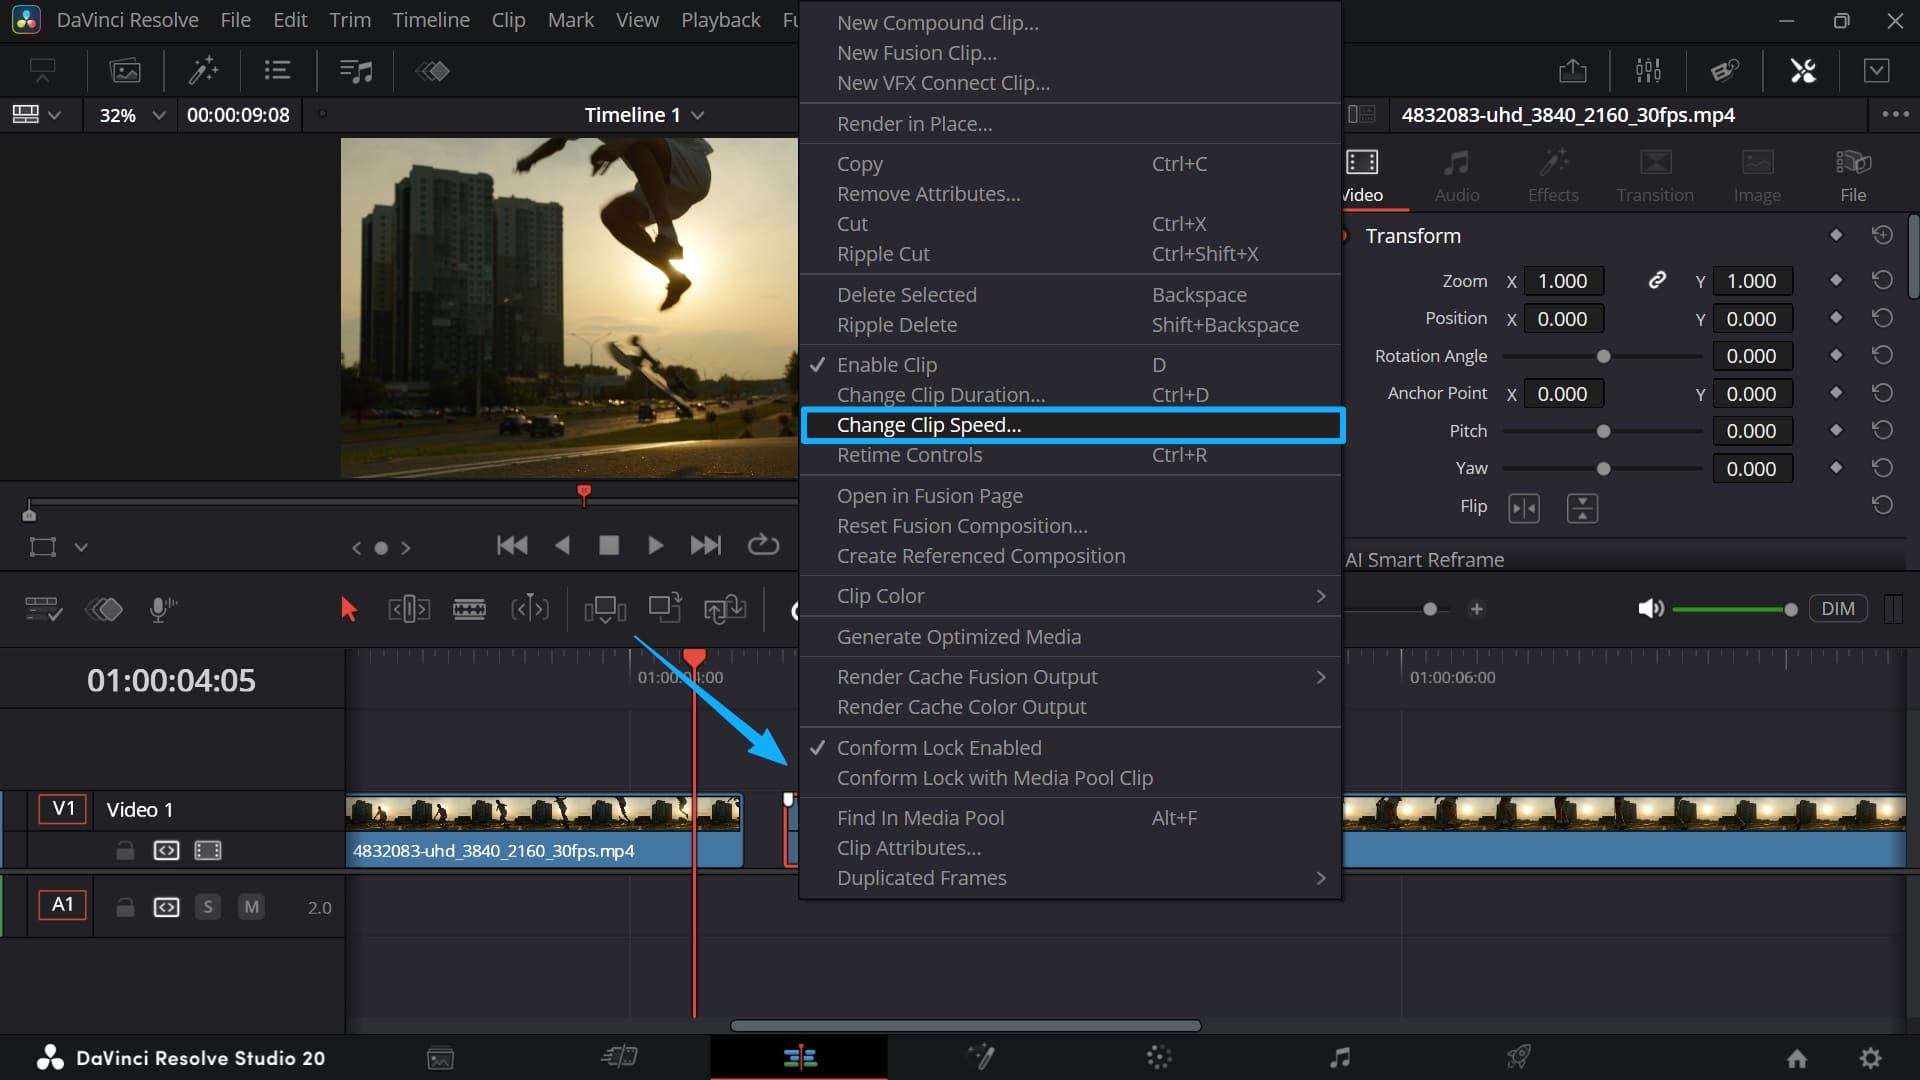
In the dialog that appears, check Freeze Frame, then click Change. Resolve creates a still from the first frame of that clip, effectively freezing the image.
Step 5: Adjust the Duration of the Freeze Frame
The frozen clip will keep its current length. To change how long the freeze holds, drag the edge of the freeze clip in the timeline to extend or shorten it.
Step 6: Export Your Video
- When you're satisfied, switch to the Deliver page.
- Choose your export settings (format, resolution, filename).
- Click Add to Render Queue, then Render All to export your video with the freeze frame included.
Further Reading:
Quick Tips
- If you want the freeze to come from any other frame, split the clip so that the clip you freeze starts on that exact frame.
- Add a short crossfade or dip to black before/after the freeze for a smoother visual transition.
- You can also create a freeze frame using the Freeze Frame option from the viewer's right-click menu in some Resolve versions, but splitting + Change Clip Speed is universal and precise.
Nice work! You now know how to create a freeze frame in DaVinci Resolve. This simple but powerful technique can add real impact and creativity to your videos. Follow the steps in this article, and you'll be able to add freeze frames to your editing workflow with ease.