How to Freeze Frame in Premiere Pro?
In all video editing software, all operations are performed on frames, so modifying frames has a significant impact on the overall video.
You may have often seen the freeze frame effect in creative videos, and in Premiere Pro, you can achieve that effect with Frame Hold.
Freezing frames is a very common function in video editing. So, do you know how to freeze frames in Premiere Pro? In this straightforward tutorial, we will provide you with the answer.

In this article, you will learn:
- What Is a Freeze Frame?
- How to Export a Frame in Premiere Pro?
- How to Freeze Frame in Premiere Pro?
- Final Thoughts About Freezing Frame in Premiere Pro
What Is a Freeze Frame?
A freeze frame refers to capturing a still frame from a video. This frozen frame can be used as a separate asset in your Project panel for future use or directly attached to a clip to create a freeze-frame effect.
Further Reading:
How to Export a Frame in Premiere Pro?
If you take a closer look, you'll notice a camera icon below the Program Monitor or Source Monitor panels, which is used for "Export Frame" — capturing the current frame as a still image.
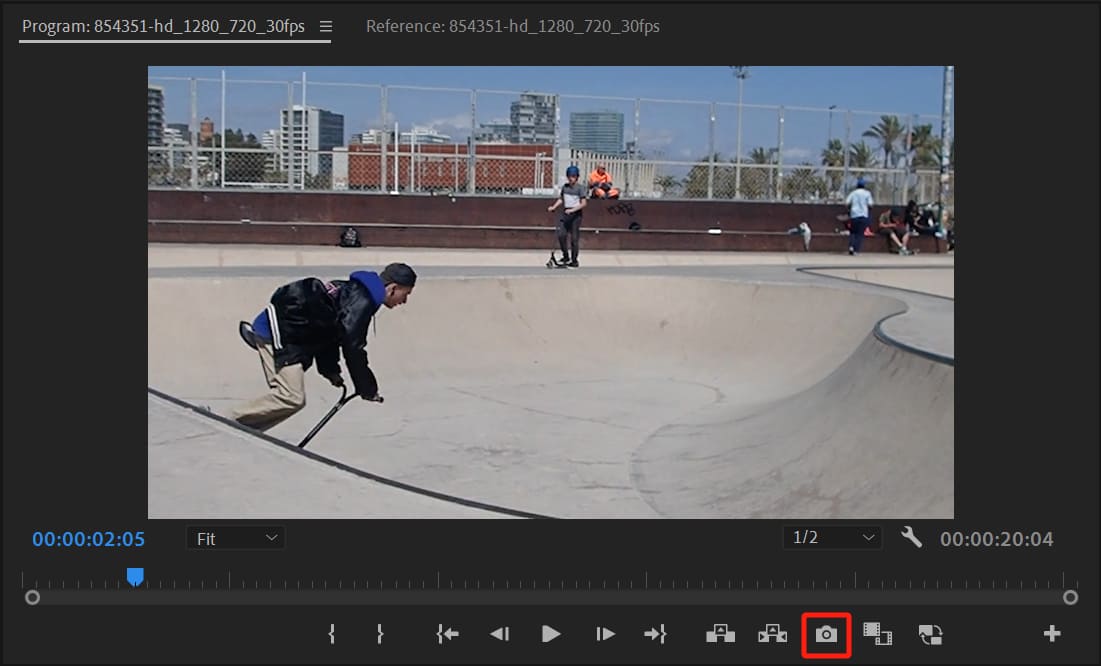
If you don't see the camera icon, you can click on the "+" button (Button Editor) on the right side to open the Button Editor, where you can find "Export Frame" and drag it onto the panel.
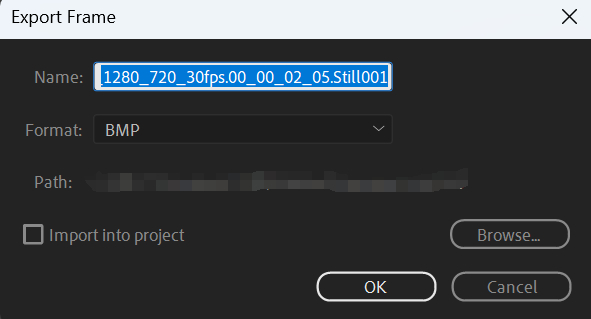
In the "Export Frame" panel, after clicking "OK," the current frame will be saved as an image file in the specified folder.
If you check "Import into project," the captured frame will also be imported into the Project panel simultaneously.
How to Freeze Frame in Premiere Pro?
To start, open the Premiere Pro software and create a new project. Import the desired video clips into your project and drag them onto the timeline to create a sequence.
1. How to Freeze a Frame from a Specific Point to the End of a Clip?
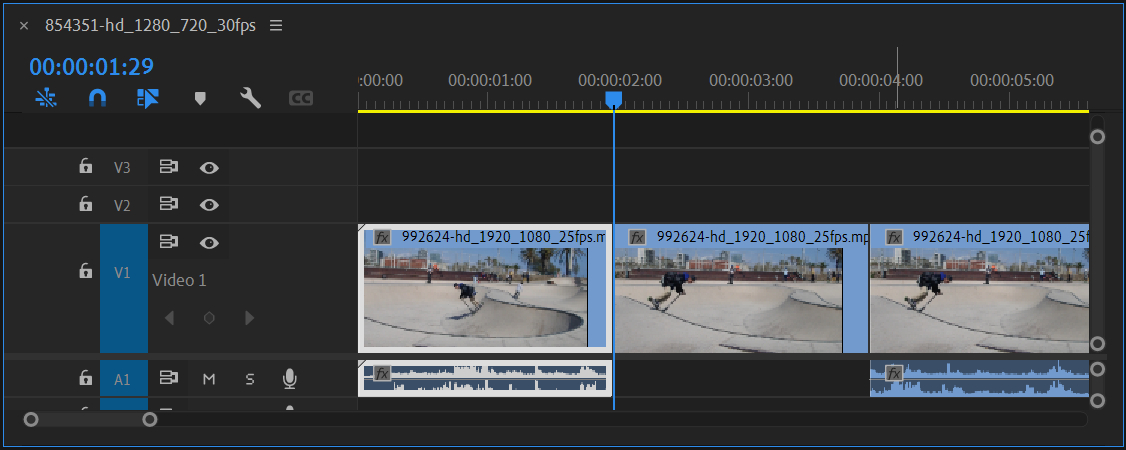
You can move the timeline playhead to the specific frame where you want to set the freeze frame. Right-click on that frame and choose "Add Frame Hold."
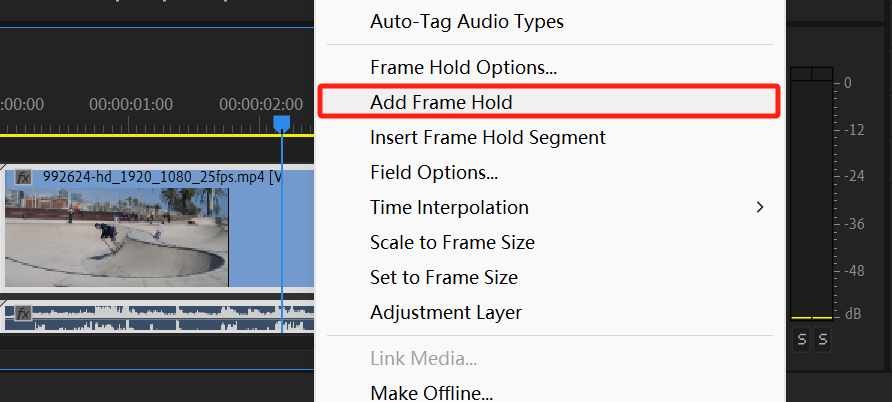
After executing this command, you will notice that the video clip on the timeline is split into two segments. The latter segment now becomes a static single-frame image, creating the freeze-frame effect.
In other words, if you want to freeze a frame from a specific point in the clip until the end, you need to position the playhead at the desired frame and perform the steps we mentioned above.
Using "Add Frame Hold," the portion of the clip following the playhead position will be replaced with the frame at that specific point. You can adjust the duration of this freeze frame as you prefer.
2. How to Freeze a Specific Frame Within a Clip?
If you only want to freeze a specific frame, here's what you need to do.
First, position the playhead at the frame you want to freeze. Right-click on the clip and select "Insert Frame Hold Segment."
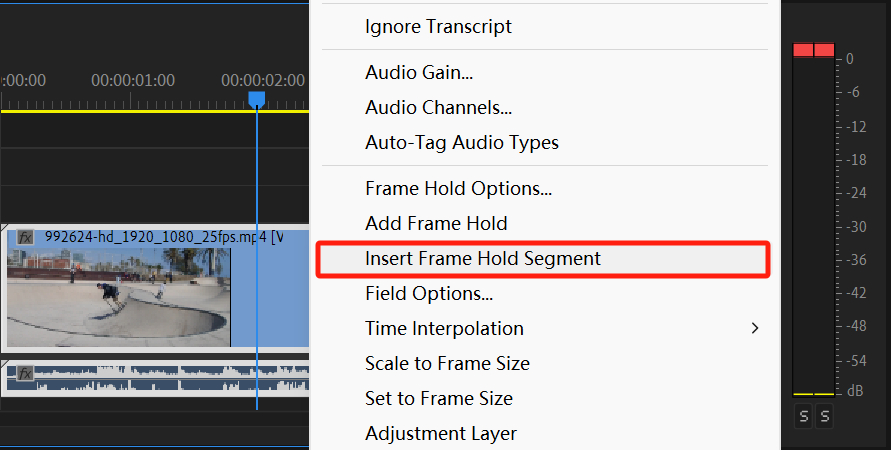
After performing this action, Premiere Pro will split the current clip into three segments: the left segment plays normally, the middle segment is frozen, and the right segment plays normally again.
The frozen frame corresponds to the frame where the playhead is positioned, with a default duration of 2 seconds.
3. How to Change a Freeze Frame That Has Already Been Created?
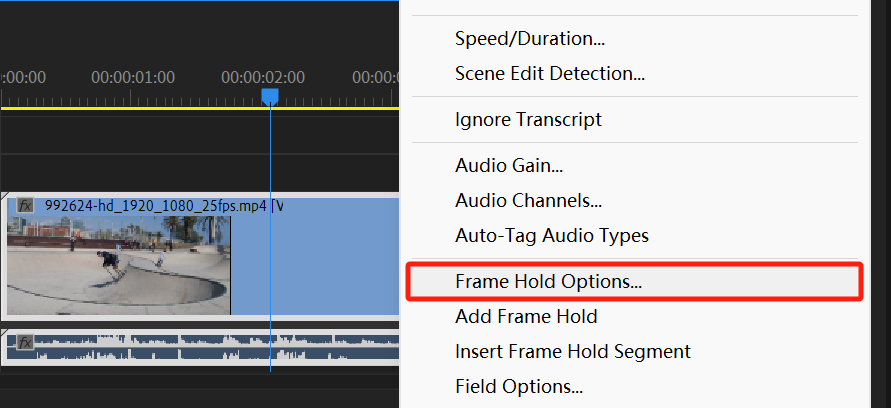
If you want to modify a freeze frame that has already been created, you can right-click on the segment in the timeline where the frame is frozen and select "Frame Hold Options."
If the segment you right-click on has not been frozen yet, this action will convert the entire segment into a freeze frame.
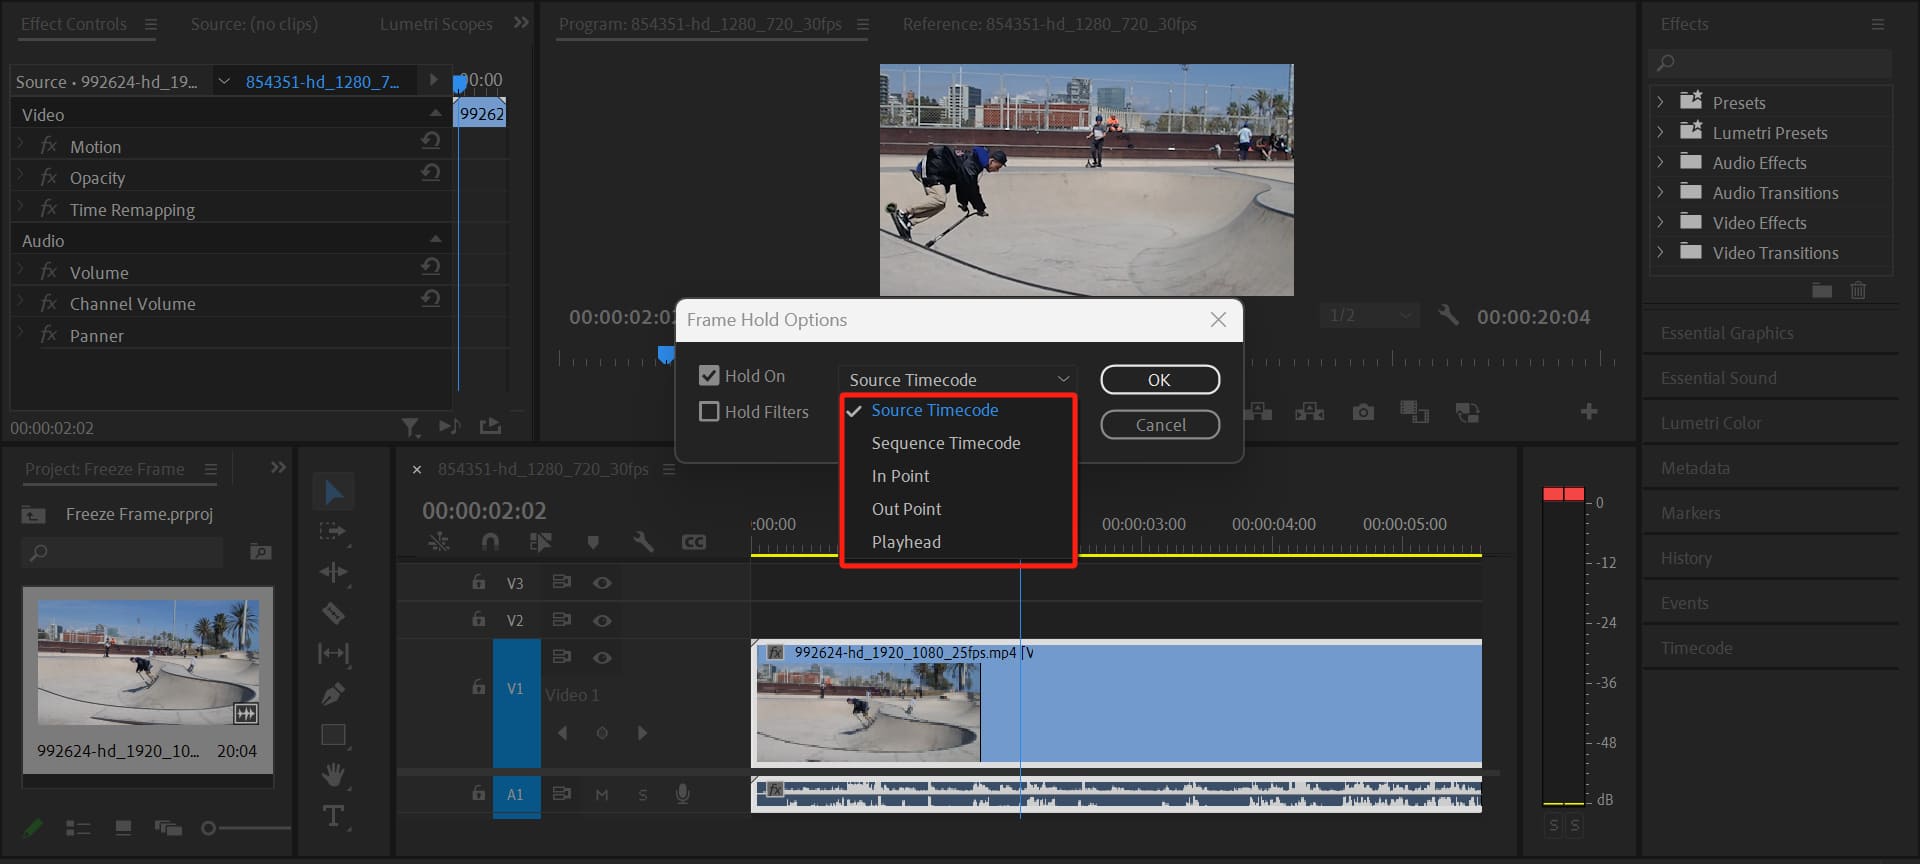
You have several options to choose from in the "Hold On" dropdown menu of "Frame Hold Options", and here's an explanation of each option:
- Source Time Code: You can select a specific frame from the source clip for the freeze frame. Browse the Source Monitor panel to find the desired frame, note the timecode in the bottom left corner, and enter that timecode in the "Frame" field.
- Sequence Time Code: As the name suggests, you can choose a frame from the current sequence to be the freeze frame.
- In/Out: You can use the In or Out frame of the clip within the sequence as the freeze frame.
- Playhead: This is the recommended and most intuitive option. Premiere Pro will use the current frame at the position of the playhead as the freeze frame.
As for the "Hold Filters" option, if it is not checked (default setting), when you create a freeze frame, any keyframes you have set in the Effect Controls panel will still function as normal.
If you check "Hold Filters," the freeze frame will capture the frame after applying all the effects, including any adjustments made using the Effect Controls.
Great job! That's all there is to freezing frames in Premiere Pro. Whether you need to create a freeze frame or extend a frame, you can easily accomplish it using the methods we've shared.
Final Thoughts About Freezing Frame in Premiere Pro
In this tutorial, we shared the techniques for freezing frames in Premiere Pro. Whether creating vlogs, editing short films, or producing professional-grade movies, freeze frames can bring more creativity and expressiveness to your work.
Don't forget to flexibly apply this technique in your creations to make your videos more eye-catching!
At the end of the tutorial, we would like to recommend TourBox, a creative tool loved by digital artists and content creators.

In video editing, one of the common challenges for creators is precise control over the timeline. However, with the creative tool TourBox, you can intuitively, flexibly, and accurately control your timeline as if you have it all in the palm of your hand.
Imagine being able to zoom in and out of the timeline, switch between previous and next clips, fine-tune edits, cut, delete, undo, redo, and more—all with just one hand.
What's even better is that TourBox's excellent tactile feedback design provides an immersive editing experience. Its ergonomic design ensures that you won't feel fatigued even during long editing sessions.

Check out our video editing page to learn more about TourBox and how it revolutionizes everything about video editing.