How to Import & Organize Photos in Lightroom Classic?
Lightroom Classic is a powerful tool for organizing and editing your photography, and learning how to import your photos correctly is the first step toward a streamlined workflow.
In this tutorial, we will walk you through the process of importing and organizing your photos into Lightroom Classic, ensuring that your images are organized and ready for editing. Let's get started!

In this article, you will learn:
- How to Import Photos Into Lightroom Classic?
- How to Organize Photos in Lightroom Classic?
- Final Thoughts About Importing and Organizing Photos in Lightroom Classic
How to Import Photos Into Lightroom Classic?
There are three different methods to import photos into Lightroom Classic (LrC), each with its own characteristics. These three methods are quite similar, and it mainly depends on your personal preference.
Let's briefly introduce each method.
Method 1: Dragging Photos Directly Into LrC
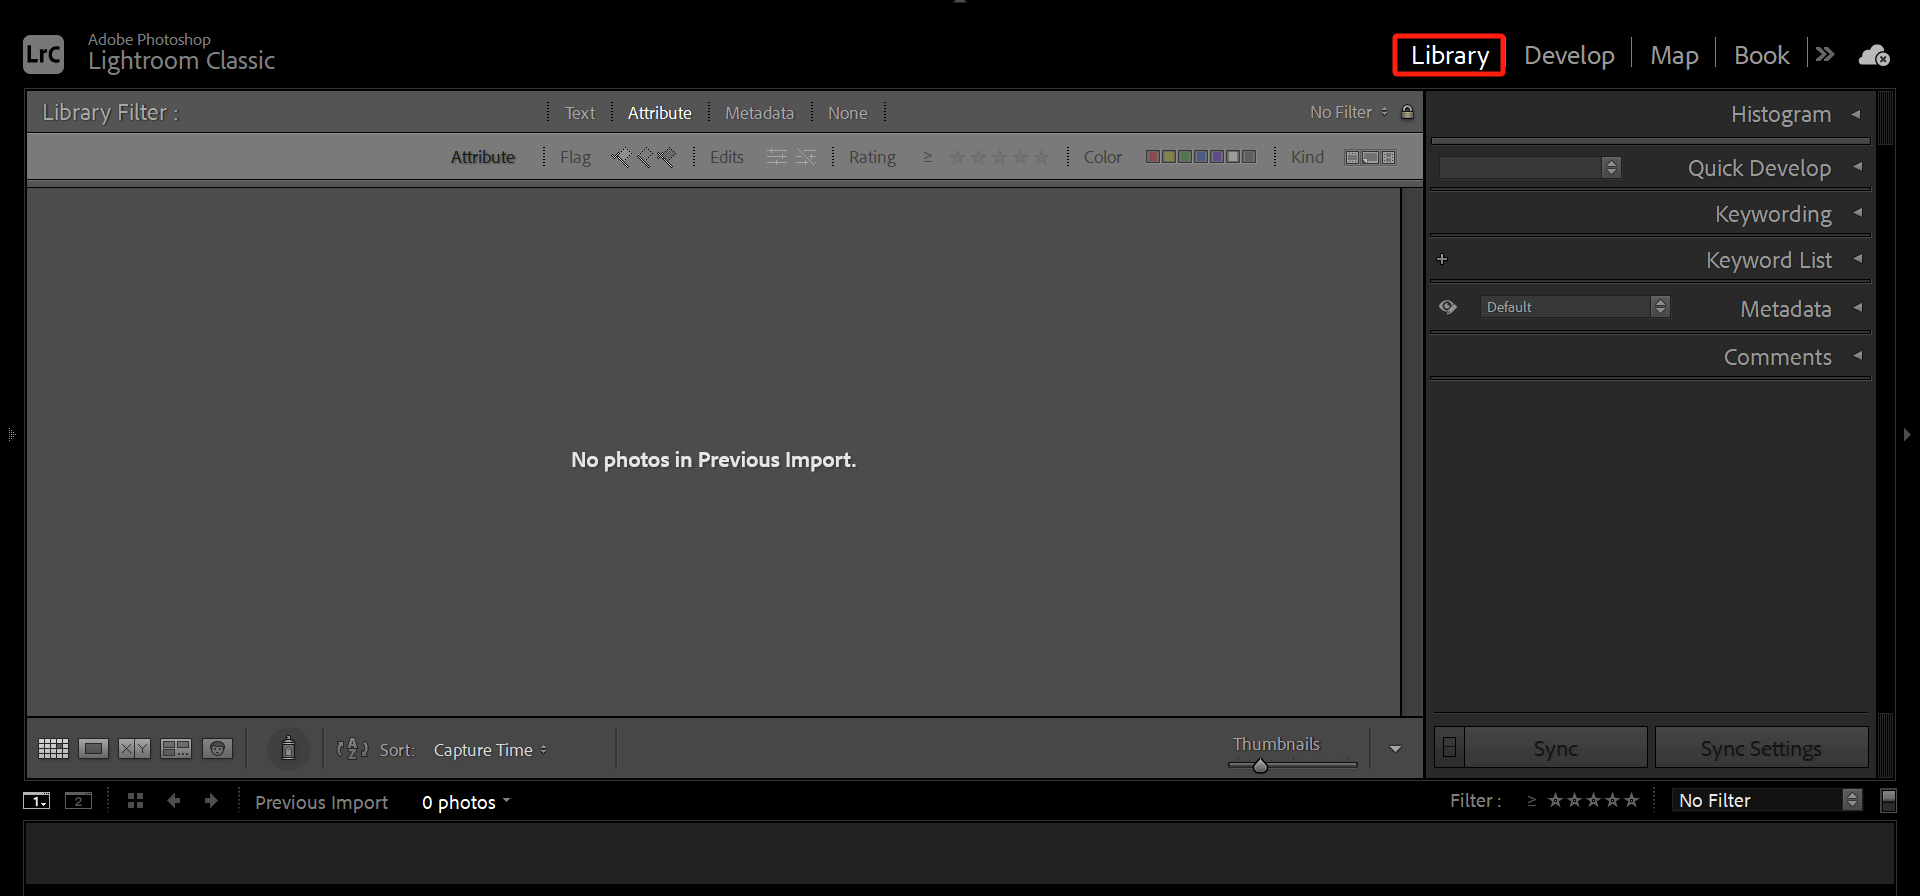
The simplest and most commonly used method is to drag the photos directly into Lightroom Classic. When dragging, it's important to note that you can only do this in the Library module. If you try to drag photos in any other module, nothing will happen.
So, before importing, click on the Library module by clicking on the "Library" button in the top right corner, and then drag the photos into LrC.
Method 2: Importing Photos Through the File Menu
The second method is to click on the "File" menu in the top left corner and select "Import Photos and Video." The advantage of this method is that you can perform the import operation in any module of Lightroom Classic.
Whether you choose the first method of dragging and dropping or the second method of importing through the menu, the interface you'll see will look the same as shown in the image below. You can click the "Show more options" button in the bottom left corner to expand additional settings.
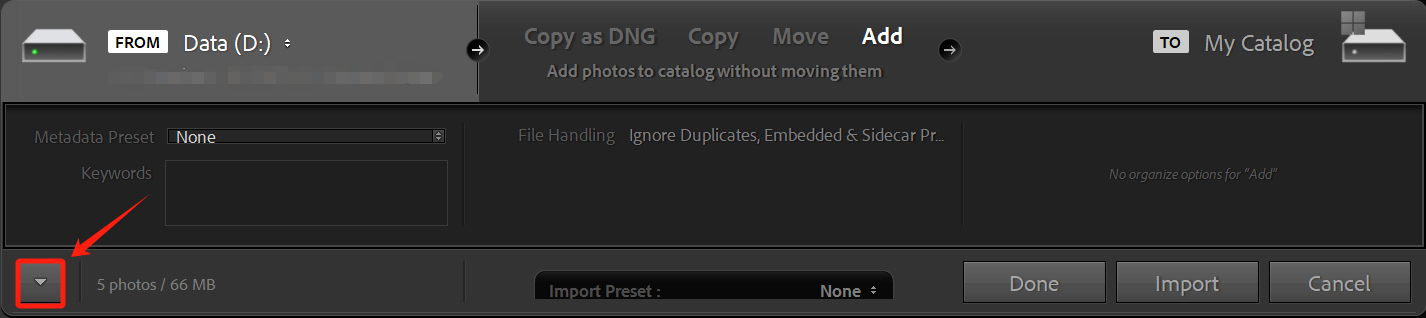
After clicking the "Show more options" button, you'll enter the photo import panel. On the left side, you'll see the directory of your computer's hard drive, and in the middle, you'll find the thumbnail images of the photos.
It may take some time to load these thumbnails, depending on your computer's speed.
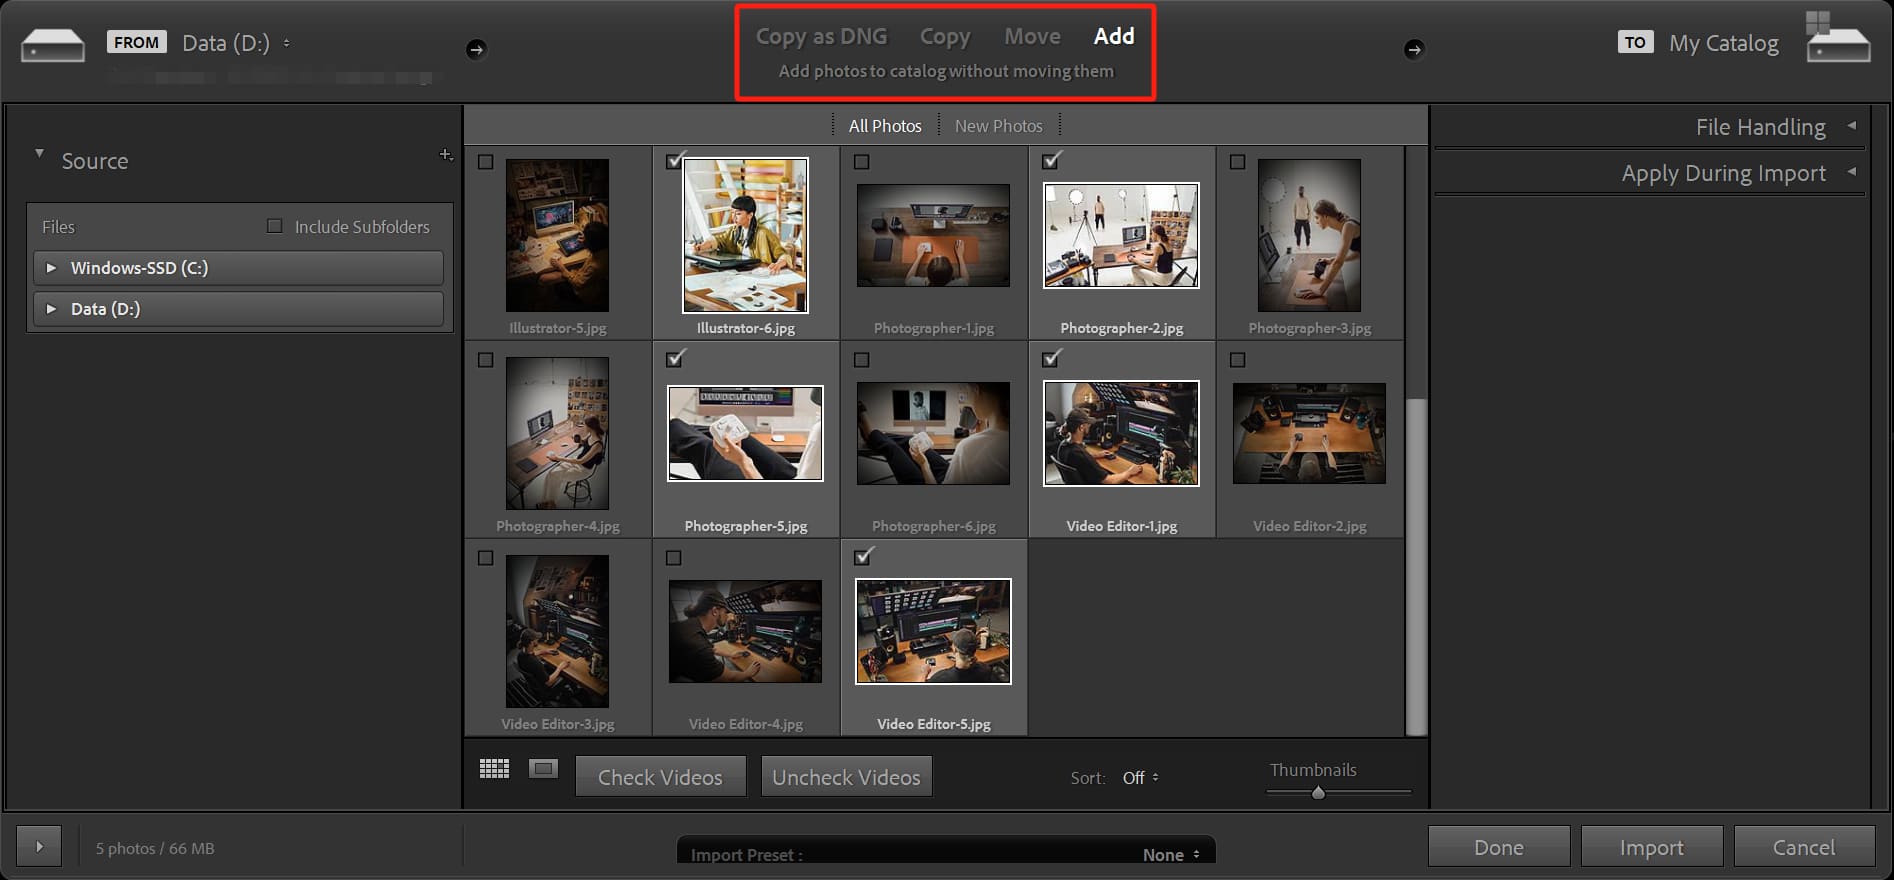
However, the most important options are at the top in the import section. Since both import methods assume that the files have already been manually copied to your computer or hard drive, it's crucial to select the "Add" option at the top center, which is the rightmost option.
If you choose "Copy" or "Move," Lightroom Classic will duplicate or move the original files to its default location, which can result in redundant data and disrupt your file management system. Therefore, it's important to double-check and make sure to select the "Add" option.
However, there's no need to worry too much because once you select it, Lightroom Classic will remember this preference for future imports. It's still a good idea to take a quick look each time you import, just to be on the safe side.
What Is the DNG Format?
When importing photos, you may come across the option to "Copy as DNG." How does it differ from the "Copy" option, and what exactly is the DNG format?
When shooting, you have the option to capture in RAW format. RAW files preserve all the information captured by the camera, utilizing the original color space from the image sensor, resulting in high image quality and ample post-processing flexibility.
However, RAW files can be problematic due to compatibility issues. Most RAW files cannot be directly read by mainstream computer software.
To address this, Adobe developed the DNG (Digital Negative) format, which serves as a lossless and universal storage format for RAW files. The biggest advantage of DNG is its universal compatibility.
Not only can Adobe software open DNG files, but also built-in image viewers on Windows, Apple, and Android systems, as well as many third-party software on computers and smartphones, can preview this format.
Additionally, DNG files undergo lossless compression, resulting in smaller file sizes, sometimes even less than 50% of the original RAW file size.
Due to its lossless nature, universal compatibility, and smaller file size, some photographers choose to convert their original RAW files, such as NEF, into the DNG format during the import process for better storage and management.
Let's summarize the four main options for importing photos in Lightroom Classic:
- "Copy as DNG" converts the photos, regardless of the original RAW format (e.g., ARW, CR2, NEF, or even JPG), into the DNG format before importing. Whether or not to choose this option depends on weighing the pros and cons specific to your workflow.
- "Copy" simply duplicates the source files to the specified destination, while retaining the original files in their initial location.
- "Move" transfers the source files to the specified directory, effectively deleting them from their initial location.
- "Add" does not perform any operations on the source files; it only adds the photo information to the LrC database, such as the file path and EXIF data.
Method 3: Importing Photos From a Memory Card
The third method involves importing photos directly from a memory card without manually copying them to your computer or hard drive. With Lightroom Classic, you can perform both the copying and importing simultaneously.
To begin, open Lightroom Classic and insert the memory card. The software will automatically detect the memory card and open it, switching the interface to "Copy" mode.
Before importing, there are a few details to review:
- On the left side of the interface, you'll see the source, which represents the location of the memory card. Sometimes, the camera may create multiple folders on the card, so ensure you select the correct location.
- On the right side, you'll find the destination, where you can choose the appropriate folder for saving the imported photos. Once you've made all the selections, click the "Import" button in the bottom right corner to simultaneously import and copy the photos.
For a visual guide on how to import camera photos into Lightroom Classic, you can check out Jason Hermann's video on YouTube.
Why Can't Import Photos into Lightroom?
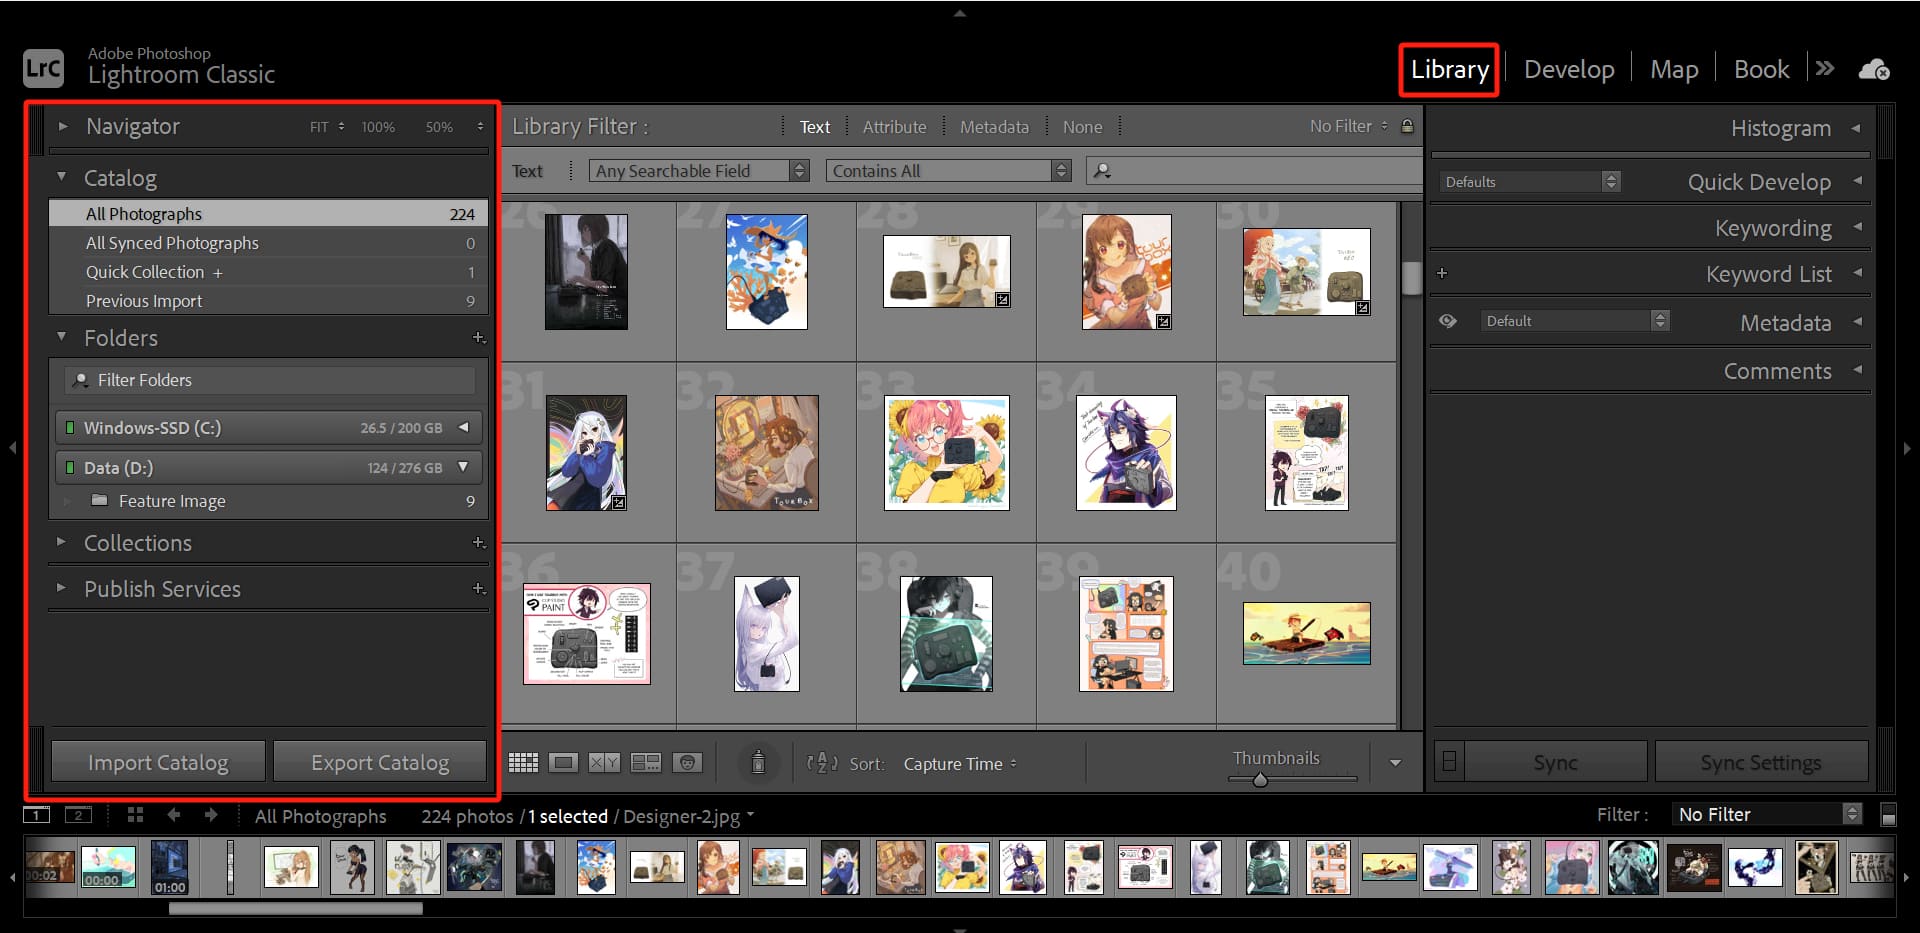
During the import process, you may encounter a common issue of being unable to import photos. If the thumbnail images in the middle are all grayed out and you cannot select or import them, it means that you have already imported these photos before.
You can find the previously imported photos and folders in the Navigator panel on the left side of the Library module.
How to Organize Photos in Lightroom Classic?
Whether it's from your travels or everyday photography, we strongly recommend backing up and organizing your photos as soon as possible, ideally on the same day.
This not only ensures data safety and prevents any potential errors with your camera or memory card but also makes it easier for you to process and locate your photos.
Since most of the time, you won't finish editing all your photos on the same day or even the next day, especially when it comes to travel photography where you accumulate several days' worth of photos and videos, having a well-designed management system becomes crucial for preserving your data.
Lightroom Classic serves as an excellent photo management tool. Once you import a large number of photos into Lightroom Classic, you can efficiently organize them using its features, making it particularly useful for sorting through travel photos.
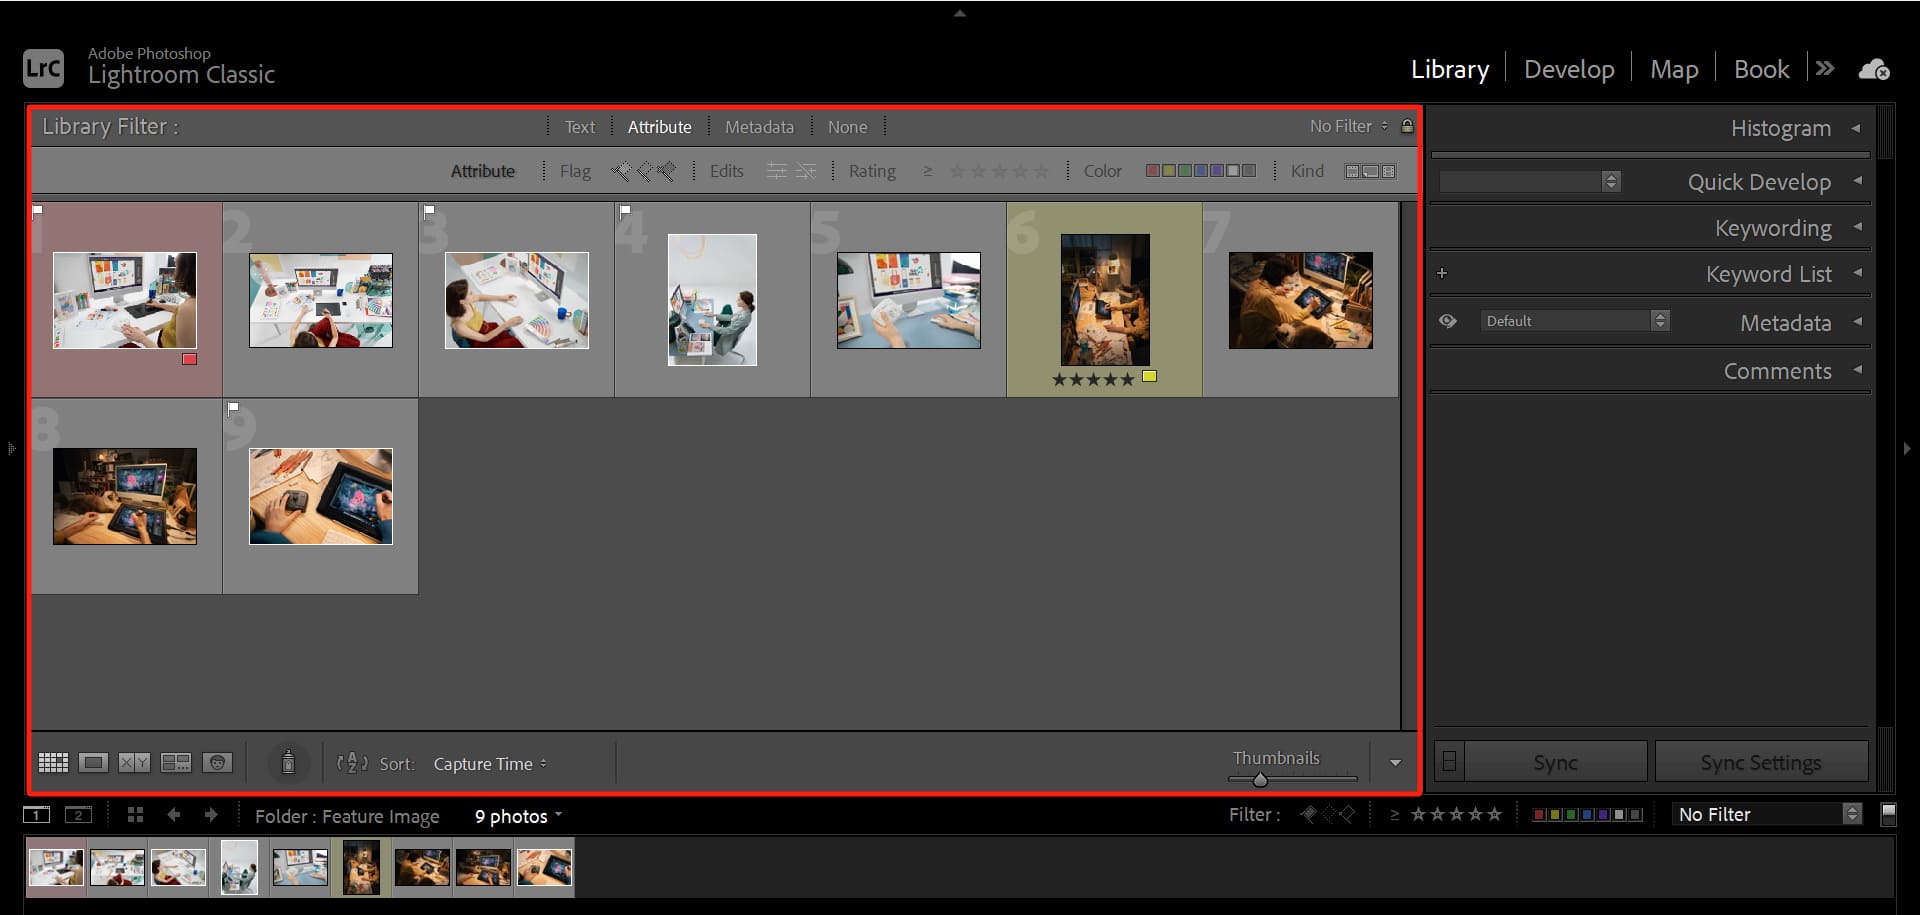
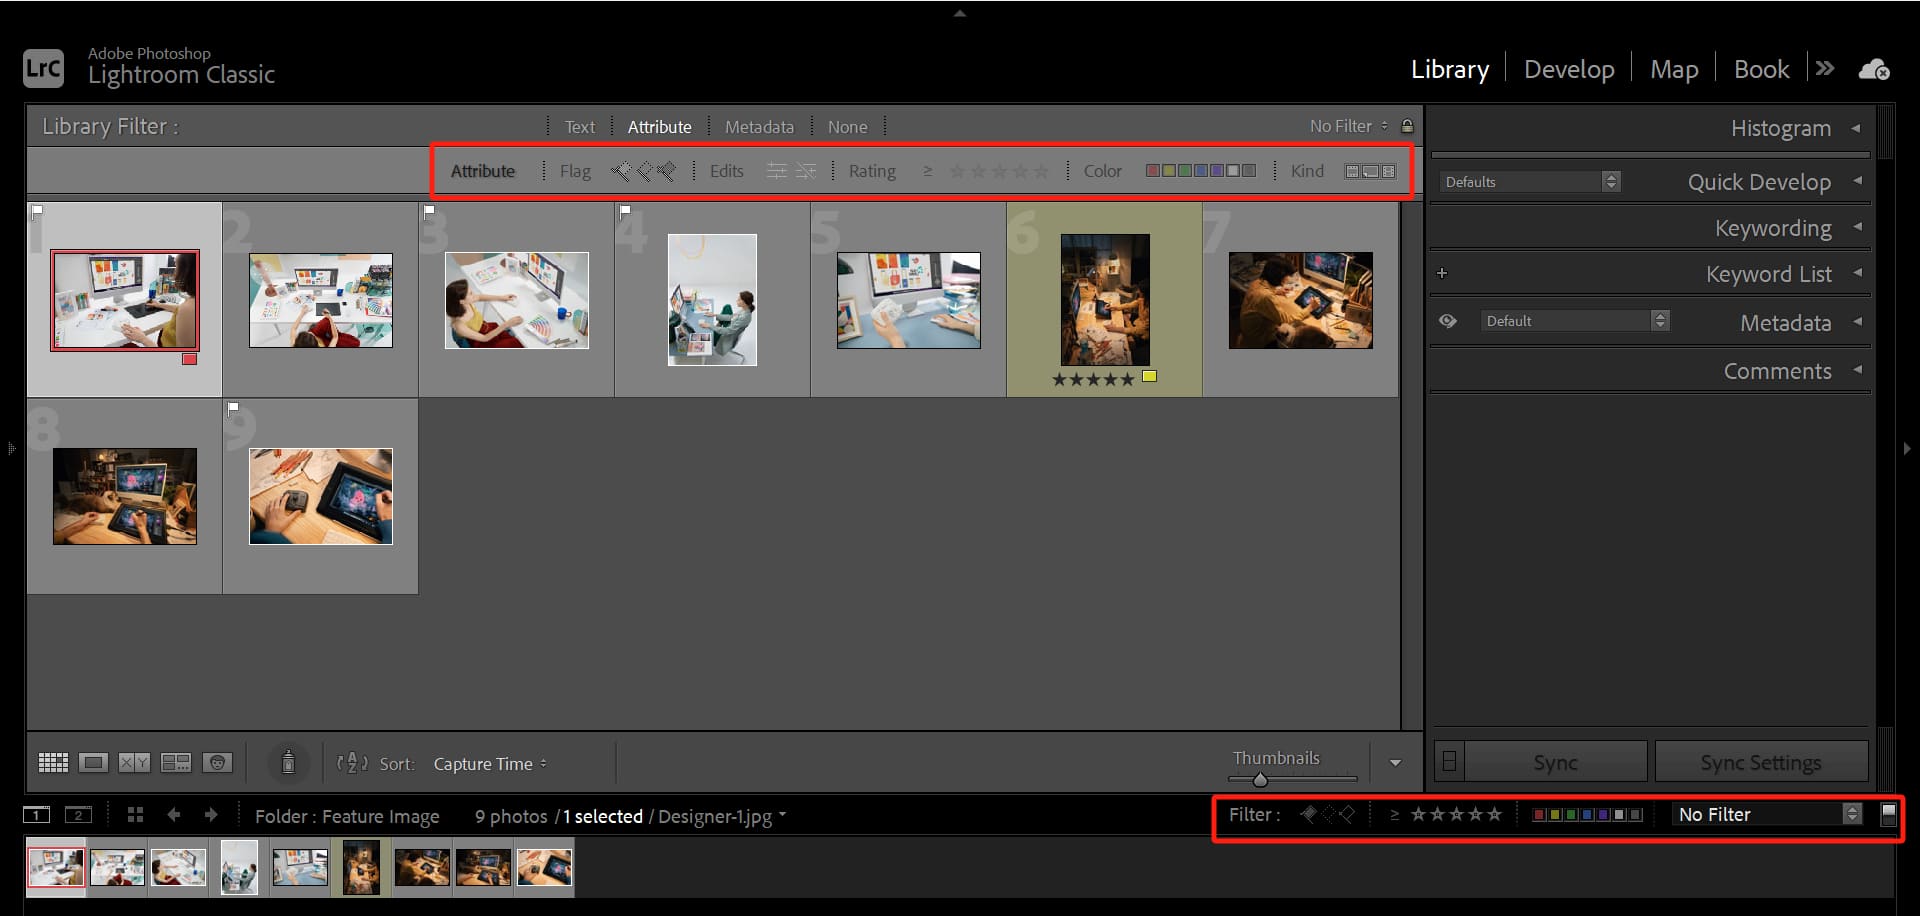
In the Library module, you can use the Library Filter panel to mark and categorize each photo by using flags, star ratings, and color labels. You can click on the corresponding icons on the photo or right-click on the photo and select the appropriate options from the menu that appear to apply these markers.
If you're a photographer or photography enthusiast, you're likely to capture a large number of photos during each trip. However, not every photo is worth keeping, especially if you've taken multiple shots of the same scene.
You can mark the photos you want to keep by adding a small flag to indicate your preference. The ones without any flag are considered unwanted or discarded shots, but you don't have to delete the photo data entirely.
Once you've finished marking all the photos, you can use the filters in the bottom right corner or the Attribute section of the Library Filter panel to display only the photos you've chosen to keep. This will make it easier to focus on editing and processing these flagged photos.
Within the flagged photos, you can also assign star ratings to further differentiate your level of preference for each photo. You can give five stars to those you find particularly stunning and three stars to the ones that are just average. This allows you to quickly filter and identify your favorite photos.
Color labels can be used to categorize photos based on different criteria, such as sunset shots or nighttime scenes. This helps in organizing and searching for specific types of photos, as the colors provide a visual cue.
LrC's photo management sounds incredibly convenient, but wait, what if you're importing not just a few photos, but hundreds of them? Do you really have to manually apply tags to each photo, even with keyboard shortcuts? That would be a tedious and exhausting task.
You might want to consider using TourBox, which allows you to assign various functions in LrC, such as toggling between photos and setting tags, to the buttons and dials on the TourBox controller.

This way, you can swiftly move to the next photo and apply the corresponding tags, speeding up your photo management workflow in Lightroom Classic.
These labels are entirely based on your habits and preferences, so it's up to you whether or not to use them. However, it's a good practice to organize and manage your photos after each shoot for long-term convenience. It's a habit that will surely benefit you in the future.
Final Thoughts About Importing and Organizing Photos in Lightroom Classic
In conclusion, importing and managing photos in LrC is crucial for photographers and photography enthusiasts alike. It ensures data safety, facilitates organization, and streamlines the editing process.
By efficiently marking and categorizing your photos using flags, star ratings, and color labels, you can easily identify and work on your favorite shots.
If you love editing photos and creating content on your iPad, check out our new TourBox Elite Plus. It works on both PC and iPad to speed up your photo edits and make your workflow smoother.

Its matte finish feels amazing — you won't want to let it go.