How to Learn Photography: A Simple Guide for Beginners
If you are just starting to learn photography, the most important thing is not to buy the most expensive camera first. It is to find a learning method that works for you.
In this blog, we want to share a simple and effective self-study method for beginners. We hope it can help you avoid common mistakes and enjoy the shooting process more.

In this article, you will learn:
How to Learn Photography
Step 1: Learn the Basics of Your Camera
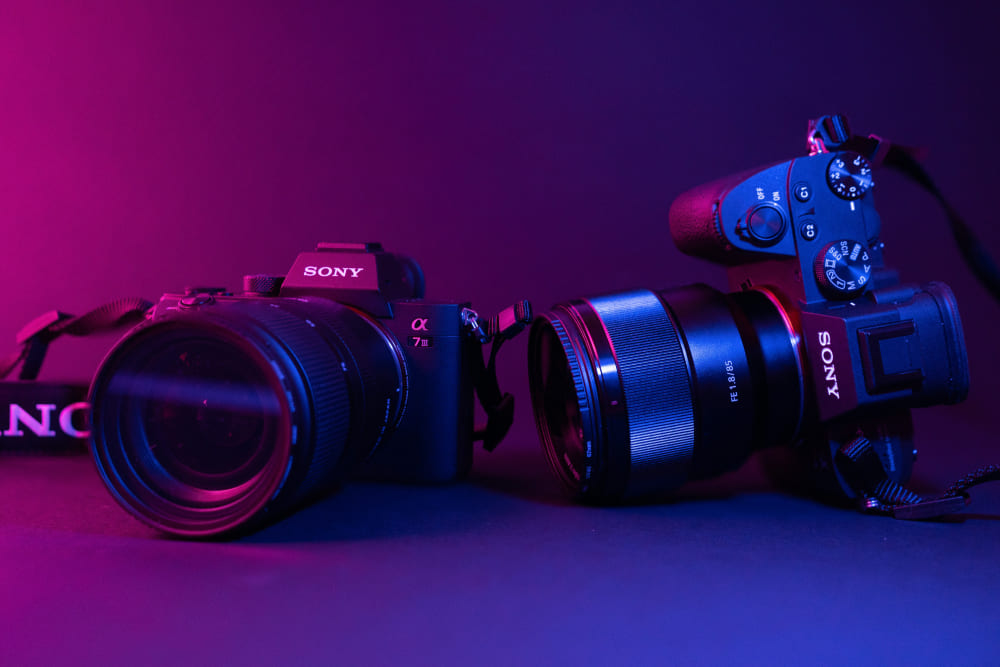
Before you start learning photography in a more complete way, it is very important to get familiar with your camera's basic functions. Reading the camera manual carefully can help you quickly learn where the buttons, dials, and menu items are.
Because cameras from different brands and models can have very different button layouts, the manual is often the fastest way to get started. At the very least, it can keep you from getting lost when you follow tutorial videos and cannot even find the buttons on your own camera.
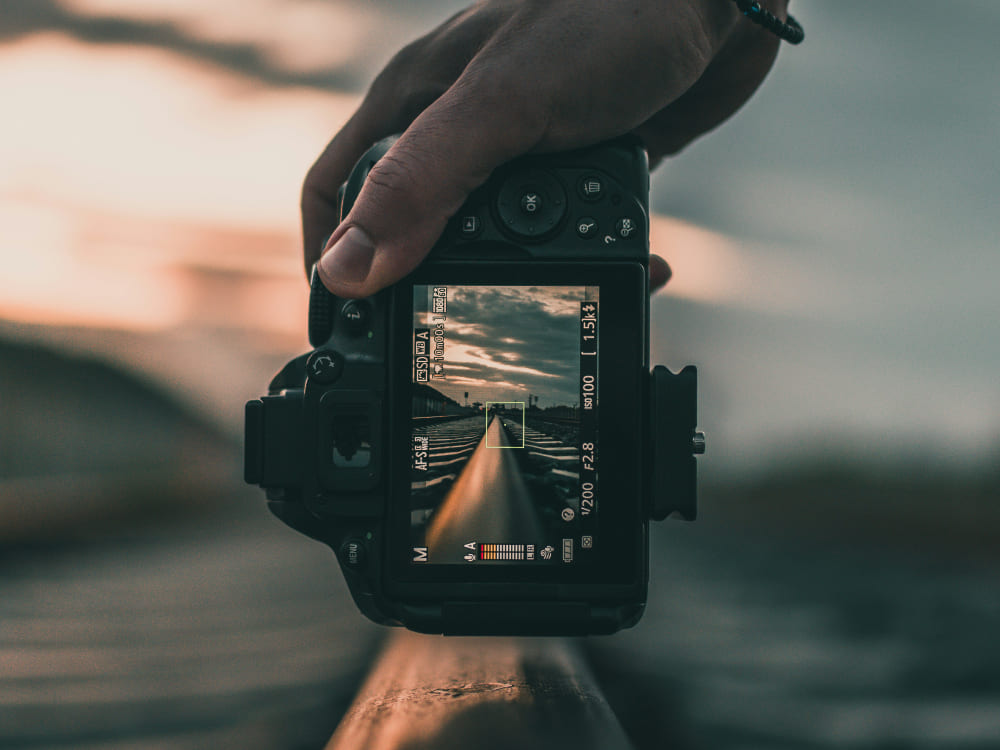
Being able to expose correctly and focus accurately is the most basic step in learning photography. Once you understand these two key points, you can start shooting with more confidence. This is especially true now, since modern digital cameras are much better at auto exposure and autofocus. That also makes it much easier for beginners to get started.
A lot of beginners feel lost as soon as they pick up a camera: What settings should I use? Which mode should I choose? How do I use these buttons? The best way to get past this stage is to practice again and again.
There is no shortcut. The most important thing is to shoot more, use the camera more, and get more familiar with it. For example, try to set aside time at least twice a week to pick up your camera and shoot seriously. Little by little, the controls will become natural, and your hands and muscle memory will build up on their own.
Camera operation is easy to forget, especially when you do not use it often. After a while, you may even forget some of the functions you use most. If you are still not fully familiar with the basic buttons and settings, and you rush into more advanced skills, you will often only make things more confusing for yourself.
Techniques like time-lapse, exposure bracketing, focus stacking, and panoramic stitching all require combining multiple shots. It is better to put these aside for now and come back to them after you have become comfortable with the basics.
How can you tell whether you are ready to move on? You can check one simple thing: Can you finish a full single-shot session on your own without panicking, including composition, exposure, focus, and saving the photo?
If these steps already feel fairly easy, then you have built a good base for the next stage. As long as you practice often enough, this stage will not last too long.
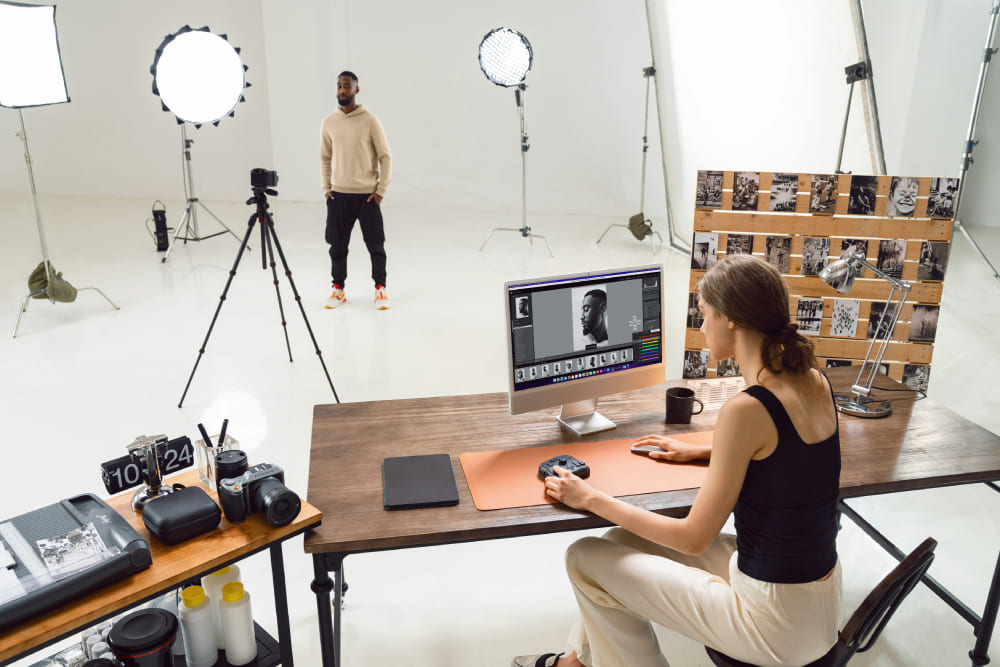
In the digital photography age, many people forget how important post-processing is. In fact, unlike in the film era, both shooting and editing matter just as much in digital photography.
The shooting stage gives you the basic image, while post-processing can improve the final result even more, and sometimes make an ordinary photo look completely different.
So no matter how good your photos already are, we still recommend learning basic editing as early as possible. Through editing, you can better spot problems in your shooting process, and you will also understand exposure, color, and the overall look of an image much more deeply.
Step 2: Find a Subject You Like
Photography includes many different genres and shooting styles. Learning with a clear goal is often the most efficient way, and also the easiest way to get started. For beginners, finding a subject you are truly interested in is an important step before going deeper.
The key points, shooting ideas, and even the gear and workflow used for different subjects can be very different. For most beginners, it is also hard at first to know which type of photography they really like. In that case, you can try the following methods.
Method 1: Look at more photographers' work and start shaping your own taste.
You can browse a lot of photos online and slowly find the styles and subjects that interest you, such as portraits, landscapes, street photography, still life, animals, or a certain mood, tone, or way of framing a shot. The goal here is not to decide right away what you will shoot forever. It is to help you build a general direction first.
That said, this method mostly stays at the "appreciation" stage. After all, a lot of the things other people shoot may not be easy for you to do right away.
For example, you may not have the chance to photograph celebrity models, and you may not often travel or have the chance to shoot big scenes. But that does not stop you from finding possible directions by looking at other people's work. In the end, you only know whether something is right for you after you try it yourself.
Method 2: Start from your own interests.
Before getting into photography, everyone usually already has some hobbies. Maybe you like collecting figures or toys, fishing, walking, cooking, baking, or traveling for work.
All of these can become a starting point for photography practice. Even if you do not have a clear interest yet, you can start by photographing your family's daily life and capturing simple but meaningful moments.
Starting with things you already know will make learning feel more natural and help you get into it faster. Because you already understand these subjects to some degree, you only need to connect your habit of "observing life" with photography, and you will slowly find your own rhythm.
Method 3: Find a photographer whose taste matches yours and try to copy and learn from them.
Copying is actually a very useful method in the beginner stage. You can choose one or a few photographers you like and pay attention to what they shoot, how they shoot, what gear they use, and how they handle light and composition. You can even try practicing with similar gear and a similar point of view.
The point is not just to copy their photos. More importantly, try to understand why they shot them that way. Think about their choices, see how they built the frame, and then ask yourself: if I were taking this photo, what would I do? This process can help you build your own shooting ideas faster and avoid getting lost in blind trial and error.
When it comes to finding a subject you like, some people may be lucky and figure it out quickly. They find their direction and stick with it, and that is great. But if you also go through hesitation, trial and error, and setbacks, that is completely normal.
If you have never really shot it yourself, it is hard to know whether you truly like it. Looking at other people's photos and actually taking photos yourself are two very different things.
Photography is a process of constant exploring, self-reflection, and growth. What makes it truly interesting is that you can always find something new in it and keep learning along the way.
Step 3: Improve Your Photo Editing Skills
In today's world, digital photography is everywhere. Almost any camera, and even a phone, can easily take a photo that looks pretty good. Because of that, many people tend to overlook how important post-processing is.
But from a creative point of view, the camera mainly handles the "recording" part. The stronger your work is in the shooting stage, the more room you have in editing. And the easier it is for your photo to move closer to the result you want.
In fact, post-processing has been a key part of photography since the film days. The only difference is that many darkroom tasks were not widely known, so people often think photography is just about pressing the shutter. But in reality, a photo is often not truly finished just because it has been taken.
Post-processing matters because it gives your photo more possibilities. After taking a photo, it helps to ask one more question: What else could this become? Besides being "already good," could it have more depth, more mood, or a stronger subject? Do not let the photo stop at the moment you press the shutter. Try to use editing to push it toward a fuller and more refined result.
For example, you can reshape exposure, adjust color, strengthen the subject, and improve the light and shadow balance. These are things that may not be fully achieved during the shoot, but can be refined later in editing. In many cases, post-processing is not just simple touch-up work. It is more like the finishing touch that turns a photo from "captured" into "fully expressed."
It is also not hard to tell whether your editing worked. Just compare the before-and-after versions. If the edited photo is closer to the image you had in mind, then the editing was effective. If you still prefer the original after looking at both, that means there is still room to improve, and it is worth spending more time practicing and learning.
For anyone who wants to create more personal and more artistic work, learning photo editing is almost a must. Especially when you are just starting out, shooting comes first, but editing should not be ignored. Shooting gives a photo its base, while editing helps bring out its full strength and finish.
As you get more comfortable with editing, your thinking during shooting will also become clearer. You will start to picture what the final image might look like the moment you press the shutter. In other words, the stronger your editing skills are, the more control you have over the whole photo. Your shooting decisions will be more accurate, and your creative process will feel more relaxed.
For beginners who are just starting to learn photography, there is no need to chase advanced editing skills right away. If you first get the basics right, like color correction, cropping, and adjusting brightness and contrast, your photos can already improve a lot. In this process, a creative controller like TourBox can also be very helpful.

It makes common editing tasks smoother and reduces the need to switch back and forth between the mouse and keyboard. That way, you can focus more on the image itself. For beginners who want to learn photography and post-processing step by step, this can be a very useful tool.

If you are interested in how TourBox can improve photography editing efficiency and the final quality of your work, please visit our Photo Editing page to learn more.
Step 4: Learn How to Control Light
To use a camera and lens well, you need enough practice with the basics. But to really understand correct exposure, you need even more practice and repetition. For most beginners, this process can take a while, and it may also feel a little boring. Still, it is a very important step in learning photography.
People in photography often joke that the first 20,000 photos of a photographer are probably mostly "bad shots." That may sound exaggerated, but it actually makes a lot of sense.
Photography is never just about pressing the shutter button. It tests your camera skills, but it also tests your understanding of light, composition, and the overall image. All of these skills take time to build through constant shooting.
At its core, photography is the art of chasing light, understanding light, and using light well. For photographers, what really matters is not just seeing light, but learning how to control it. Using artificial light is often the point where you start moving to a higher level in photography.
Whether you are learning how to use a reflector, a flash, or different kinds of filters and fill lights, the goal is the same: to make light work better for your creative idea. In other words, you are no longer just waiting for natural light. You are starting to shape the light on purpose so the image looks more like what you want.
That said, this step is usually not something beginners should rush into too early. It is better to first build a solid base in exposure, focus, and composition, and then slowly learn how to control light. That way, you will be more stable, and you will also understand more clearly what light really does in photography.
Three Principles for Self-Taught Photography
In addition to the self-learning steps shared above, there are three more very important rules in photography learning. You can sum them up in three words: look more, listen less, compare less.
1. Look More
Look at more work from visual arts, and do not limit your view to photography alone. Painting, film, posters, illustration, and even strong ad visuals are all good ways to improve your eye for design and build a sense of image.
A lot of people say they "do not understand art." At first, you do not need to rush into complex ideas. You only need to feel the mood, atmosphere, and rhythm the image gives you. No matter what kind of work it is, the first feeling is often its most honest expression.
It may feel quiet, heavy, warm, or intense. It may also feel distant, restrained, or mysterious. All of these are worth taking in slowly.
Photography is, at its core, a form of visual expression. It is not just about pressing the shutter. By looking at the color, composition, light, and style in different works, you will slowly build your own sense of taste. You will also get a clearer idea of what makes an image feel strong.
2. Listen Less
"Listen less" does not mean you should ignore advice completely. It means you should not depend too much on other people's opinions to decide whether your photos are good or bad.
When people first start learning, they often really want approval from others. They hope their family, friends, or people online will say, "Your photos are great." That feeling is normal, because it can make you want to keep learning. But the problem is that if you rely too much on outside feedback, it is easy to treat other people's opinions as the only standard.
Family and friends often praise you because they want to encourage you. Likes and comments online also do not always help you improve your skills. What really matters in photography is not how others see your work, but whether you are actually getting better.
In the end, photography is often a very personal thing. The judgment, feeling, and choice you make at the moment you press the shutter matter most. People who truly feel satisfied through photography are often not doing it because others praise them, but because they can see their own growth.
3. Compare Less
Try to compare yourself less with people around you, and do not keep putting your work up against the work of masters.
In fact, every photo you make is valuable, because it captures how you felt in a certain moment, in a certain place. It may not be perfect, but it belongs to you, and that alone matters.
Instead of always comparing yourself with others, bring your focus back to the subject you truly care about. You can keep following one topic, or try shooting the same subject from different angles, with different focal lengths, or at different times. Then you can see how the image changes.
In that process, you will slowly understand something important: the real joy of photography is not making the same photo as everyone else. It is finding your own way of seeing.
Conclusion
In this blog, we shared a few steps for learning photography on your own, and we also put together three very important rules for self-study. To finish, we want to recommend a few photography books worth reading.
These are not mainly technical books about how to shoot. Photography techniques have changed very fast in recent years. Some shooting problems that were worth studying over and over a few years ago may not be the main issues today. Instead, we want to recommend photo books and photography books that include personal stories or the background behind the work.
Because often, what is really worth learning is not just how a photo was made, but also why it was made. Understanding the time when a photo was created, and the photographer's state of mind, ideas, and situation at the time, often helps us understand photography better than studying technique alone.
Here are the books we recommend:
- Annie Leibovitz at Work By Leibovitz, Annie
- Peter Lindbergh. Untold Stories By Krämer, Felix, Wenders, Wim
- Ansel Adams: The National Parks Service Photographs By Adams, Ansel
- Sebastião Salgado. GENESIS By Salgado, Lélia Wanick
- New York. Portrait of a City By Golden, Reuel
- Stephen Wilkes. Day to Night (Multilingual Edition) By Rexer, Lyle