How to Make Lightroom Presets?
When you have hundreds or thousands of photos, doing the same color adjustments over and over is boring and a waste of time, and that's exactly why Lightroom presets exist.
Every photographer develops their own color style, so it's useful to know how to make presets in Lightroom. Presets let you quickly apply a custom look to your photos, and you can share the style you create with others.
So let's get right to it: this simple tutorial will walk you through the process of making presets in Lightroom.

In this article, you will learn:
- What Are Lightroom Presets?
- How to Make Presets in Lightroom?
- How to Export and Share Lightroom Presets?
- Practical Tips for Making Lightroom Presets
- Conclusion
What Are Lightroom Presets?
Lightroom presets are sets of predefined adjustment settings you can apply to a photo with one click. They include exposure, contrast, color temperature (white balance), saturation, color grading, and other controls.
Using presets lets photographers quickly create a consistent look and speed up editing. If you don't know where to start with color, previewing different Lightroom presets can also help you find a basic direction for further tweaks.
You can find many presets shared or sold online by well-known photographers. Or you can make your own presets based on your personal style and color preferences.
For example, you might create presets for a film look, a documentary style, or a dreamy vibe. Then you can apply them to many photos at once to keep tones, contrast, and color consistent.
How to Make Presets in Lightroom?
Here we'll use Lightroom Classic as an example. First, pick the photo you want to edit, then switch to the Develop module.
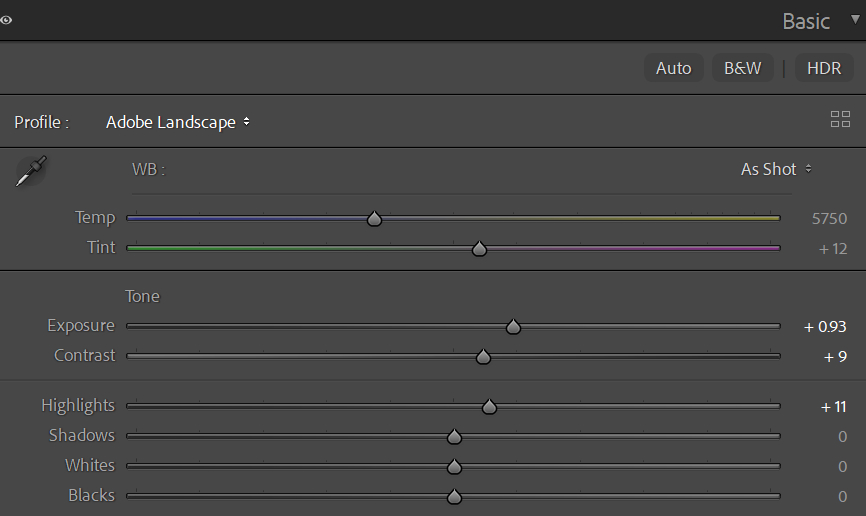
Make global adjustments in the right-hand Basic panel and other panels.
- Exposure controls overall brightness — drag right to brighten, left to darken.
- Contrast increases or lowers the difference between lights and darks.
- Highlights and Shadows help recover detail in overexposed or underexposed areas.
- Whites and Blacks set the thresholds for the brightest and darkest parts of the image.
- Temp and Tint adjust the overall warm/cool tone.
- The Tone Curve lets you fine-tune brightness across the tonal range.
- In the Color Mixer (HSL), you can adjust Hue, Saturation, and Luminance for individual color channels like red, green, and blue.
Once you finish the basic adjustments, you've already done most of the work for a preset. Now save it.
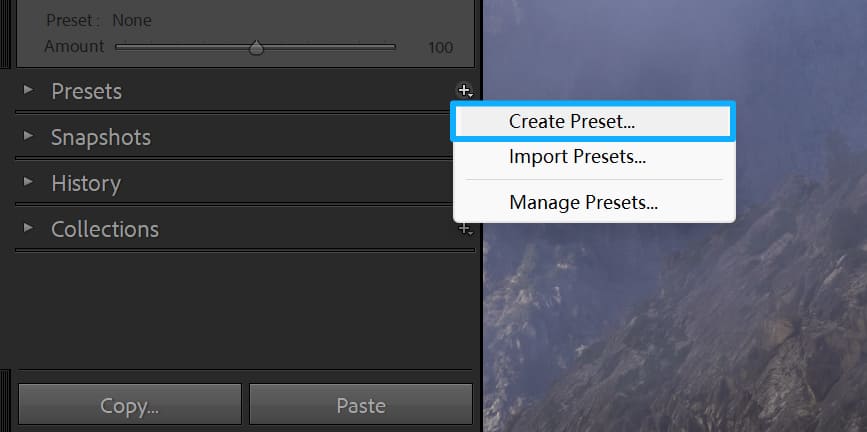
After editing, open the Presets panel on the left and click the "+" button, then choose "Create Preset."
In the dialog that appears, name your preset and pick a preset group (by default, it goes under User Presets). Check the settings you want to include. You can uncheck "Select All" and only pick the parameters you need — then click Create.
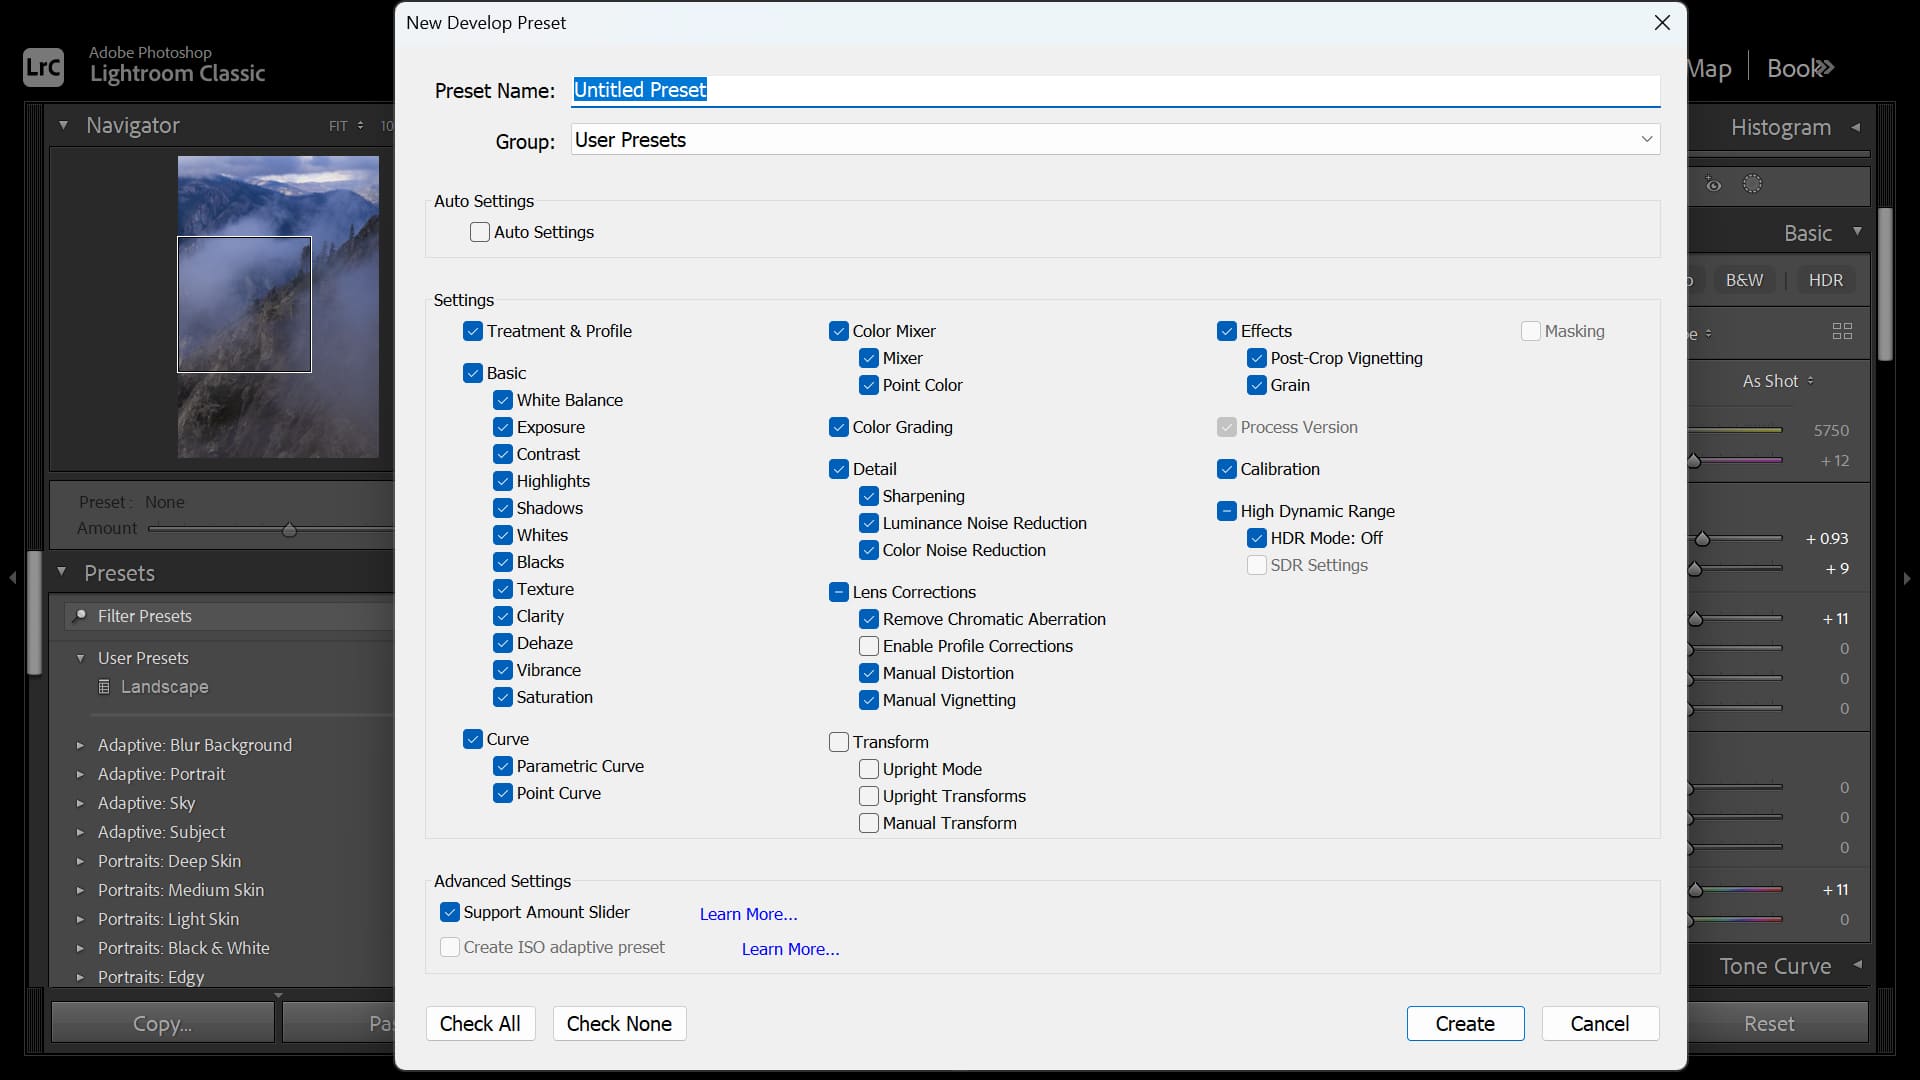
Your new preset will appear in the chosen group in the Presets panel. For best results, include only global adjustments. Avoid saving settings that depend on the current image, like crop, local adjustments (brushes, gradients), or watermarks — this keeps the preset more flexible and easier to use.
In Lightroom's desktop and mobile (cloud) apps, creating a preset is very similar to Classic. Open the Presets panel and click the Create Preset icon. Enter a name, pick a group, check the settings you want to include, and save.
The key difference is sync: the cloud version automatically syncs presets to every device where you're signed in, so you don't have to copy files. In Lightroom Classic, you must manually copy preset files between devices. The cloud version also offers features like AI-recommended presets and advanced profiles, which Classic does not have.
One more note: the cloud version currently can't export presets as .xmp files — you can only sync them or apply them directly.
How to Export and Share Lightroom Presets?
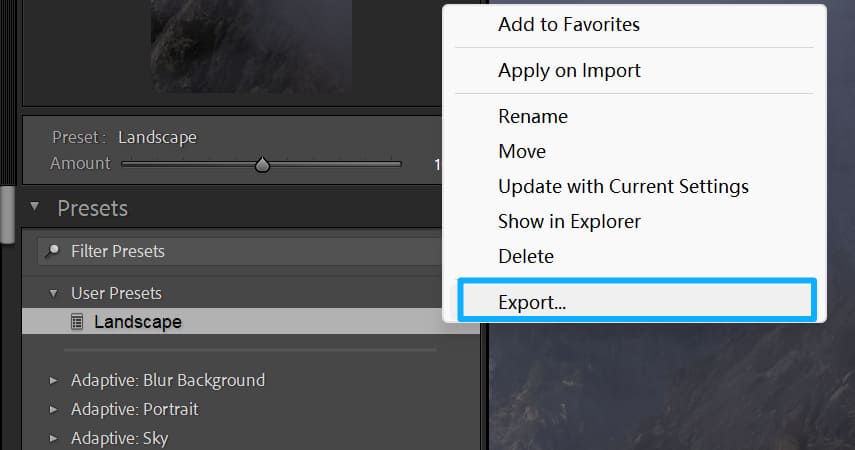
Lightroom Classic lets you export custom presets as .xmp files so you can share or back them up. In the Develop module, open the Presets panel, right-click the user preset you want, choose Export, give the file a name, and save.
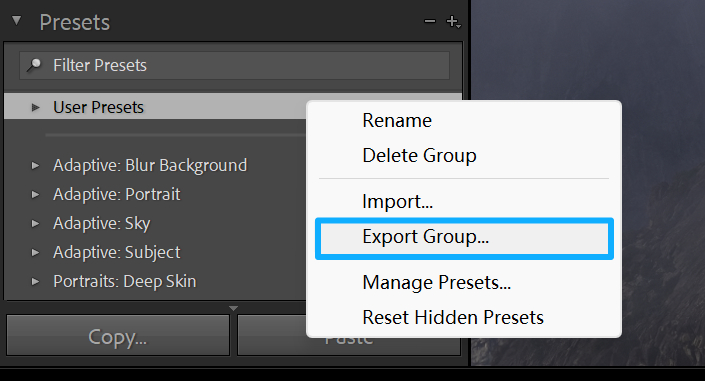
To export a whole group, right-click the preset group and choose Export Group. That will save every custom preset in that group at once.
You can send the exported .xmp files by email or upload them to a cloud service like Google Drive. The recipient can load the file in their Lightroom Classic by using Import Presets.
Note: built-in default or system preset groups can't be exported. Only user-created or third-party presets can be exported.
If you want a local backup, you can copy the presets folder directly from your system:
- Windows: C:\Users\[User Name]\AppData\Roaming\Adobe\CameraRaw\Settings
- macOS: ~/Library/Application Support/Adobe/CameraRaw/Settings
Practical Tips for Making Lightroom Presets
1. Only Include Global Edits
When you make a preset, check only the settings that make sense for many photos — things like exposure, tone curve, saturation, and color grading.
Don't save settings that only work for a single image, such as crop, rotate, local brush edits, linear/radial gradients, or camera lens corrections. You can uncheck those when creating the preset so the preset won't cause unwanted changes on other photos.
2. Test Your Preset
Apply the new preset to many photos with different lighting and subjects. See how it looks. If a preset makes some images too saturated or shifts color too much, tweak the settings or split it into separate presets. For example, make a noise-reduction preset for high-ISO shots.
3. Organize and Back Them up
Group and name presets by style or use, like "Portrait — Warm" or "Landscape — Cool," so you can find them fast.
Right-click a preset and choose "Show in Explorer" (or "Show in Finder" on Mac) to find the preset file. Back up your .xmp folders regularly to avoid losing custom presets when you change computers or if the system fails.
Conclusion
In this article, we showed the process for how to make Lightroom presets and shared some practical tips. We hope these simple methods and small tips are helpful.
Finally, we'd like to recommend a popular controller among photographers: TourBox. When you color-grade in Lightroom Classic (LrC), the side panels can block your view of the image. You end up tweaking inside the LrC's native interface, and it's easy to miss small details or not get the best result.

TourBox offers a built-in feature for LrC called the Dynamic Panel. It's a highly customizable floating panel that removes the native panel clutter so you can see and feel each color change more clearly.

TourBox is more than a shortcut controller. It includes many built-in features like the Dynamic Panel that cover photo management, editing, and color grading across your whole post-processing workflow. If you're interested, visit our Photo Editing page to learn more.