How to Photograph the Milky Way: A Beginner's Guide
The moment you look up and see the Milky Way stretching across the night sky, it is easy to want to keep that breathtaking view forever. In fact, with a few key settings and shooting tips, you can capture this river of light in your photos too.
In this article, we will share some steps and tips for photographing the Milky Way. So, without further ado, let's get started.

In this article, you will learn:
- What Is the Milky Way Like?
- Best Time to Photograph the Milky Way
- Camera Settings for Photographing the Milky Way
- Best Cameras and Lenses for Milky Way Photography
- How to Compose Milky Way Photos?
- Conclusion
What Is the Milky Way Like?
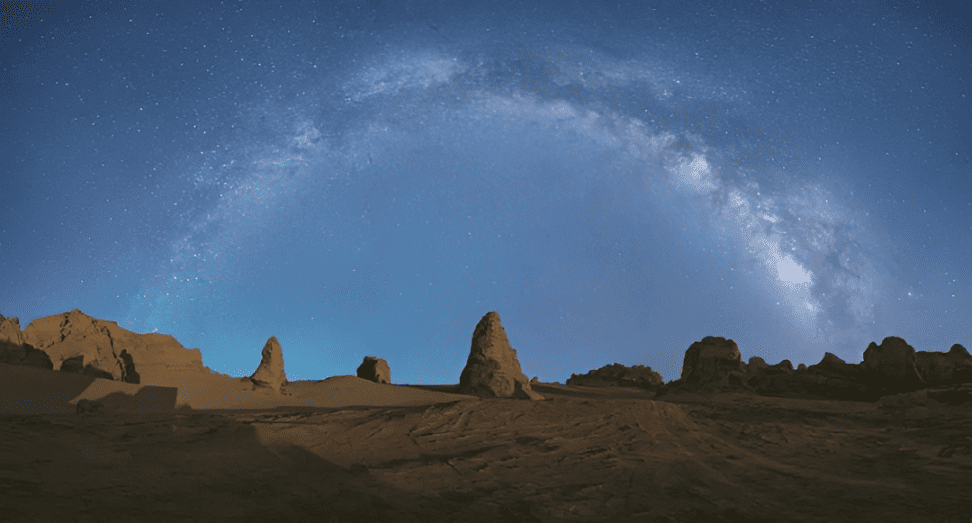
The full Milky Way appears as a curved band of stars, but you need a panoramic stitch to capture the whole view. Based on how high the Milky Way is in the sky, the best time to shoot a panoramic Milky Way in the Northern Hemisphere is from April to September. As the season goes on, the Milky Way will appear higher and higher in the sky.
That said, there is no right or wrong when it comes to the Milky Way's height. You also need to think about the height of the landscape in front of you. For example, deserts are usually better for shooting in May, while high-altitude locations are better in July and August. (Northern Hemisphere)
The easiest type to capture is a single-frame Milky Way shot. This usually shows only one part of the whole Milky Way, known as the galactic core, which is the most visible section. As shown below:
Of course, the best way is to check the Milky Way and moon conditions before you shoot using an app. We recommend Stellarium Mobile. It lets you choose your shooting location and time, and it can simulate the Milky Way and moon conditions at that moment. It is very useful and easy to use.
Best Time to Photograph the Milky Way
You may see many photographers say that the Milky Way should be shot when it is dark and there is no moon. But that is not fully accurate. That is the easiest time to shoot the Milky Way, but not always the best time.
So when is the best time to photograph the Milky Way?
1. When the moon is rising or setting near the horizon
At this time, moonlight can light up the landscape without affecting the Milky Way too much. The good part is that the soft yellow light creates a nice contrast between warm and cool tones. The downside is that the shooting window is short, only about 15 minutes.
2. When there is a crescent moon under 15%
The moon can stay in the sky, and it will not affect the Milky Way much for the whole night. The good part is that you have a longer shooting time. The downside is that the moonlight is white, so the colors can be harder to balance.
Here are some Milky Way photos taken at different times:
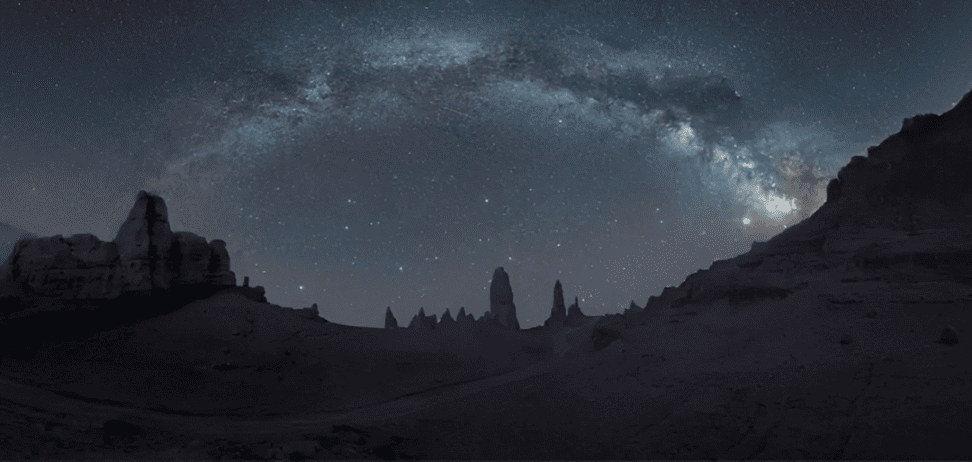
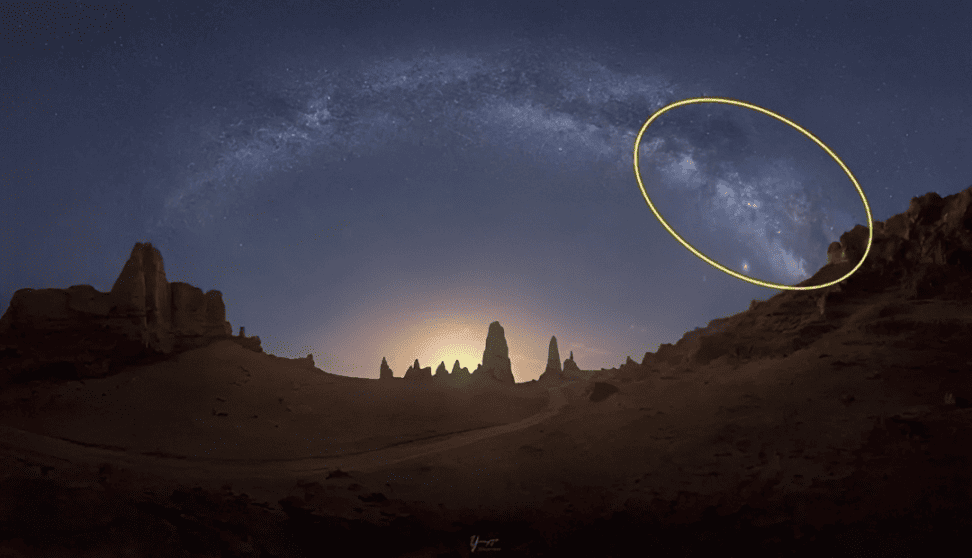
No moonlight effect
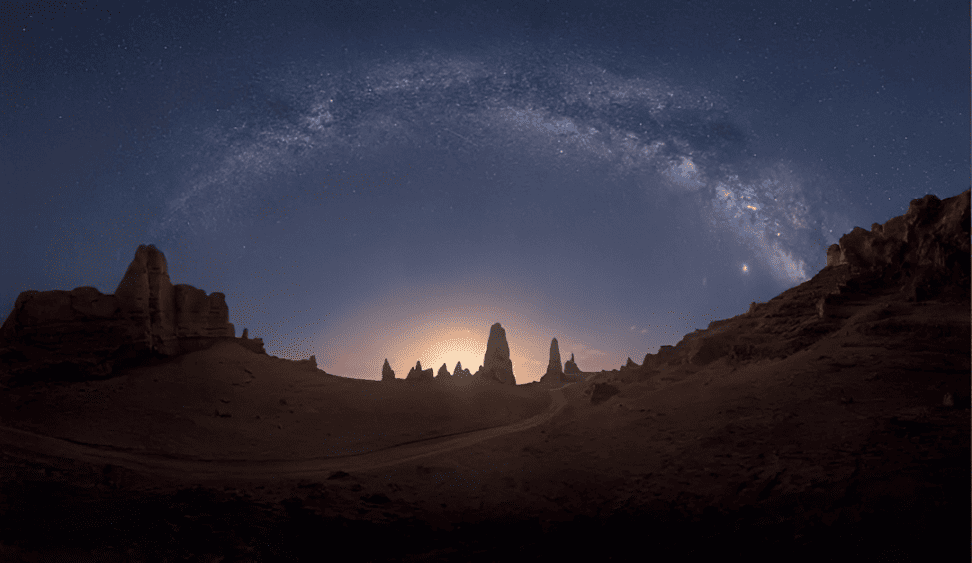
Backlit effect when the moon is rising
Side light effect when the moon is rising
Effect with a crescent moon and stronger brightness
Shooting the Milky Way with moonlight can add more color to the scene, show more detail, and greatly improve image quality. The ISO can also be lowered much more.
Camera Settings for Photographing the Milky Way
- Shutter speed: For a focal length wider than 20mm, use a 20-second exposure. If you are shooting at 24mm to 35mm, use a 10-second exposure.
- Aperture: f/2.8 is the most common choice. A wider aperture, such as f/1.4 or f/1.2, is even better. It lets you keep the ISO lower, which helps image quality.
- ISO: If there is no moonlight, and you are using f/2.8, the ISO is usually around 2500 or 3200. With an f/1.2 lens, it is usually around 1250. If there is moonlight, you can lower the ISO by one stop.
- White balance: For a single-frame Milky Way shot, white balance does not matter much. You can adjust it freely in the RAW file later. But for star trail time-lapses or panoramic stitches, you should set the color temperature manually. A common choice is around 4200K.
- Turn off long exposure noise reduction and high ISO noise reduction: These in-camera noise reduction settings do not affect RAW files. They only affect JPEG files, so they do not help with editing. They also make the camera take longer to process each shot, so you cannot take the next photo right away. In starry sky time-lapses or star trail stacking, this can make the result look less smooth and less continuous.
Best Cameras and Lenses for Milky Way Photography
First, we need to clear up two things:
- A higher megapixel count usually means weaker high-ISO image quality.
- Medium format cameras are usually not as good as full-frame cameras in low light.
The reason is simple: the more megapixels a sensor has, the denser the pixels are. That means each pixel is smaller, so it collects less light. As a result, high-ISO performance is usually worse.
More megapixels do not automatically mean better image quality. Megapixels mainly affect how much you can crop or enlarge an image before it starts to look soft.
Image quality also includes dynamic range, color accuracy, and high-ISO performance. For night sky photography, you usually do not need heavy cropping or very large prints, so 24 to 30 megapixels is more than enough.
Camera brands do not use megapixels only to separate good cameras from bad ones. They also use them to serve different kinds of users. And when sellers talk about "better image quality" from higher megapixels, they often mean the more expensive models bring in more profit.
So when you shoot the night sky, you really do not need a high-megapixel camera. A camera like the Nikon Z6 III or the Panasonic S1M2, which has a lower-resolution sensor, is already a very good fit.
As for lenses, wider is not always better. You should choose the focal length based on the Milky Way's position and the landscape in front of you.
- For regular shots, a zoom lens like a 16–35mm f/2.8 is a practical choice.
- For panoramic Milky Way shots, it is better to use a lens wider than 18mm, such as the Panasonic 18mm f/1.8, Sigma 14mm f/1.4, or Viltrox 16mm f/1.8.
- For single-frame Milky Way shots, meaning a photo focused on the Milky Way's core, you can consider lenses like the Panasonic 24mm f/1.8, Sigma 24mm f/1.4, or Nikon 20mm f/1.8.
In short, for Milky Way photography, what matters most is not chasing the highest megapixel count, but choosing a camera with good low-light performance and a lens that matches your scene.
How to Compose Milky Way Photos?
When you photograph the Milky Way, you are not just taking a picture of the sky. The Milky Way is not really the subject on its own. It is an astronomical sight. The Milky Way is the same everywhere in the world, so if you only photograph it, every image will start to look the same.
That is why, if you want to create a strong Milky Way photo, you need to think about what makes your image unique. In other words, you should use a distinctive foreground or landscape to shape the look of the photo.
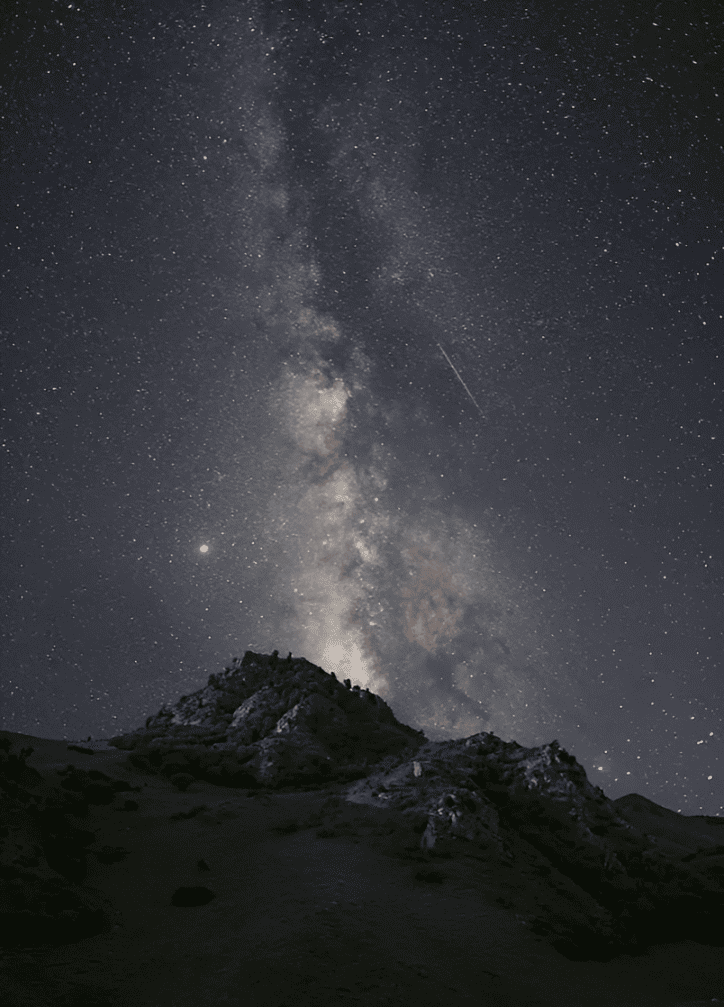
For example, in the photo below, the vast starry sky, the wide desert, and the small figure create a strong contrast.

Conclusion
That wraps up our guide on how to photograph the Milky Way. We hope you enjoy the process and get something meaningful from every shoot. And if you are lucky enough to see a meteor streak across the night sky, do not miss that moment of good luck and a wish come true.
Finally, let's talk about post-processing for Milky Way photos. These images usually need some basic edits, such as noise reduction, brightening the night sky, boosting contrast, correcting white balance, and adding a little sharpening. These steps help the image look cleaner and more transparent.
And if you have a TourBox to help with your editing, both your workflow and your final results can improve a lot.

When you edit photos with TourBox, you can clearly feel each small adjustment at your fingertips. It feels more like you are touching and shaping the image by hand, instead of just using software. That kind of control is something a mouse and keyboard cannot really match.
On top of that, using TourBox's physical dials to adjust settings is more precise and detailed than dragging sliders with a mouse. You do not need to keep staring at the slider position. Instead, you can fine-tune step by step, like manual focus, until everything feels just right. That makes it easier to notice the small details that can make or break a photo, and to achieve the most precise edits your software allows.

If you are interested in TourBox, feel free to click through to our Photo Editing page to learn more.