How to Put Text Behind a Person in CapCut?
Introducing text behind a person in your videos can add a creative touch and emphasize key elements of your story. In this tutorial, we will guide you through the process of achieving this effect using CapCut, a popular video editing software.

In this article, you will learn:
- Things to Know Before Editing with CapCut
- How to Put Text Behind a Person in CapCut?
- Final Thoughts About Putting Text Behind a Person in CapCut
Things to Know Before Editing with CapCut
CapCut is an efficient video editing software that is perfect for beginners with no editing experience and content creators looking to quickly produce short videos in bulk.
With its user-friendly interface and a wide range of templates, CapCut offers a simple editing experience. It provides music, emojis, special effects, filters, and transitions, making it suitable for editing simple short videos or vlogs.
However, due to its simplified interface, CapCut may not support complex creative ideas or frequent modifications, making it less suitable for commercial video production.
In this tutorial, we will be using the PC version of CapCut for editing. CapCut is available as a mobile app, online version, and PC software. However, the PC version generally offers a more comprehensive editing experience.
So let's dive into how to put text behind a person in CapCut and explore the exciting possibilities this software has to offer.
How to Put Text Behind a Person in CapCut?
If you're using CapCut for the first time, you can visit the official CapCut website and download the desktop version of the software. Once the download is complete, follow the installation instructions to set up CapCut on your computer.
After the installation is complete, launch the CapCut application on your computer. You'll be greeted with a clean and intuitive interface, ready for your editing work.
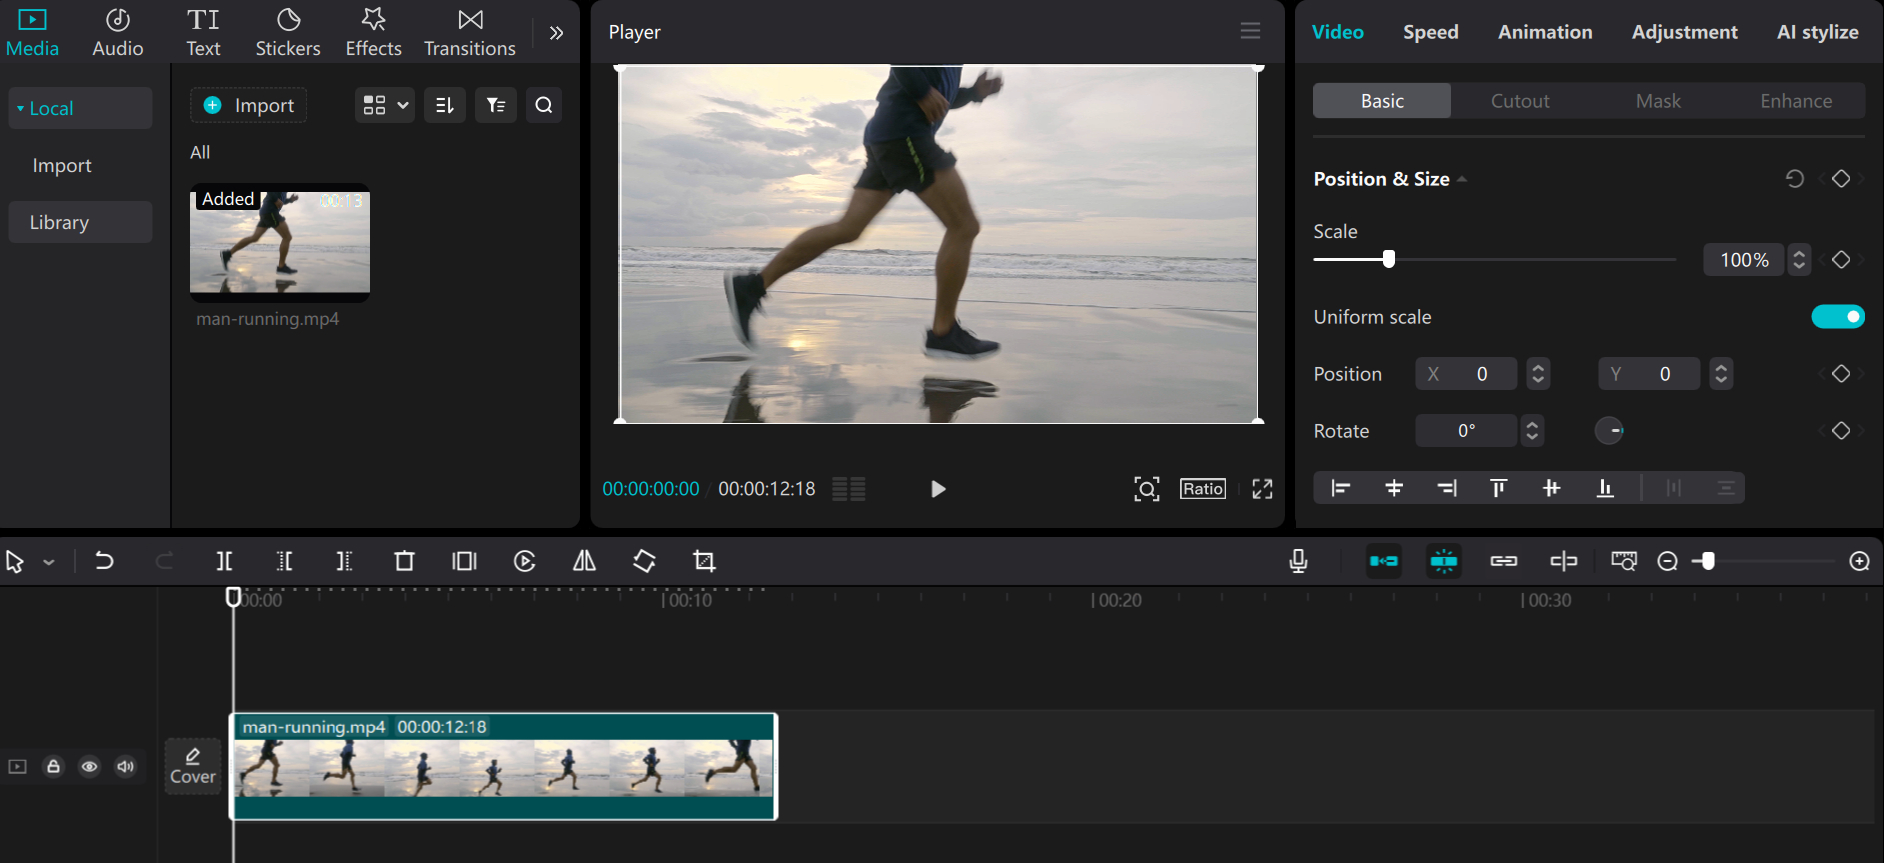
Click on the "New Project" button, which will open the CapCut project editing page. To import your desired files, click the "Import" button in the top left corner of the Media panel or simply drag and drop the files into the Media panel.
Note:
CapCut supports various file formats, including videos, images, and audio.
Once your media files are imported, they will appear in the Media panel. Arrange the files on the timeline in the desired order to create your video sequence. You can trim, split, and rearrange the clips on the timeline to perfect your storytelling.
Switch to the Text panel on the left side of the CapCut interface. Here, you have the option to let CapCut automatically generate captions for your video, upload your own custom fonts, or use the default text and text effects provided by CapCut.
For this tutorial, let's choose one of the text effects and drag it onto the timeline, placing it above the footage track. Adjust the length of the text track to match the duration of your video track and make any necessary trimming adjustments.
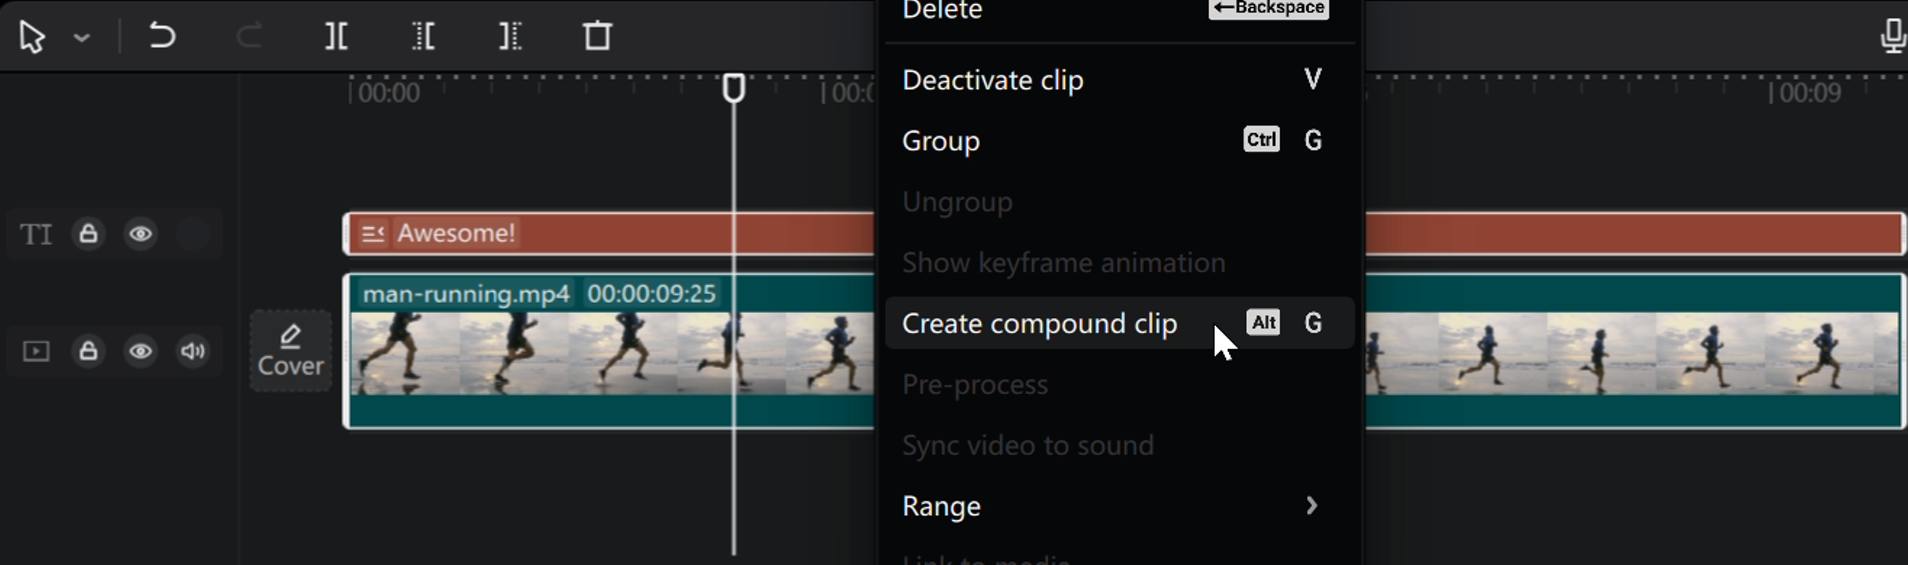
The result will be similar to the video below, where the text layer appears on top of the footage, covering a significant portion of the visuals. Now, how can we make the text appear behind the person running in the video?
Select both the text and video tracks by dragging the mouse over them. Once both tracks are selected, right-click on either track and choose "Create compound clip."
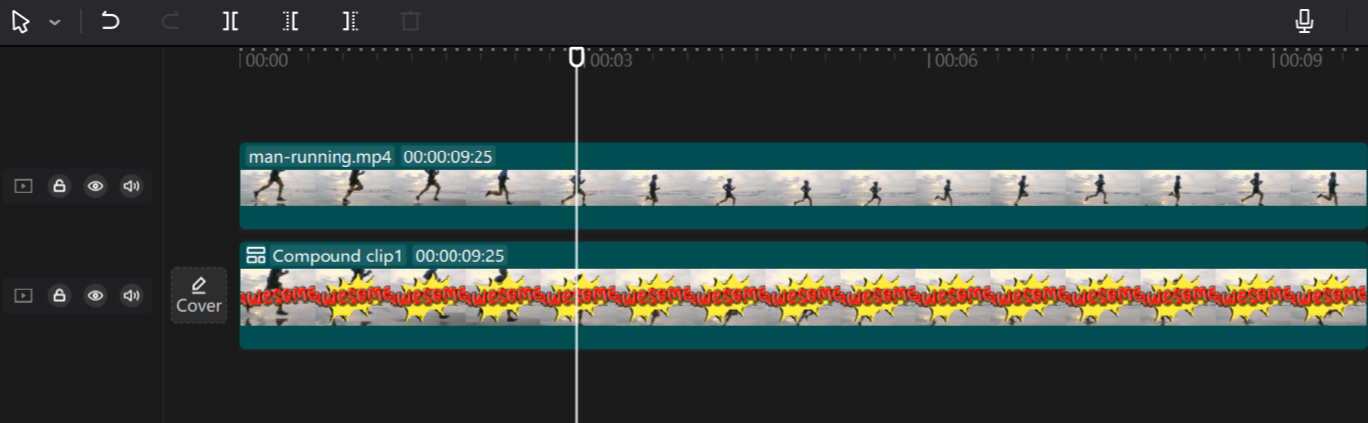
Now, you can import the original footage again and drag it onto the timeline, placing it above the compound clip track, as shown in the image below.
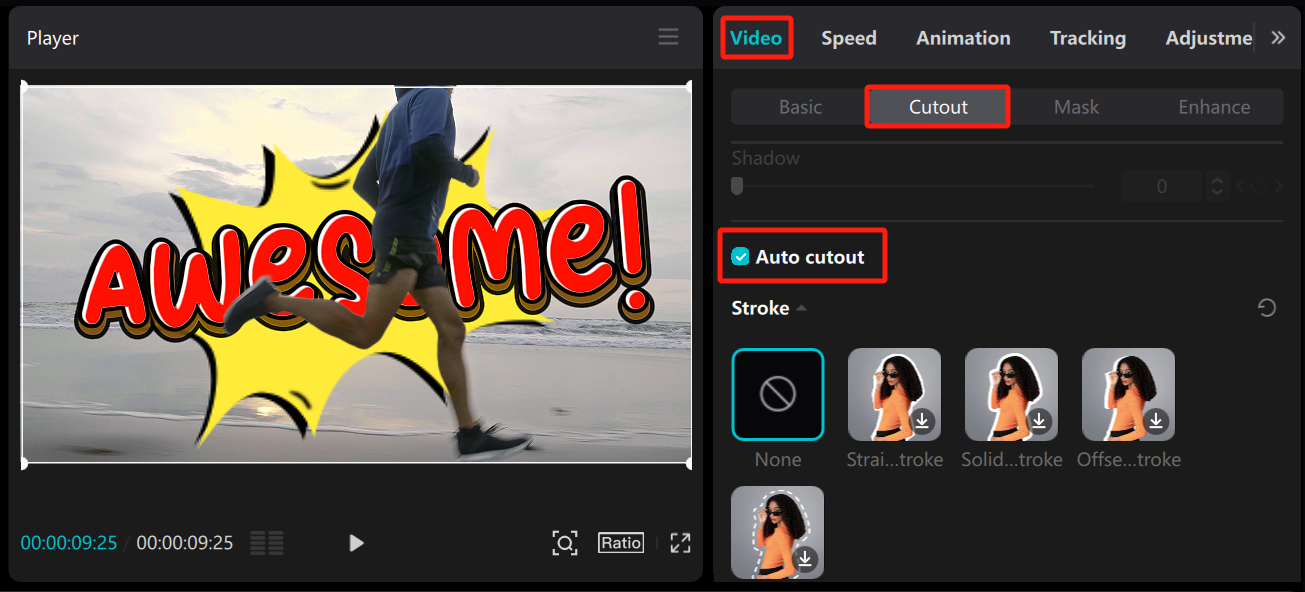
Select the newly imported footage segment on the timeline and navigate to the Cutout panel under the Video options on the right side of CapCut. Scroll down until you see the "Auto cutout" checkbox.
Check this box and wait for a moment as CapCut intelligently extracts the person from the background for you.
Now, let's take a look at the final result of putting text behind a person in CapCut. Isn't it incredibly simple?
Final Thoughts About Putting Text Behind a Person in CapCut
As we mentioned earlier, CapCut is a very user-friendly editing software that is highly popular among content creators because of its simplicity and ease of use.
However, simplicity can be both an advantage and a disadvantage. CapCut may not have all the advanced features and capabilities of professional editing software like Premiere Pro, making it challenging to achieve complex creative ideas.
If you are a beginner in video editing or a newly established content creator, there is no need to pressure yourself to immediately master all the complexities of professional editing software.
The most important thing is to develop your editing mindset, such as understanding storytelling techniques, determining what elements to add, how to piece together different shots, and effectively using footage and sound effects.
As you continue to learn, your perspective and possibilities will broaden. You will gradually explore other editing software beyond CapCut and gain knowledge on capturing the best footage and using the language of visuals to tell compelling stories.
Lastly, we highly recommend a tool called TourBox. Designed specifically for content creators, TourBox is a powerful and intuitive editing controller that can greatly enhance your editing experience.

With TourBox, you can have precise control over various editing functions and parameters, allowing you to work more efficiently and creatively. Its ergonomic design and customizable buttons make it a seamless extension of your editing process, providing quick access to commonly used tools and commands.
And that concludes our tutorial on how to put text behind a person in CapCut. We hope this guide has been helpful on your creative journey.