Methods for Removing People in Photoshop: A Comprehensive Guide
When you're capturing outdoor scenic photos, it's common for passersby to enter your frame, potentially affecting the composition unintentionally. Similarly, you wouldn't want strangers to intrude on those precious moments when taking pictures of family and friends.
If unwanted individuals appear in your photos and you want to remove them seamlessly, you can do so using Photoshop. So, how do you photoshop someone out of a picture?

In this article, you will learn:
- How to Remove People in Photoshop?
- Method 1 for Removing People: Image Stacking
- Method 2 for Removing People: Utilize Post-Processing Tools
- Method 3 for Removing People: Leverage Content-Aware AI Functionality
- Final Thoughts About Removing People in Photoshop
How to Remove People in Photoshop?
In Photoshop, there are numerous tools available for removing people. In terms of method, there are generally three main approaches: stacking, utilizing various post-processing tools within Photoshop, and leveraging Photoshop's content-aware AI functionality.
Below, we will delve into these three methods separately, enabling you to confidently remove people (or objects) from your photos without any stress!
Further Reading:
Method 1 for Removing People: Image Stacking
Stacking to remove people is not widely used because it's quite cumbersome and heavily relies on the initial shooting process.
The principle involves capturing multiple shots using a tripod, where all parameters and positions must remain consistent.
In these shots, people move around while the background remains static. By comparing and analyzing these images in Photoshop, you can extract the static scenes.
However, this method requires capturing a large number of photos initially. Generally, the more shots you take, the higher the precision in post-processing removal.
During shooting, a dense crowd or a person standing still in one spot can affect the composite's accuracy.
Image stacking is commonly employed in astrophotography, macro photography, and other fields to achieve higher-quality images. While this method can be used to remove people or objects, it leans more towards showcasing skills than practicality.
Additionally, this technique demands high computer performance. Processing multiple photos in Photoshop can strain a computer's capabilities, potentially leading to crashes if the computer lacks sufficient performance.
Further Reading:
Method 2 for Removing People: Utilize Post-Processing Tools
When removing someone in Photoshop, using post-processing tools is a common method. This approach typically requires just one photo, making it straightforward and practical.
There are various post-processing tools in Photoshop, each relatively easy to operate once you select the appropriate one. Here are a few commonly used editing tools:
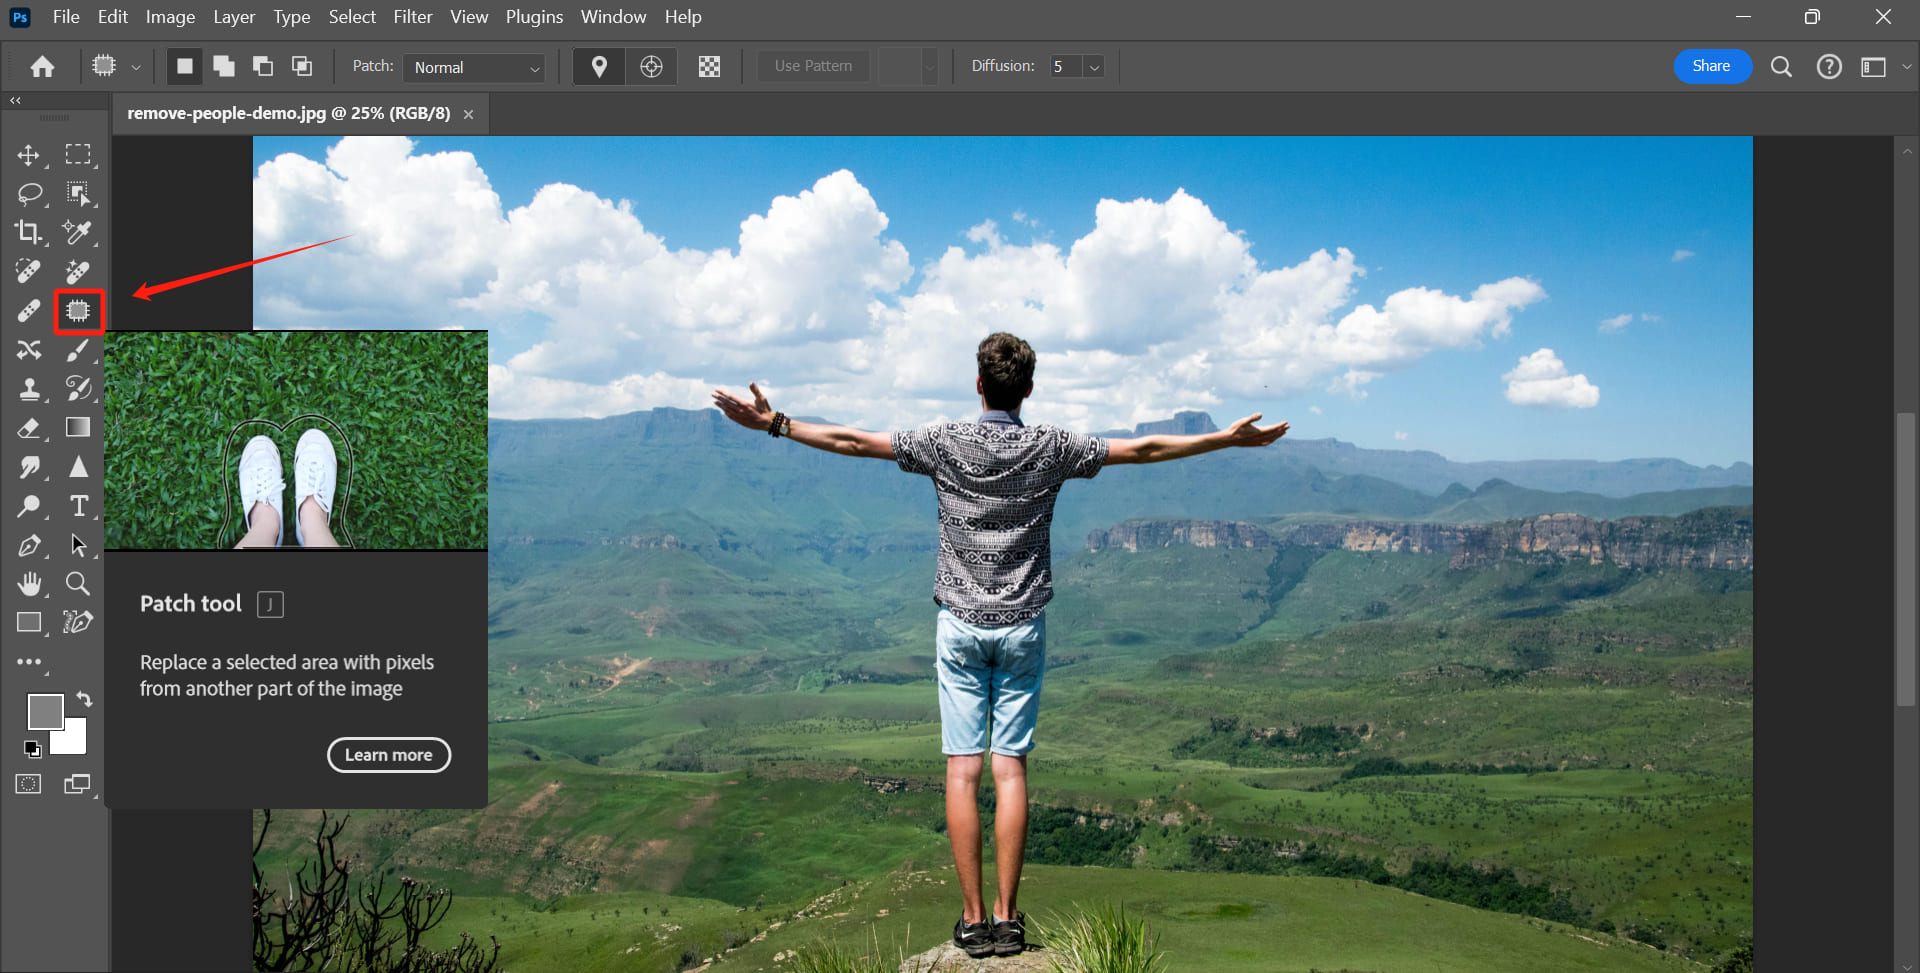
1. Patch Tool
The Patch Tool in Photoshop works by covering unwanted content with nearby normal textures, akin to a skin graft in surgery.
It's important to note that the Patch Tool is not a one-stop solution. Typically, after using the Patch Tool, you may notice some imperfections that stand out.
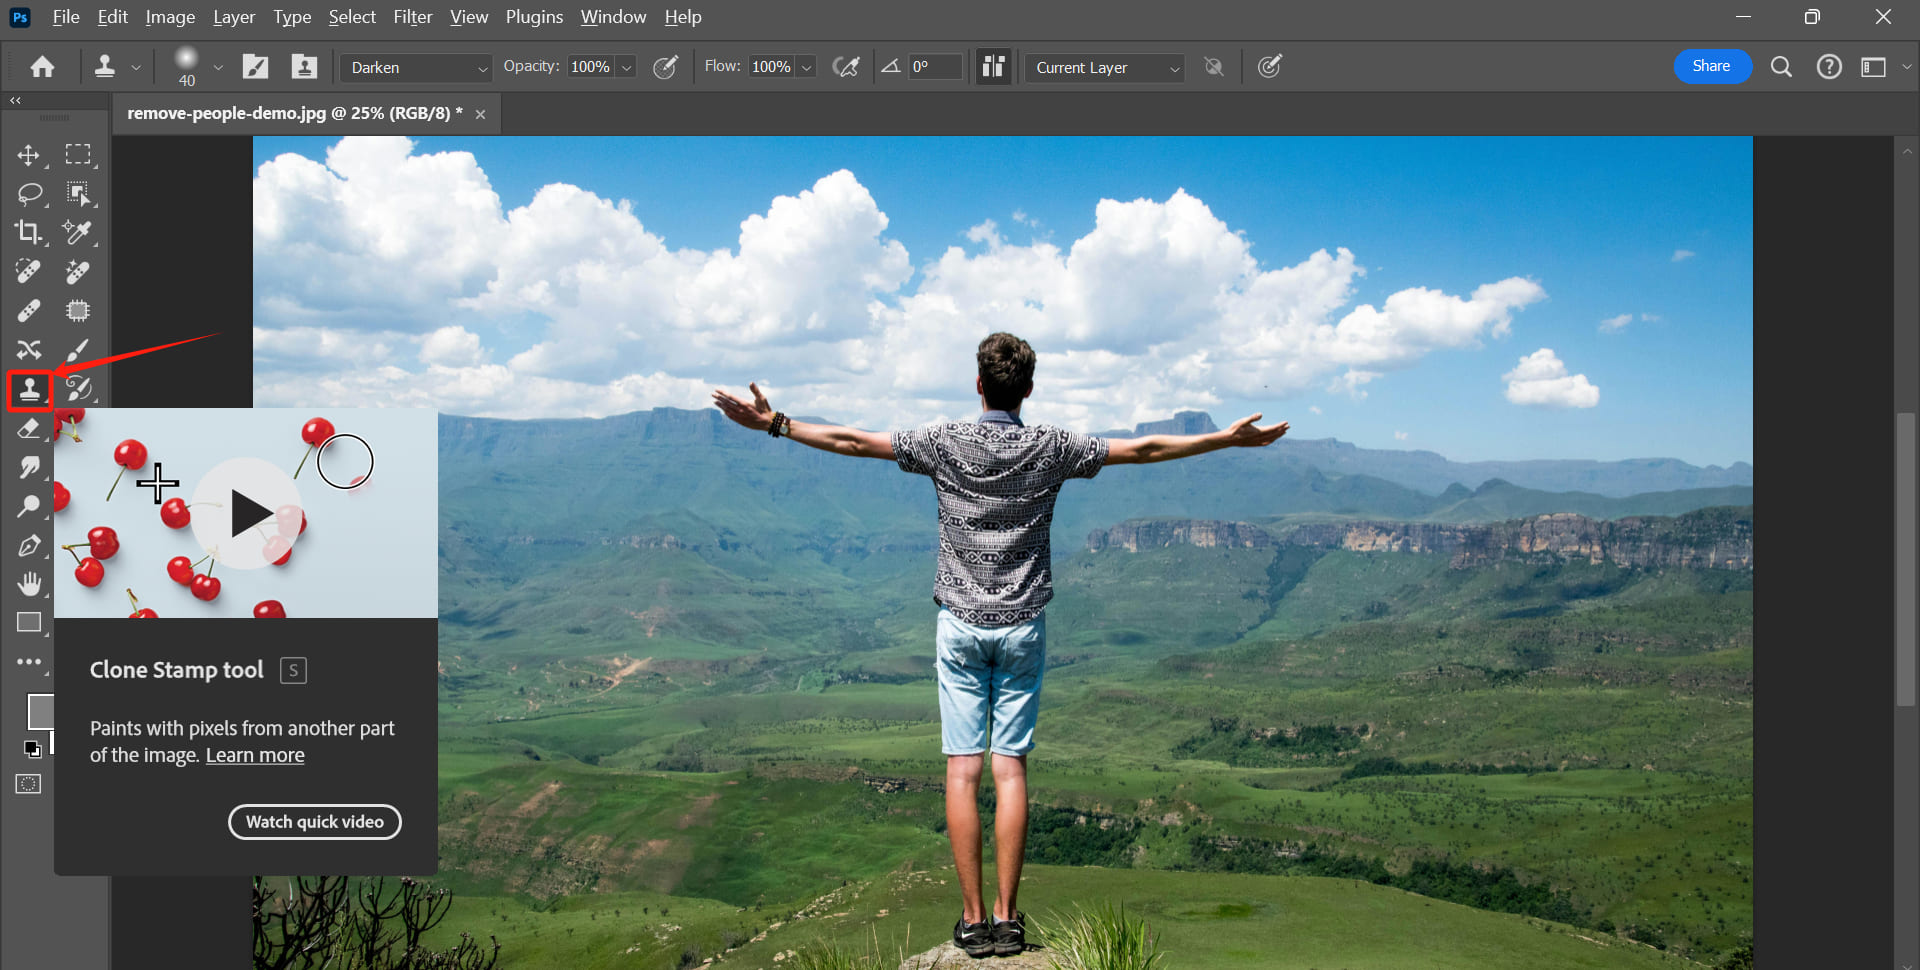
In such situations, you can switch to the Clone Stamp Tool in the toolbar, and by holding down the "Alt/Option" key, select colors from the surrounding area. This helps soften the imperfections, seamlessly blending them with the surrounding scene and colors.
2. Clone Stamp Tool
The Clone Stamp Tool is another excellent choice. It's like an expanded version of the Patch Tool. While the Patch Tool is simpler to use, the Clone Stamp offers more versatility for different functions.
Using the Clone Stamp Tool is a bit more complex and requires some skill to use effectively.
If you're interested in learning more about the specific techniques for using the Clone Stamp Tool, feel free to check out our related tutorial. It's sure to inspire and enlighten you!
Further Reading:
3. Spot Healing Brush and Healing Brush Tool
The Spot Healing Brush and Healing Brush Tool can also remove unwanted content. It's best not to use these tools individually for this purpose.
These tools are typically better suited for fixing small imperfections like blemishes on a face or removing wires. They may not be as precise for removing larger areas like people.
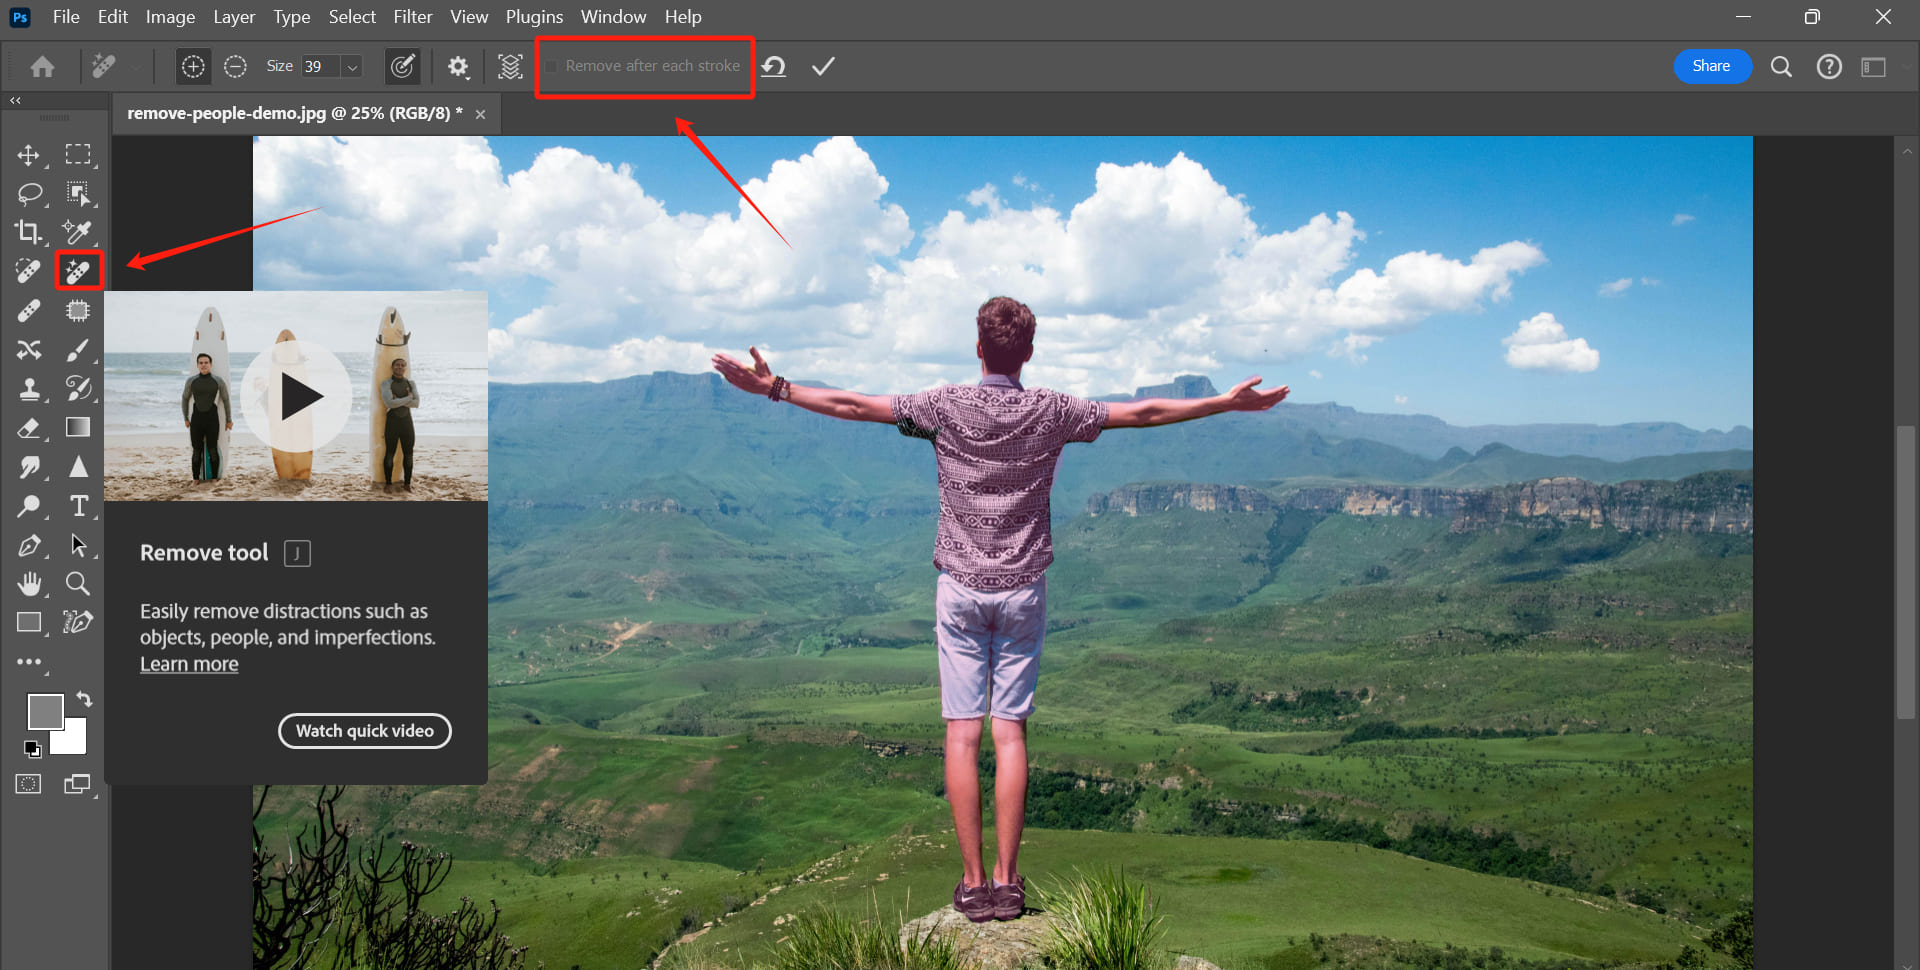
4. Remove Tool
You can directly utilize the Remove Tool to erase someone in Photoshop. As advertised, it's excellent for eliminating people, objects, and imperfections.
It's quite straightforward to use. Simply adjust the brush size appropriately, then brush over the person, completely covering them. Try to be as precise as possible to effectively remove the person.
One tip is to leave the "Remove after each stroke" checkbox at the top unchecked. This allows you to gradually brush over until you are satisfied before confirming.
For more complex scenes, you may need to use the Remove Tool multiple times to refine imperfections. Be patient, and you'll achieve the desired results.
If you find adjusting brush sizes and switching tools too cumbersome, consider trying out the TourBox, a creative controller.

The TourBox allows you to perform various intricate operations with fewer movements, significantly streamlining your workflow in Photoshop. It's like using a game controller while playing video games, offering excellent responsiveness that you'll quickly grow fond of.
Check out our photo editing page to see how TourBox can make your post-processing work easier and more efficient.
Method 3 for Removing People: Leverage Content-Aware AI Functionality
With the advancement of AI technology, Photoshop has also embraced AI and introduced some content-aware features to assist in editing. This is particularly useful when removing unwanted elements like a person or an object from images.
1. Content-Aware Fill
Content-Aware Fill is an advanced and powerful feature in Adobe Photoshop. It operates through intelligent algorithms that analyze patterns, textures, and colors in adjacent pixels, generating fills that closely match the original content.
Simply use any selection tool to encircle the person you want to remove, aiming for minimal error—the smaller the selection, the more accurate the recognition.
It's worth noting that to avoid edge residues after using Content-Aware Fill, you can slightly expand the selection by about 5 pixels before executing the fill.
Navigate to "Edit" > "Content-Aware Fill" in the top menu bar. This will open the Content-Aware Fill panel.
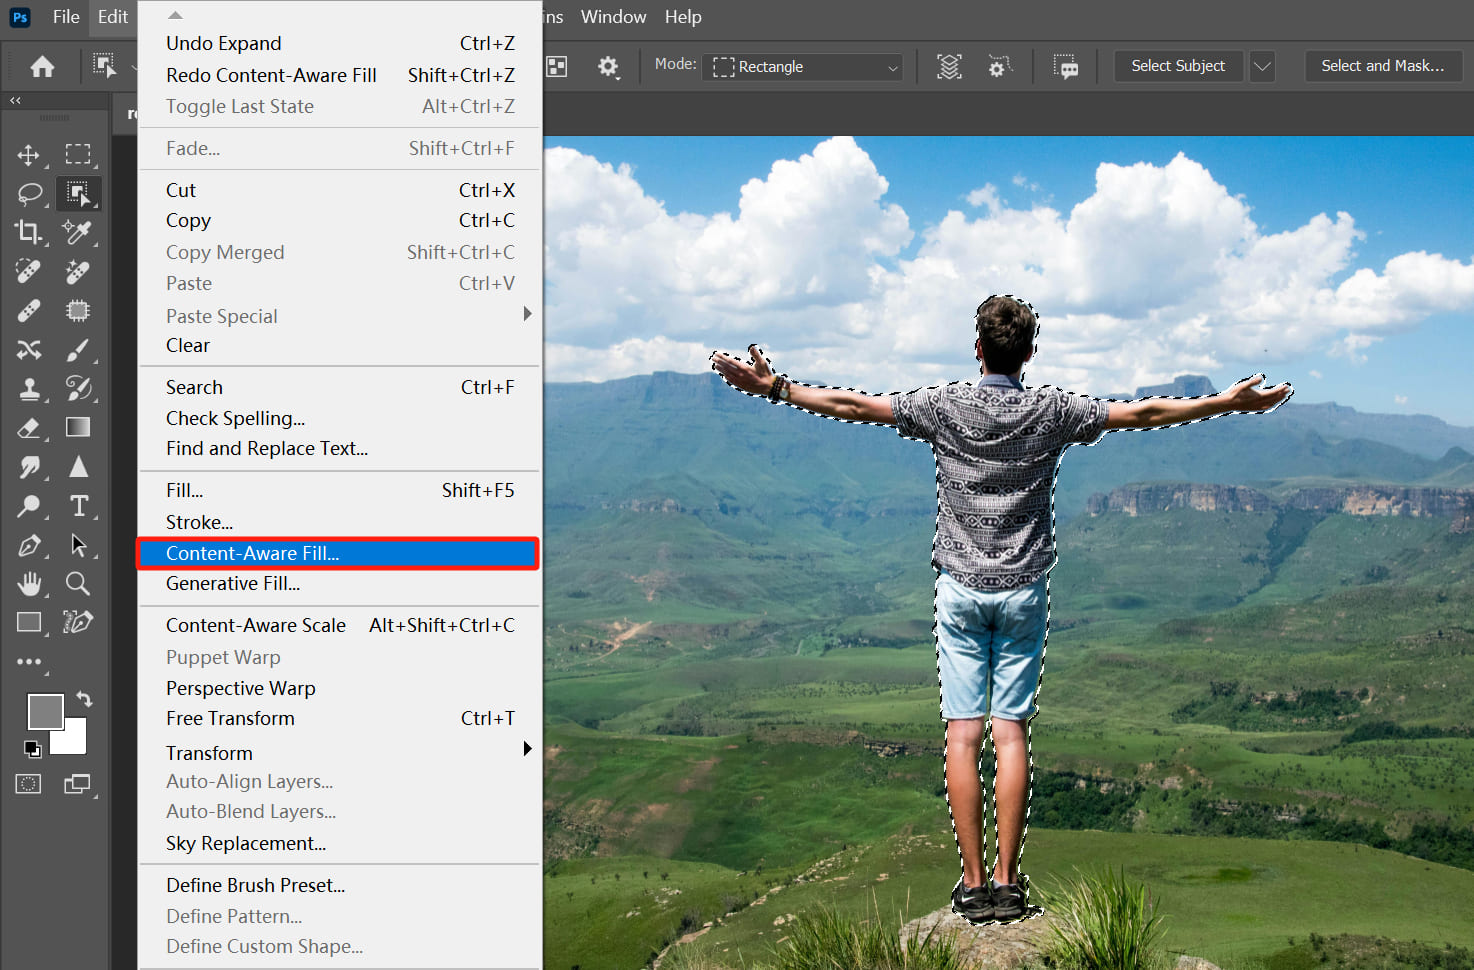
You don't need to adjust any other options; simply click OK. This makes it easy to remove the person.
However, this method is best suited for relatively simple scenes, such as backgrounds with a lot of repetitive textures.
For more complex image scenarios, the recognition might not be as precise. In such cases, you can use Content-Aware Fill for initial processing and then make further adjustments using other post-processing tools as needed.
2. Generative Fill
If there's one ultimate solution in Photoshop for removing a person, it's Generative Fill.
Generative Fill excels in handling complex scene algorithms and produces outstanding results, even though it takes a bit longer to process. Additionally, you can enhance the generated results by adding auxiliary descriptions.
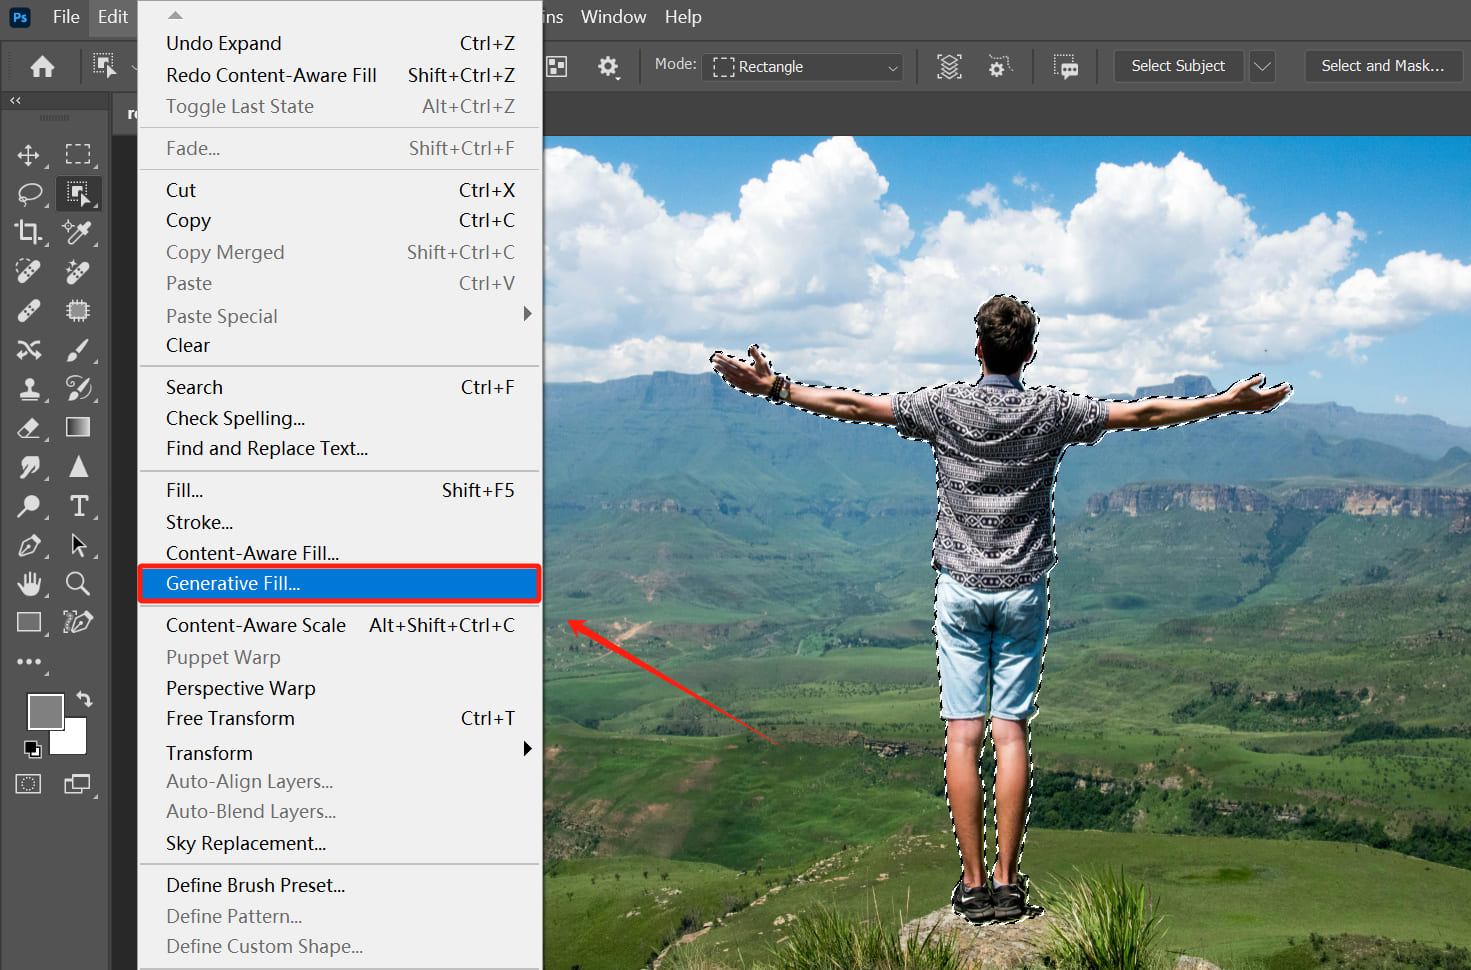
However, due to computational constraints, this feature isn't unlimited in its usage. Adobe offers different Generative credits to users based on their subscription plans. These credits determine how often you can utilize the Generative Fill feature each month.
If you're interested in learning more tips and tricks for using Content-Aware Fill and Generative Fill, please check out our related article. We've provided a detailed and clear sharing of experiences on this topic.
Further Reading:
Final Thoughts About Removing Someone in Photoshop
The methods we've shared above can handle most scenarios. As long as the background isn't overly complex, you can typically remove a person from a photo.
In actual photo editing, achieving your goal with just one tool can be challenging. In such cases, you can use a combination of tools. For example, if the content filled by Content-Aware Fill has some imperfections, you can patch them up by using different tools in multiple steps.

Removing a person in Photoshop is straightforward once you grasp the principles. It's all about having some patience, using a variety of tools in a logical sequence, and making incremental adjustments based on the image's specifics!