How to Rent DaVinci Resolve Studio Licenses?
Before, only larger organizations could rent Blackmagic Cloud licenses for DaVinci Resolve Studio using the license management system. Now, individual users can rent a license the same way when they need extra access to DaVinci Resolve Studio.
When you use the "Rent Licenses" option, you activate the license with your Blackmagic Cloud ID and pay only for what you use. This lets you manage licenses for different computers right inside Blackmagic Cloud. It also makes user management simpler and project costs clearer.
Today, we'll show how to rent DaVinci Resolve Studio licenses through Blackmagic Organizations, how to assign a rented license to a Blackmagic Cloud ID, and how to remove a rented license from your account. Let's get started.

In this article, you will learn:
- Step 1: Sign in to Blackmagic Cloud
- Step 2. Rent Licenses
- Step 3. Assign Licenses
- Step 4: Activate DaVinci Resolve Studio
- Conclusion
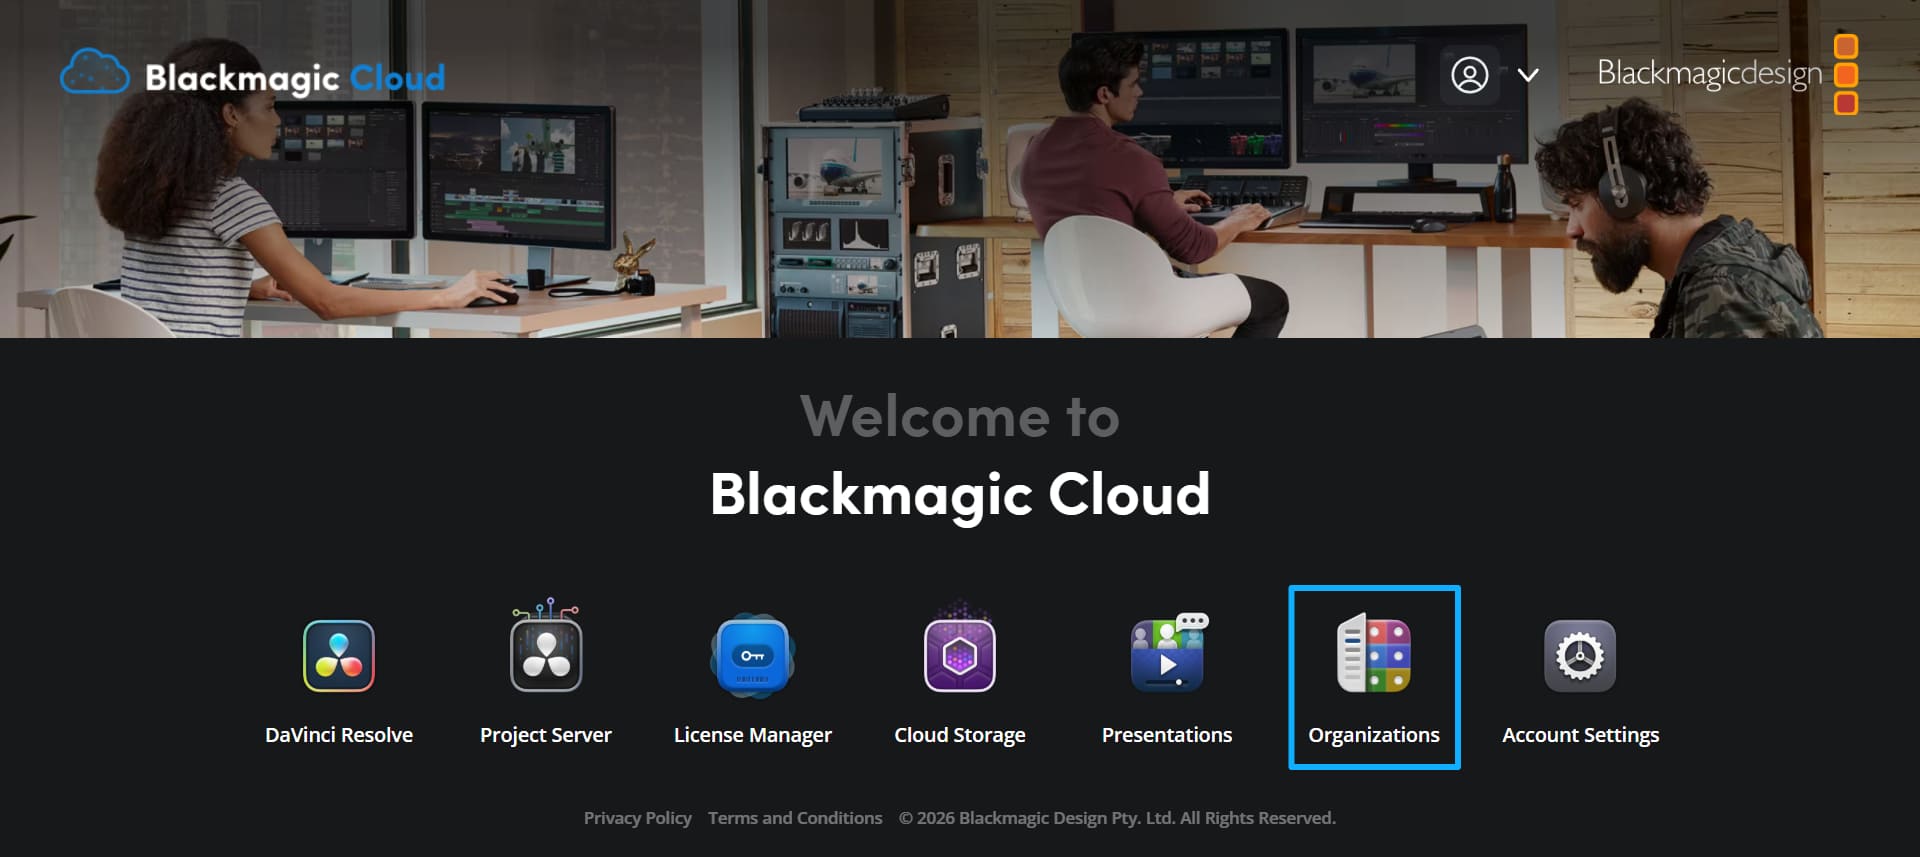
Step 1: Sign in to Blackmagic Cloud
To rent a DaVinci Resolve Studio license, first sign in to Blackmagic Cloud. Copy this web address and open it in your browser: https://reurl.cc/pKqmp8. Then enter your account email and password to sign in.
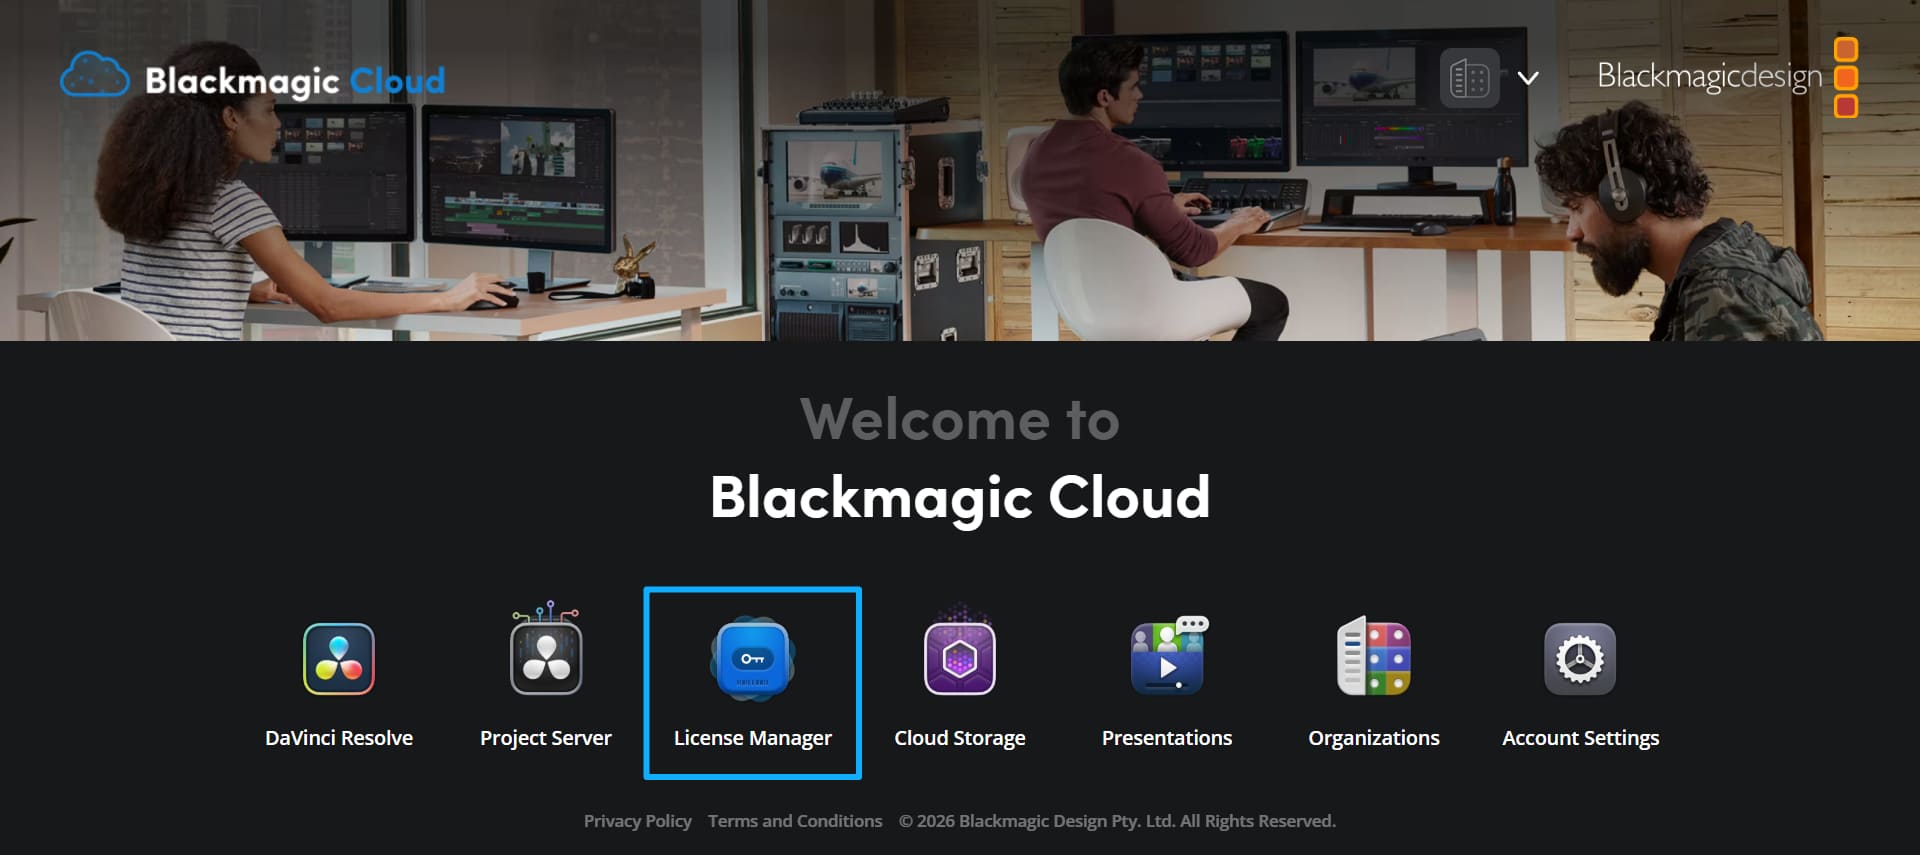
After you sign in, click "Organizations." If you haven't created an organization yet, the system will prompt you to make one.
When you finish creating it, you'll go to the Organizations management panel's Home page.
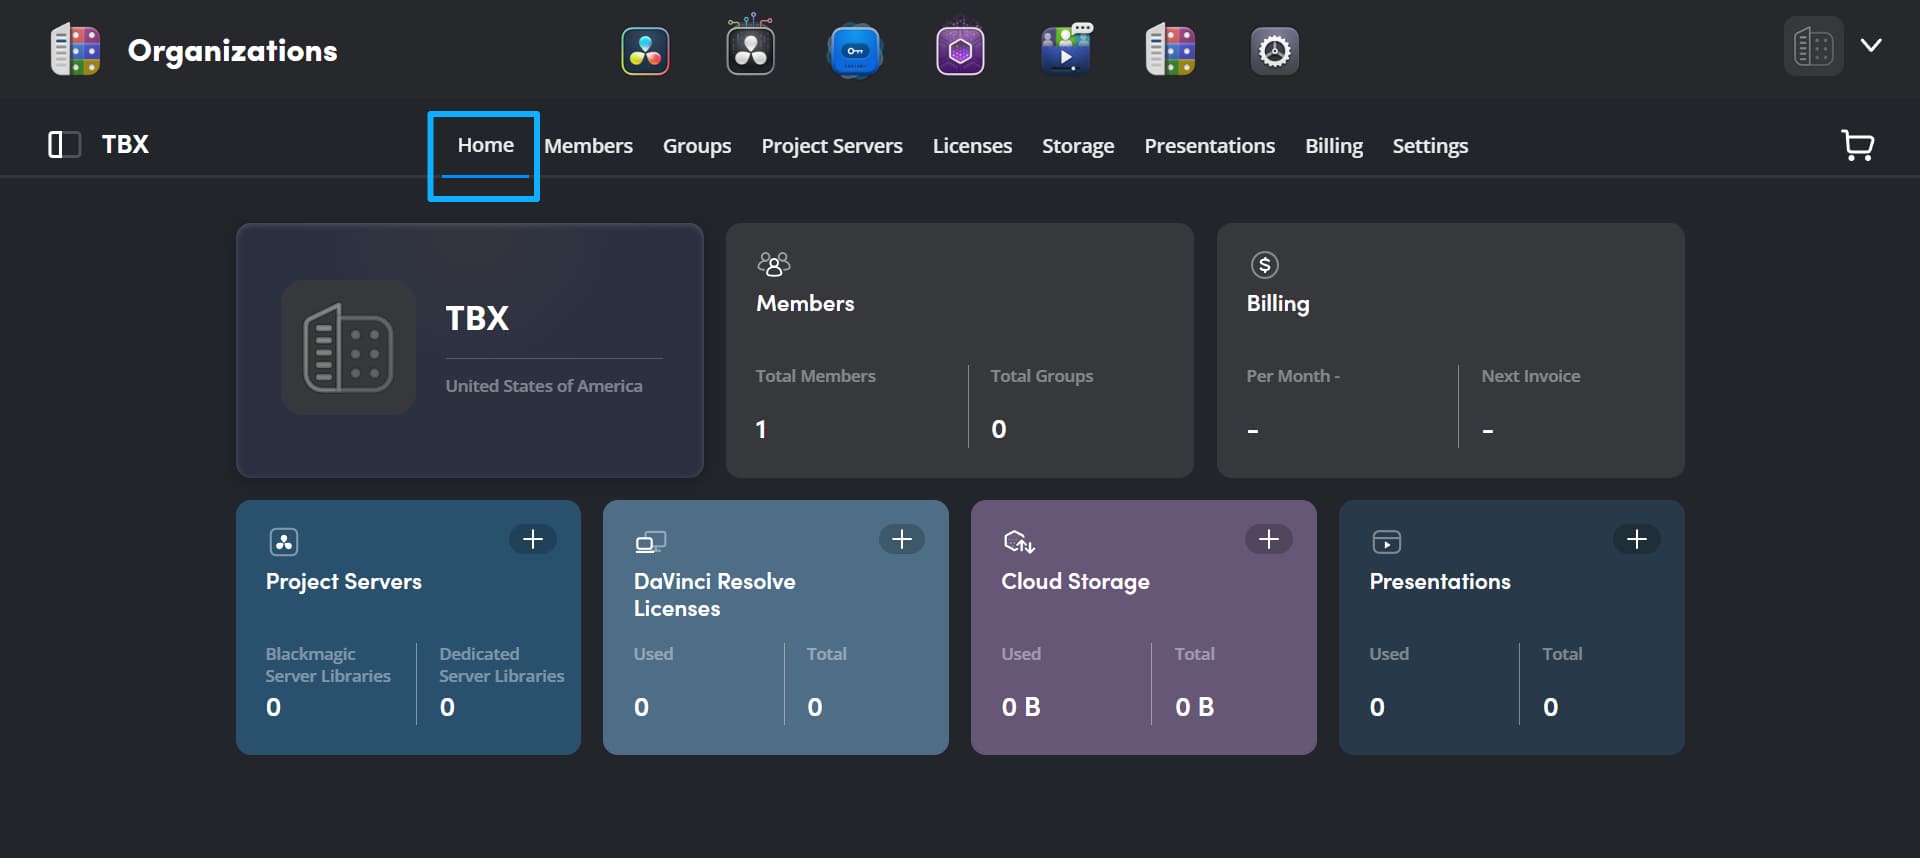
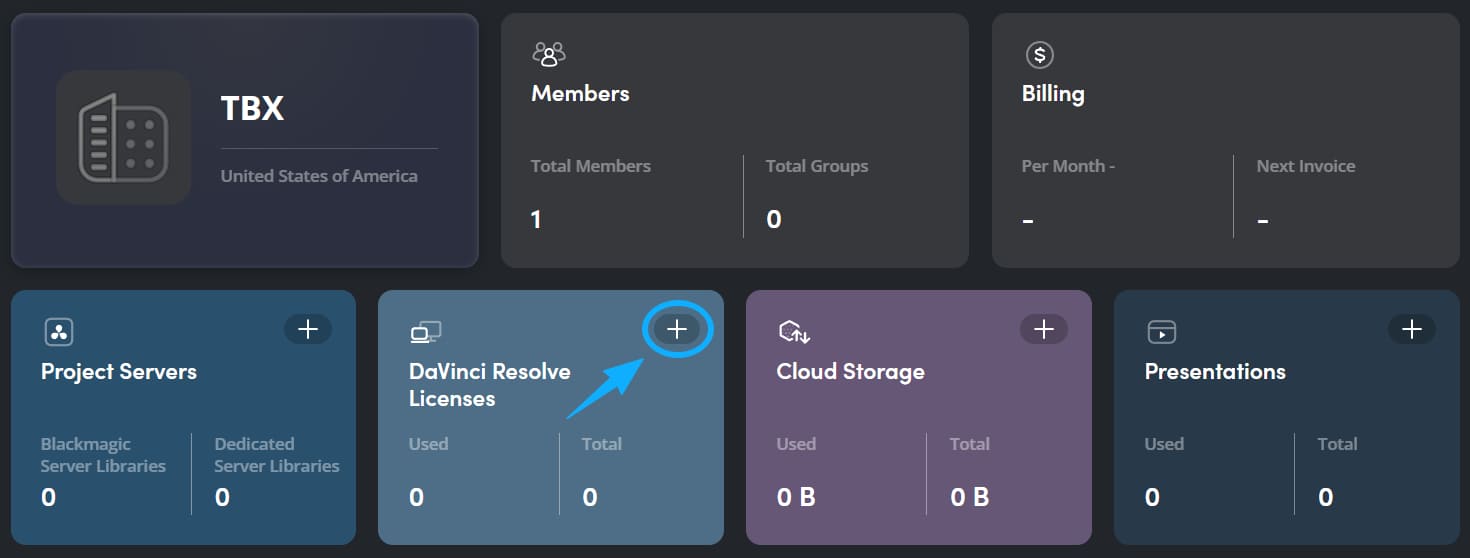
Step 2: Rent Licenses
Click the plus (+) next to the "DaVinci Resolve Licenses" category for DaVinci Resolve Studio.
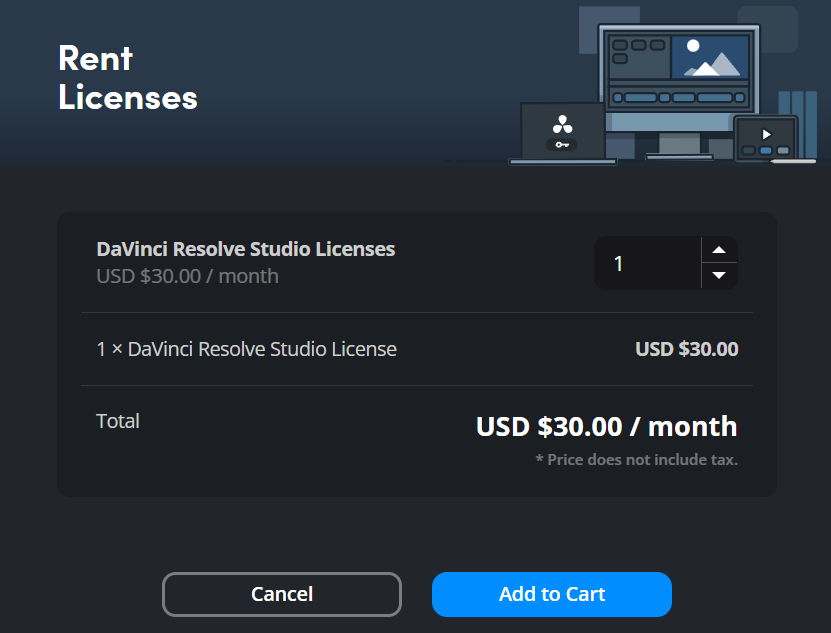
In the pop-up "Rent Licenses" window, enter how many licenses you need. Then click "Add to Cart."
If you don't have more items to add, click "Proceed to Cart." If you want to add other items to the account, like cloud storage or a project library, click "Return Home" and add them now.
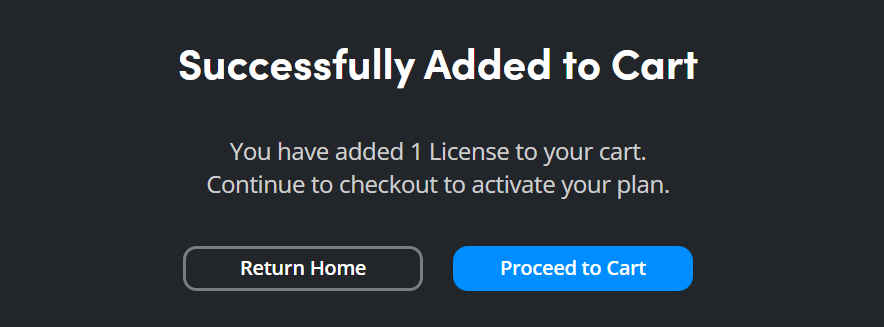
On the cart confirmation page, check that the number of licenses is correct. Then click "Continue."
When you pick a payment method, confirm the card and the total amount. If your account doesn't have a saved credit card, the system will ask you to enter your card details. Then click "Pay Now" to complete the payment.
If the payment goes through, you'll see a payment confirmation on screen, and you'll get a confirmation email.
Step 3: Assign Licenses
After you add the licenses to your account, the next step is to assign them to users.
In the Blackmagic Organizations management panel, click Licenses, then click Manage. That opens the Licenses Manager.
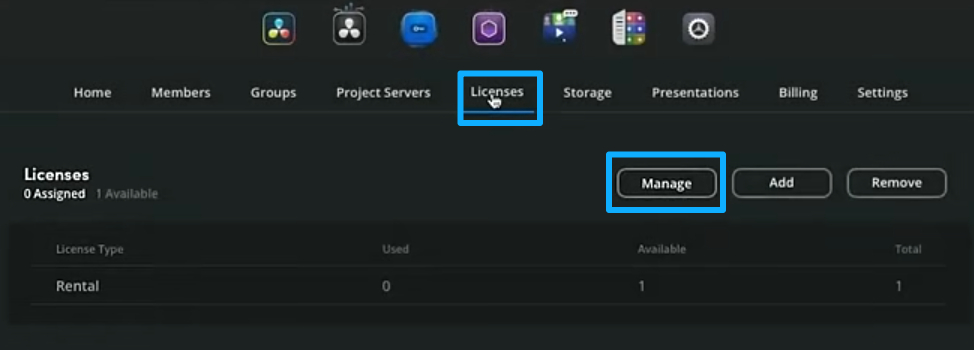
Or you can click the Licenses Manager icon at the top of the Organizations panel. Then click Assign. A window called Assign Licenses will appear. You can assign a license to a single Blackmagic Cloud account or to a user group.

Tip: If you assign to a group, make sure you have enough licenses for every user in that group. For example, if the group has two users, you need at least two licenses.
In the window, enter the user's Blackmagic Cloud ID or the user group name. After you choose the account or group, click Assign Licenses.
To check the assignment, go to the Licenses Manager page and click All Licenses in the sidebar. That page lists all Blackmagic Cloud accounts that have licenses. You can also check the Computers column to see whether a license is in use.
Step 4: Activate DaVinci Resolve Studio
Now open the program. When it starts, you will see a choice to activate with "Use License Key" or "Blackmagic Cloud ID."
Click Use Blackmagic Cloud ID, then enter your account email and password. When the start page asks you to "Select the account profile to use," pick the organization account you made. The license is tied to that organization, so be sure to choose it. Then click Log In.
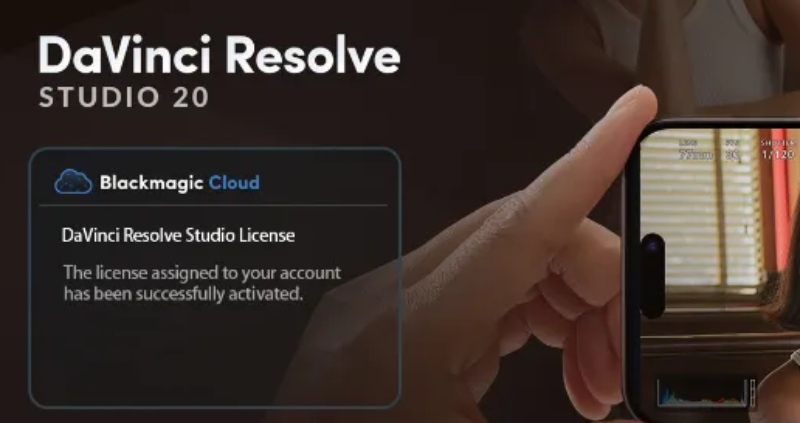
If activation works, you will see a message that the license is active. Click Continue, and the program will start normally.
Conclusion
Now that you know how to rent, assign, and activate DaVinci Resolve Studio licenses, ending a rental is also simple. Sign in to Blackmagic Cloud. Go to the License Manager panel. There you can deactivate, unassign, or remove rented licenses from your account.
We hope this guide helped you learn the steps to rent DaVinci Resolve Studio licenses. If you edit and color grade videos often, we'd like to recommend a creative controller that can speed up your workflow: TourBox.

With TourBox, you can map Resolve shortcuts and functions to its physical buttons and knobs. You can also hover the cursor over a control and turn a knob to grade faster and easier. You won't need to keep clicking and dragging with the mouse. TourBox makes color work more efficient and more intuitive.

Best of all, TourBox is priced competitively. It works with DaVinci Resolve and with any creative app. If you're interested, visit our DaVinci Resolve page to learn more.