A Step by Step Guide: How to Roll Text in Premiere Pro
Are you looking to add a bit of flair to your video projects? Rolling text is a simple yet effective way to make your titles and captions stand out. Whether you're creating a YouTube video, a promotional clip, or a short film, rolling text can add a dynamic touch to your project.
Adobe Premiere Pro replaced the Title Panel with a simpler Graphics Panel. However, the software was updated in 2018 with new and improved features that allow video editors to create better end credits.
Aside from the Essential Graphics panel, Premiere Pro offers easy and efficient methods for adding text to the start or end of your video.
In this article, we'll explore how to make rolling credits in Premiere Pro, so you can take your video editing skills to the next level.

In this article, you will learn:
- How to Use Essential Graphics to Roll Text
- How to Use Images to Roll Text
- How to Use Keyframes to Roll Text
- A Good Helper for Video Editing
How to Use Essential Graphics to Roll Text
To create rolling text (also known as scrolling text or credits) in Adobe Premiere Pro in easy-to-understand steps, follow these instructions:
1. Create a new project or open an existing one: Launch Premiere Pro, and either create a new project or open an existing project where you want to add the rolling text.
2. Create a new sequence: Go to File > New > Sequence, choose a suitable preset, and click OK. If you already have a sequence, skip this step.
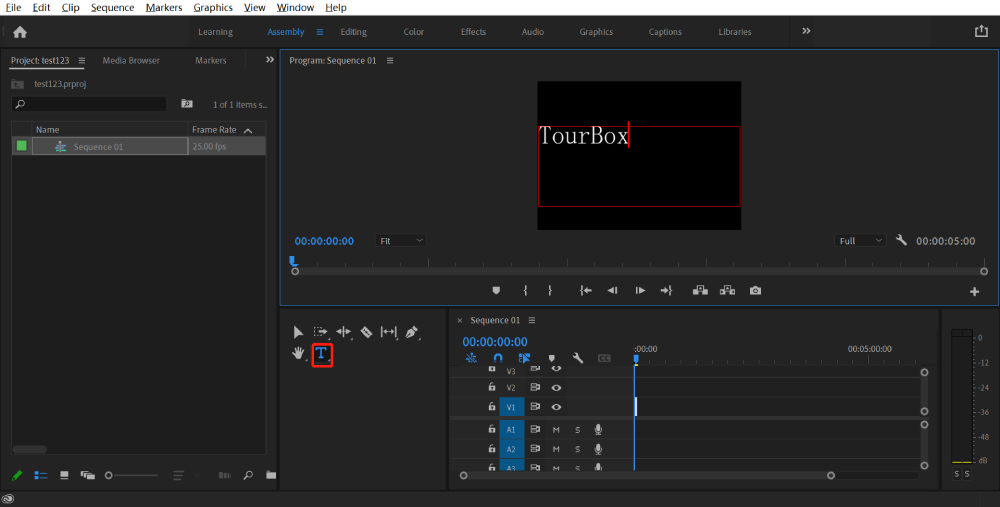
3. Add a new title: Go to Graphics > New Layer > Text or use the Type tool (press T on your keyboard) and click anywhere in the Program Monitor to create a new text layer.
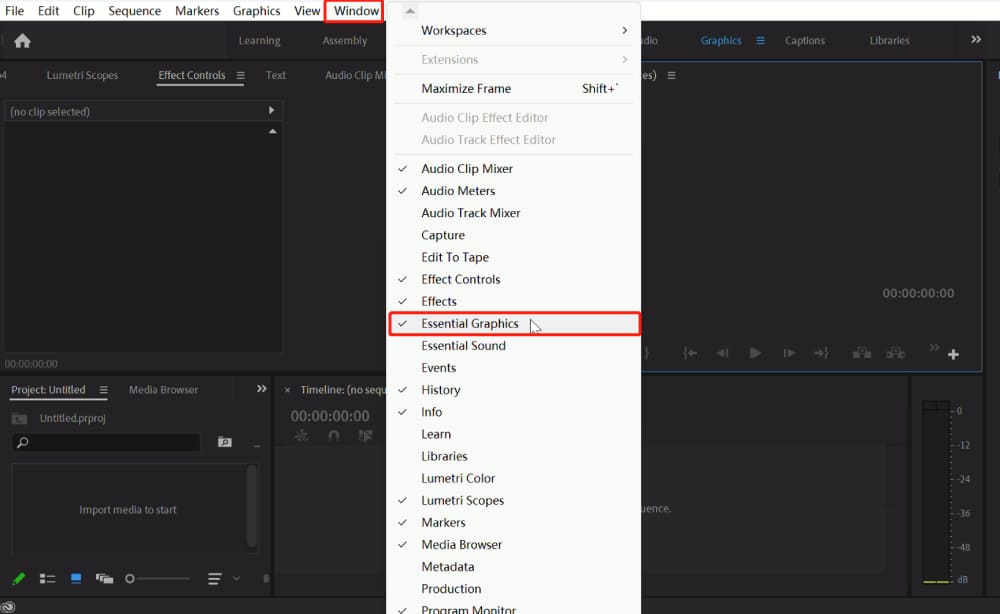
4. Enter your text: Type your desired text using the Essential Graphics panel on the right side of the screen. You can format the text using the various options available in this panel (font, size, alignment, color, etc.).
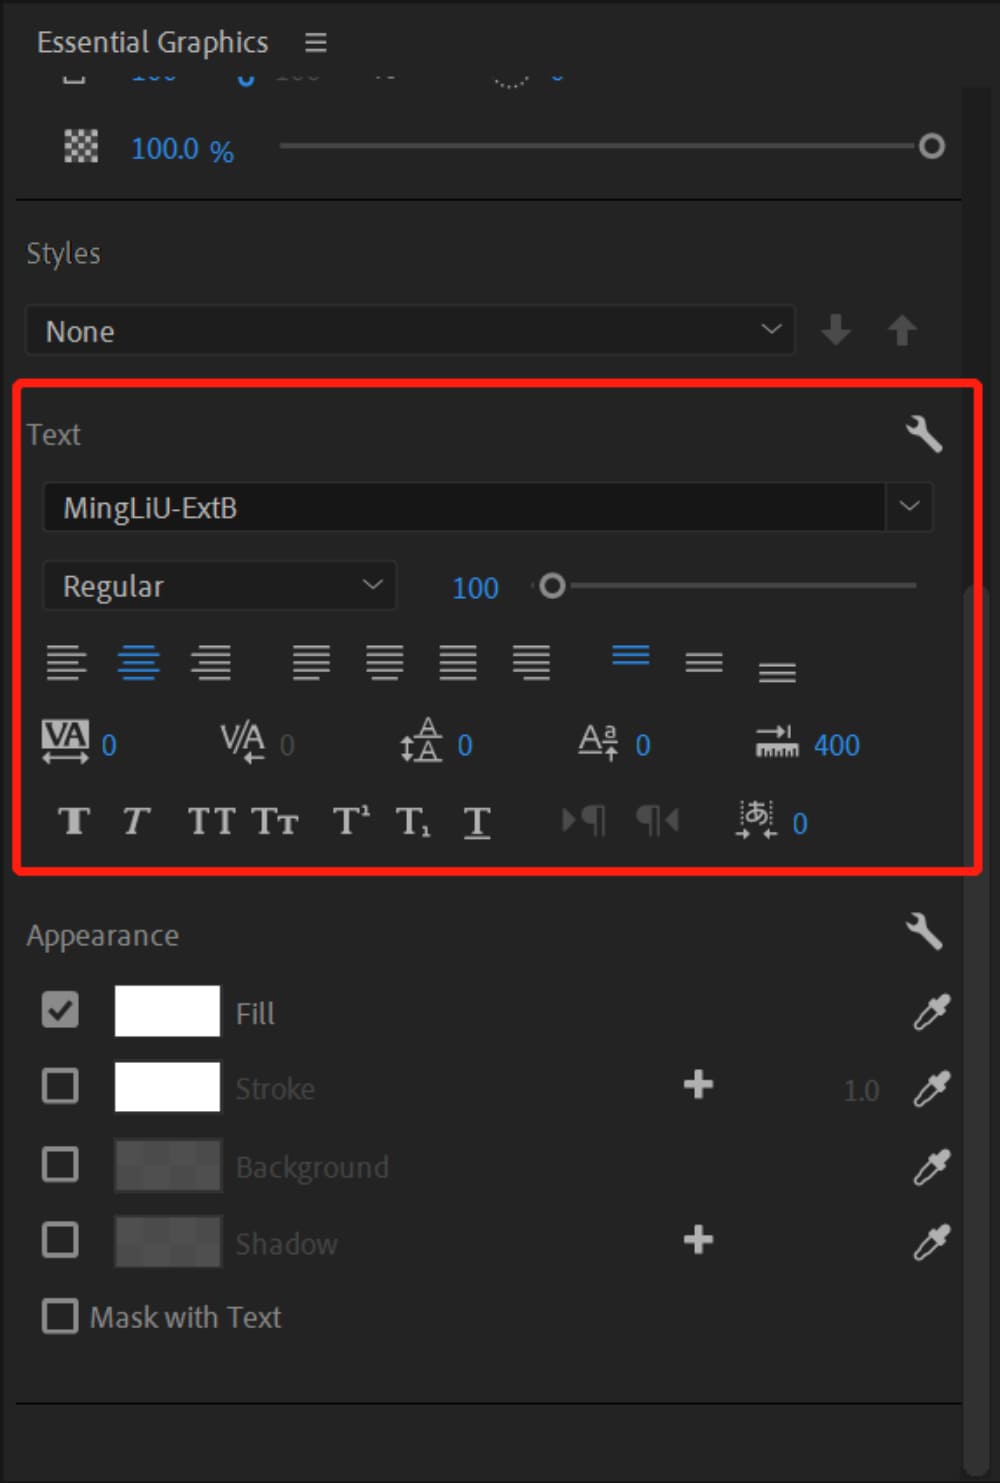
5. Adjust the Text Layout: In the Essential Graphics panel, click on the Edit tab and scroll down to the Text section. Adjust the layout of the text according to your actual needs.
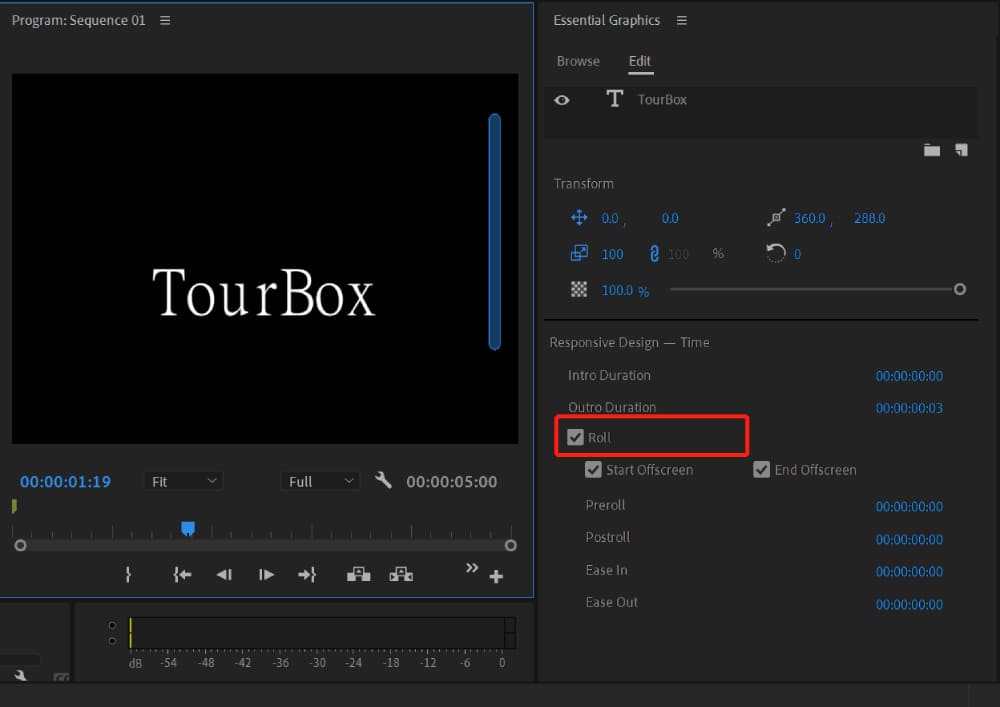
6. Check the Scroll Box: Click the program panel to deselect the text. Scroll down at Essential Graphics and check the roll box to enable scrolling subtitles. You can decide whether you'd like the credits to begin and conclude off-screen.
Additionally, you can fine-tune the Preroll and Postroll settings, as well as apply Ease-in or Ease-out settings to achieve a smoother transition. If you need to adjust the duration of the scrolling text on your timeline, it's a breeze. Simply grab one end of the object and drag it to increase or decrease the length.
7. Preview the Effect: Press Spacebar to preview the rolling text effect in the Program Monitor.
8. Render and Export: Once you are satisfied with the rolling text effect, render your sequence and export your video using File > Export > Media.
How to Use Images to Roll Text
Believe it or not, you can even use images to create scrolling text in Adobe Premiere Pro. It may sound unbelievable, but it's true. Let's take a closer look at how it works.
- Design the material you want to use for your scrolling text in Adobe Photoshop. Make sure to save the file in a PNG format with a transparent background.
- Import the image into Premiere Pro and place it on the timeline.
- Adjust the duration of the text by dragging one end of the image to your desired length.
- Position the playhead at the beginning of the image and drag it off the screen in the preview panel, setting a keyframe.
- Drag the image upwards until its bottom edge is off the screen, and set another keyframe.
- Check to see if the animation is working by pressing play at the beginning of the still image.
How to Use Keyframes to Roll Text
Rolling text in Premiere Pro using keyframes is a simple process. First, add a text layer to the timeline and adjust the duration of the text. Then, position the playhead at the beginning of the timeline and drag the text off the screen in the preview panel.
This creates the first keyframe. Next, move the playhead to the end of the timeline and drag the text upwards until the bottom edge is off the screen, creating the second keyframe.
This creates an animation of the text scrolling upwards. You can preview the animation to make sure it's working correctly.
By adjusting the position and duration of the keyframes, you can customize the scrolling text to fit your video's needs. With this method, you can easily create professional-looking rolling credits for your videos.
Here is a YouTube video about how to animate a text or title in Premiere Pro with keyframes:
A Good Helper for Video Editing
If you're using Premiere Pro to create rolling text, you know how tedious and time-consuming it can be to manually adjust the position and duration of each keyframe. However, there's a controller called TourBox that can greatly improve your productivity and make the process much easier.

TourBox is a compact and intuitive device that lets you assign shortcuts for various functions and tools in Premiere Pro. With TourBox, you can quickly and easily navigate the software and control the rolling text animation.
This saves you time and effort, allowing you to focus on your creative process and produce high-quality videos more efficiently.
Whether you're a professional video editor or a YouTuber, TourBox is an excellent tool worth considering to streamline your workflow.