How to Rotate a Photo in Lightroom Classic?
Lightroom Classic is a powerful software for managing and editing photos. It offers various methods to rotate photos and improve their composition and visual appeal.
In this tutorial, we will share several ways to rotate a photo in Lightroom Classic, so you can quickly learn the techniques for rotating photos. Let's get started!

In this article, you will learn:
- How to Rotate a Photo in 90-Degree Increments in Lightroom Classic?
- How to Rotate a Photo at Any Angle in Lightroom Classic?
- How to Flip (Mirror) a Photo in Lightroom Classic?
- Final Thoughts About Rotating a Photo in Lightroom Classic
How to Rotate a Photo in 90-Degree Increments in Lightroom Classic
Sometimes, the orientation of our captured photos may not match our desired composition.
For example, we may want a vertical photo but end up with a horizontal one, or vice versa. In such cases, we need to rotate the photos in 90-degree increments to align them with our expectations.
Lightroom Classic offers several quick ways to rotate photos in 90-degree increments, including:
- Using the Keyboard Shortcuts
- Using the Top Menu Bar
- Using the Bottom Toolbar
- Using the Thumbnail Corner Icons
- Using the Right-Click Menu
- Using the TourBox
1. Using the Keyboard Shortcuts
Press "Ctrl (Command) + [" to rotate the photo counterclockwise or "Ctrl (Command) + ]" to rotate it clockwise. This method works in both the Library and Develop modules.
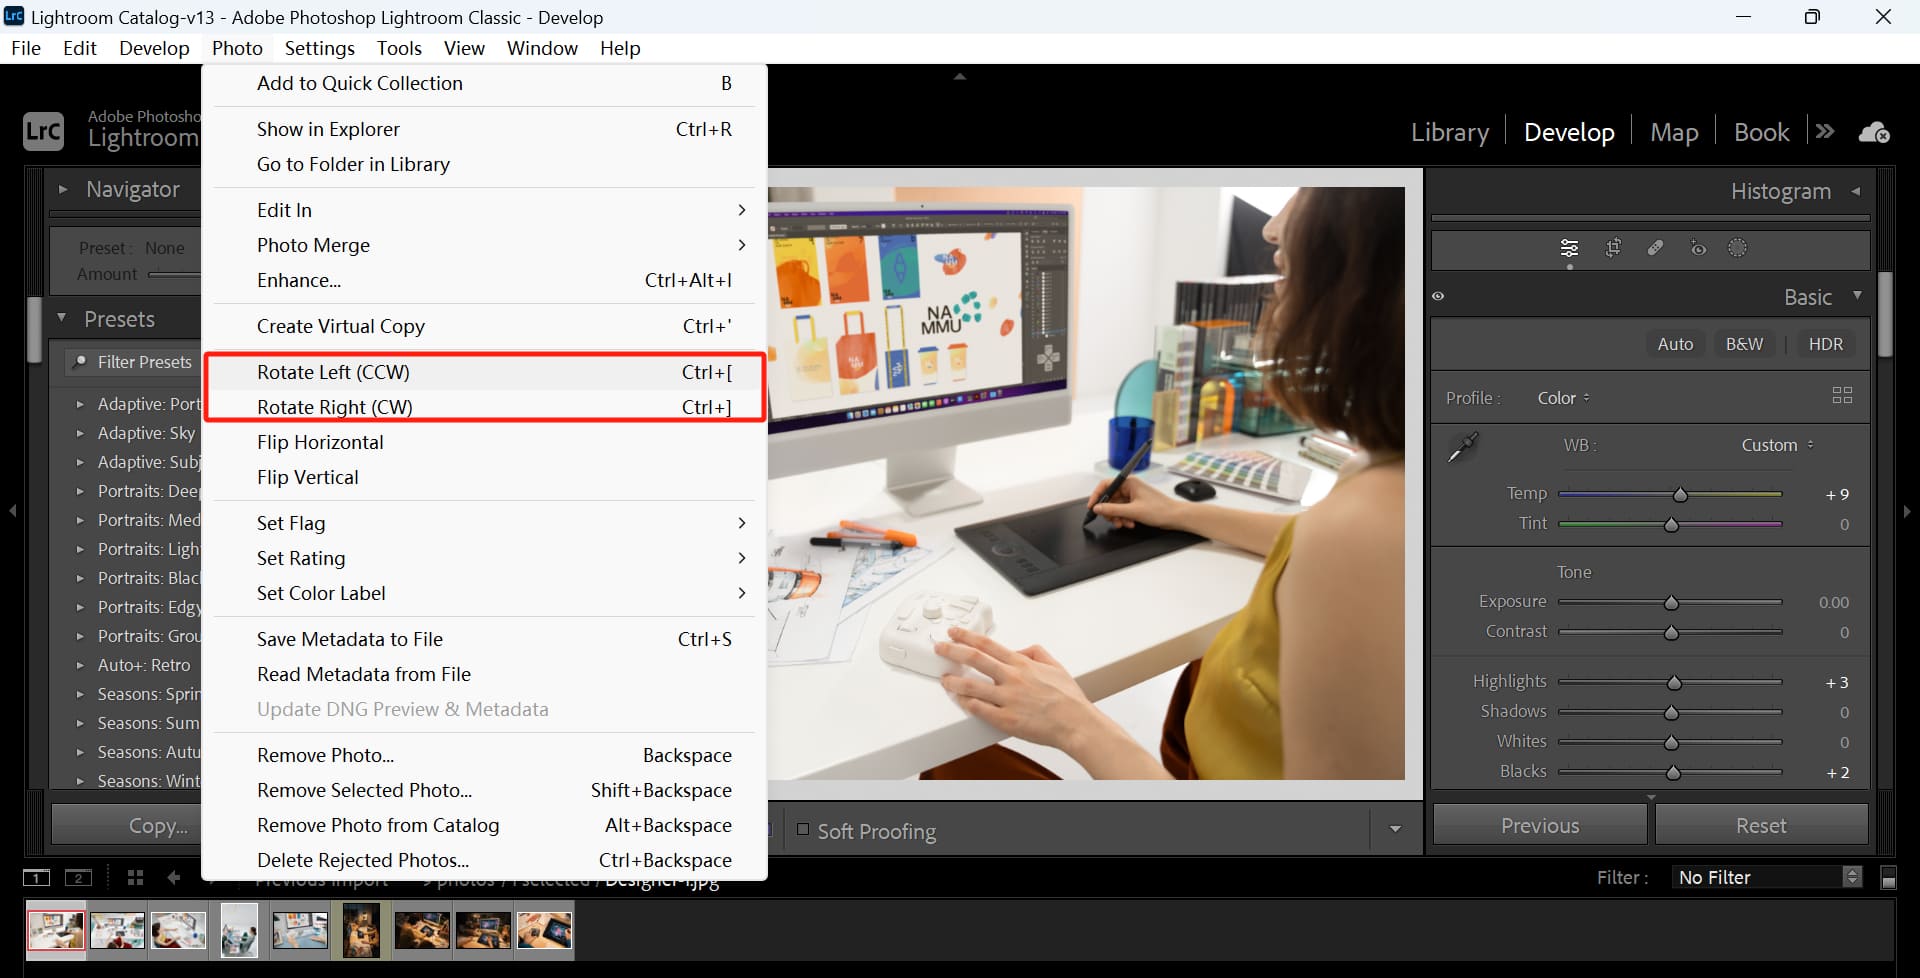
2. Using the Top Menu Bar
Click on the "Photo" menu, then select the "Rotate Left" or "Rotate Right" command. This method is also available in both the Library and Develop modules.
3. Using the Bottom Toolbar
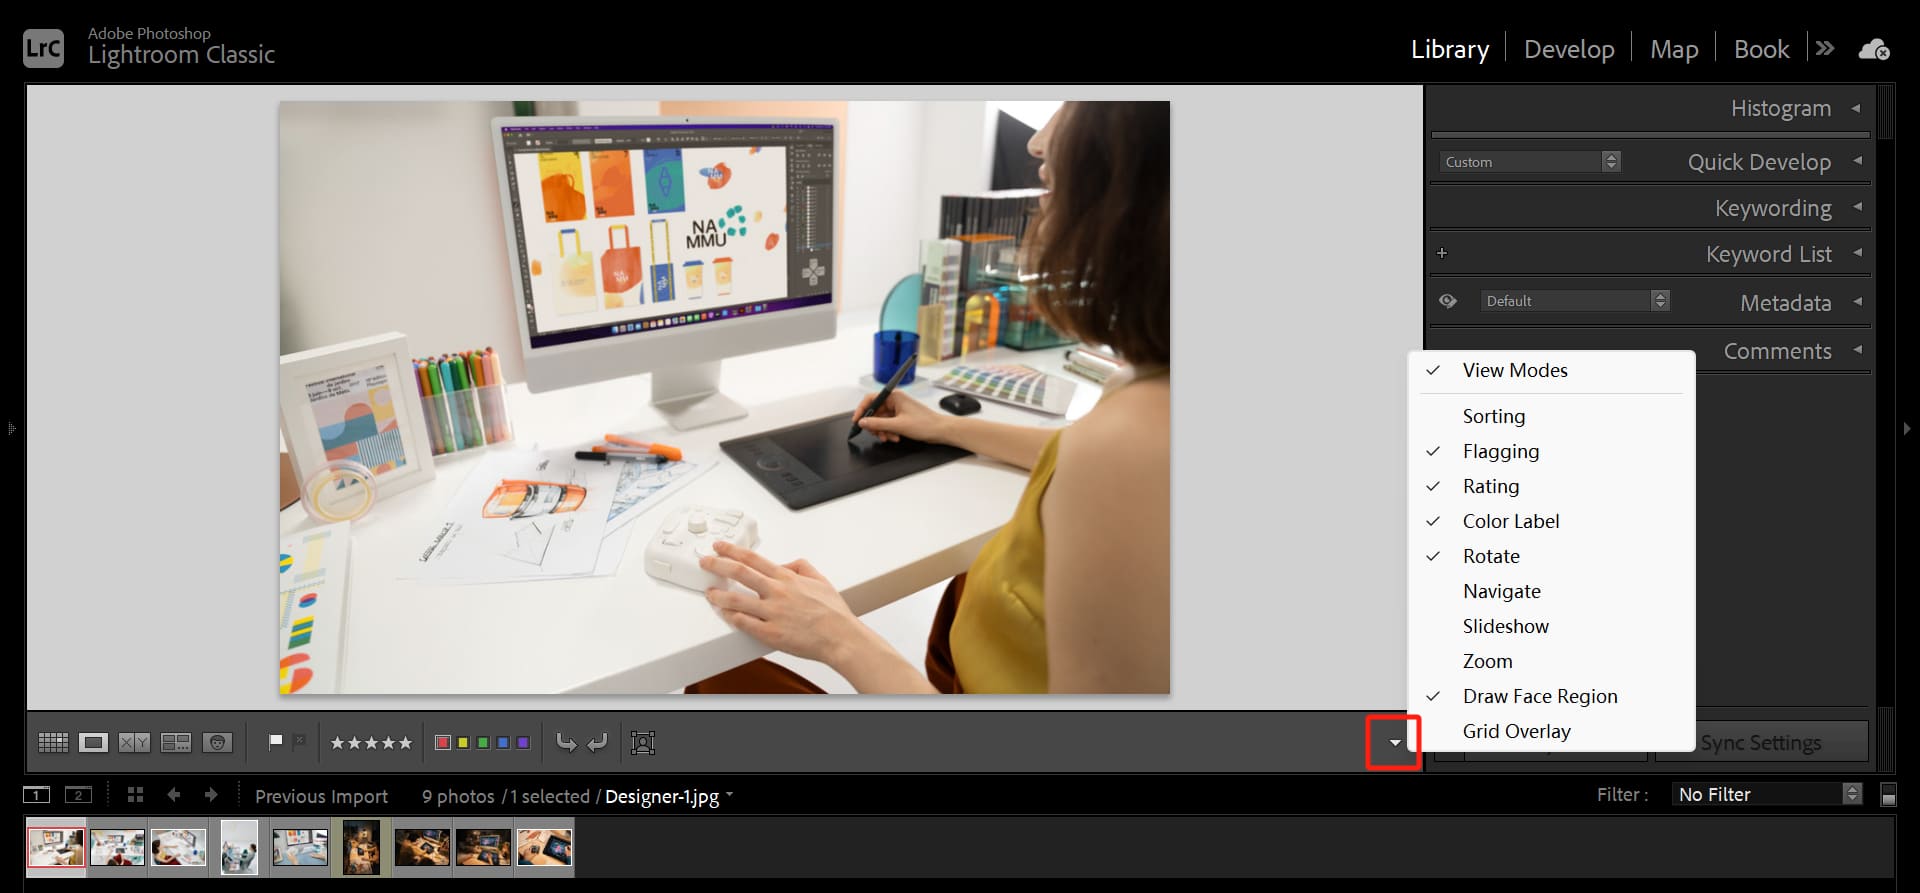
In the Library module, if the toolbar is visible (you can activate it by pressing the T key if it's not), you'll see two rotation icons above the thumbnail at the bottom. They represent "Rotate photo left" and "Rotate photo right." Simply click on these icons to rotate the photo.

If you don't see these icons in the toolbar, you can customize the toolbar by selecting "Select toolbar content" on the right side of the toolbar.
4. Using the Thumbnail Corner Icons
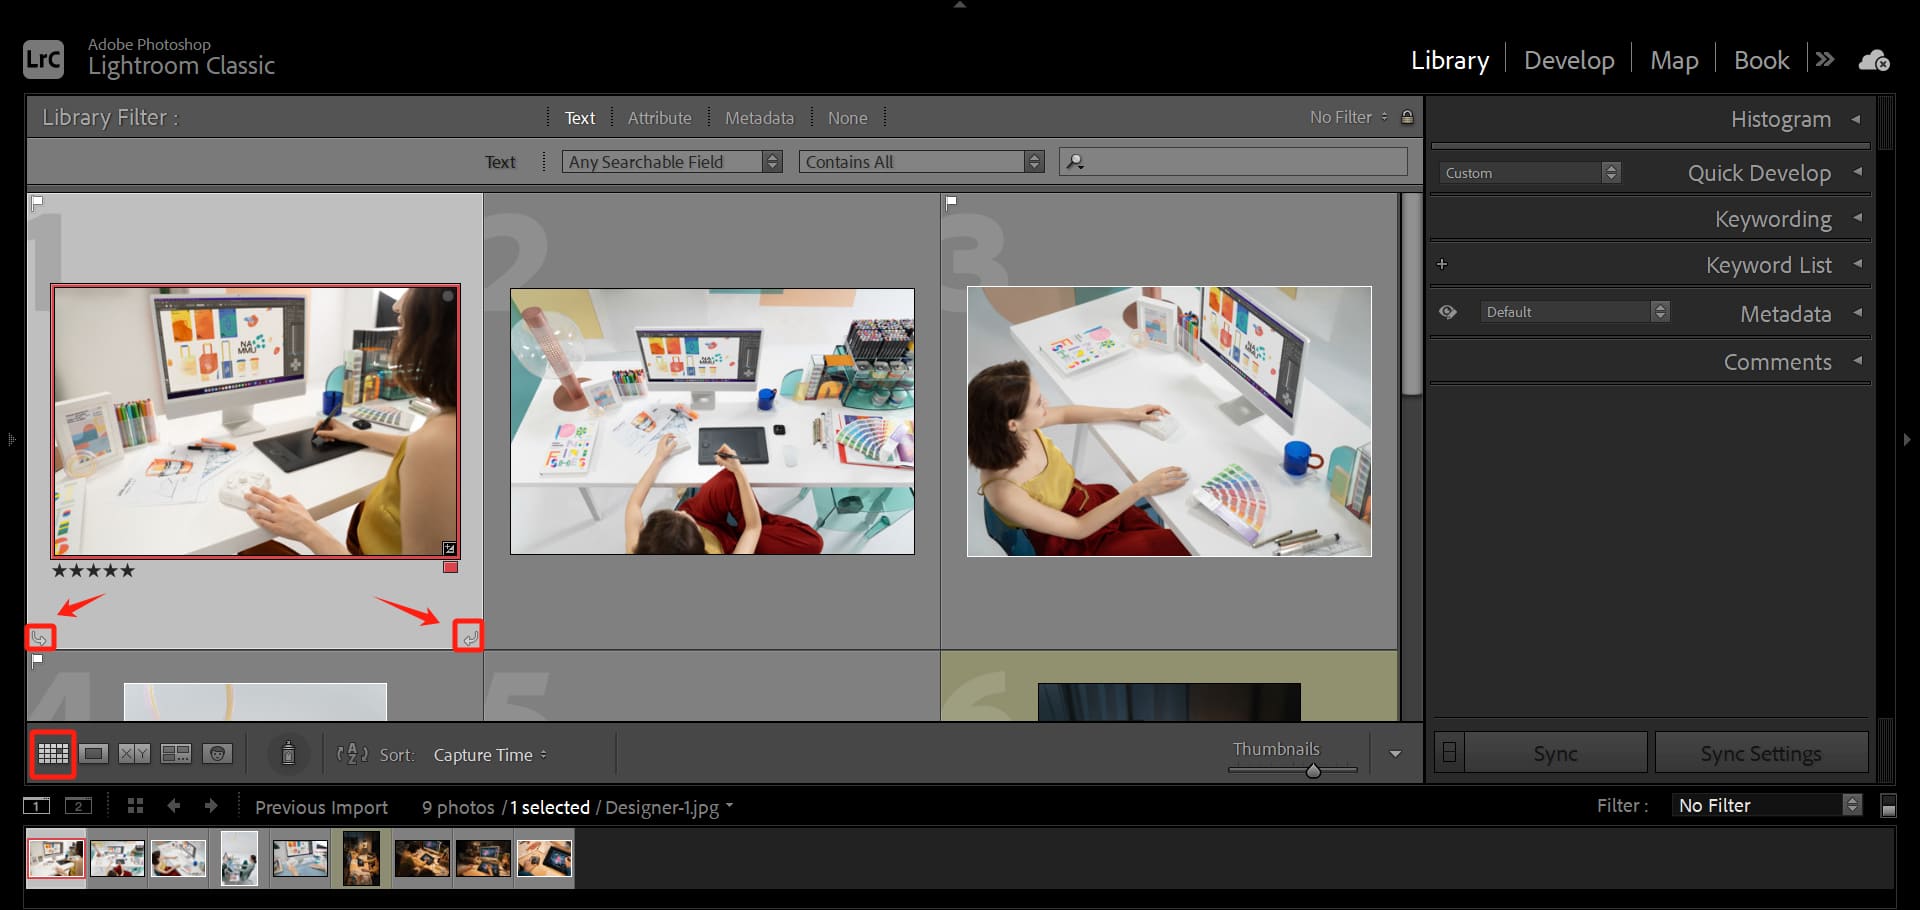
In the Grid view of the Library module, when you hover your mouse over any thumbnail, you'll notice two rotation icons in the bottom left and bottom right corners of the thumbnail.
These icons represent rotating the photo left or right, respectively. Simply click on these icons to rotate individual photos.
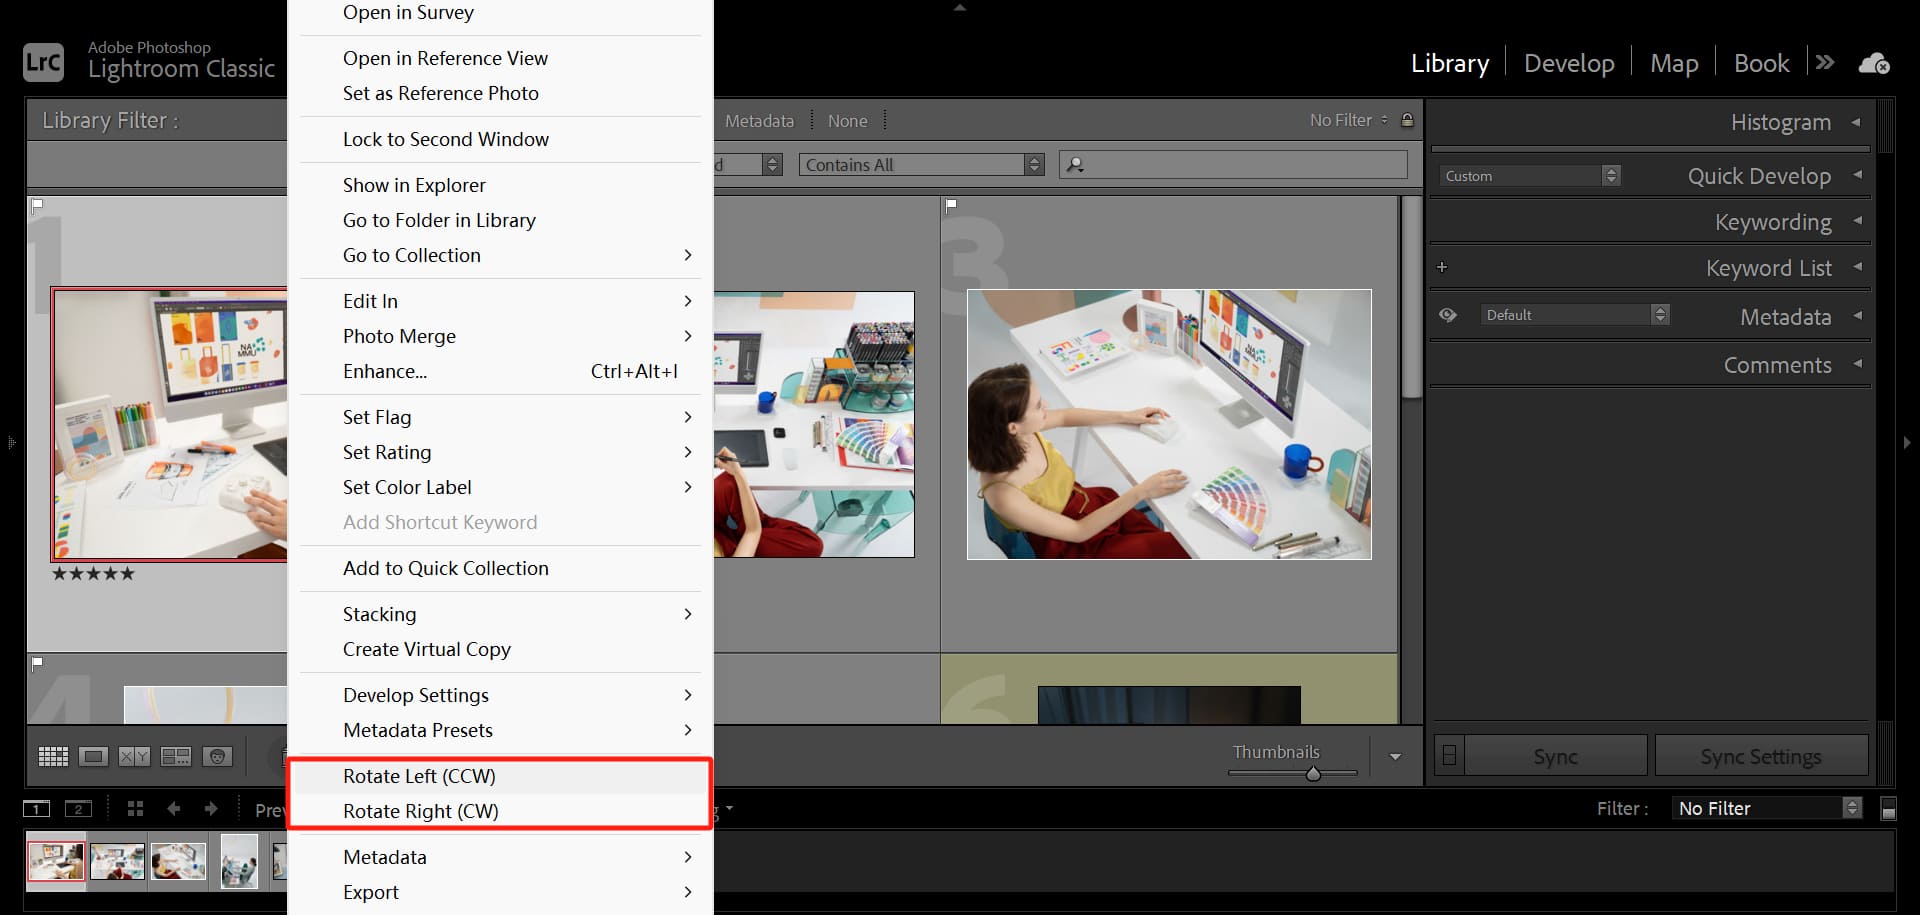
5. Using the Right-Click Menu
In the Grid view of the Library module or in the Develop module, you can right-click (or Option-click) on a thumbnail and select the "Rotate Left" or "Rotate Right" command.
6. Using the TourBox
Have you heard of TourBox? TourBox is a creative tool designed for creators, content creators, and photographers. You can set the rotation of photos on the Dial of TourBox and customize the rotation speed.

With just a gentle turn of the Dial, you can easily rotate your photos. But that's not all – you can use TourBox to perform any operation in Lightroom Classic, including batch processing photos, applying presets, color grading, and more.
With TourBox, you can accomplish all of these tasks with just one hand, freeing yourself from the hassle of using traditional keyboards and mice.
Tips:
It's worth noting that all of these methods can be used to rotate multiple photos simultaneously by selecting the photos you want to rotate before applying the rotation.
How to Rotate a Photo at Any Angle in Lightroom Classic?
Sometimes, the photos we capture may appear a bit skewed, with the horizon or vertical lines not aligned properly, affecting the overall beauty and balance of the photo. In such cases, we need to rotate the photos at any angle to make them more upright and stable.
Lightroom Classic offers a "Crop Overlay" tool that allows you to rotate photos at any angle in the Develop module.
In the Develop module, select the photo you want to rotate and click on the Crop tool in the right panel, or press the R key to activate the Crop Overlay panel.
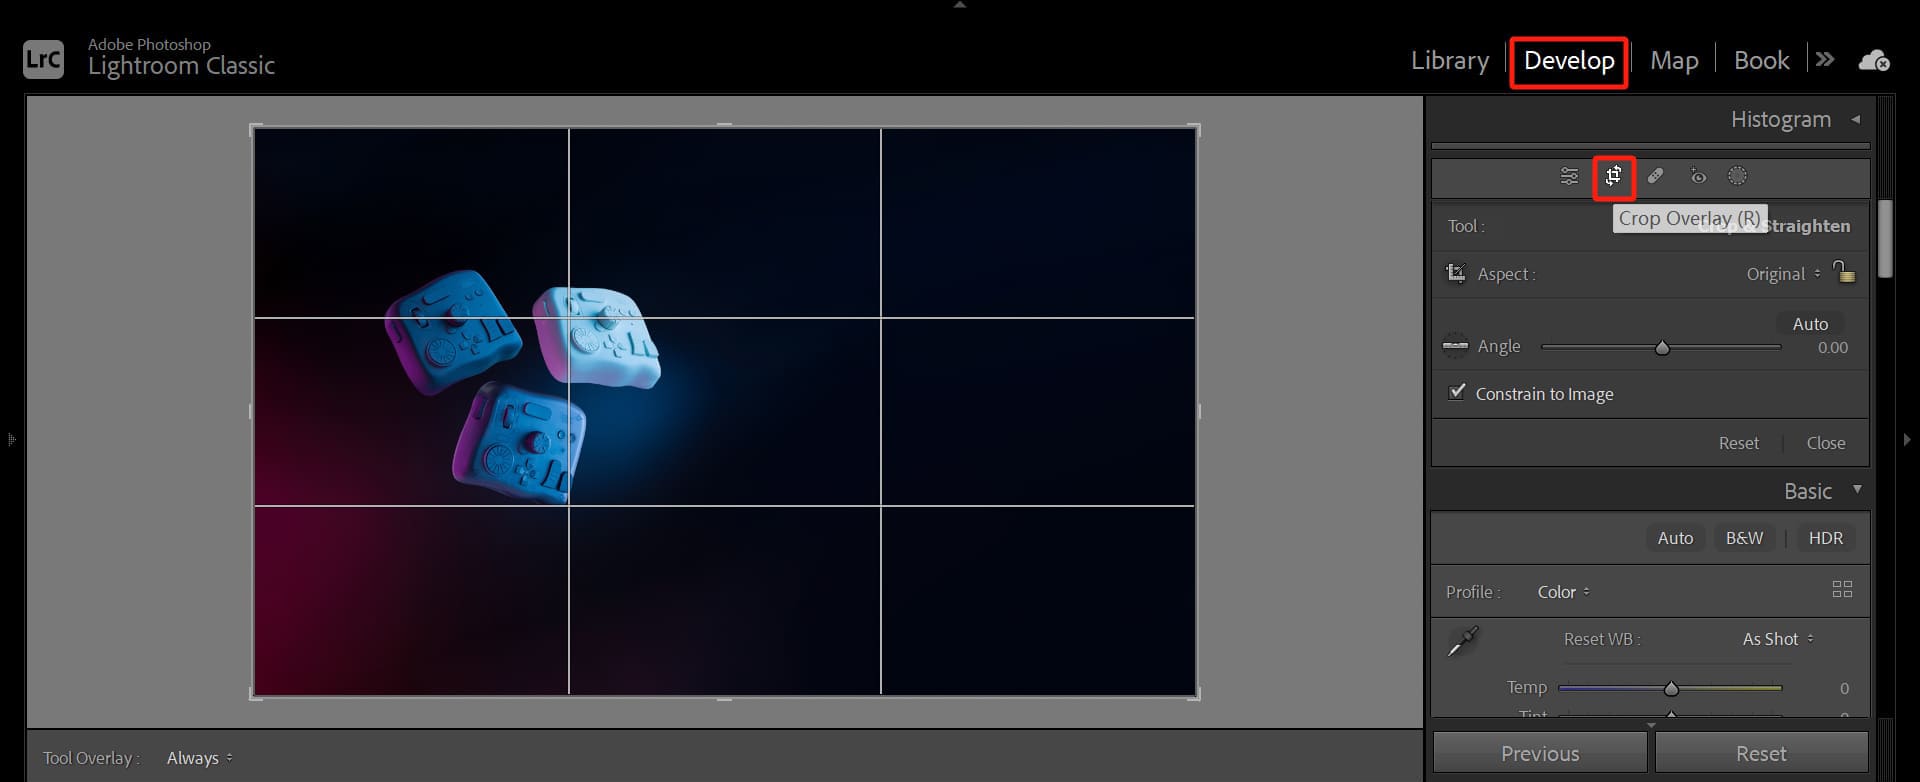
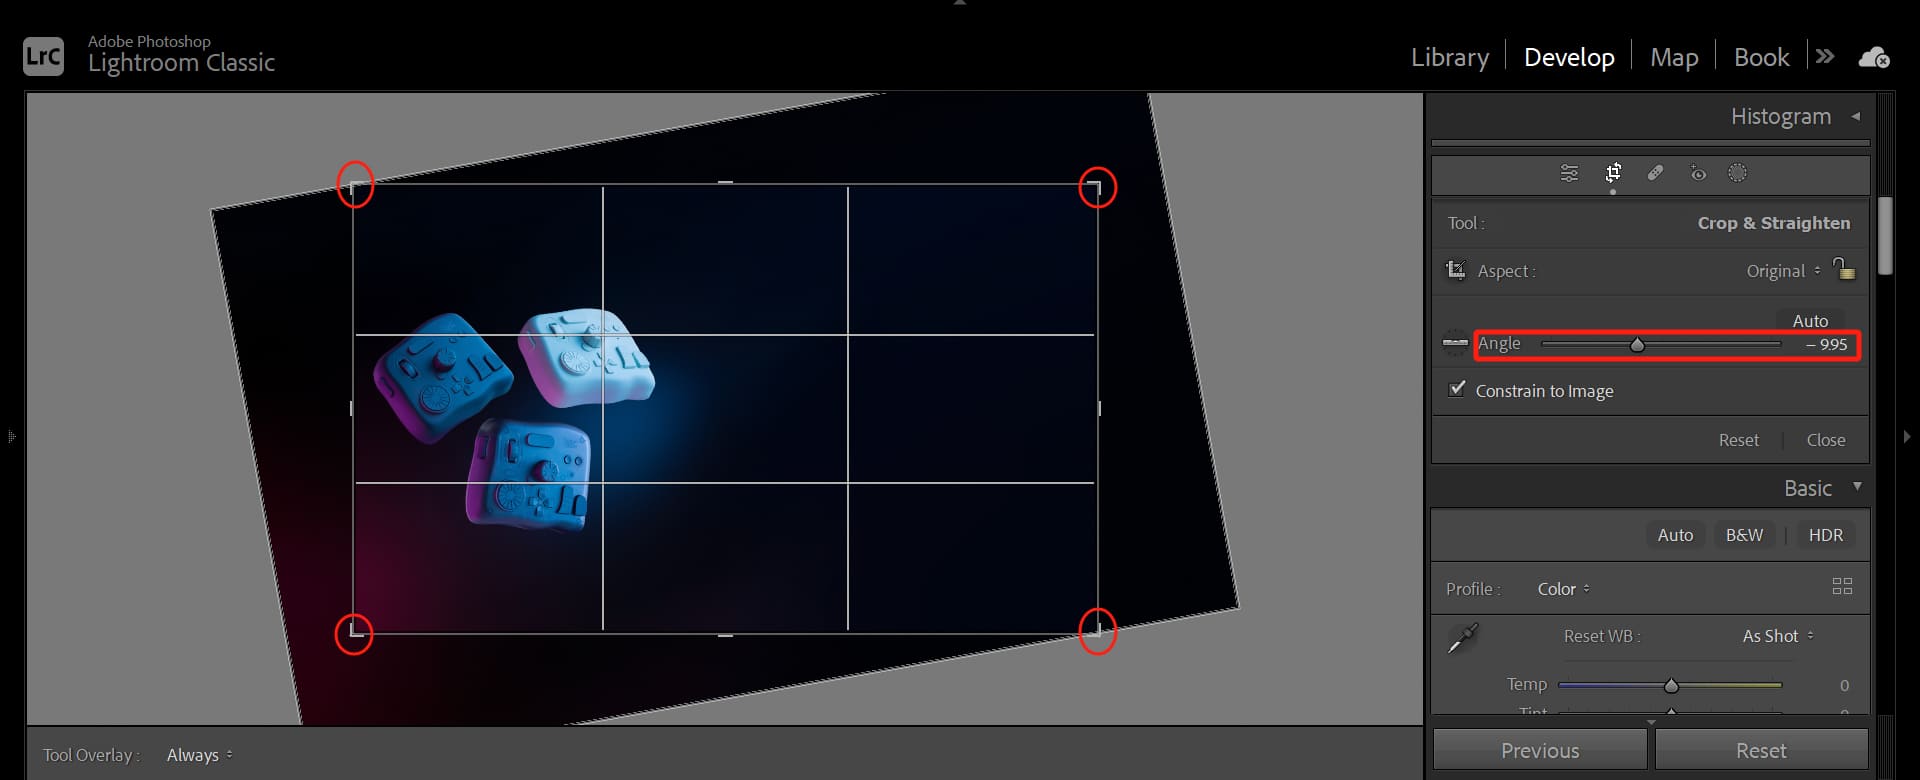
In the Crop Overlay panel, you'll see an Angle slider. You can drag it to rotate the photo or enter the desired rotation angle in the adjacent input box. You can also drag the photo from the corners to rotate it.
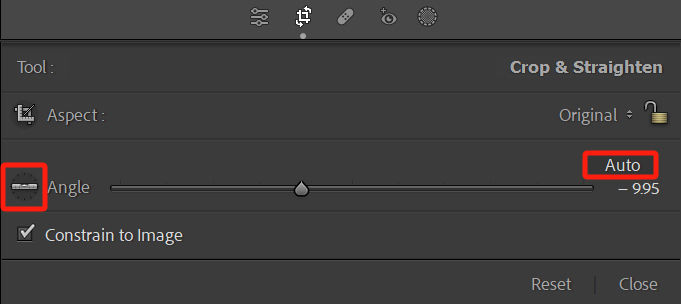
If you want to align the horizon or vertical lines in the photo, you can use the Straighten Tool in the Crop Overlay panel. It's represented by an icon of a ruler.
Click on this icon and draw a line on the photo that you want to align, such as the horizon or the edge of a building. Lightroom Classic will automatically rotate the photo to align your drawn line with the horizontal or vertical lines.
If you want Lightroom Classic to automatically rotate the photo, you can click on the "Auto" button in the Crop Overlay panel. Lightroom Classic will use machine learning algorithms to analyze the photo and rotate it automatically.
While rotating the photo, you can press the "O" key to toggle between different crop overlay grids, such as the rule of thirds, golden ratio, diagonals, etc. These grids can help you improve the composition and visual appeal of the photo.
Once you are satisfied with the rotation result, press the Enter key or click on the Crop tool again to apply the rotation and exit the Crop Overlay panel.
Tips:
Certainly, you can accomplish all of the mentioned operations by controlling TourBox with just one hand. Don't worry about TourBox's setup being complicated – it comes with a wide range of default presets for various creative software applications, allowing you to quickly get started and have a seamless experience.
How to Flip (Mirror) a Photo in Lightroom Classic?
Sometimes, we may want to flip (mirror) a photo to change its visual orientation or create some interesting effects. For example, we can flip a horizontal photo to become a vertical photo or flip a photo with left-right symmetry to become one with top-bottom symmetry.
Lightroom Classic offers two ways to flip (mirror) photos:
- Flip Horizontal: Flips the photo along the vertical axis, essentially swapping the left and right sides of the photo.
- Flip Vertical: Flips the photo along the horizontal axis, essentially swapping the top and bottom parts of the photo.
To flip (mirror) photos in Lightroom Classic, you can use the following methods:
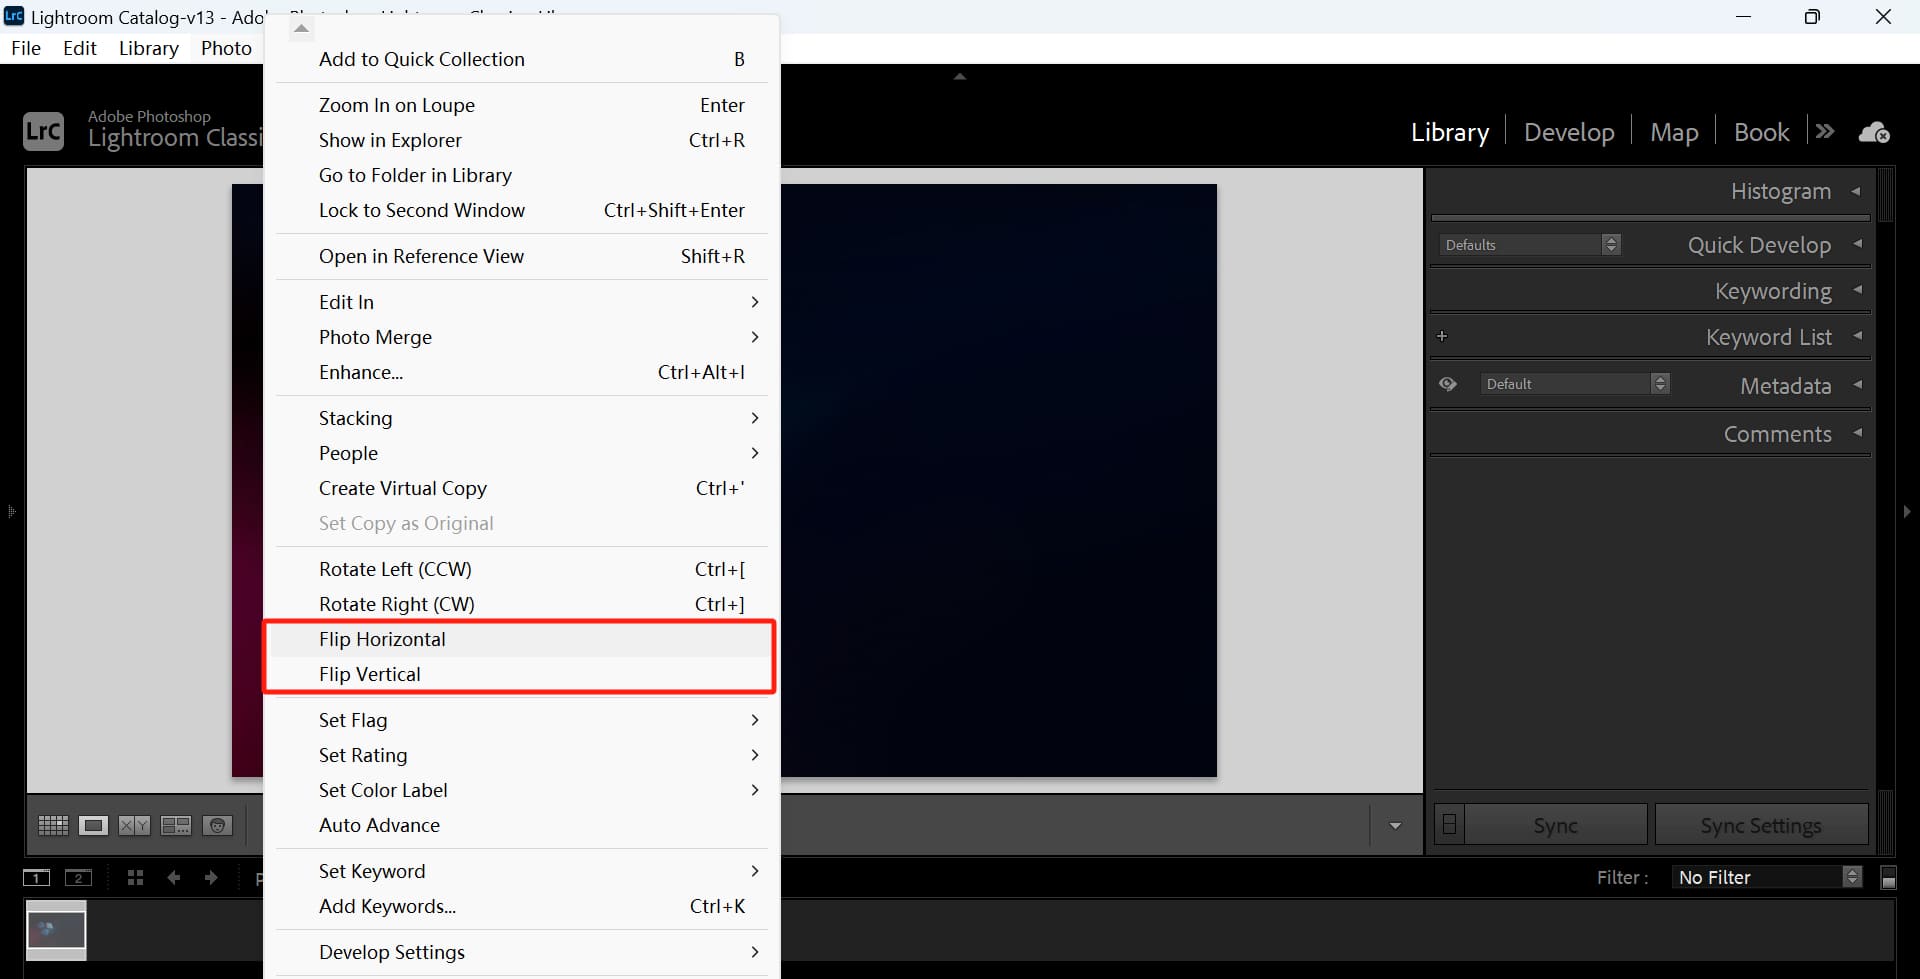
- Using the top menu bar: Click on the "Photo" menu, then select the "Flip Horizontal" or "Flip Vertical" command. This method works in both the Library module and the Develop module.
- Using the right-click menu: In the Grid view of the Library module or in the Develop module, you can right-click (or Option-click) on a thumbnail and select the "Flip Horizontal" or "Flip Vertical" command under the Transform menu.
Similarly, all of these methods can be used to flip multiple photos simultaneously by selecting the photos you want to flip before applying the flip. You can also set up TourBox to handle these operations and eliminate the hassle of searching for commands, navigating menus, or memorizing keyboard shortcuts.
Final Thoughts About Rotating a Photo in Lightroom Classic
And that concludes our tutorial on how to rotate a photo in Lightroom Classic. Before we wrap up, we'd like to share some important considerations when performing photo rotation:
- When rotating a photo, it's essential to maintain the aspect ratio and resolution to avoid compromising the quality and clarity of the image.
- While rotating a photo, pay attention to the composition and visual impact to ensure a balanced and visually pleasing result. You can use the Crop Overlay grids in Lightroom Classic. Additionally, you can use the "Straighten Tool" or the "Auto" command to align the horizontal or vertical lines in the photo.
- When rotating a photo, consider the orientation and orientation that best aligns with your intended purpose and output format. You can also use the "Flip Horizontal" or "Flip Vertical" commands to alter the visual orientation of the photo or create interesting effects.
Product Recommendation:
If you find the price of TourBox NEO or TourBox Elite to be a bit expensive, and the features they offer might seem a bit too complex for a photography or design beginner, why not give TourBox's latest series, TourBox Lite, a try?

It provides a professional photo editing experience at a very affordable price, making it perfect for users who are new to TourBox.
What's even better is that TourBox can be used in a wide range of applications, including video editing, image editing, digital painting, and everyday office software. If you're a creative individual who loves innovative tools, you're bound to fall in love with the experience of using TourBox.