Two Easy Methods: How to Cut Out Hair in Photoshop?
For designers and photographers, handling hair when cutting out a portrait in Photoshop can be quite tricky.
In this tutorial, we'll show you two simple methods to tackle hair selection with ease.

In this article, you will learn:
- Method 1: Using Channels to Cut Out Hair
- Method 2: Object Selection Tool + Select and Mask
- Conclusion
Method 1: Using Channels to Cut Out Hair
The first method we'll cover is using Photoshop's channels to extract hair.
Channel selection is an advanced technique, especially useful for handling complex hair details.
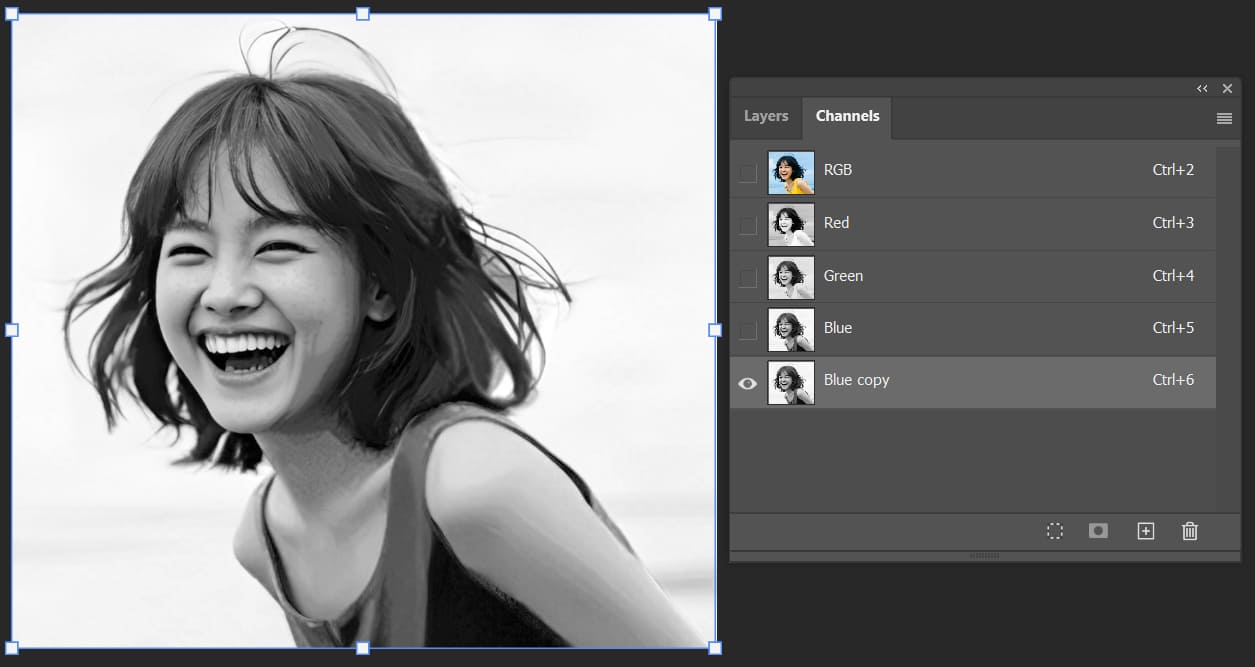
Start by importing your photo into Photoshop. Go to the top menu, and click Window → Channels to open the Channels panel.

In the Channels panel, pick the channel with the greatest contrast between the subject and the background. Then, duplicate this channel (an important step!) because you shouldn't make changes directly to the original channel.
Here, we chose the Blue channel because it contrasts most in our example.
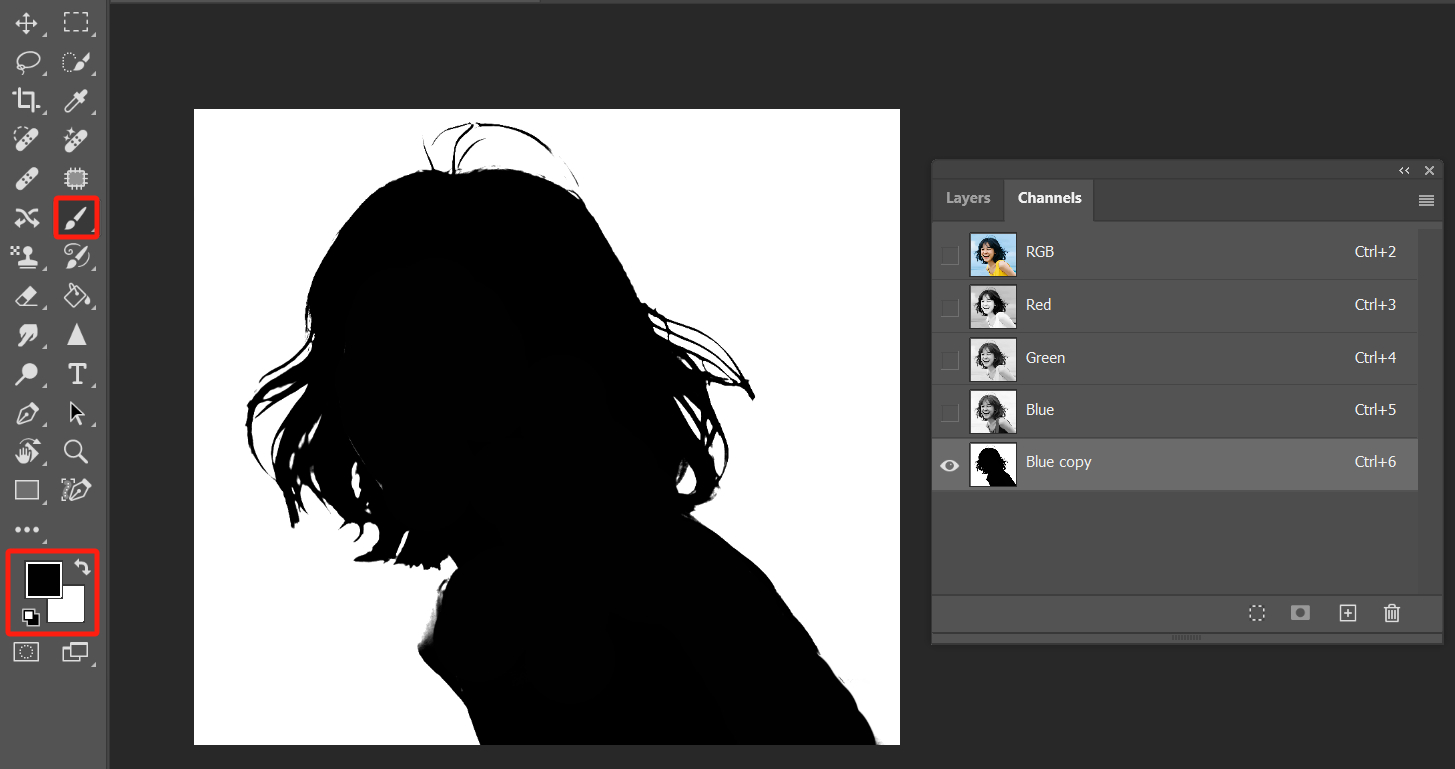
Press Ctrl/Command + L to open the Levels Tool. Adjust the sliders to make the background whiter and the subject darker, then click OK.

Select the Brush Tool from the toolbar on the left. Use a black brush to paint over the parts you want to keep and a white brush for the parts you want to remove.
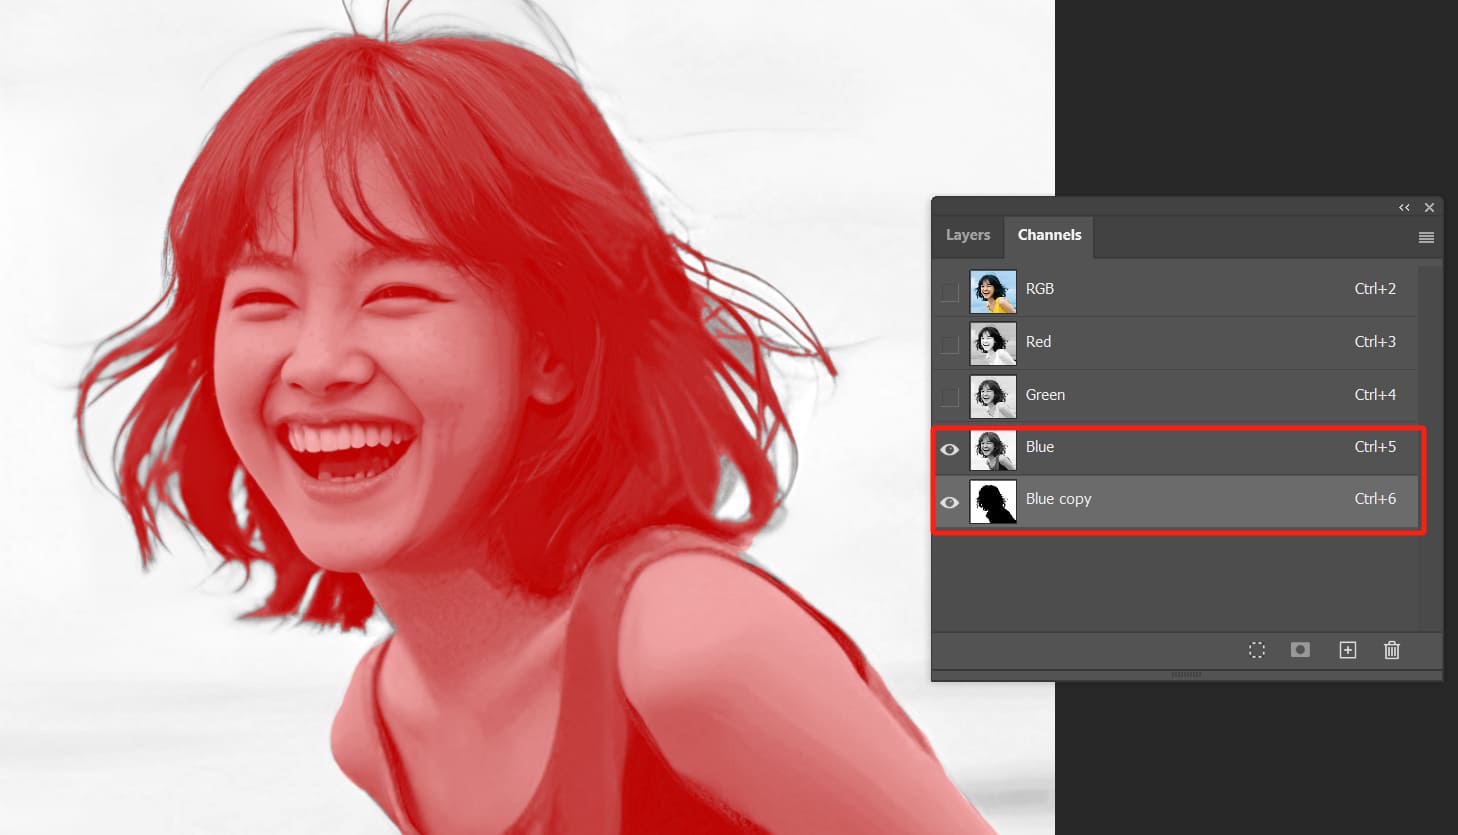
Since we don't have the original image as a reference, it's easy to make mistakes when using the brush. To avoid this, we can display both the Blue channel and its duplicated channel layer at the same time.
As shown below, when you display both channels together, the subject will appear as a light red selection instead of a solid black one. This makes it much easier to see and work with.
Hold Ctrl/Command and click on the channel thumbnail to create a selection. Then press Ctrl/Command + Shift + I to invert the selection.
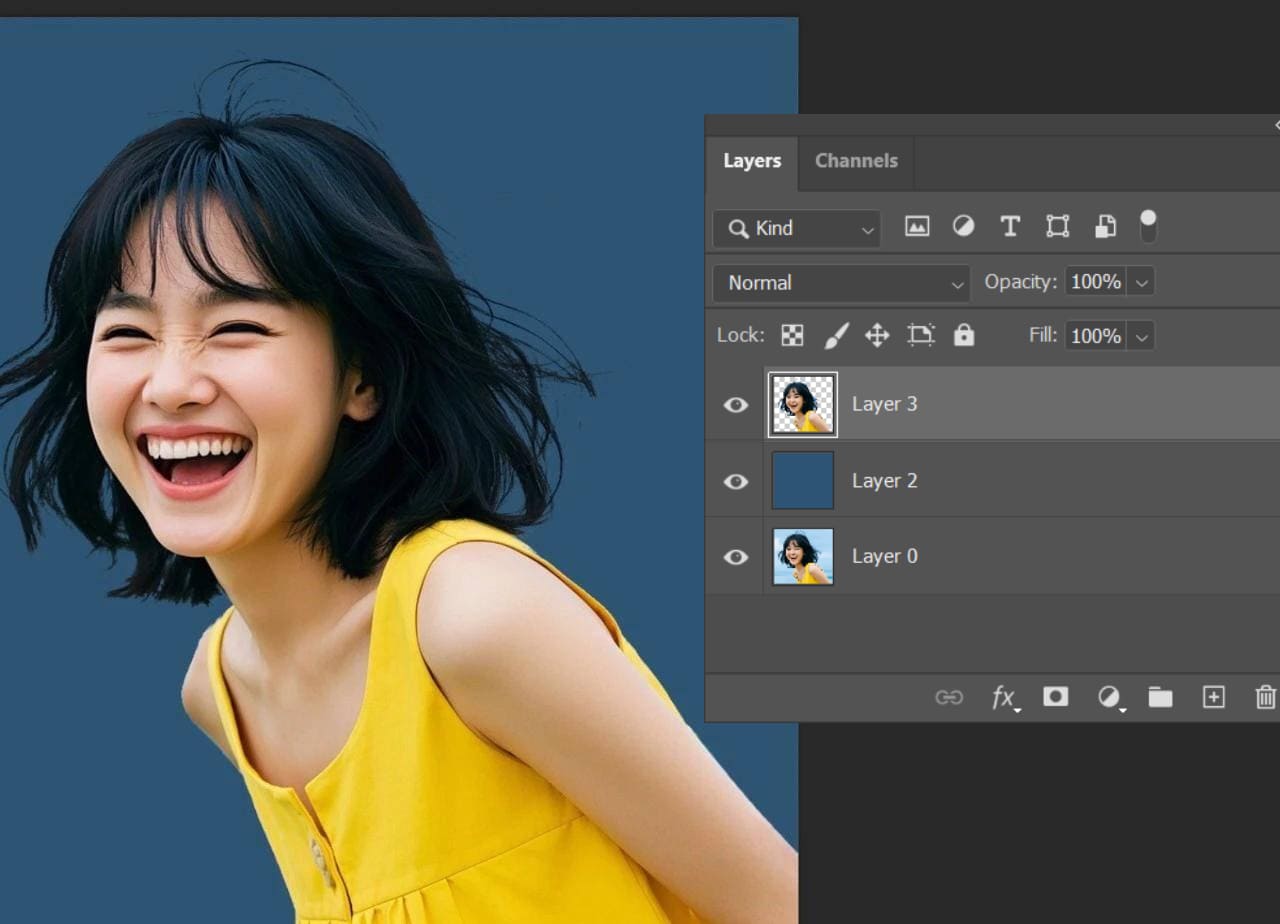
Then, click on the RGB channel layer, and return to the Layers panel. Press Ctrl/Command + J to duplicate the selected area onto a new layer. Your subject is now cut out.
For further refinements, like cleaning up the hair edges, use the Dodge Tool to carefully enhance the edges. This will make the hair strands look more natural and polished.
Let's add a solid color background to the photo to see the final result.
As you can see, using channels to cut out hair might seem simple, but it's actually quite challenging. You need to carefully refine the details to make the final result look natural.
If your photo was taken in a professional studio with a solid background, the channel method becomes much easier since Photoshop can more easily detect the edges of your subject.
However, when working with photos that have complex backgrounds, using channels can be very tedious.
In fact, using channels to extract hair was a popular Photoshop technique over a decade ago. Another similar method from that era involves using the Pen Tool for hair cutouts.
While these older methods can deliver good results, they require meticulous attention to detail and a lot of time. This isn't ideal for photographers and designers who value efficiency — and Adobe knows that.
So next, let's explore a simpler and faster way to cut out hair in Photoshop.
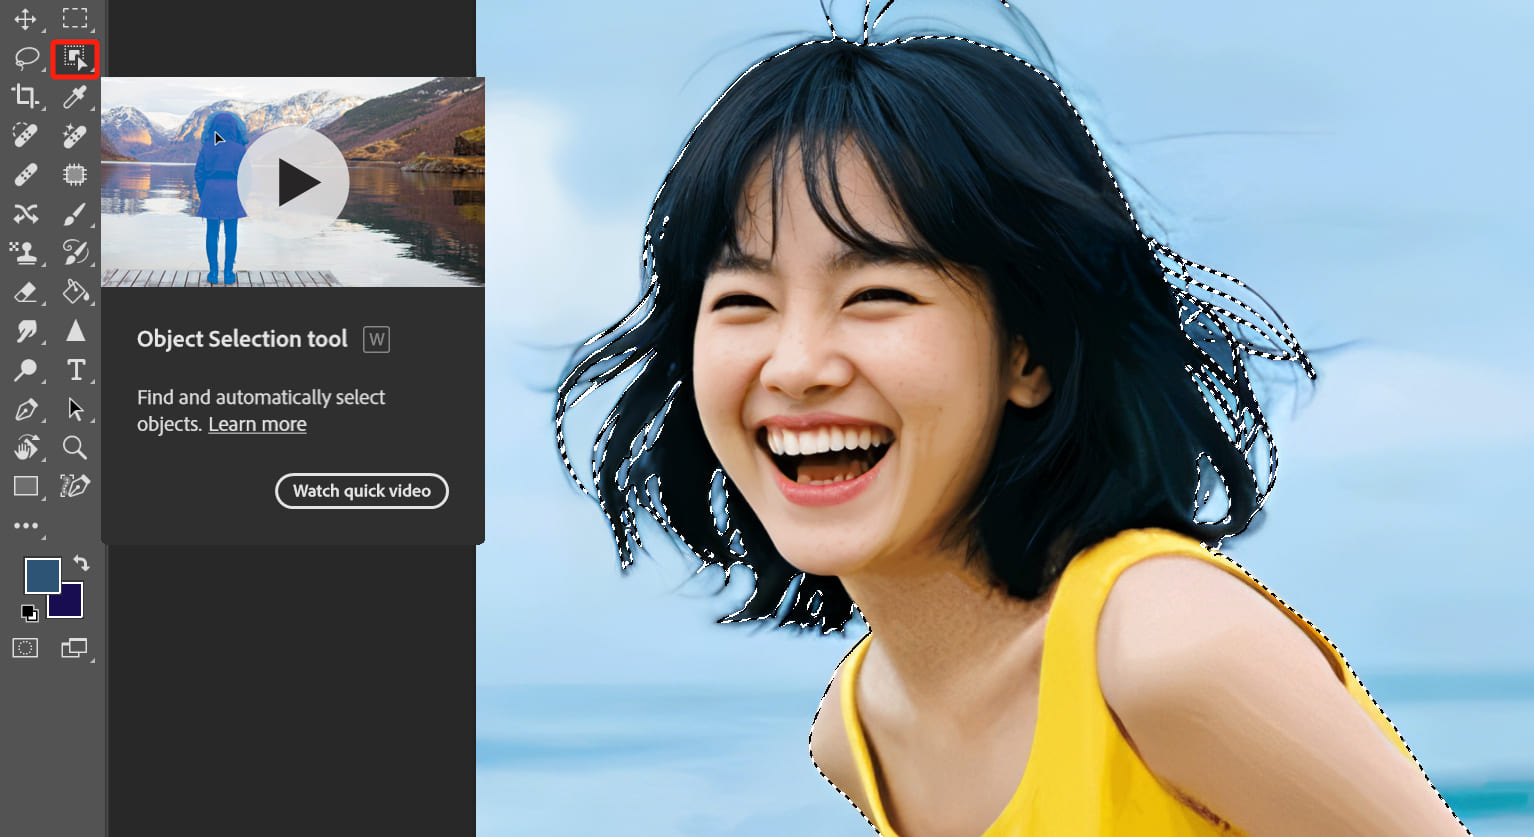
Method 2: Object Selection Tool + Select and Mask
The second method uses the Object Selection Tool to cut out the subject and Select and Mask to refine the hair details. It's super simple and takes only 2–3 minutes to complete.
Select the Object Selection Tool from the toolbar on the left. Click on the subject, and Photoshop will automatically create a selection around it after a brief moment.
But we're not done yet! In the top options bar, click Select and Mask to open the refinement panel.

First, change the View Mode to Transparency. This makes it easier to see the results as you work.
The cutout effect isn't perfect at first, but with a few quick slider adjustments, we can make a big difference.
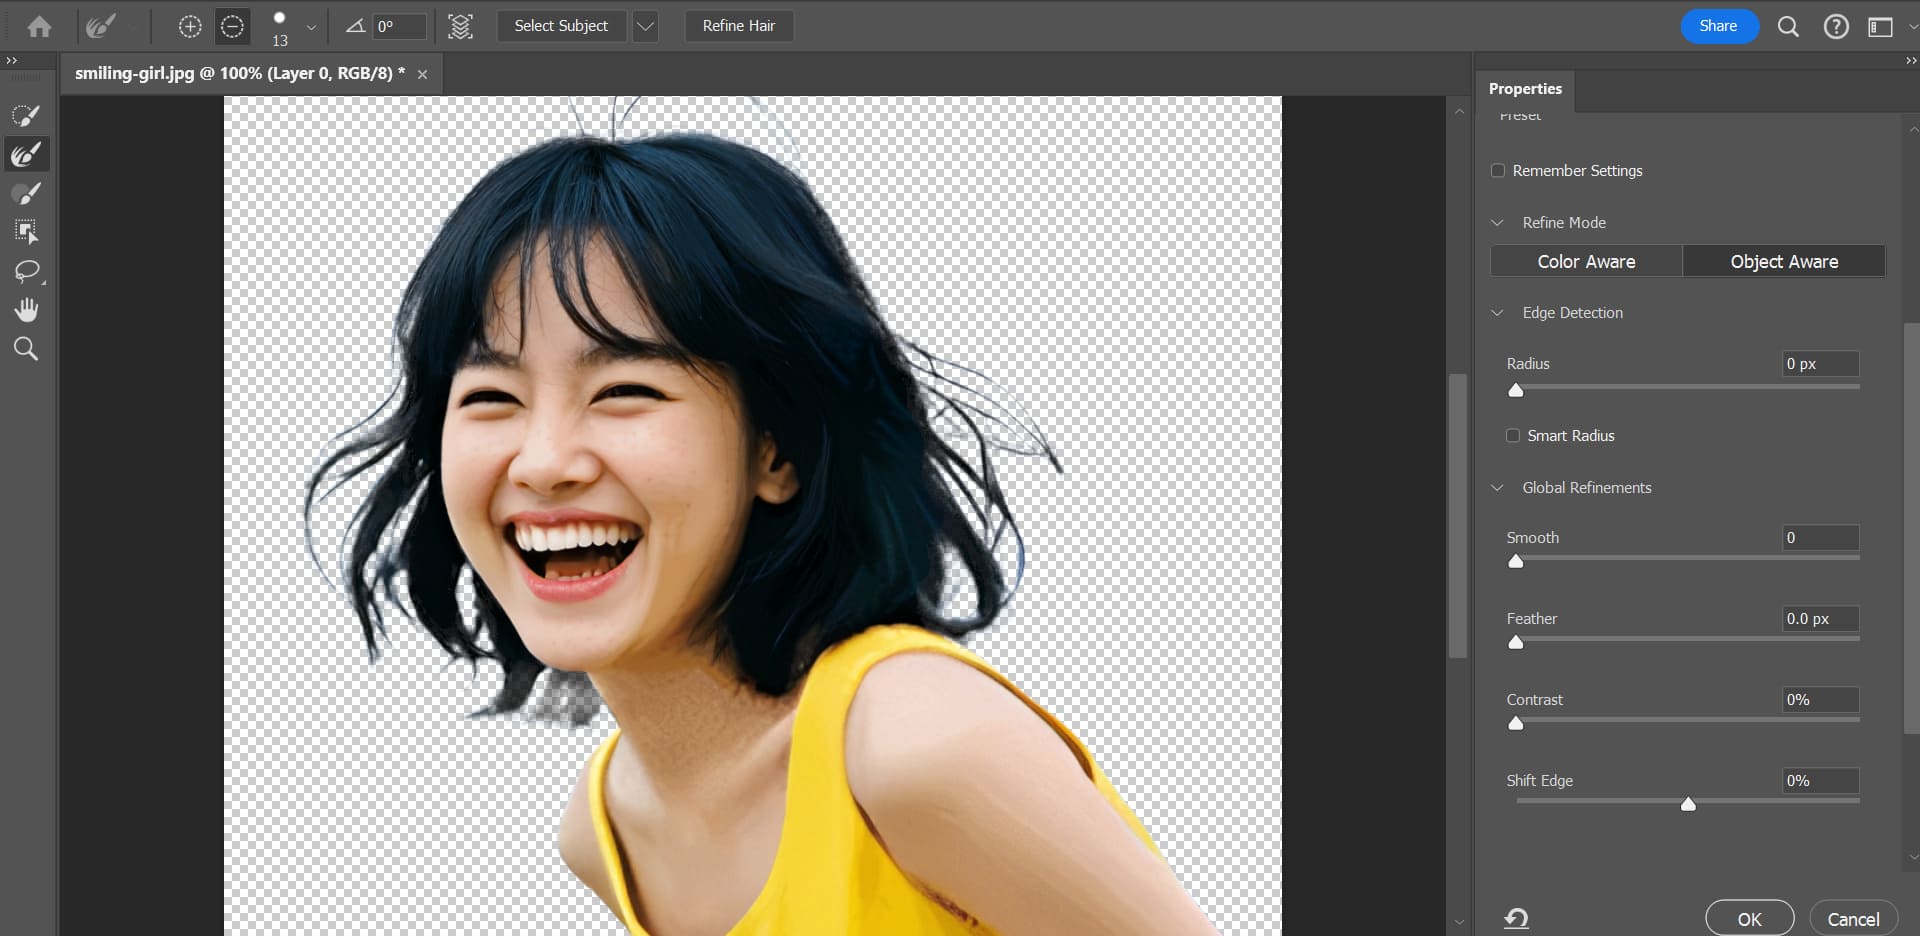
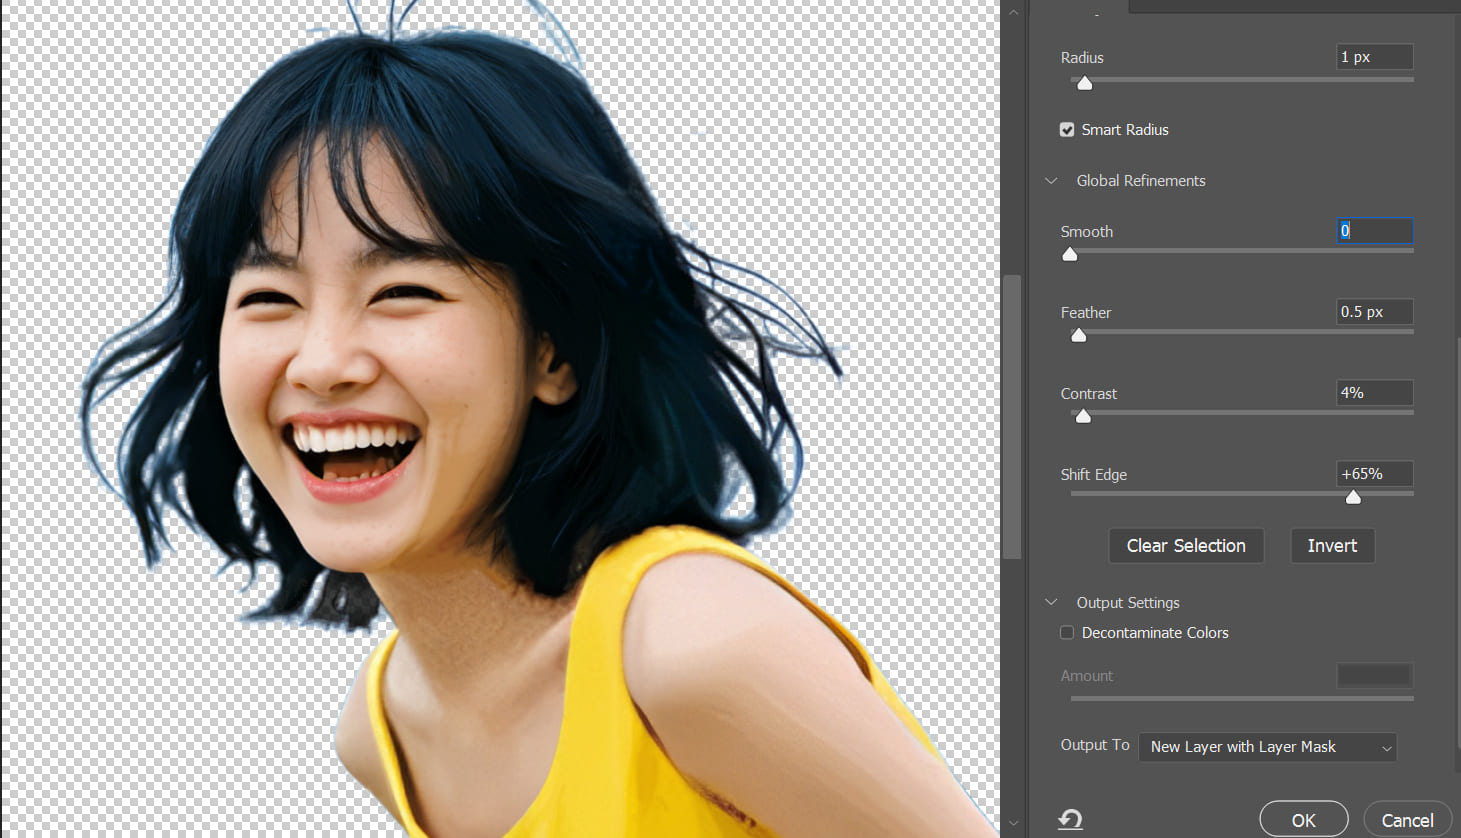
In the properties panel on the right, start by checking Smart Radius and increasing the radius slightly.
Next, add a small amount of feathering, boost the contrast, and use the Shift Edge slider to fine-tune the result based on your photo until it looks just right.
Change the Output To setting from "Selection" to "New Layer with Layer Mask," then click OK.
With these simple steps, you can easily achieve a clean and detailed cutout, especially for tricky areas like hair. This method is not only fast but also delivers amazing results!
Conclusion
In this tutorial, we covered two methods for cutting out hair: using channels and the Select and Mask tool.
No matter which method you choose, tasks like zooming in on the image, adjusting brush size, and fine-tuning sliders are unavoidable. While these actions seem simple, doing them repeatedly can be time-consuming and tiring.
That's where a tool like TourBox comes in. Designed specifically for photographers and designers, this creative console makes these tedious tasks much easier, streamlining your workflow and boosting efficiency.

With TourBox, you can quickly zoom in on details, refine edges, or adjust feathering and contrast with smooth, precise controls. It turns time-consuming adjustments into quick and effortless actions.
Not only does it save you time, but it also lets you focus on your creativity. Plus, TourBox is ergonomically designed to feel comfortable in your hand, even during long editing sessions.

If you're curious about TourBox, check out our photo editing page to learn more about how it can transform your workflow!