How to Sharpen a Video in DaVinci Resolve?
You've probably had this happen: you try to sharpen a video to bring out detail. Sometimes the sharpening is too weak, so the image still looks soft and flat. Other times, you sharpen too hard. Then you get noise and hard edges, and good footage gets ruined.
In DaVinci Resolve, you don't need a complex node setup to get clean, lossless sharpening. With the right method, three simple steps are enough. You can boost detail while keeping a natural look. Even a beginner can do it. Today, we'll share how to sharpen a video in DaVinci Resolve. Let's get started.

In this article, you will learn:
How to Sharpen a Video in DaVinci Resolve?
Many beginners' first mistake when sharpening footage in DaVinci Resolve is sharpening the whole frame at once. This often hugely boosts noise in the dark areas. It can also create bright, harsh edges. Those problems lead to over-sharpening.
The core idea in DaVinci Resolve is to control exactly where you sharpen. Only sharpen the parts that need more detail. That stops the issues at their source. This is the main thing we do in Step 1.
Step 1: Add a Matte
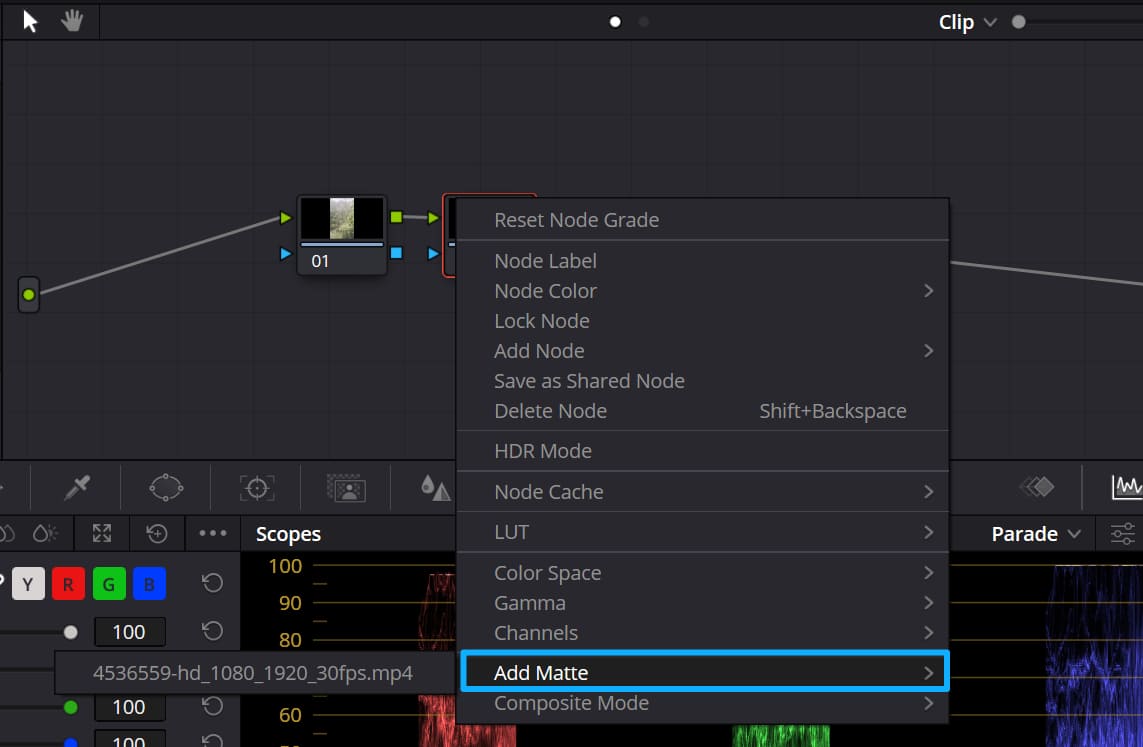
Add a mask and precisely pick the bright/detail areas. This is the key to lossless sharpening. In the Nodes panel, make a Serial node for the clip you want to work on. Right-click that node and choose Add Matte. You don't need to change the matte type — the default is fine for basic work.
Next, press Shift+H (or click the Highlight button above the Viewer) to show the matte. Areas covered in gray are hidden — sharpening will not affect them. The non-gray, highlighted areas are the parts you should sharpen.
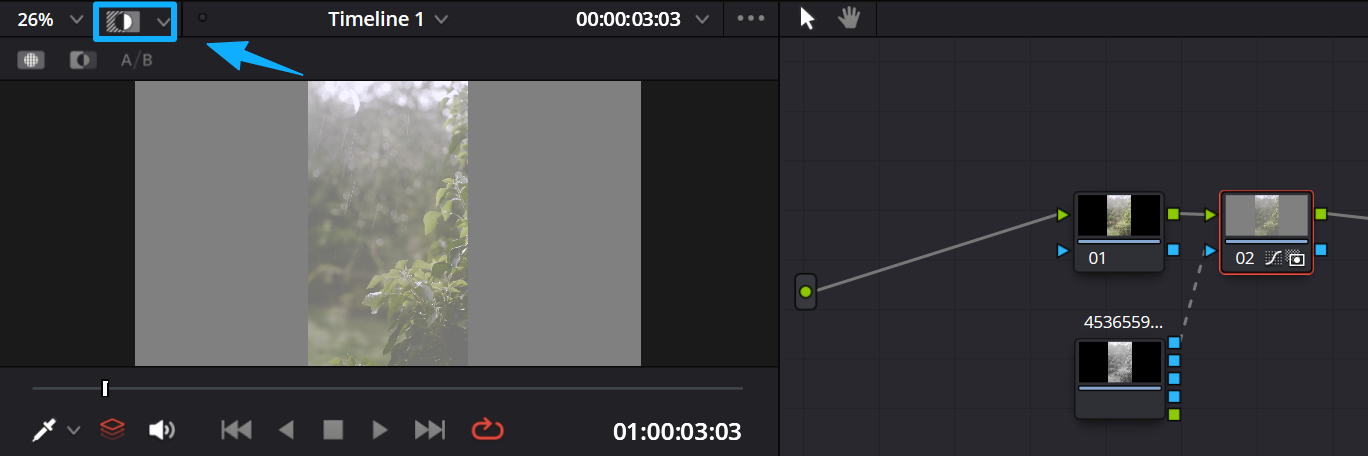
This method lets you lock onto real detail, like hair strands, facial features, landscape textures, and building edges. It makes sharpening targeted and avoids boosting noise in dark areas. That makes the rest of your sharpening work much more meaningful.
Step 2: Adjust the Sharpen
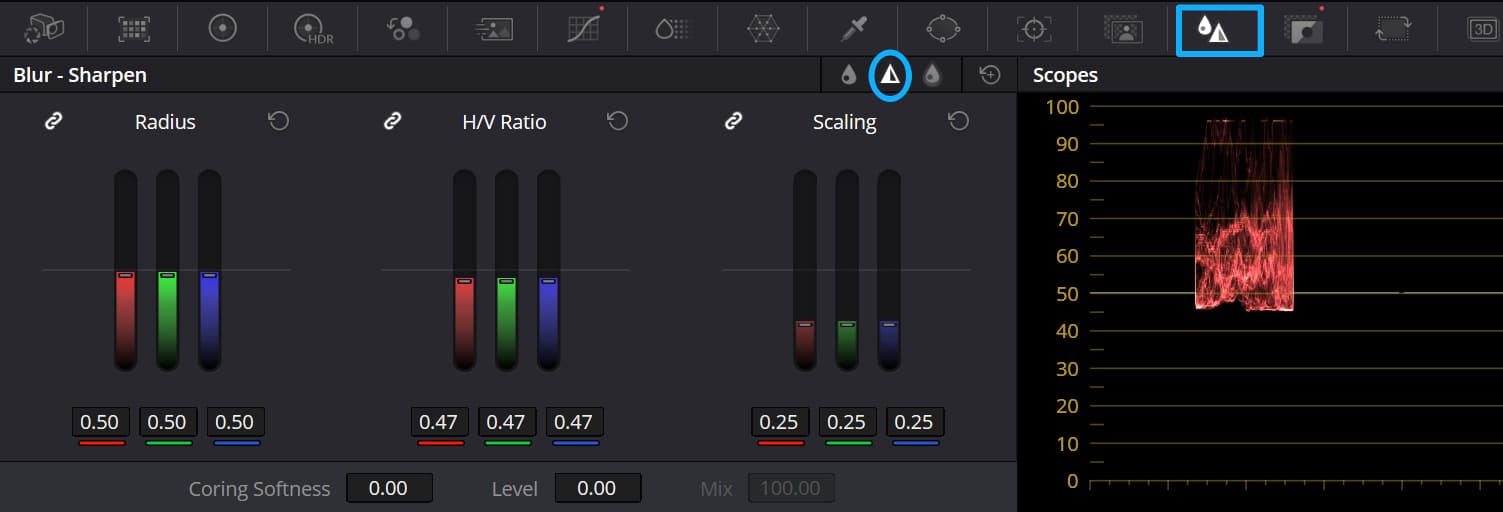
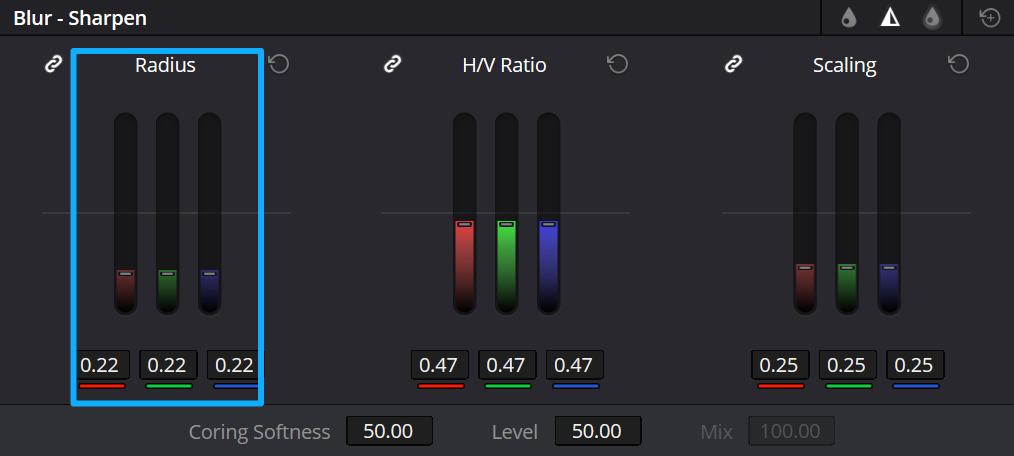
After you add the matte, click the Blur tab in the Color page, then switch the panel at the top from Blur to Sharpen. Focus on three main settings. Use these values, and even beginners won't go wrong.
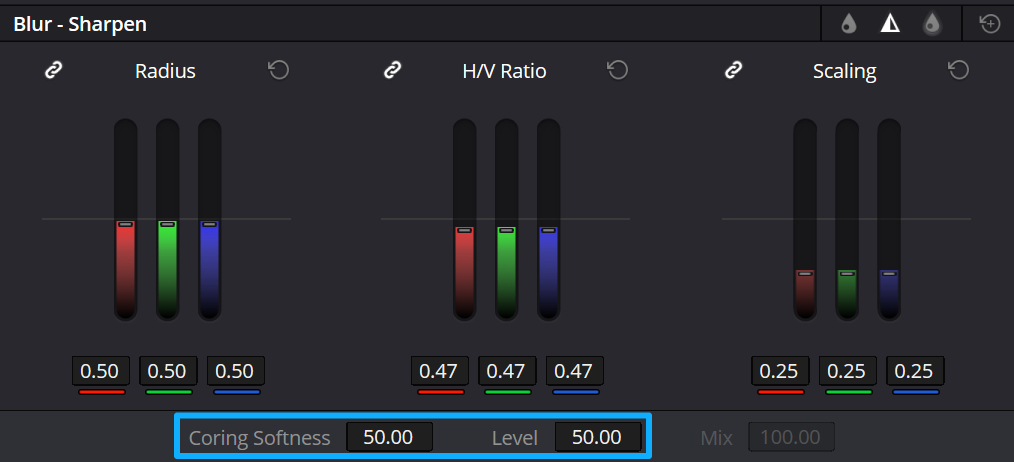
First, set Coring Softness and Level to about 50. These two work together. A higher Level makes the sharpening affect low-contrast areas less. That keeps flat areas from looking odd. A higher Coring Softness boosts sharpening on high-contrast edges. That helps bring out fine edge detail.
Next, tweak Radius. Be careful: if you did not make a matte first, dropping the radius directly can look very unnatural. With a matte, you can push the radius farther. That makes the sharpening more obvious while keeping a natural look. Adjust it based on your clip's resolution, and keep the overall value fairly low.
Step 3: Adjust Midtone Detail
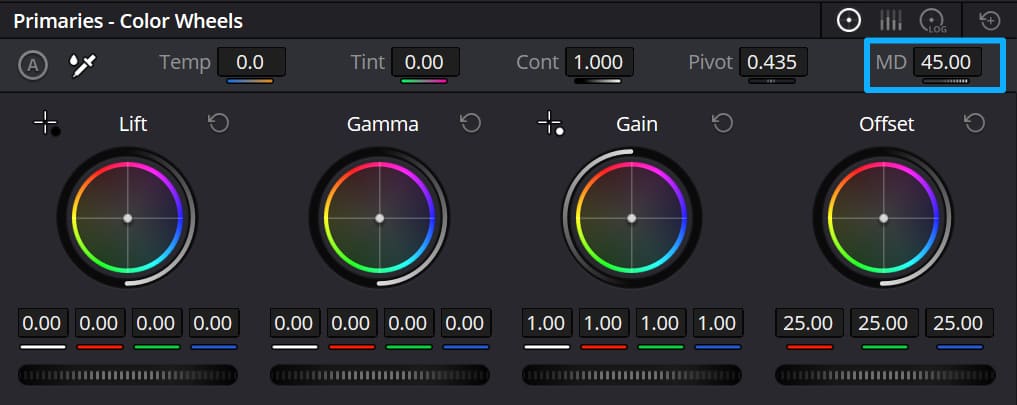
This step is the finishing touch that helps the sharpening stand out. After you finish the Sharpen panel settings, go back to the Primaries - Color Wheels panel in DaVinci Resolve.
Find the Midtone Detail (MD) slider and gently move it up a little. Don't push it too far. A small change will add more depth to the midtones.
Sharpening alone can make details pop, but still leave the image flat. Adding midtone detail softens the light-to-dark transitions and helps the sharpened details blend into the whole image. That gives the shot more texture and clearer depth.
When you drag curves, color wheels, or other controls with a mouse in DaVinci Resolve, it's hard to land on the exact number you want. If you have a TourBox, hover your mouse over a color wheel, slider, curve, or number field and use TourBox's physical knob to change values faster and more precisely.

Like using a gamepad to play video games, TourBox gives you a more immersive color-grading feel. You can map your favorite shortcuts and functions to TourBox's buttons and knobs. It also includes many built-in features and macros to support more of your creative work.

For creators who edit video, grade color, and make content regularly, TourBox's ergonomic design can greatly improve your workflow. If you're interested, click our link to learn more.
Conclusion
Sharpening in DaVinci Resolve really follows one simple rule: pick the area, adjust the settings, then add detail.
Don't sharpen the whole frame. Use a matte to control where the effect applies. Tune the sharpening controls so the effect helps the picture instead of hurting it. Finally, add a bit of midtone detail to make the result blend in naturally.
This method works for most clips — portraits, landscapes, vlogs, or documentary footage. Open the Resolve and try it on your footage. You'll likely see a clear, more natural result.