Mastering Speed Control in Premiere Pro: All You Need to Know
When watching Vlogs or movies, you often come across cool effects like sudden acceleration or slow-motion shots. However, when you try to edit your own footage and speed up certain clips, they don't seem as smooth no matter what you do.
In this tutorial, we will share methods on how to speed up clips in Premiere Pro. This will help you quickly master the art of smoothly adjusting video speeds in Premiere Pro. So, let's get started.

In this article, you will learn:
- How to Speed Up Clips in Premiere Pro?
- Tips for Speed Change in Editing
- Final Thoughts About Changing Speed in Premiere Pro
How to Speed Up Clips in Premiere Pro?
First, let's import the prepared footage. Here, for the accelerated clips, we highly recommend using aerial footage like the video below.
Due to the aerial perspective, everything appears to move slowly. When you speed up the footage using Premiere Pro, it creates a pronounced sense of motion. The effect will be quite noticeable.
Method 1: Time Remapping
After importing this footage into Premiere Pro, you will notice a straight line on the timeline at the bottom of the Premiere Pro interface, as shown in the image below.
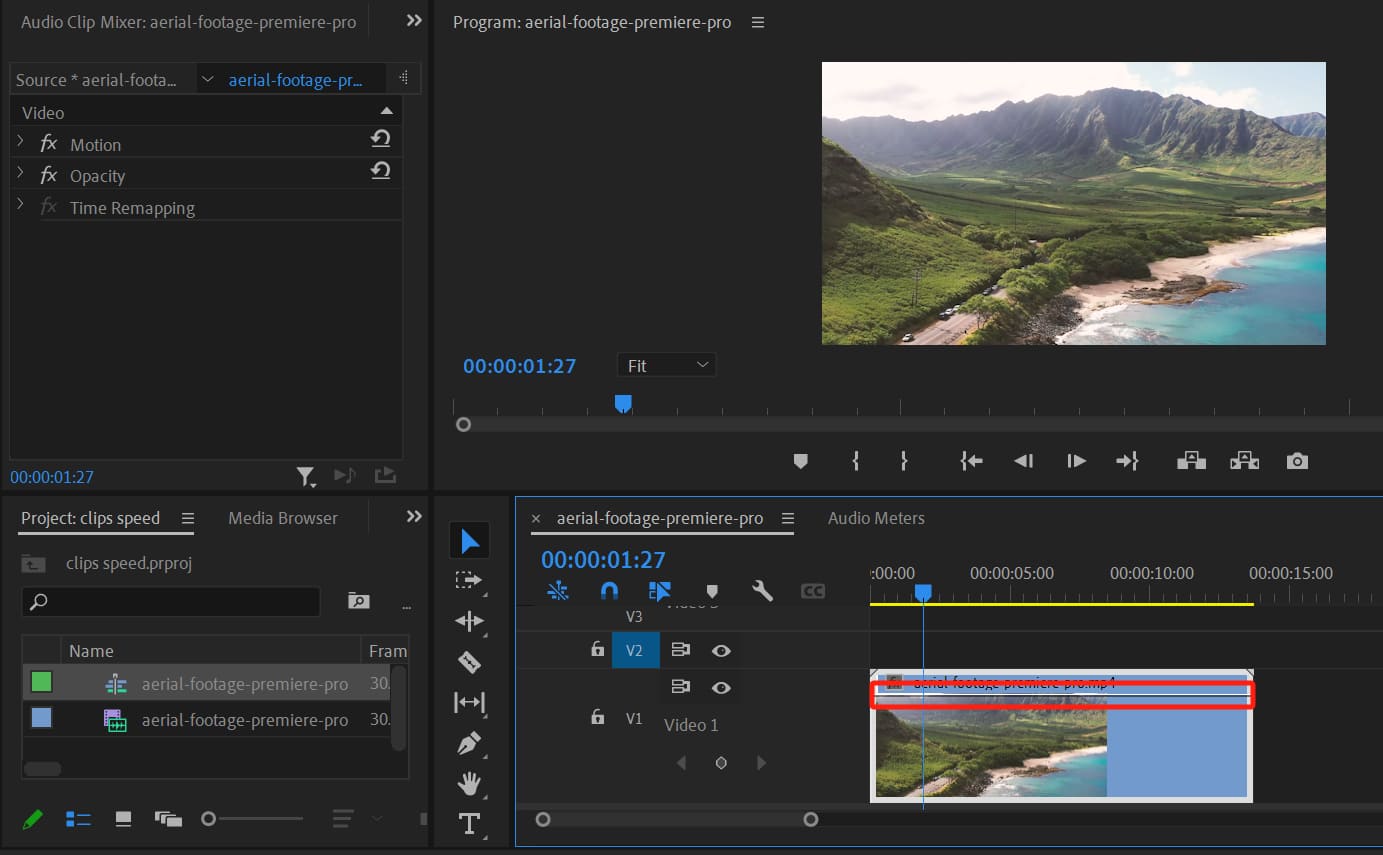
If you try to drag this line, you will see a numerical value. In its default state in Premiere Pro, this line controls the opacity. Dragging it all the way down will make the footage in the monitor above turn completely black.
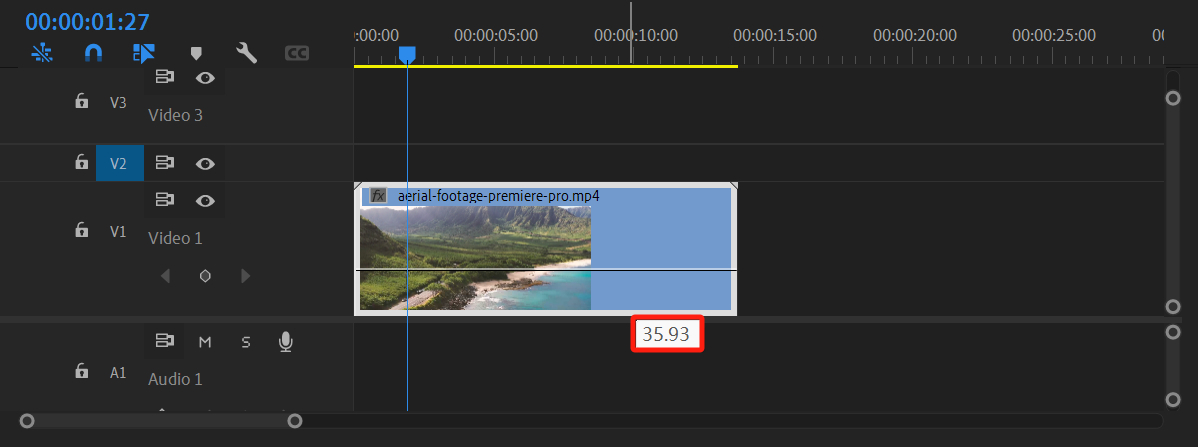
Wait a minute, isn't this tutorial about adjusting clip speed? Don't worry. At this point, you can right-click on the footage in the timeline and select "Show Clip Keyframes" > "Time Remapping" > "Speed".
At this point, the line will slightly change in height, and when you drag this line, the footage will either accelerate or decelerate. Moving it upwards speeds up the footage, while moving it downwards slows it down.
The corresponding speed adjustment will also change the duration of the clip.
Additional Tip:
If you find the track height on the timeline too small and inconvenient for viewing and editing, you can drag the edges between tracks to adjust the height of the track.
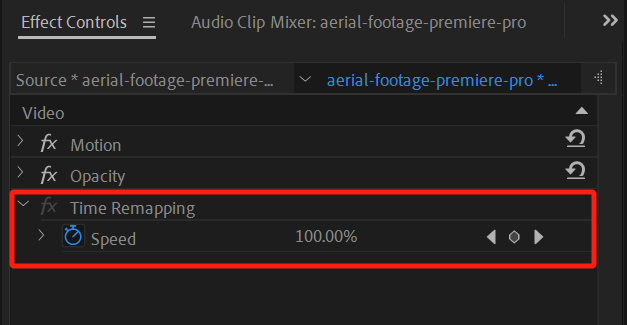
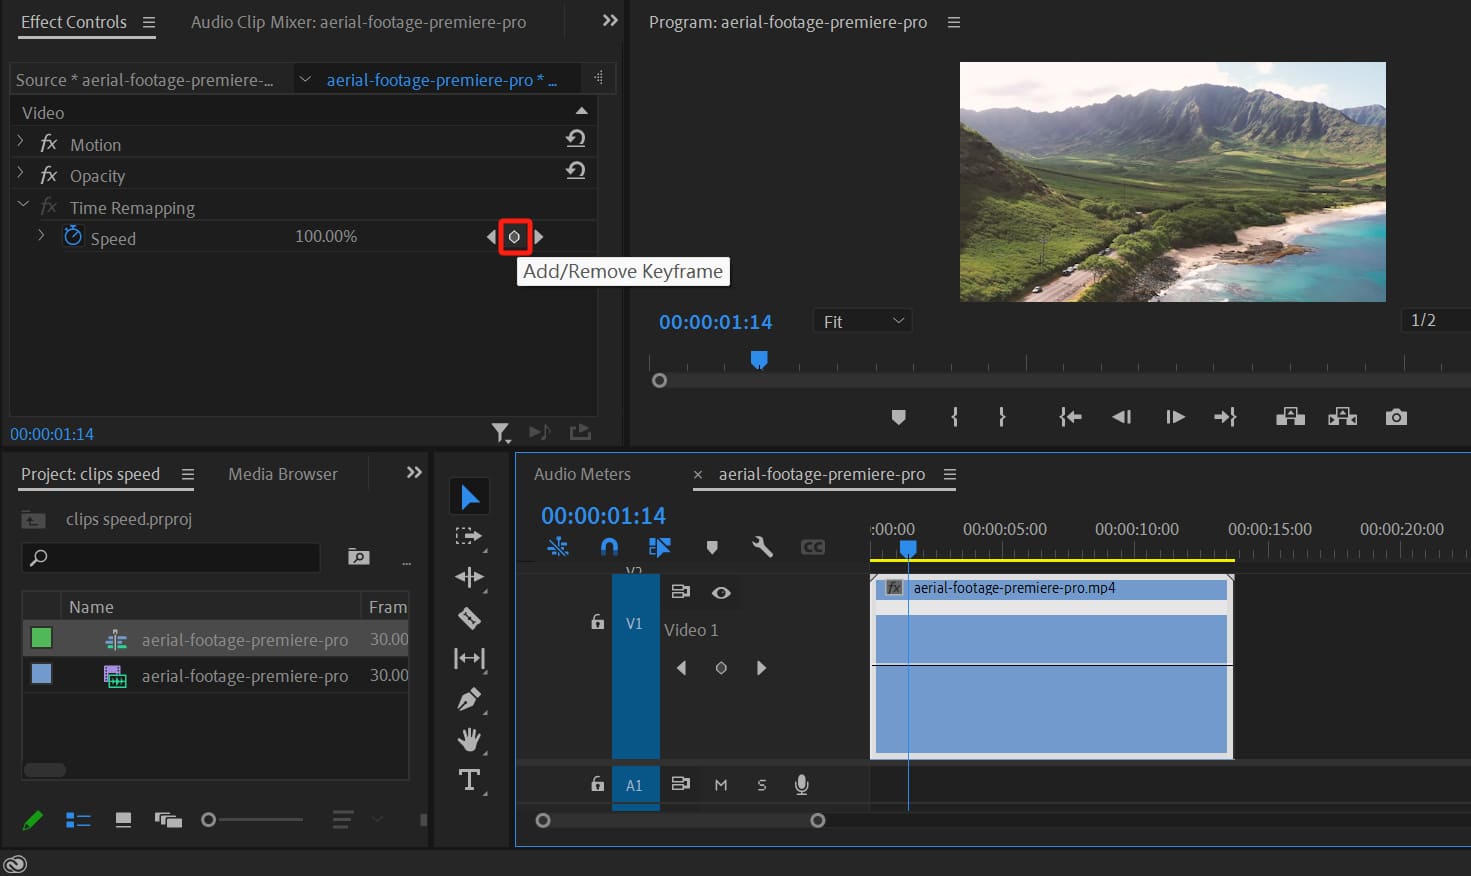
Next, you need to navigate to the Effect Controls panel located in the top left corner of Premiere Pro. In this panel, locate the Time Remapping settings.
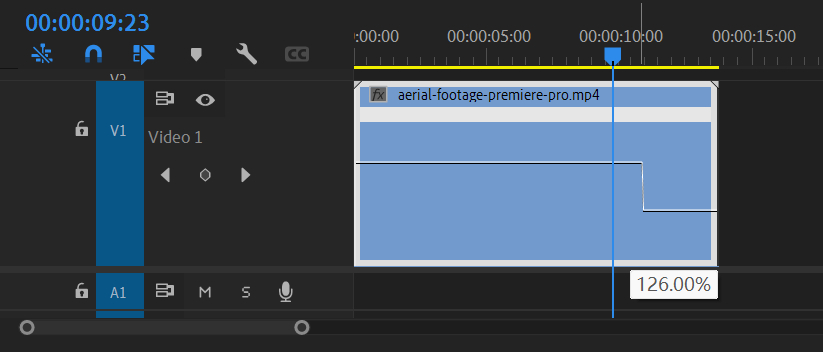
On the timeline, navigate to the specific point in the footage where you want the speed change to begin. Click on the small diamond-shaped icon to the right of the speed option under Time Remapping to add a keyframe.
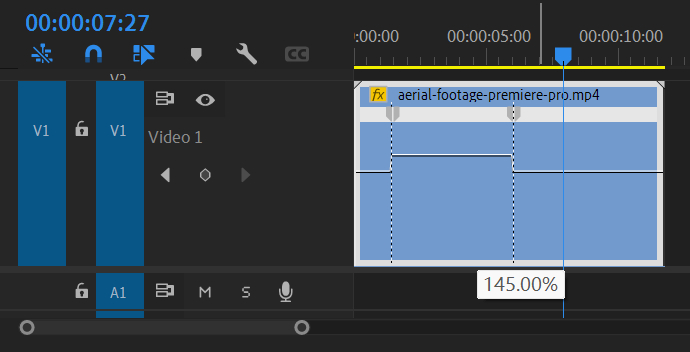
Next, play the footage on the timeline. At the desired point where you want the speed change to end, click on the same diamond-shaped icon to add a keyframe for the end point. You will notice a dotted line area with markers on the timeline.
To adjust the speed of the selected clip, drag the horizontal line in the middle of the dotted line area up or down.
Additional Tip:
Hold down the SHIFT key and press the left or right arrow key on your keyboard. Each press of the arrow key will move the indicator 5 frames. While doing this, make sure to keep the SHIFT key pressed.
To achieve a smooth speed transition, you can also drag the keyframes at both ends to create a fade-in or fade-out effect. By clicking on the keyframes and adjusting the curve in the pop-up slider, you can make the transition more seamless and fluid.

Method 2: Clip Speed/Duration
Using Time Remapping, you can accelerate the footage up to a maximum of 1000%, which is equivalent to 10 times the original speed.
While this may sound sufficient, in certain special cases, if you require even higher speeds, you can right-click on the footage on the timeline and select "Speed/Duration" to adjust the speed accordingly.
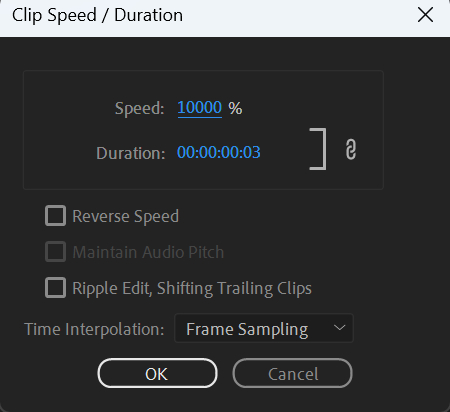
Note:
In the "Speed/Duration" settings panel, you can adjust the speed up to a maximum of 100x.
Of course, you can achieve the same slow-motion effect using the above-mentioned method.
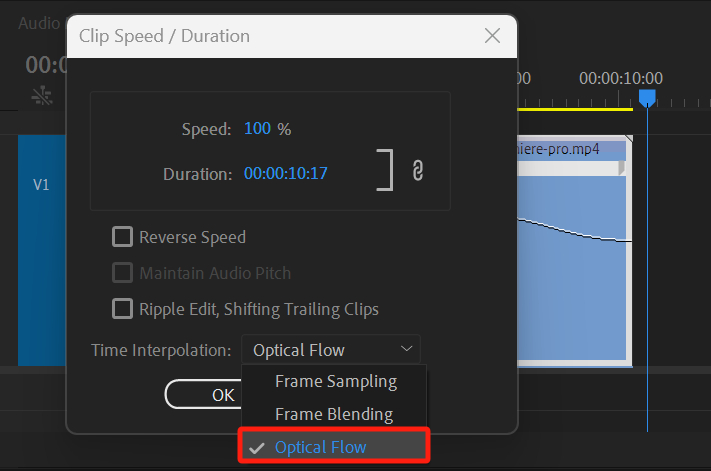
However, if your footage is not shot at a high frame rate and you want to avoid a choppy look when slowing down the speed, you can optimize it through the settings in the Speed/Duration panel.
Select the "Optical Flow" option from the Time Interpolation drop-down list in the Speed/Duration panel. Premiere Pro will analyze each frame and attempt to fill in the gaps, making the slowed-down footage appear smoother and less choppy.
When applying speed change to footage, the three modes of Time Interpolation have different effects:
- Frame Sampling: This mode simply duplicates the same frame, resulting in a visually choppy look.
- Frame Blending: This mode also presents the same frame but adds a slight blending and overlay effect, resulting in a slightly smoother visual appearance. Frame blending is commonly used in fast-paced clips as it creates dynamic blurring effects.
- Optical Flow: This mode truly adds new frames by predicting the motion trajectory between two frames and recalculating them. As a result, the total frame count of the footage is actually increased.
Although Optical Flow is great, it has some limitations. To achieve the best Optical Flow effect, you need to have significant contrast in the frames. Otherwise, you may experience distortion in the footage.
In practical shooting scenarios, it is advisable to capture footage at the highest frame rate possible. This allows Optical Flow to have an ample number of frames for analysis, resulting in better overall results.
Tips for Speed Change in Editing
The core of those cool and fancy transitions you often see in movies and vlogs is actually speed variation. After learning how to speed up clips in Premiere Pro, we would like to share some additional knowledge about speed variation in video editing.
1. What Is Speed Ramping
Speed ramping is the professional term for slow-motion effects. In the past, when shooting on handheld film cameras, some cinematographers deliberately increased the speed.
This allowed them to achieve slow-motion effects when playing back the film at normal speed in post-production. That's how the term speed ramping originated.
Of course, modern cameras can directly record high frame rate footage, but the term speed ramping has persisted.
Speed ramping and speed variation can bring out the details of each action, making them a favorite technique among many cinematographers and editors.
2. How to Handle Frame Skipping
When using the Speed/Duration panel for speed ramping, if your speed variation is not a whole number, such as shooting footage at 180 frames and placing it on a 25-frame timeline, then slowing it down by 25%, you may encounter frame skipping.
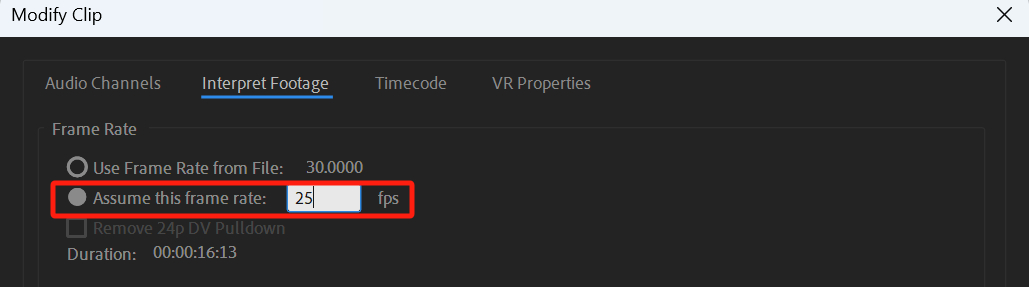
In such cases, you can use Interpret Footage to slow down the footage speed. The method to use Interpret Footage is also very simple.
Right-click on your footage in the Project panel, then click Modify > Interpret Footage. In the pop-up panel, adjust the "Assume this frame rate" option to the desired frame rate you want to slow down to, such as 25.
This method allows you to process all the footage at once for slow motion. The advantage of this method is that it eliminates frame-skipping issues.
You can think of it as playing a roll of film at a different speed. It follows the same principle as speed ramping, except that each frame is mapped to a different position.
3. How to Achieve Smooth Transitions Between Shots
If you want to achieve smooth transitions between shots, the speed variation method we mentioned earlier is essential.
Specifically, it means matching fast with fast and slow with slow. If the end of one footage is sped up, the beginning of the next footage should also be sped up. This creates a seamless transition between shots.
Final Thoughts About Changing Speed in Premiere Pro
In this tutorial, we've explored how to speed up clips in Premiere Pro. By now, you should have a solid understanding of how to apply time remapping, adjust speed/duration, and utilize different interpolation modes to achieve the desired effects.
To take your editing skills to the next level and streamline your workflow, we highly recommend considering a tool like TourBox.

TourBox is a versatile and intuitive controller specifically designed for creative professionals. With TourBox, you can easily navigate through Premiere Pro's interface and access important functions with just a few clicks and twists.

Its ergonomic design and customizable buttons allow for seamless control over your editing process, reducing the time spent on repetitive tasks and making your editing experience more efficient and enjoyable.