How to Split a Clip in Premiere Pro: An Easy Tutorial
Splitting a clip in Premiere Pro is a fundamental editing technique that allows you to divide a single video or audio clip into multiple segments.
Whether you need to trim unwanted footage, create separate sections for further editing, or insert transitions, knowing how to split clips is essential for mastering the art of video editing.
In this comprehensive tutorial, we will guide you through the process of splitting clips in Premiere Pro. So, let's dive in and learn how to split a clip like a pro in Premiere Pro!

In this article, you will learn:
- How to Use the Timeline Panel in Premiere Pro?
- How to Split a Clip in Premiere Pro?
- Final Thoughts About Splitting Clips in Premiere Pro
How to Use the Timeline Panel in Premiere Pro?
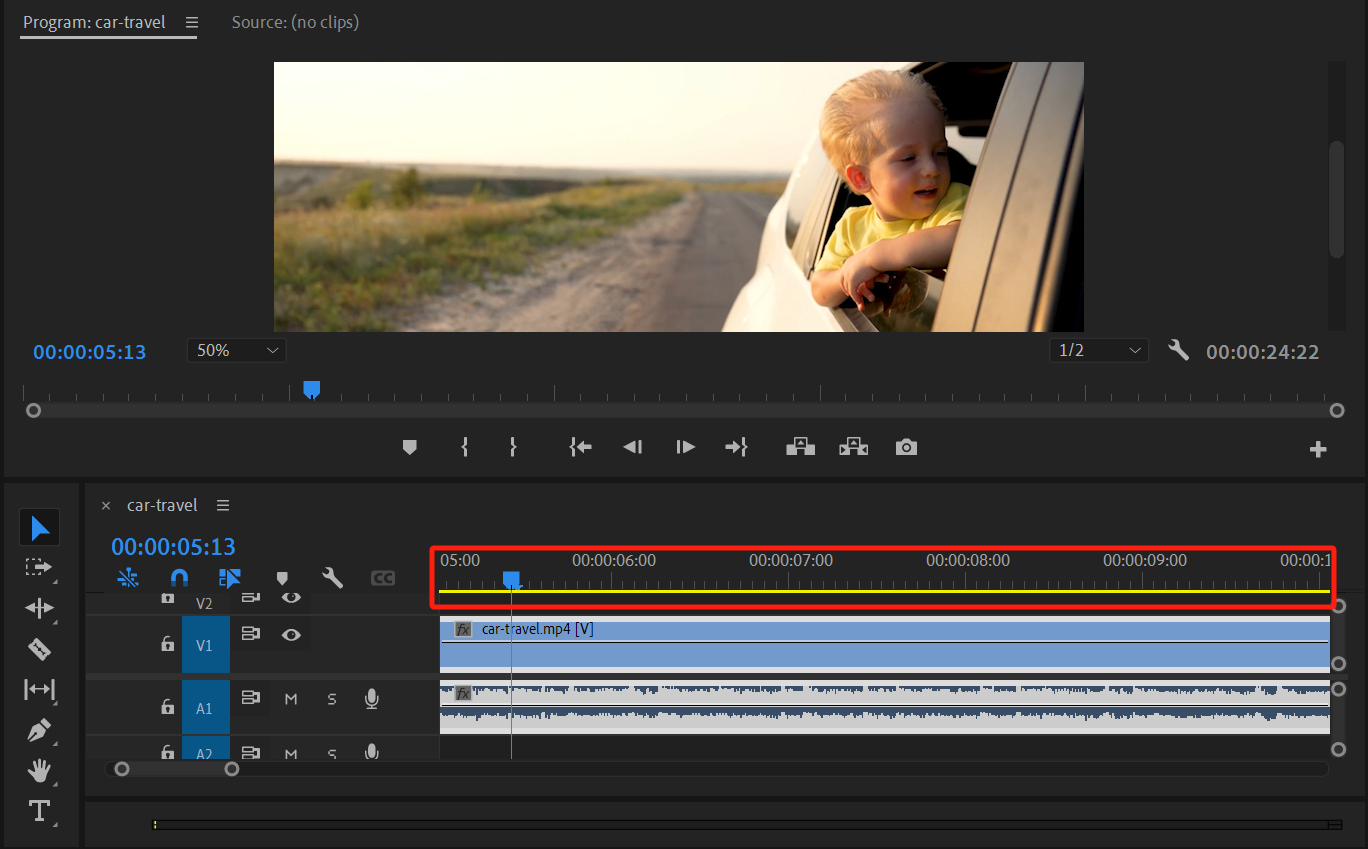
Editing videos in Premiere Pro primarily takes place on the Sequence Timeline panel. When you open a Premiere Pro project, simply drag your media clips onto the timeline, and you'll notice a yellow track scale above the timeline panel, indicating the duration of your video.
By using your mouse to select any point on the track scale or drag the pointer, you can swiftly navigate to specific positions in your video for seamless editing.
Extra Tip:
If the Timeline panel is not visible in Premiere Pro, you can access it by going to the Window menu at the top of the Premiere Pro interface and selecting the Timeline panel.
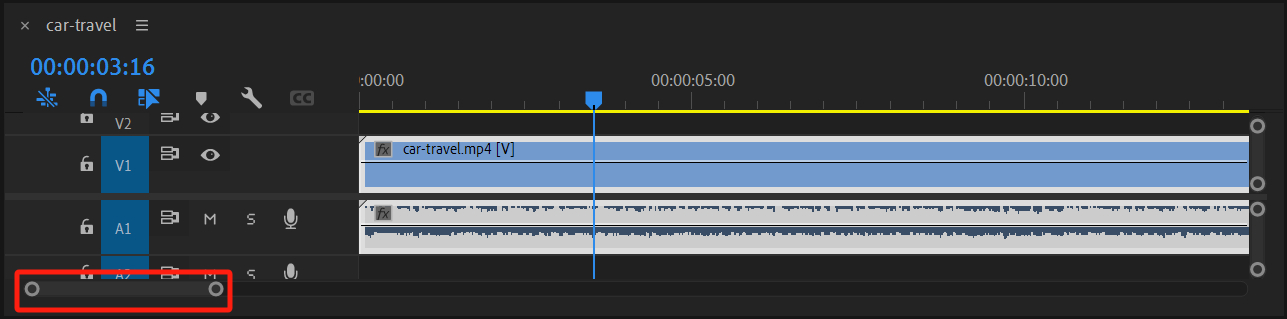
If we consider the timeline scale at the top of the Timeline panel as a means of selecting absolute positions, then the horizontal bar below the timeline serves as a tool for relative adjustments, allowing you to zoom in and out of the timeline scale.
This horizontal bar represents the currently edited segment. By holding down the left mouse button and dragging this bar left or right, you can quickly navigate to the relative position of this segment within the entire project timeline.
Furthermore, on either side of the horizontal bar, there are endpoints that can be adjusted to scale the currently edited segment.
In actual editing scenarios, it is often necessary to shrink the segment to view the entire video while also zooming in to focus on specific parts for detailed adjustments. That's why this relative position adjustment bar is an incredibly useful and essential tool.
Once you've had some hands-on experience, you should be able to grasp how to use it effectively.
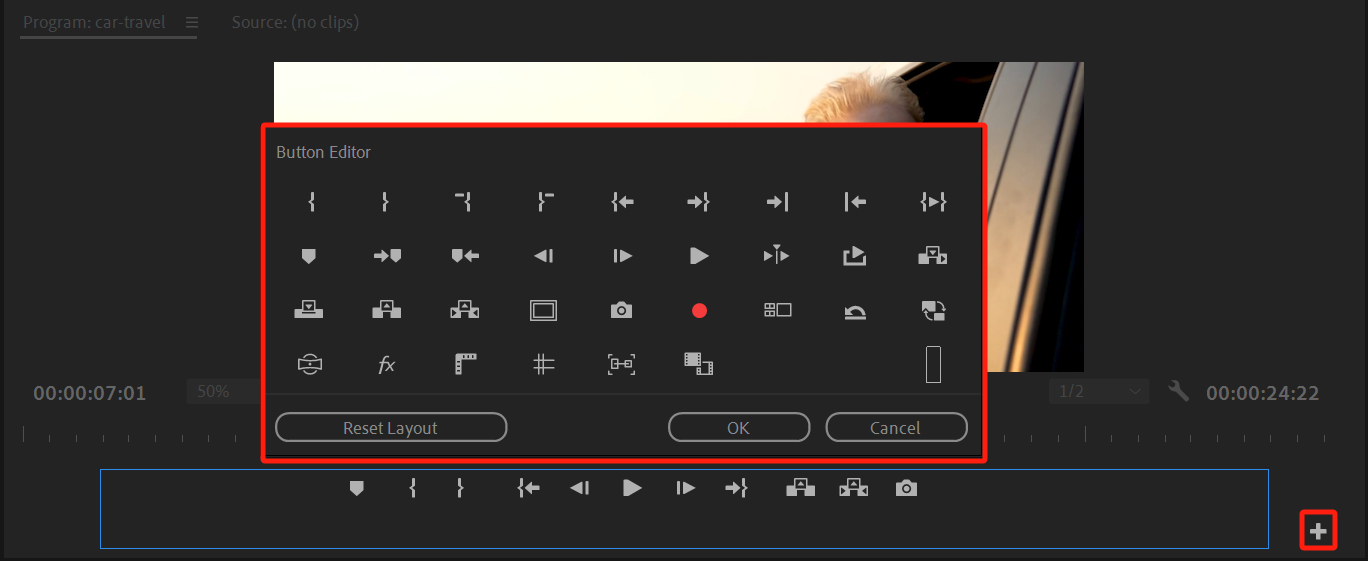
After editing or adding effects to your video, you'll likely want to preview the edited result. To do this, simply click on the "Play-Stop Toggle (Space)" button located below the Program Monitor panel.
This button serves as both a play and stop button, and you can also use the spacebar as a shortcut.
If you can't locate this button, click on the "Button Editor" button on the right side (it's represented by a plus icon).
From there, you can customize your button layout by dragging buttons from the Button Editor panel to the desired locations on the toolbar, or vice versa, to remove buttons from the toolbar and place them back in the Button Editor panel according to your preferences.
How to Split a Clip in Premiere Pro?
After learning the basics of using the timeline and monitor in Premiere Pro, let's dive into the best method for splitting a clip in Premiere Pro.
Whether your footage is from a phone, camera, or screen recording on your computer, there are often unwanted sections that need to be removed.
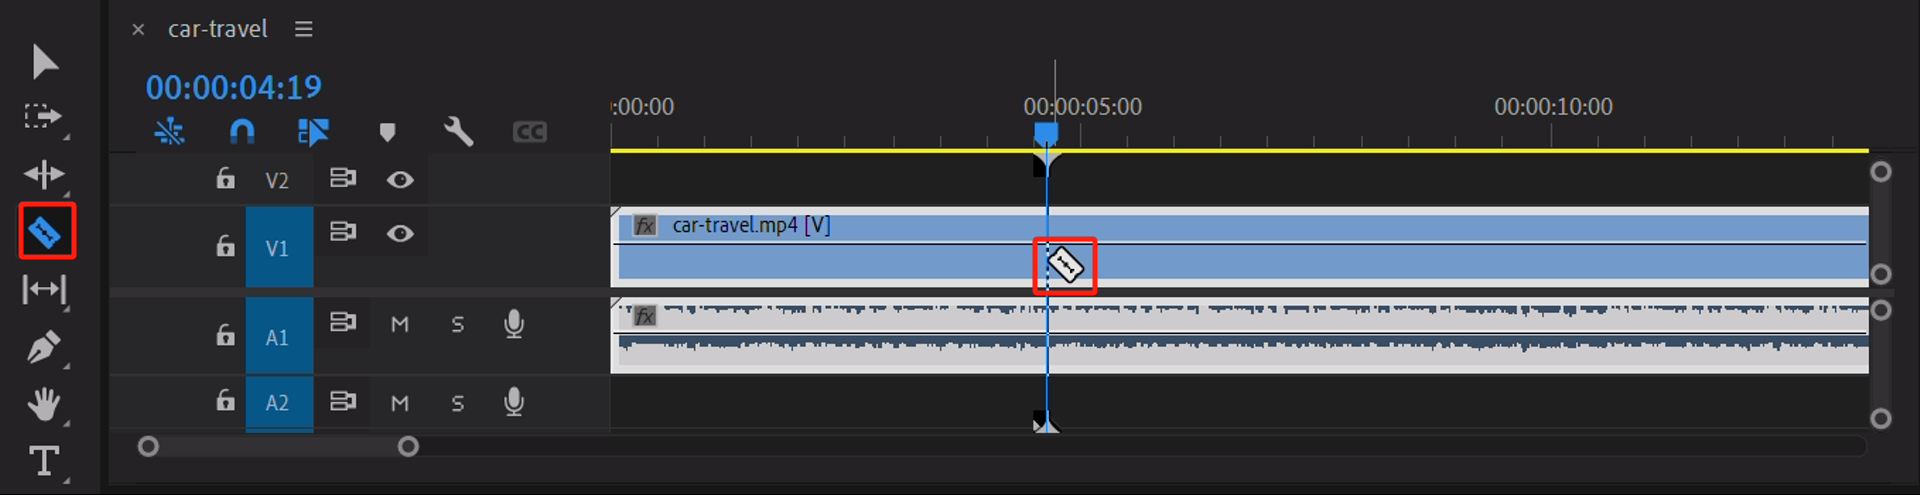
In Premiere Pro, you can use the "Razor Tool" located in the editing toolbar on the left side of the timeline panel. The shortcut key for this tool is the "C" key on your keyboard.
With the Razor Tool selected, hover your mouse over the segment of the clip you want to split on the timeline. The cursor will change to a razor shape, indicating that you can now perform the splitting action.
By default, simply click the left mouse button at the desired position, and Premiere Pro will split the clip into two parts (including both video and audio tracks) based on your selection.
You can also hold down the Alt key while using the Razor Tool to split only one track at a time. And if you hold down the Shift key, you can split all tracks simultaneously. (Mac users may need to make appropriate adjustments)
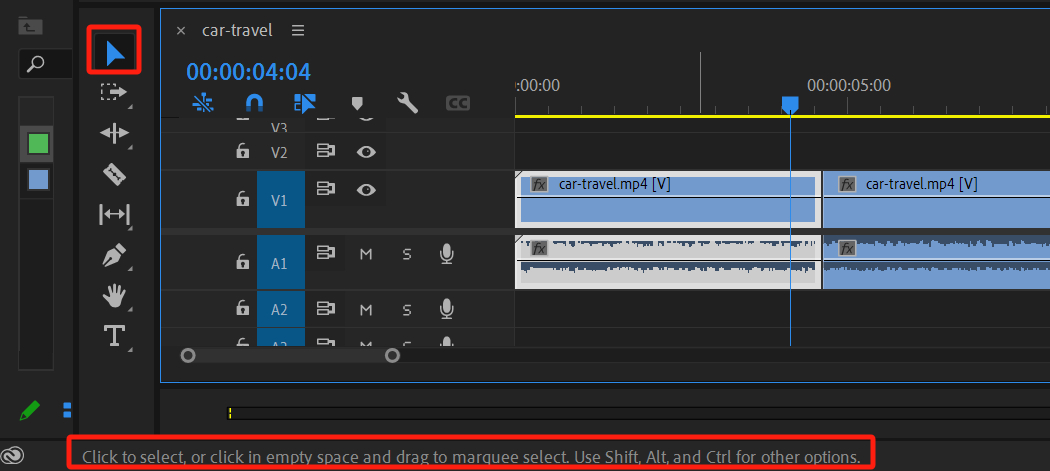
After splitting the clip, select the "Selection Tool" from the toolbox panel on the left side. The shortcut key for this tool is the "V" key on your keyboard.
With the Selection Tool activated, click on the left half of the split clip. You will notice a white border around it, indicating that it has been selected.
When using these tools, you can refer to the instructional messages in the bottom left corner of Premiere Pro for guidance.
By right-clicking, a menu will appear, and you can use the "Cut" and "Ripple Delete" options to delete the split segments.
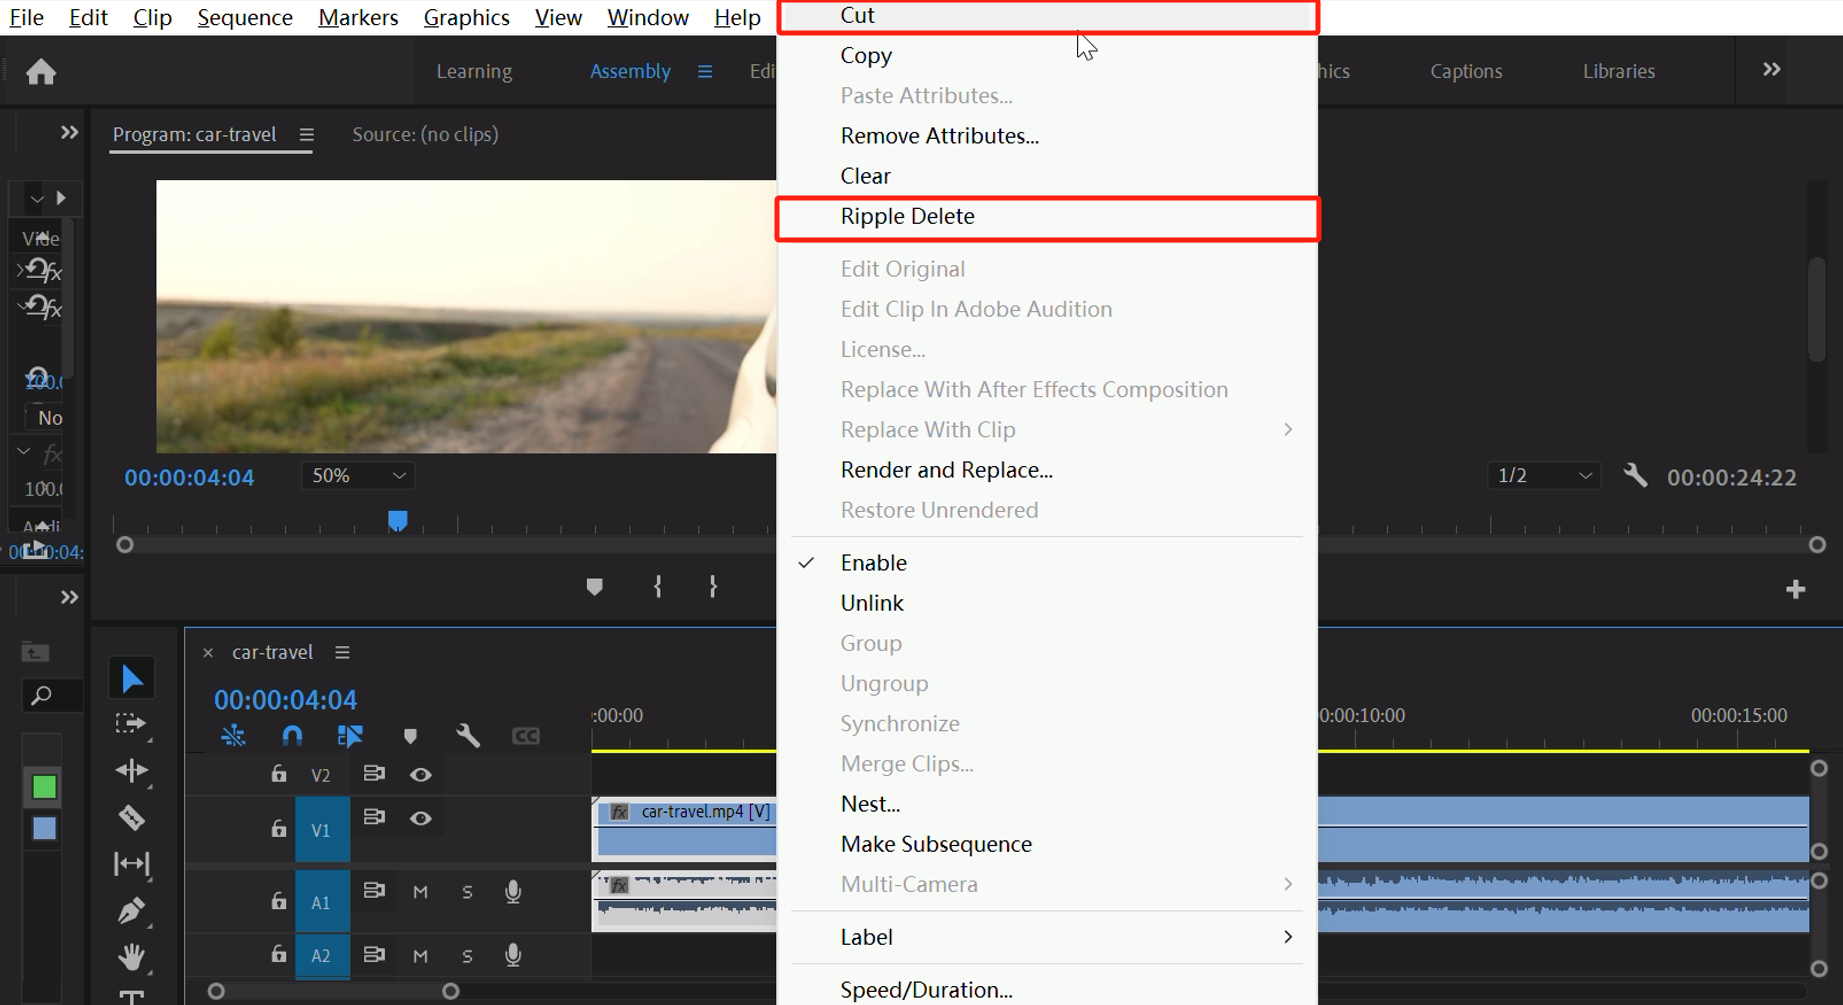
If you choose to click on "Cut," it will directly remove the selected split segment, as shown in the image below. After the cut, there will be a space in the original footage, which is obviously not what you want to see.

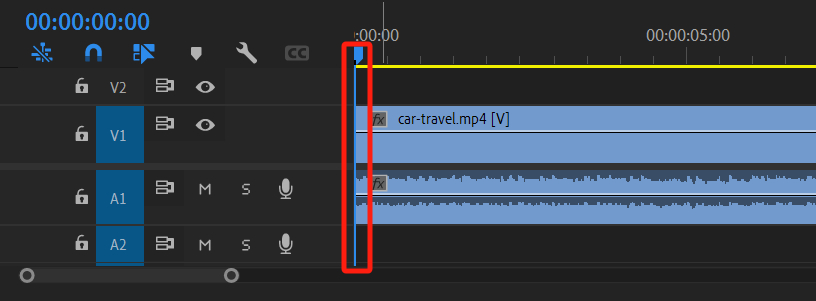
On the other hand, if you select "Ripple Delete," Premiere Pro will not only delete the selected segment but also shift all subsequent footage on the timeline to fill the gap.
By comparing the results of these two actions, you should easily understand the difference between "Cut" and "Ripple Delete."
Final Thoughts About Splitting Clips in Premiere Pro
In this tutorial, we've shared a simple yet effective method on how to split a clip in Premiere Pro. If you're a beginner in editing, you may not be familiar with the basic operations of Premiere Pro.
Before diving into your actual editing project, it's a good idea to familiarize yourself with the software.
Once you've mastered this simple technique, it's like opening a door that allows you to explore and make the most of the various powerful video editing tools offered by Premiere Pro.
Now, we would like to recommend a product that can enhance your editing experience even further – TourBox.

TourBox is a game-changing tool designed specifically for creative professionals. It seamlessly integrates with Premiere Pro, providing you with a dynamic and intuitive editing experience.
With its ergonomic design and customizable controls, TourBox allows you to streamline your workflow and increase productivity.
Whether you're a professional editor or a passionate enthusiast, TourBox is a must-have tool that can take your editing skills to the next level. Its seamless integration with Premiere Pro and its ability to enhance your workflow make it an indispensable companion for any editing project.
And that concludes our tutorial on how to split a clip in Premiere Pro. We hope this guide has been helpful in your editing journey.