How to Stretch an Image in Photoshop: A Comprehensive Tutorial
Welcome to your definitive guide on how to stretch an image in Photoshop. Whether you're a seasoned professional or a Photoshop newbie, you've likely faced a situation where an image just doesn't quite fit your design's dimensions.
Maybe you're trying to fill a specific space for a website layout, or perhaps you're creating a custom graphic and need to manipulate an image to fit just right.
Whatever the case, knowing how to stretch an image without losing quality is an essential skill in your Photoshop toolbox.
In this tutorial, we'll demystify the process and provide you with step-by-step instructions on how to stretch an image in Photoshop.
The Basics of Stretching an Image in Photoshop
Before we delve into the practical steps of stretching an image in Photoshop, it's pivotal to understand the fundamental principles of image manipulation.
This foundational knowledge will not only help you avoid common pitfalls but also ensure that your edits enhance the overall aesthetics of your image.
1. The Concept of Aspect Ratio
One of the most crucial concepts to grasp when stretching an image is the aspect ratio. The aspect ratio is the ratio of the width of an image to its height.
Preserving this ratio while stretching an image ensures that the image does not become distorted. If you stretch an image disproportionately, you might end up with a squished or elongated image, which can drastically reduce the visual appeal.
2. The Impact of Image Resolution
Another critical factor that plays a role in image stretching is the resolution of the image.
High-resolution images contain more pixels and, therefore, can be stretched to a larger extent without losing much quality.
On the other hand, lower-resolution images have fewer pixels, which means stretching them can lead to pixelation, resulting in a blurry or blocky appearance.
3. The Feature of 'Resampling'
Photoshop offers a feature called 'Resampling' when resizing an image. This feature changes the number of pixels in the image. When you're stretching an image without wanting to lose quality, you might need to resample to add more pixels to the image.
However, it's important to note that excessive resampling can lead to a loss of image quality, as Photoshop has to 'guess' what the additional pixels should look like.
In the following chapters of this guide, we will delve deeper into how to effectively stretch an image in Photoshop, ensuring it maintains its visual integrity and appeal.
Armed with this knowledge, you're now ready to embark on your journey of mastering image stretching in Photoshop. Let's get started!
How to Stretch an Image in Photoshop?
Delving into the process of stretching an image in Photoshop, we'll explore two primary methods and share an additional tip that can significantly enhance your image editing skills.
Method 1: Use the Free Transform Tool
Launch Photoshop and open the image you wish to stretch by clicking on "File" > "Open" and selecting your image.
Next, select the layer containing the image. If it's a single-layer file, the layer will already be selected.
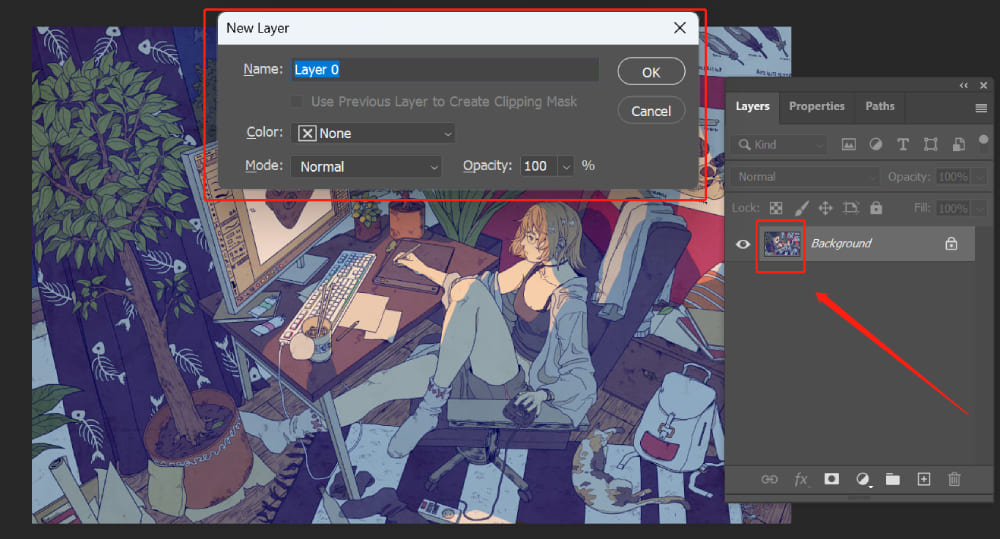
When you import a single image into Photoshop, by default, the image is set as a background layer. Before we can proceed with stretching the image, we need to convert this background layer into a regular layer.
This can be done by double-clicking the thumbnail of the layer in the Layers panel. After the background layer has been converted to a regular layer, we can then proceed with the next step of stretching the image.
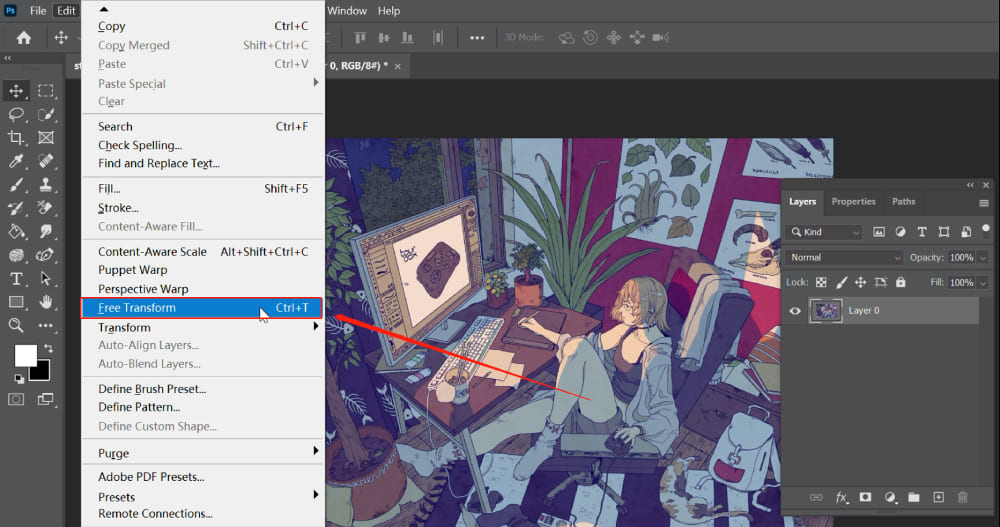
Navigate to the "Edit" menu at the top of the screen, then click on "Free Transform" or use the shortcut "Ctrl + T" on Windows or "Command + T" on Mac.
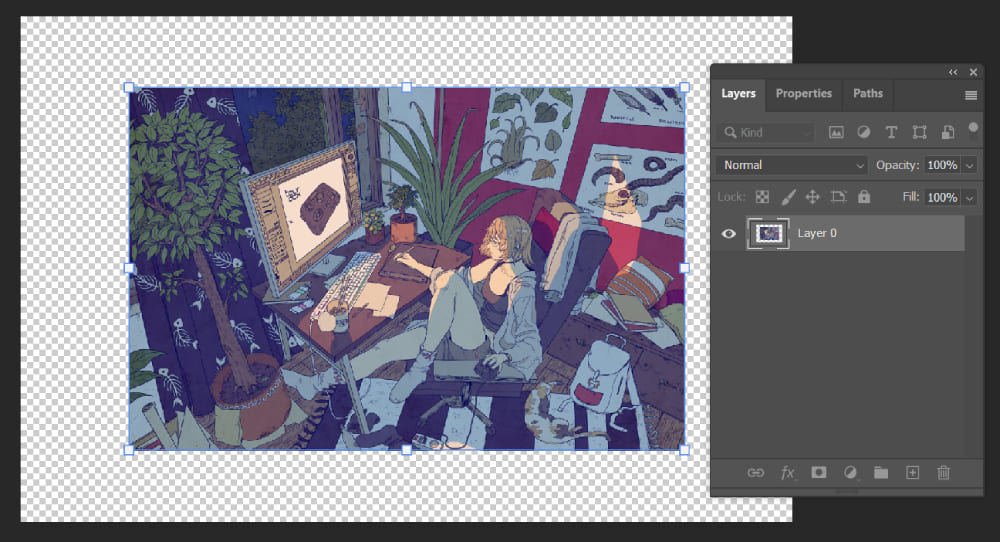
Now, click and drag the handles at the corners or sides of the image to stretch it. If you wish to maintain the aspect ratio while stretching, simply drag the image. Photoshop will automatically calculate to keep the aspect ratio consistent.
Please be aware that the Free Transform operation was updated in versions of Photoshop after CC 2019. The specifics of this operation differ between versions before and after Photoshop CC 2019.
Therefore, you should adjust your actions based on the version of Photoshop that you're using.
For versions of Photoshop after CC 2019, the Free Transform operations are:
- With no keys pressed — Proportional scaling (maintain the aspect ratio)
- Pressing 'Shift' — Free transform
- Pressing 'Alt' — Proportional scaling from the center
- Pressing 'Shift + Alt' — Free transform from the center
For versions of Photoshop before CC 2019, the Free Transform operations are:
- With no keys pressed — Free transform
- Pressing 'Shift' — Proportional scaling
- Pressing 'Alt' — Free transform from the center
- Pressing 'Shift + Alt' — Proportional scaling from the center
Once you're satisfied with the new size, press Enter to apply the transformation.
Method 2: Use the Image Size Dialog Box
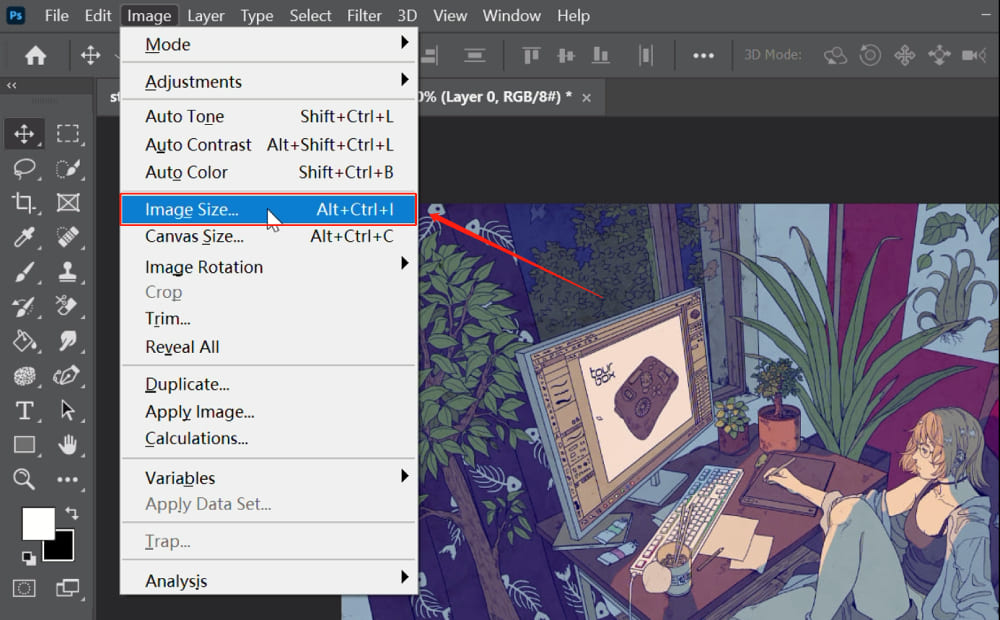
Launch Photoshop and open your image. Go to "Image" > "Image Size" or use the shortcut "Alt + Ctrl + I" on Windows or "Alt + Command + I" on Mac.
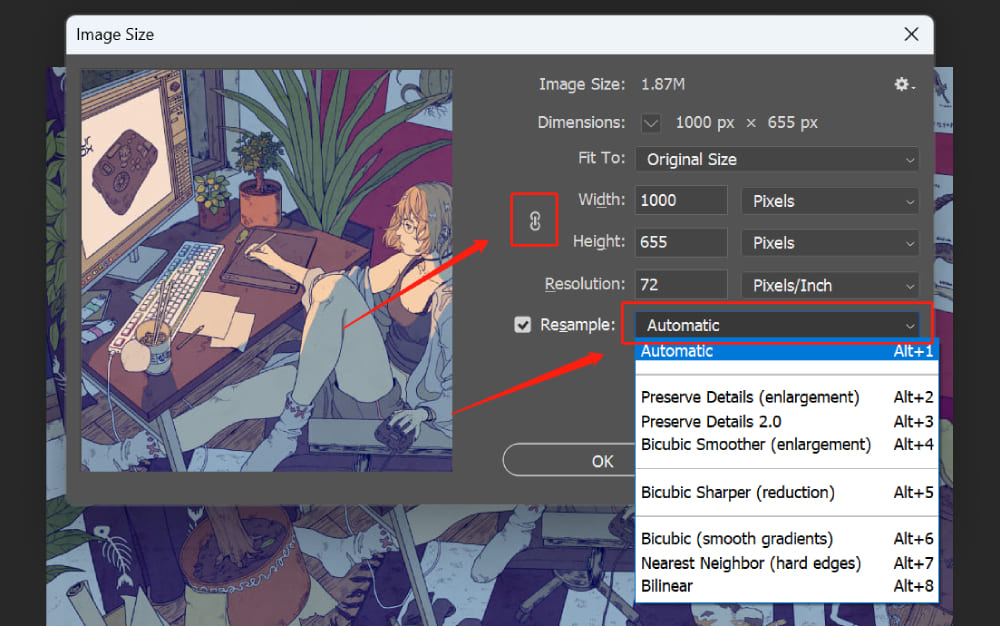
In the dialog box that opens, you'll see fields for width and height. Enter your desired size in these fields.
To maintain the aspect ratio, ensure that the chain icon, labeled as "Constrain Aspect Ratio", is selected next to the "Width" and "Height" options. If you want to stretch the image without preserving the aspect ratio, deselect this icon and adjust the width and height independently.
In the same dialog box, you'll see a 'Resample' checkbox.
- If you're reducing the image size and want to preserve details, choose 'Preserve Details (reduction)'.
- If you're increasing the size of the image, choose 'Preserve Details (enlargement)'.
- For a general-purpose resampling, 'Automatic' is a good choice.
Click 'OK' to apply the changes.
Additional Tips for Stretching an Image in Photoshop
When stretching an image, one of the challenges is maintaining image quality. This is where Smart Objects come in handy.
Smart Objects preserve the image's original data, allowing you to perform non-destructive edits.
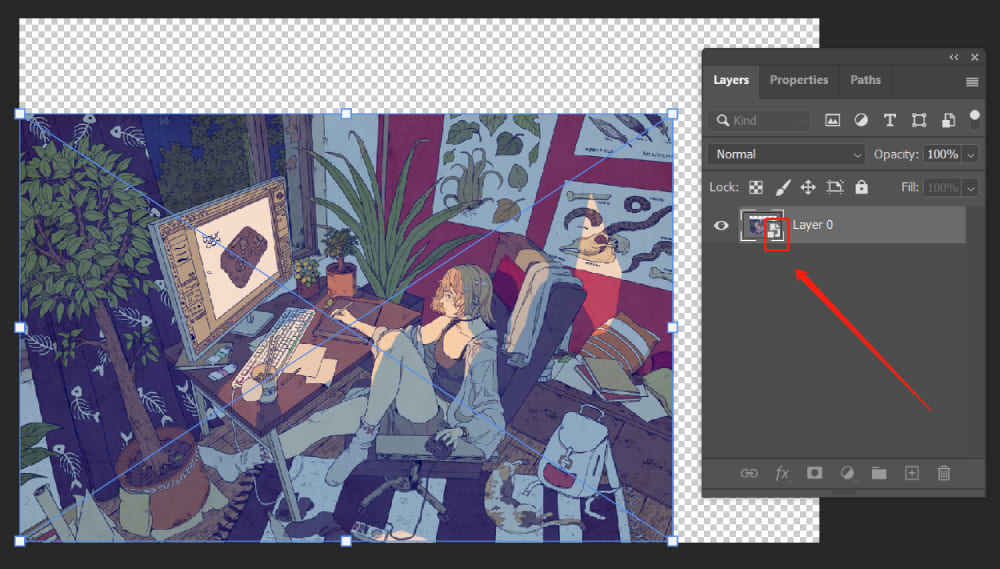
Before using either of the above methods to stretch an image, convert the image layer to a Smart Object by right-clicking on the layer and selecting "Convert to Smart Object".
Now when you stretch the image, it's the Smart Object being resized, not the original image. This means you can stretch, transform, or resize as many times as you want without losing image quality.
Keep in mind that stretching an image, especially without maintaining the aspect ratio, should be done with caution to avoid distortion and loss of quality.
Knowing how to stretch and resize images in Photoshop gives you more flexibility when working on creative projects. Whether you are adjusting an image to fit a specific layout, refining a composition, or preparing visuals for different platforms, understanding how to transform images while maintaining quality is an essential editing skill.
However, efficient editing is not only about knowing the right tools. When working on complex projects, constantly switching between menus, panels, and shortcuts can interrupt your creative flow. A smoother workflow allows you to spend more time focusing on the details that matter.
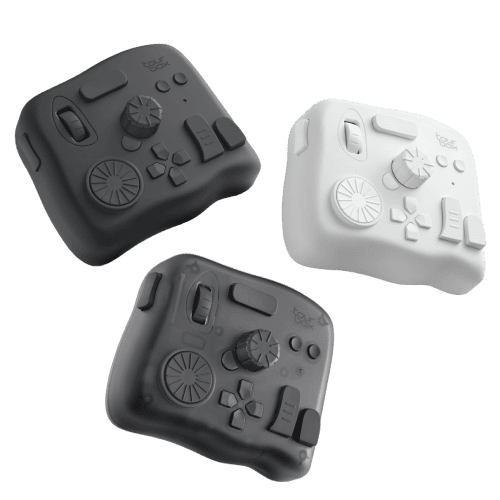
For photographers, designers, and digital artists who frequently work in Photoshop, TourBox provides a more intuitive way to control commonly used functions. With customizable buttons, dials, and shortcuts, it helps reduce repetitive operations and keeps essential controls within reach, making everyday editing tasks more natural and efficient.
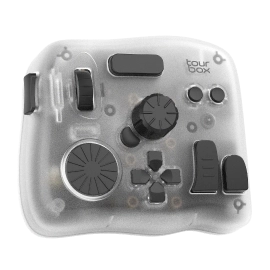
By combining powerful Photoshop techniques with a workflow that fits your creative process, you can work faster, make more precise adjustments, and bring your ideas to life with greater ease.


