How to Use the HSL Color Panel in Photo Editing?
HSL is a simple, easy-to-understand way to describe color. The HSL color panels in Adobe Camera Raw and Lightroom are super handy for photo editing. In this article, we'll mix in a bit of color theory and show how to use HSL when editing photos.

In this article, you will learn:
What Is HSL?
You've probably heard of the RGB color model: every color is made by mixing red, green, and blue in different amounts.
But RGB isn't very intuitive for people. If someone told you a color was 60% red, 30% green, and 90% blue, it would be hard to picture.
That's why people created the HSL color space — it describes color more naturally. HSL stands for Hue, Saturation, and Lightness.
Further Reading:
An Ultimate Guide to Understanding Hue & Saturation & Luminance
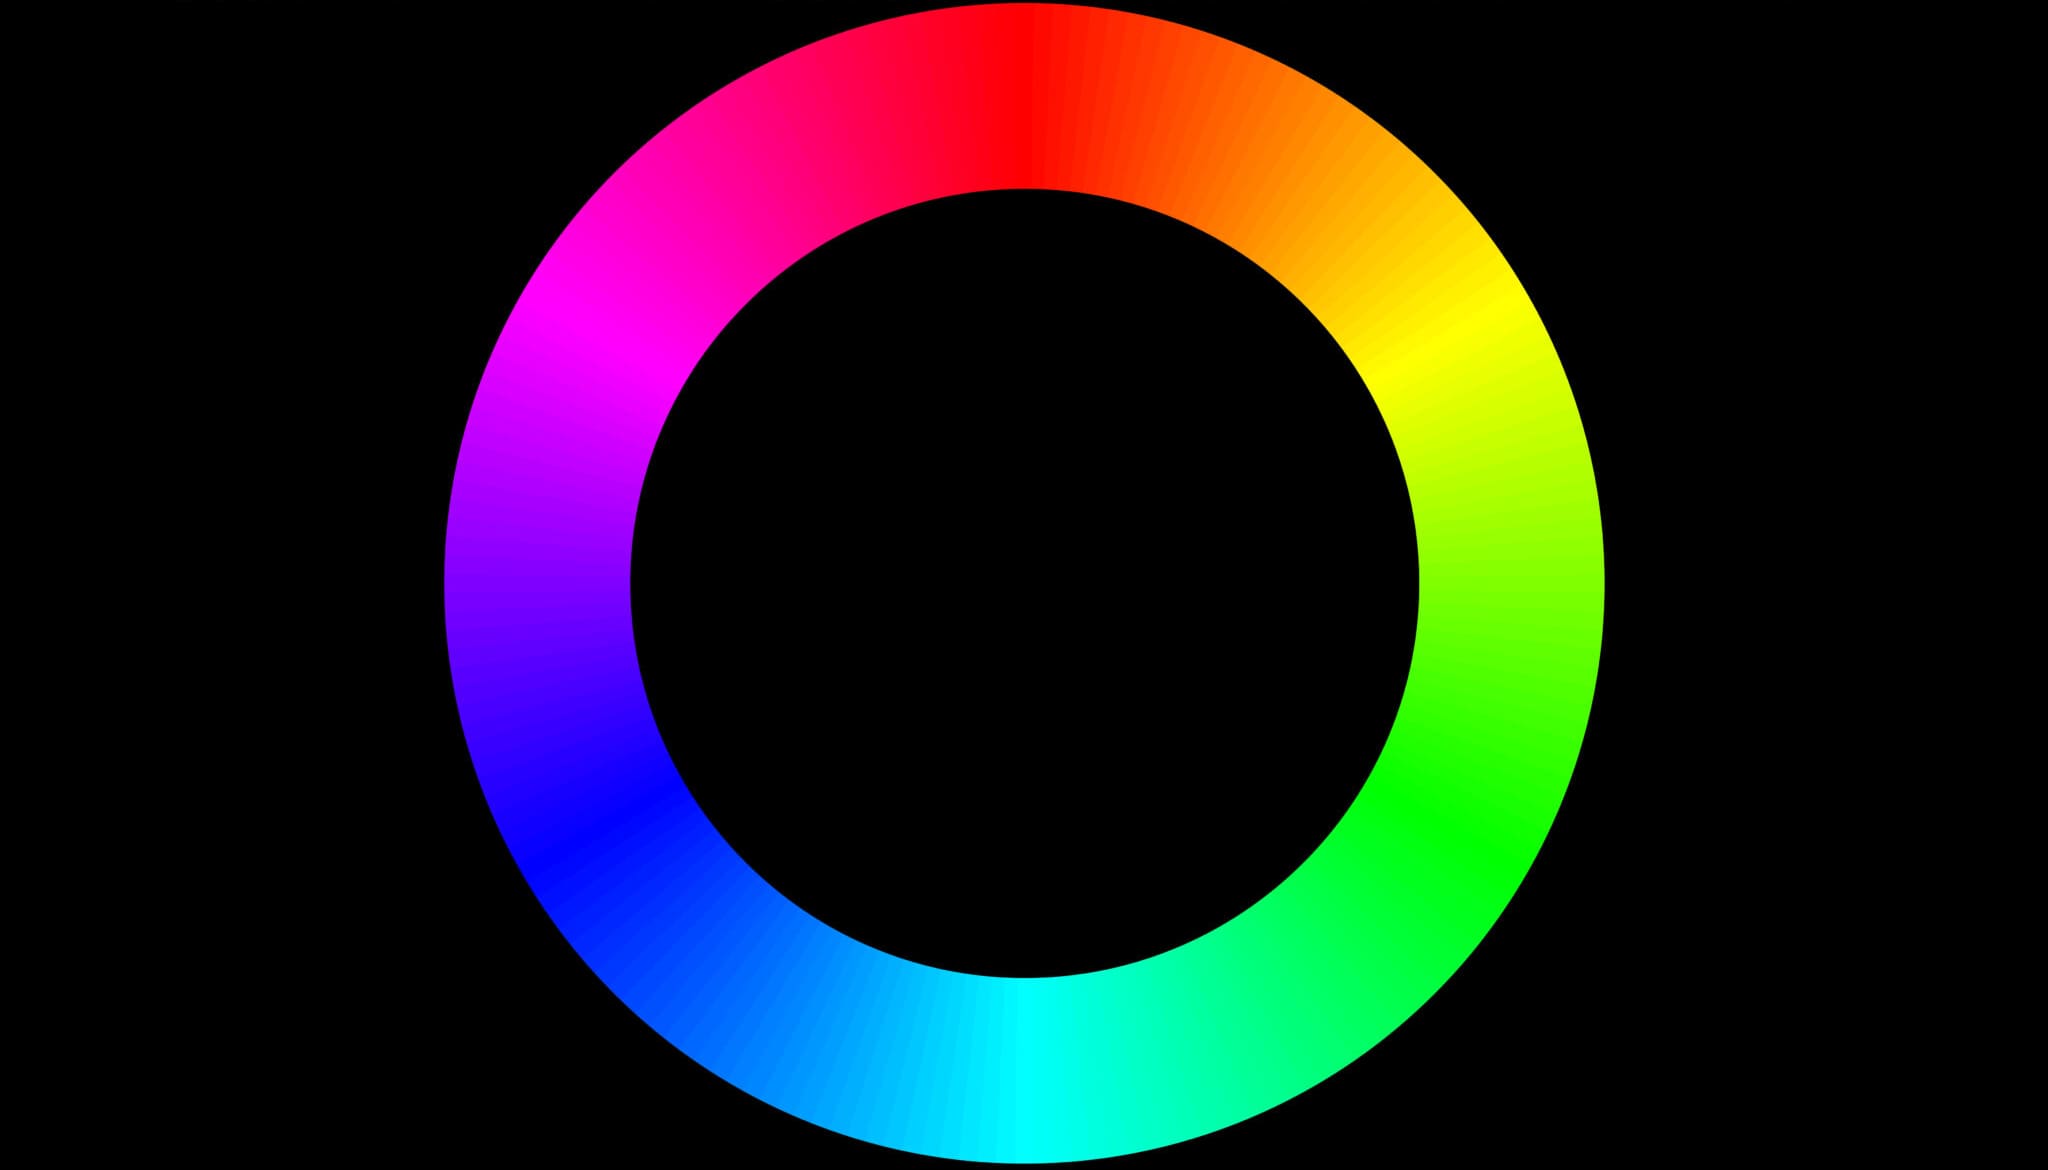
Hue is the basic "color" — the names we use, like purple, cyan, or magenta. We can show all hues on a circle (a color wheel).
On the wheel, 0°, 120°, and 240° match the RGB primaries: red, green, and blue. Mixing two primaries gives a secondary color. For example, yellow (60°) is red + green; cyan (180°) is green + blue; magenta (300°) is red + blue.
Between primaries and secondaries, there are many transition hues. Purple at 270° sits between magenta and blue. Orange at 30° comes from mixing red and yellow.
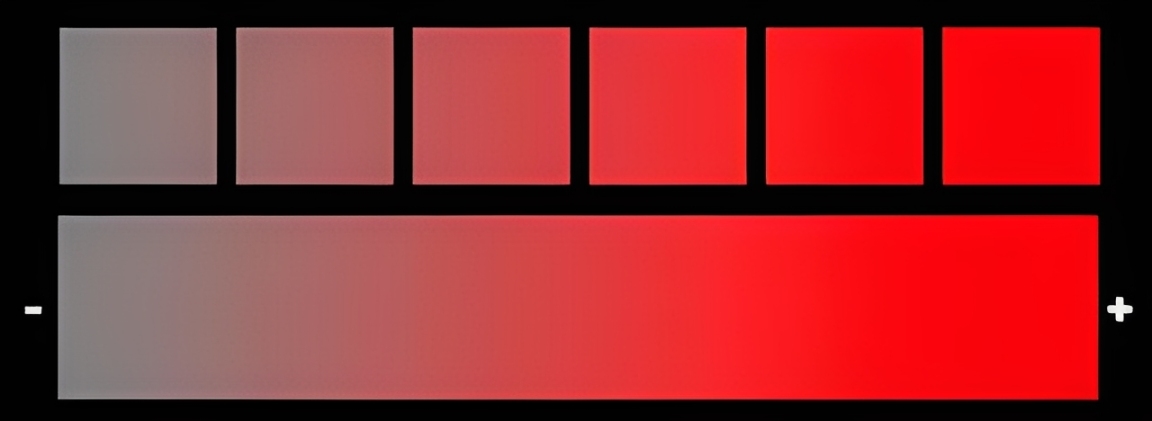
Saturation is the color's purity. Higher saturation means a color looks more vivid and intense. Lower saturation makes a color look grayer and more muted.
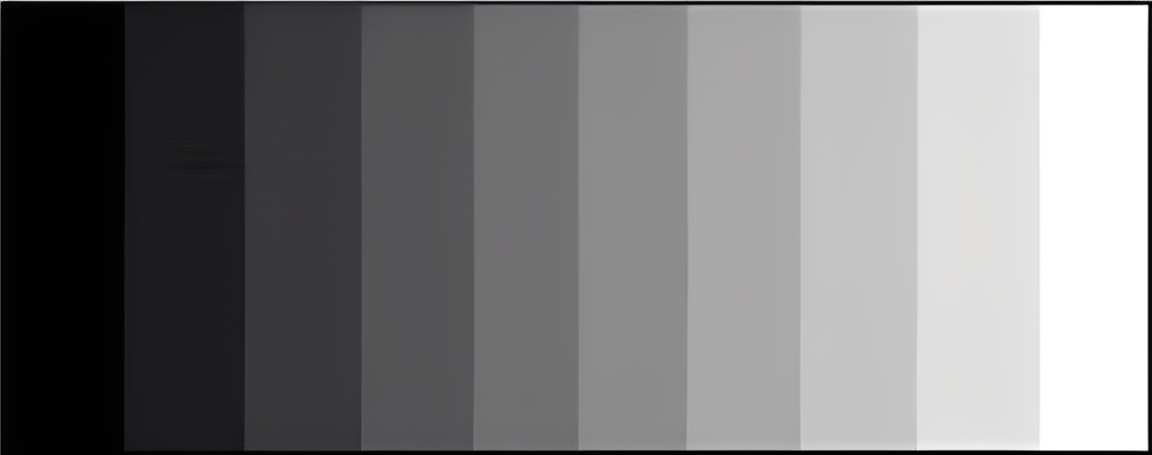
Lightness refers to how bright or dark a color is. Higher lightness moves the color toward white. Lower lightness moves it toward black.
One thing worth mentioning: in the HSL color model, the letter L originally stands for Lightness. But in photography and color-grading software, it's often labeled Luminance, and they're not exactly the same.
Lightness is a brightness value calculated by a formula. Luminance is a brightness value weighted by how the human eye responds to red, green, and blue. Basically, how bright a color looks to us.
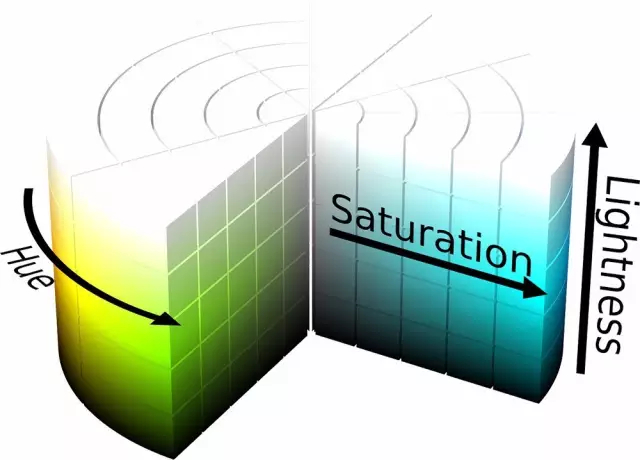
We combine hue, saturation, and lightness into a cylinder, and we get the HSL color model.
Any point inside that cylinder represents a single color. The angle around the wheel shows the hue, the distance from the center shows saturation, and the height shows lightness.
In ACR and Lightroom, the HSL tool in the Color Mixer panel is built on this HSL color space.
How to Understand the HSL Color Panel?
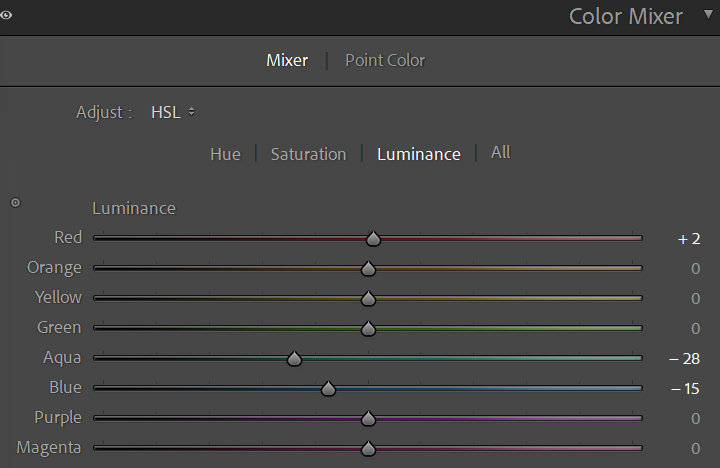
The HSL panel has three sections: Hue, Saturation, and Luminance (L). Each section has eight sliders. Each slider controls one color in the image.
The eight sliders match the main natural colors: red, orange, yellow, green, aqua (cyan/light green), blue, purple, and magenta. That lets you change each color in the photo separately.
When you move the red slider, it doesn't only change pure red. It also affects nearby red tones on the color wheel.
For example, in the Hue section, moving the red slider to the right shifts reds clockwise on the color wheel — toward orange. Moving the red slider to the left shifts reds counterclockwise — toward magenta.
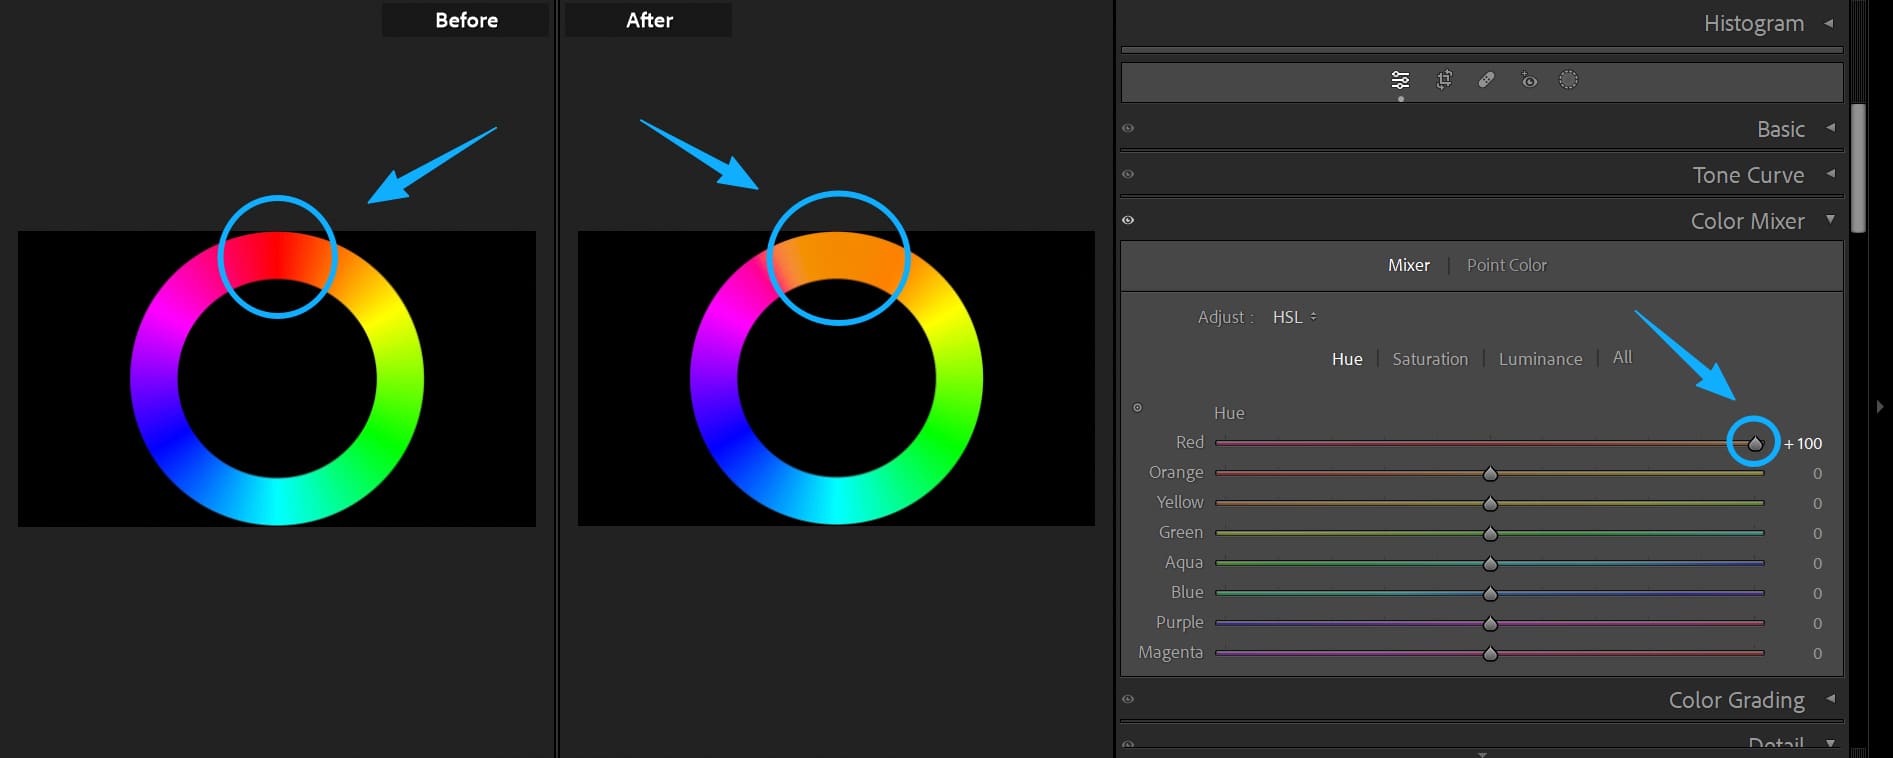
A simple rule to remember: move a Hue slider right (add value) and the color shifts clockwise on the wheel. Move it left (subtract value) and it shifts counterclockwise.
The Saturation section is easy. Move the saturation slider right, and that color becomes more vivid and pure. Move it left and the color becomes more gray and washed out.
Take the blue area on the color wheel. If you move the blue saturation slider all the way left, the blue looks much grayer. It may not turn perfectly neutral gray because nearby colors (like purple) can also affect that area.

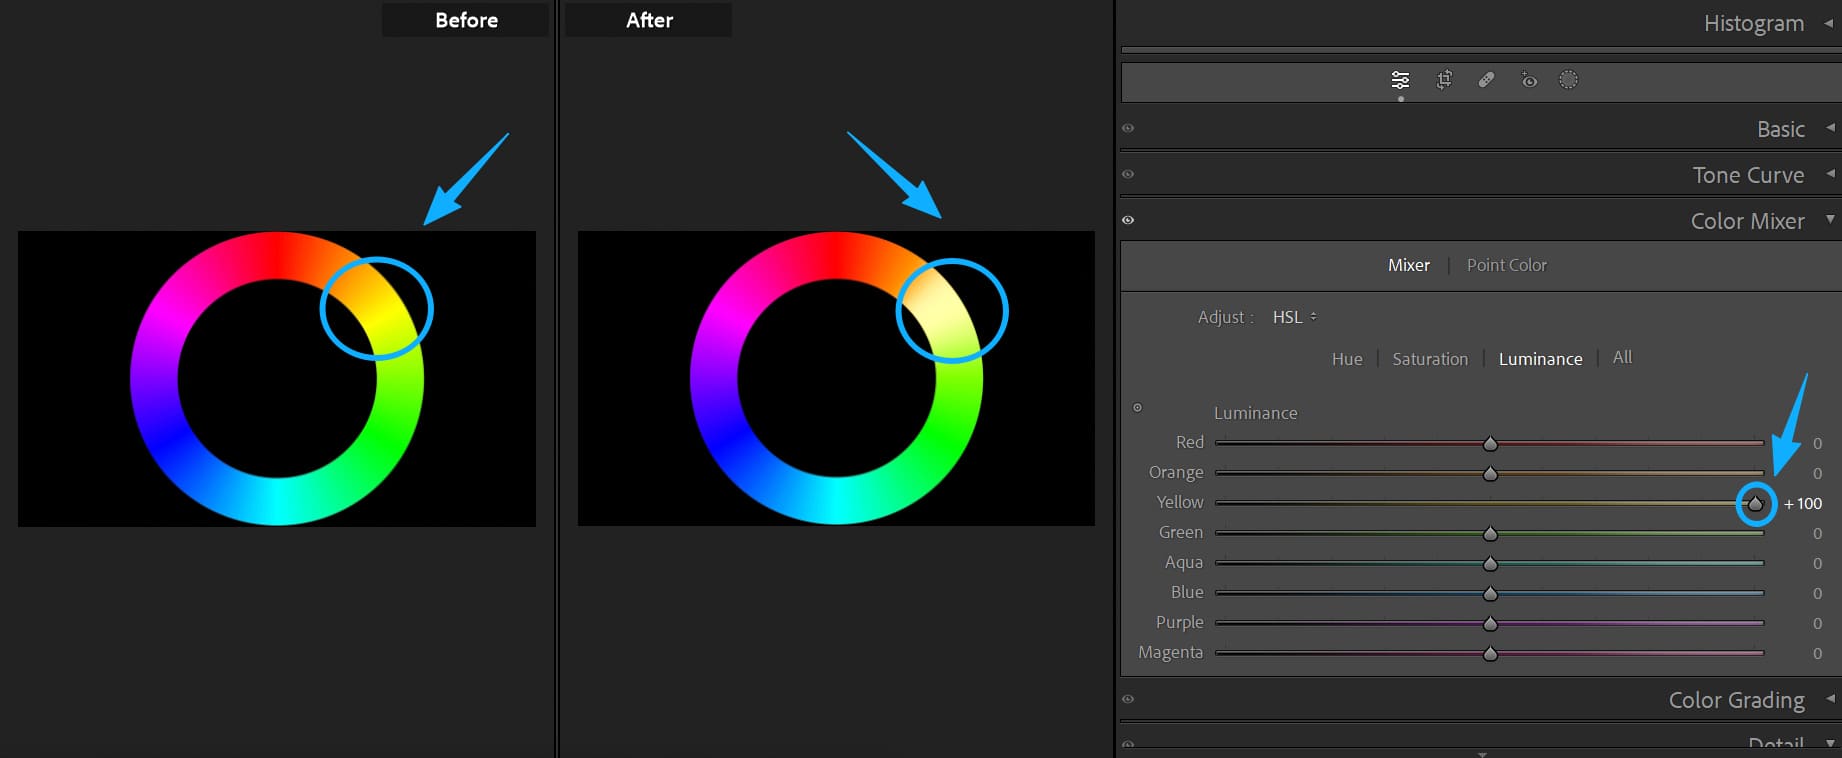
The last section is Luminance. Move the luminance slider right and the color gets brighter and closer to white. Move it left, and the color gets darker and closer to black.
For example, if you move the yellow lightness slider to +100, the yellow on the wheel becomes much brighter.
How to Use the HSL Color Panel?
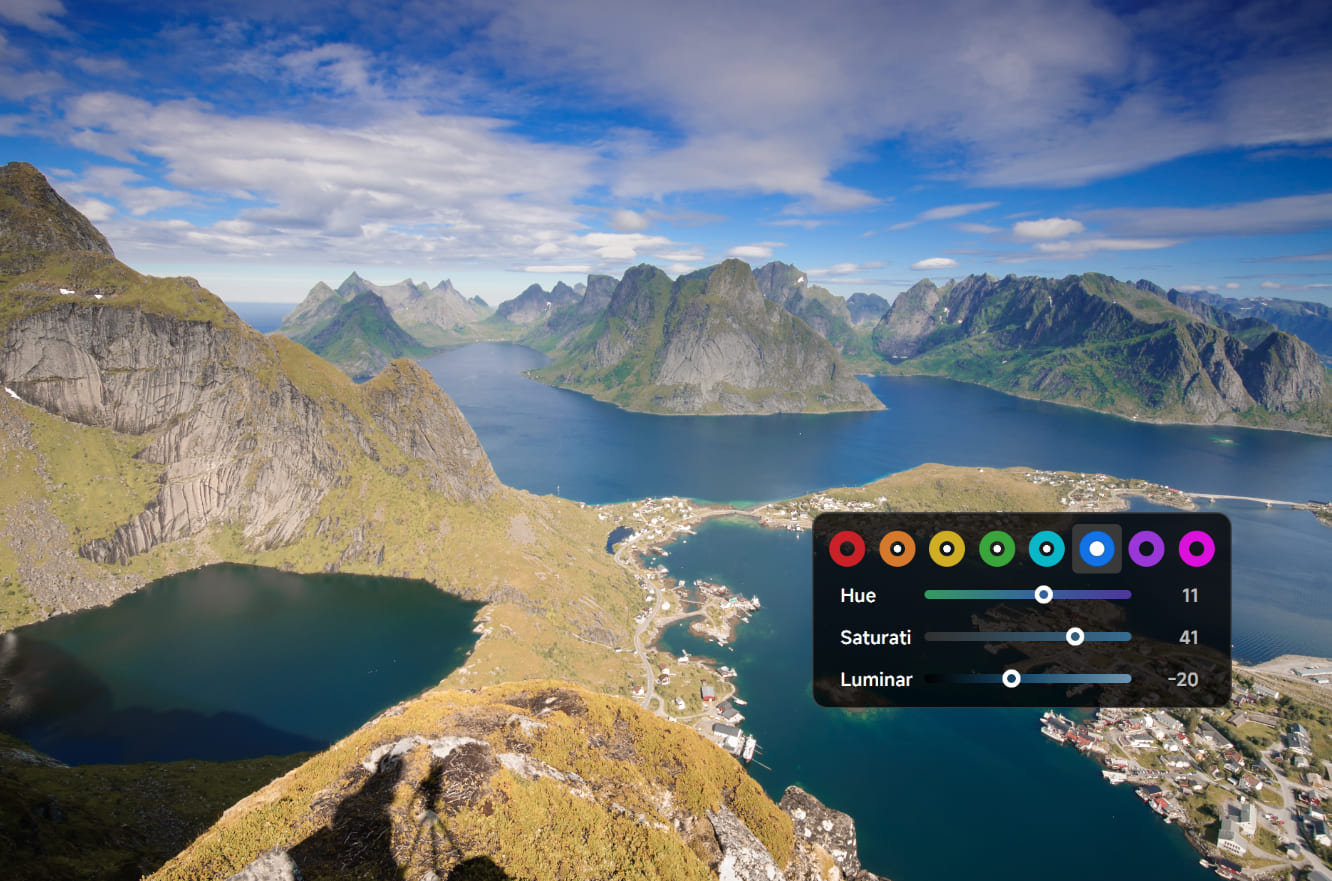
Below, we'll use this photo as an example and walk through a simple HSL workflow.
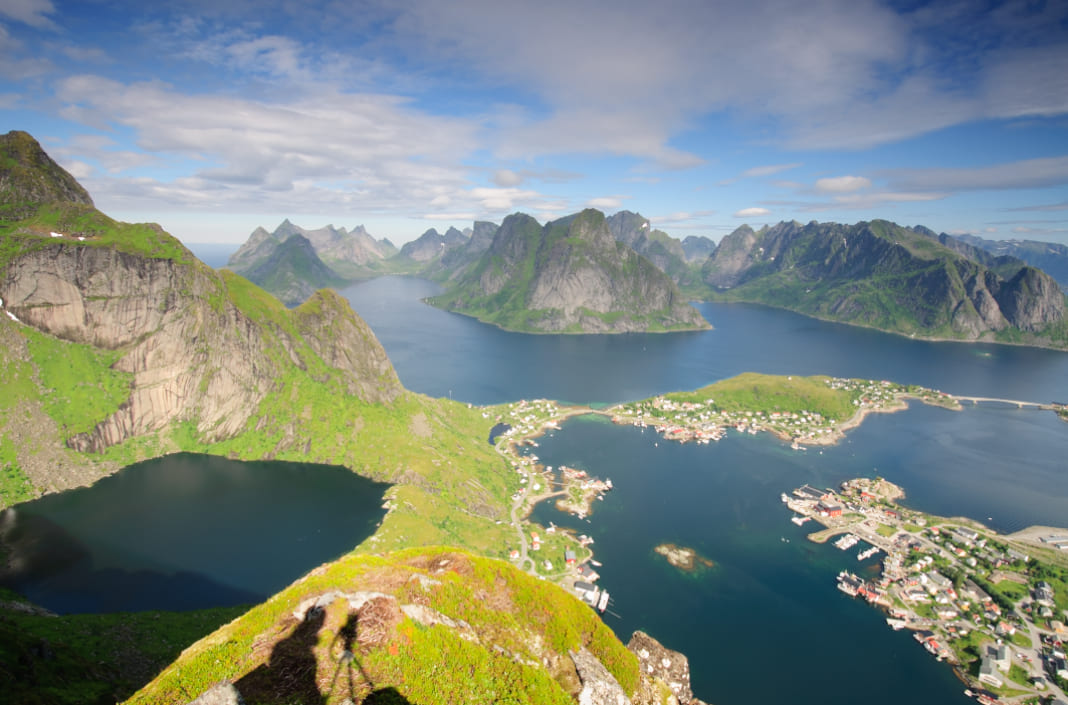
First, figure out what colors make up the photo:
- The exposed rock on the mountains is mostly orange with a little yellow.
- The sky and water are mainly blue with some cyan.
- The small red cabins on the ground are affected by both red and orange.
- The plants are more complex: sunlit plants on the near mountain read mostly yellow, then green. Distant vegetation is deep green with some cyan.
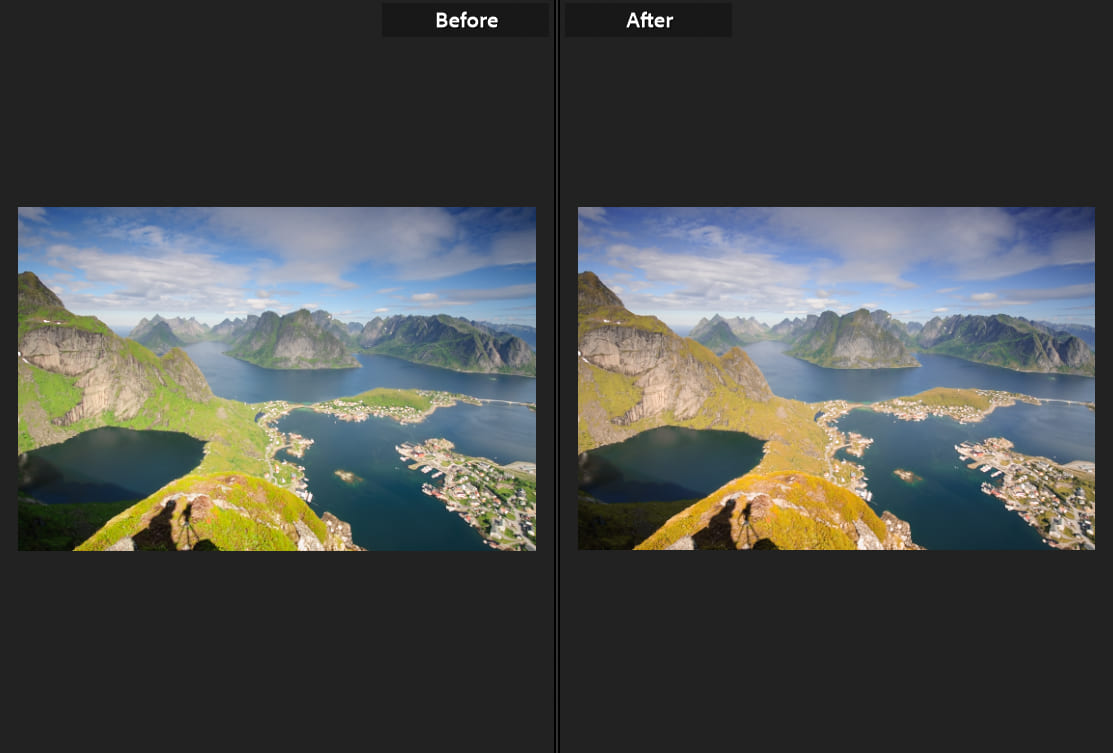
Start in the Hue panel. Move the yellow and green sliders slightly left so both colors lean more toward yellow. This step is meant to turn the fresh spring greens into the warm golds of autumn.
The original sky is a bit cyan, so move the blue slider to the right. That shifts the sky and water slightly toward purple-blue.
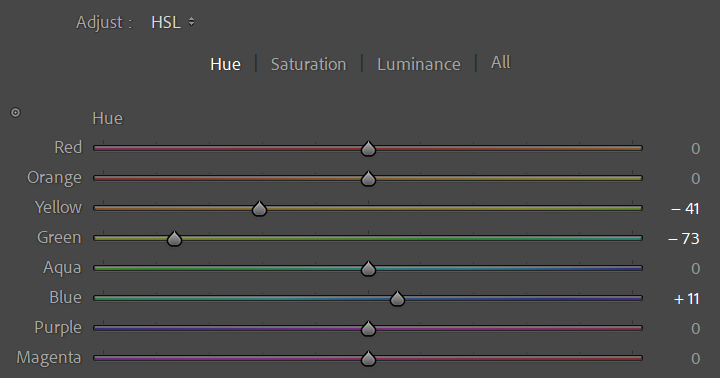
Now the green plants look more yellow, and the sky shifts from cyan-blue to a faint purple-blue.
Next, tweak Saturation. Since we want a late-autumn, slightly withered look, lower the saturation for yellow and green. Also, lower orange saturation so the rocks don't look too vivid.
For blue and cyan, move their saturation sliders to the right. That makes the sky and water clearer and richer.
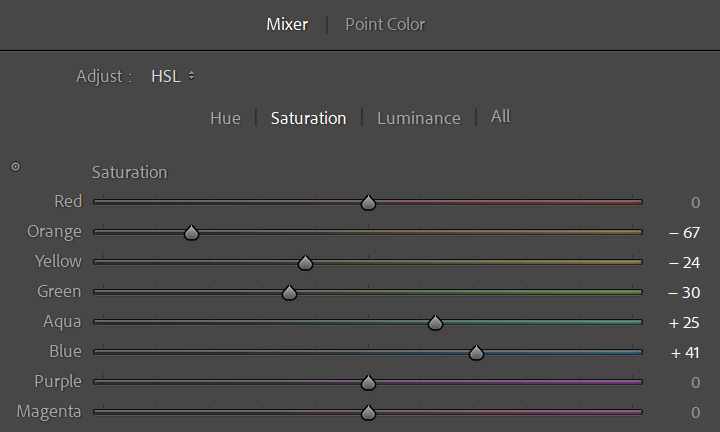
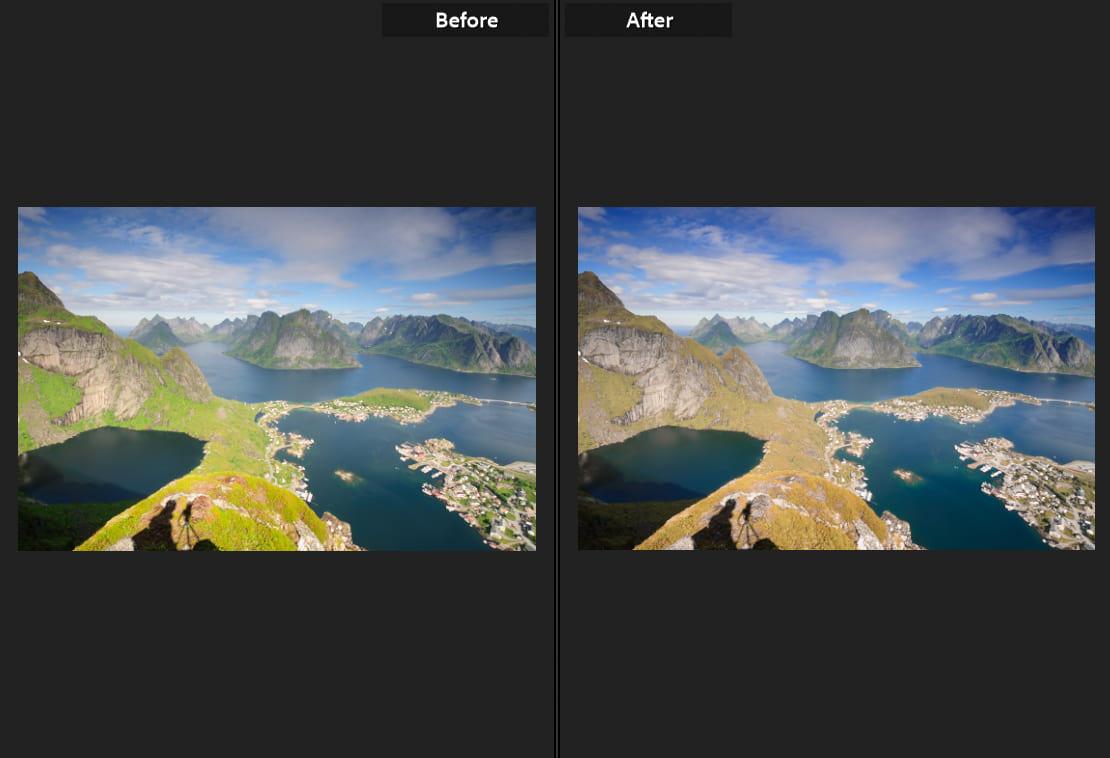
After these saturation changes, the plants look faded, and the sky looks cleaner.
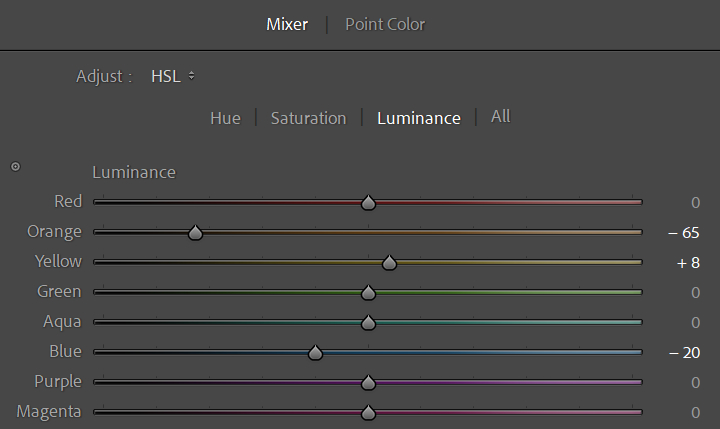
Finally, adjust Luminance. The mountains are made of rock and plants. Use luminance to separate them visually.
Lower the orange luminance to darken the rocks. Slightly raise the yellow luminance to brighten the plants. This separates the rocks from the vegetation. Then lower the blue luminance to make the sky and sea deeper and more pleasing.
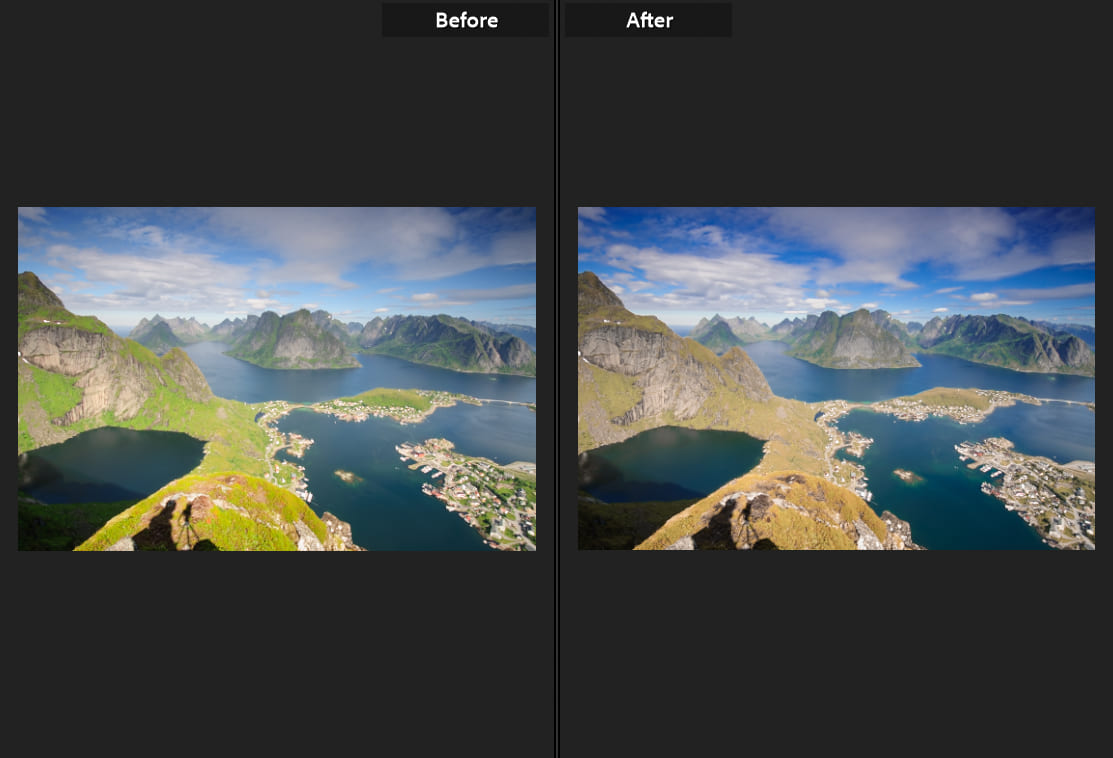
Compare the photo before and after HSL — the overall mood changes a lot.
That wraps up our step-by-step guide on using the HSL panel to color-grade a photo. For this example, we used Lightroom Classic — a very popular editing software and a go-to choice for many photographers and hobbyists.
But did you notice something awkward while working in Lightroom Classic? The Develop panels take up a lot of screen space and stay fixed in one place, which makes it hard to focus on fine details and to clearly see every part of the image.
This is a good time to consider the TourBox controller. With TourBox, you can map your most-used shortcuts and controls to physical knobs and buttons. Its built-in features can speed up your grading work and make the experience smoother.

For example, TourBox's Dynamic Panel lets you work outside Lightroom's fixed panels or move controls to a second monitor. That avoids the Lightroom sidebar getting in the way and lets you edit in true full-screen mode.
If you're interested in the Dynamic Panel, visit Our Page to learn more.

Conclusion
Here's a quick summary of the important points from this HSL Color panel tutorial:
- Color is made of Hue, Saturation, and Lightness.
- In photo-editing software like Lightroom Classic, the HSL tool has three sections: Hue, Saturation, and Lightness. Each section has eight sliders that control eight color ranges in the photo.
- The first step in HSL grading is to identify the colors in the photo and which objects those colors belong to. After that, you can adjust the hue, saturation, and lightness for each color/object separately.