How to Zoom In on Premiere Pro: A Comprehensive Guide
If you've ever watched a movie scene that zooms in on a character's face during a pivotal moment, you've probably wondered, "How can I do that in my videos?"
Well, wonder no more. We're cracking the code and spilling the secrets on how to zoom in on your footage like a Hollywood pro. Ready to take your videos from good to "wow, this is epic?" Let's get started!
How to Zoom In on Premiere Pro?
Prerequisites
Ensure you have the latest version of Adobe Premiere Pro installed on your computer. If you don't have it yet, you can download it from the official Adobe website.
Step 1: Import Your Footage
To start, open Adobe Premiere Pro and create a new project. Then, import your footage by clicking on File > Import. Navigate to the location of your video file, select it, and click Open.
Step 2: Create a Sequence
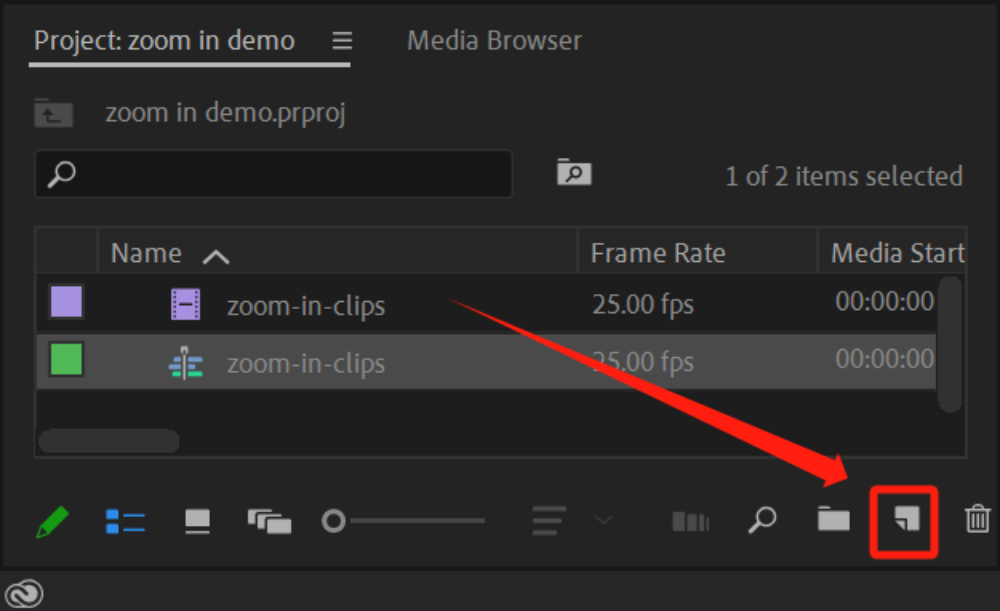
In the Project Panel, drag your imported footage to the "New Item" button. This will automatically create a sequence with the same settings as your video file.
Further Reading:
Step 3: Navigate to the Effect Controls Panel
Once your footage is on the timeline, click on it to select it. Then, navigate to the Effect Controls panel. If it's not visible, you can find it by going to Window > Effect Controls.
Step 4: Set Keyframes for Scaling
In the Effect Controls panel, you'll find the Scale property under the Motion dropdown.
To create a zoom effect, you'll need to set keyframes for Scale. A keyframe marks the point in time where a change will start or end.
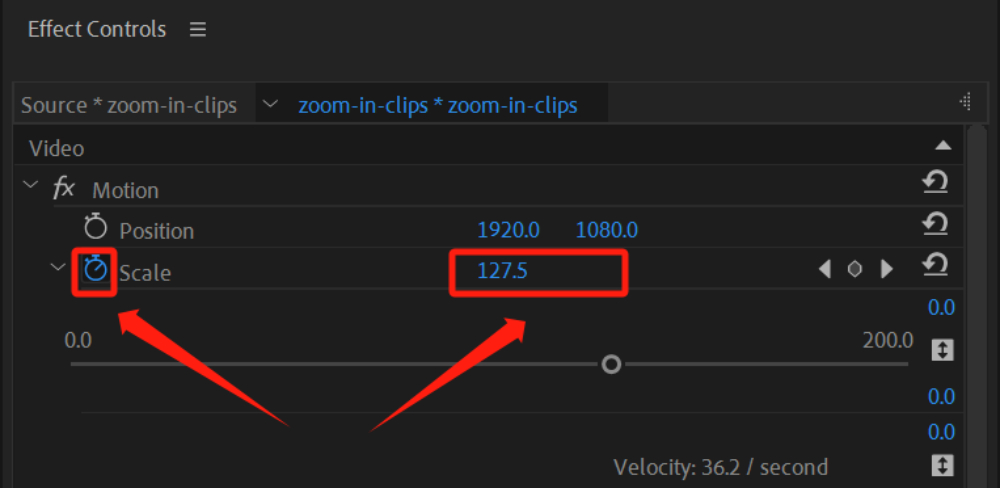
Here is a step-by-step guide on how to zoom in on Premiere Pro:
- Move the playhead in the timeline to the point where you want the zoom to start.
- Click on the stopwatch icon next to the Scale property to create the first set of keyframes.
- Move the playhead in the timeline to where you want the zoom to end.
- Increase the Scale value to zoom in. For example, a scale value of 200% will make the video twice as big.
Footage Before Zoom In Adjustment:
Footage After Zoom In Adjustment:
Extra Tip:
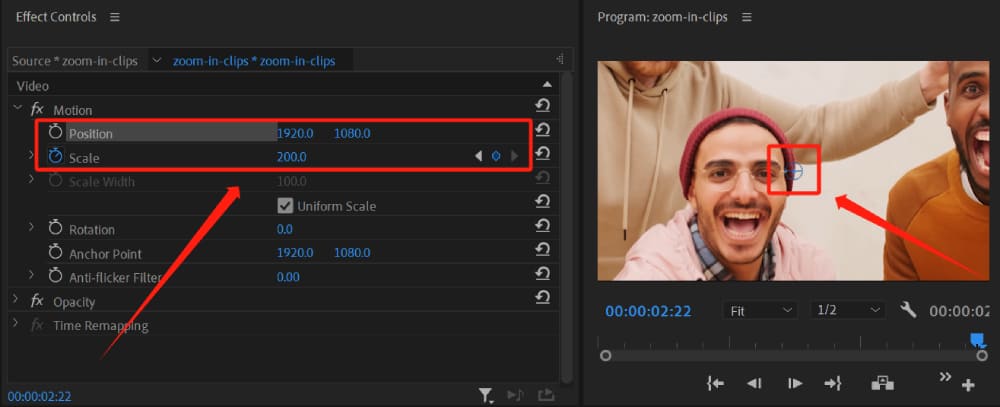
You can perform similar actions with the Position property. By inserting keyframes at the Position property, you can adjust the position values.
Alternatively, after selecting the Position property, you can adjust the position values by dragging the anchor point in the Program Monitor.
Step 5: Fine-Tuning
At this point, you should have a basic zoom effect. However, it will start and stop abruptly. To make the zoom smoother:
- Right-click on the first keyframes for Scale, and select "Ease Out".
- Right-click on the second keyframe for Scale, and select "Ease In".
This will make the zoom start and end more gradually.
If you don't see any keyframes on your timeline, right-click on the clip, select "Show Clip Keyframes," then click on "Scale" under the "Motion" option.

Step 6: Playback and Review
Finally, play back your sequence to review the zoom effect. If needed, adjust the keyframes and their values until you're satisfied with the result.
How to Partially Zoom In on Premiere Pro?
In the previous section, we covered the method of how to zoom in on Premiere Pro. But you may have noticed, this zoom effect applies to the entire video clip.
In actual content creation, zoom-in effects are often used for close-ups or comical expressions in videos. Zooming in on the entire video clip obviously doesn't meet this need.
Zooming in on a specific part of a video clip in Premiere Pro is also very straightforward.
Open the Effects panel, select "Distort > Magnify" from the Video Effects dropdown list, and drag it onto the clip in the timeline where you want the zoom effect to apply.
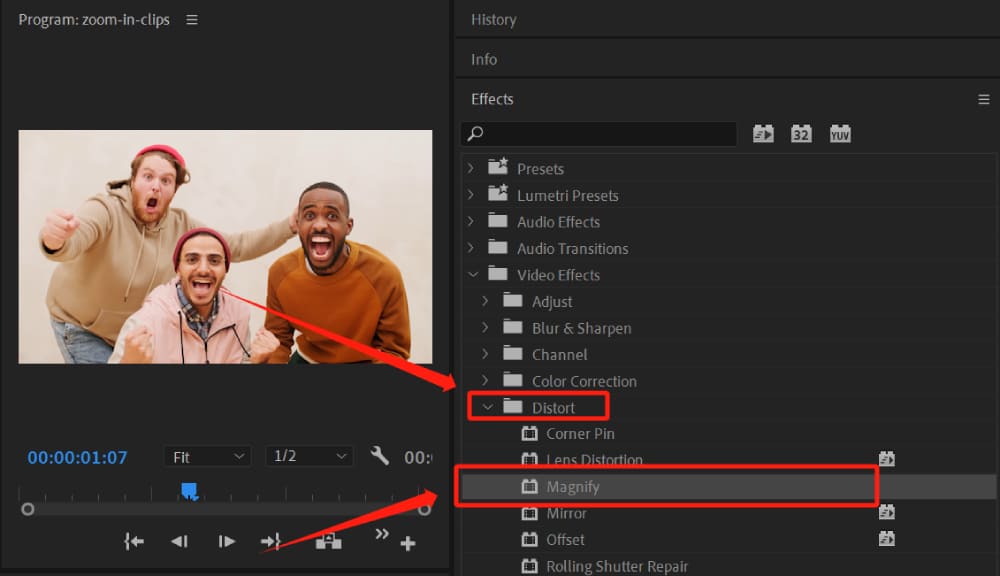
Click on the clip in the timeline, then in the Effect Controls panel, click on the Magnify parameters. Here are some common settings for magnifying:
- Shape: There are two shapes, circle and square, which represent the shape of the zoom area.
- Center: Adjust this parameter based on the actual position, or you can manually adjust it by dragging the center anchor point in the Program Monitor.
- Magnification: This is the degree to which the image is enlarged, with the value directly proportional to the magnification.
- Size: Controls the size of the zoom area. The larger the value, the larger the zoom frame, and the more content that can be magnified. (You can set keyframes here to change the size and create a gradual zoom in on a detail in the image, similar to a transition, like slowly zooming out from a point to the full image).
- Feather: Controls the level of blur at the edges of the zoom frame. The larger the value, the more obvious the edge feathering (blurring), allowing it to blend well with the original image.
- Opacity: Controls the transparency of the zoom area.
- Scaling: There are three types: standard, soft, and scatter. Visually, the standard is the original image, soft slightly blurs the original image, and scatter sharpens the original image a bit, making the edges clearer (but sometimes over-sharpening can cause color spots).
- Blending Mode: Sets the blending mode of the zoom area with the original image.
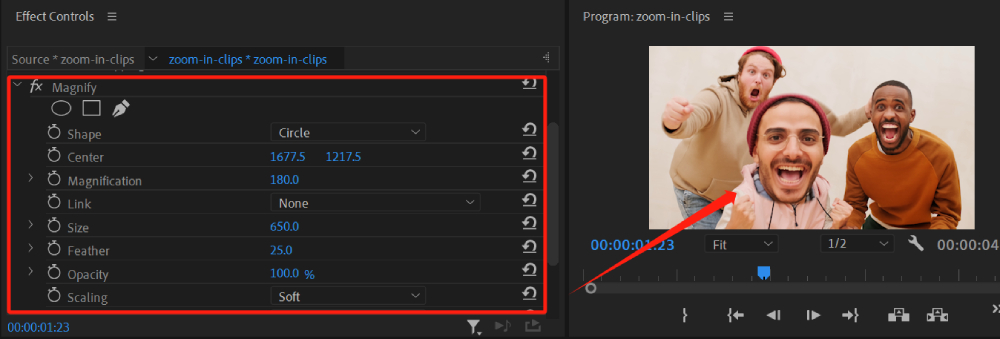
Let's take a look at the effect of zooming in on a character's face.
Take Your Premiere Pro Editing Workflow Further
Knowing how to zoom in on Premiere Pro is a useful skill for creating dynamic videos, highlighting important details, or adjusting your footage to better fit your creative vision. Whether you are editing short videos, tutorials, or professional projects, mastering these basic controls can help you work more efficiently.
As you continue editing, you'll find that a smooth workflow is just as important as learning individual tools. Frequently adjusting parameters such as scale, position, and effects can involve many repetitive clicks and menu switches.
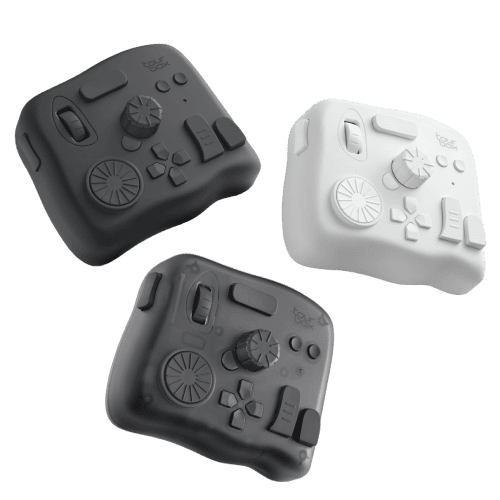
TourBox is a creative console designed to give video editors more intuitive control over their editing process. With customizable buttons, dials, and shortcuts, it helps you access frequently used functions faster and make precise adjustments without interrupting your creative flow.
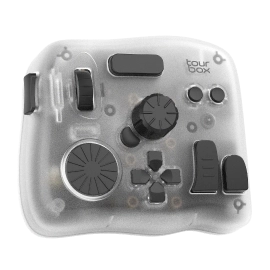
With the right techniques and a more efficient workflow, Premiere Pro becomes easier to control, allowing you to focus more on storytelling and creating better videos.


