Image File Formats Explained for Photographers
On a computer, images can actually be saved in many different formats. For photographers, common ones include NEF, TIFF, DNG, PSD, and JPG. What are the differences between them, and when should each one be used? In this blog post, we will break it down in a simple way.

In this article, you will learn:
- Camera Capture Record: Native Raw Format
- Universal Raw Format: DNG
- Editing Files: PSD and TIFF
- Output Files: TIFF, JPG, PNG, and WEBP
- Conclusion
Camera Capture Record: Native Raw Format
A native Raw file directly records the raw digital signal captured by the camera sensor. That is why it is often called a "digital negative."
Raw files keep all the information from the moment of capture. They also use the sensor's original color space, so the image quality is very high, and there is a lot of room for editing later. For this reason, photographers usually choose Raw as their first option when saving photos.
That said, Raw files also have a clear downside: they are not very compatible. Most native Raw files cannot be read directly by common computer software.
Usually, only the camera maker's own software or programs like Adobe Camera Raw can open native Raw files. And when a new camera comes out, older versions of image software often need to be updated too. Otherwise, they may not be able to recognize Raw files from the new camera.
It is also worth noting that Photoshop itself cannot read Raw files directly. It first needs to process the file through its built-in Camera Raw module before you can keep editing it.
Different brands also use different Raw file extensions. Common ones include:
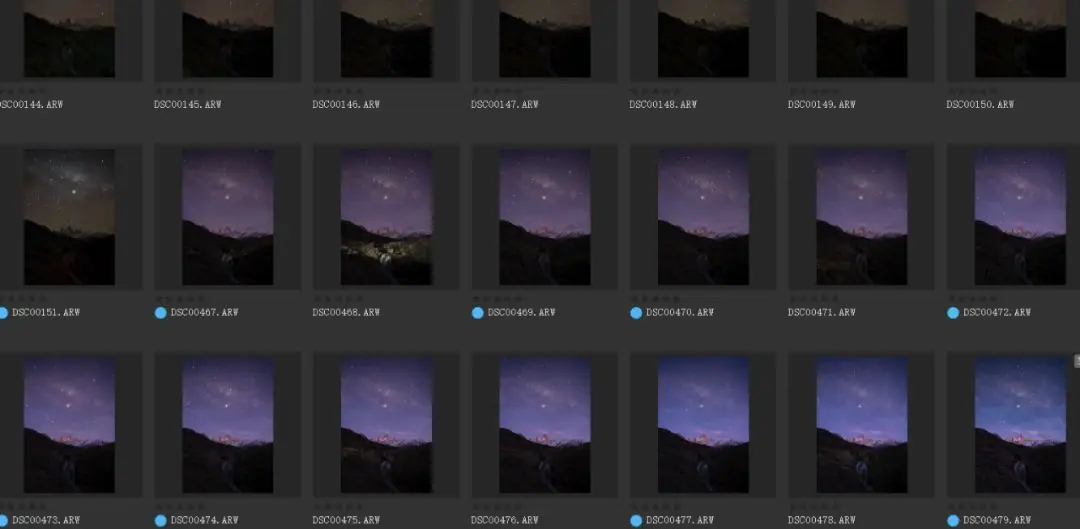
- .ARW: a common Raw file extension for Sony cameras
- .NEF: a common Raw file extension for Nikon cameras
- .CR2: a common Raw file extension for Canon cameras
- .DNG: a file extension used by some DJI drones
Universal Raw Format: DNG
As mentioned above, every camera brand has its own Raw format. But these formats are often not fully compatible with each other, and over time, they can also be harder to manage. To solve this problem, Adobe created the DNG (Digital Negative) format as a lossless, universal way to store Raw files.
If you often use Camera Raw or Lightroom Classic to merge HDR photos or create panoramas, you may have noticed that the merged file created by the software is often saved as DNG.
The biggest advantage of DNG is that it is "universal." It can be opened by Adobe software, built-in preview tools in Windows, Apple, and Android systems, and many third-party apps as well. In fact, some cameras, drones, and phones even shoot or export DNG files by default.
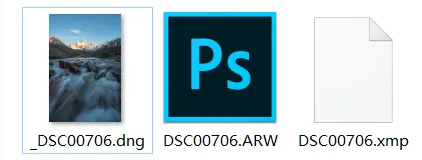
In the Windows example shown above, a DNG Raw file can be previewed directly, while Sony's native ARW file cannot. So compared with native Raw files, DNG is often easier to manage and archive.
DNG also uses lossless compression, so the file size is usually smaller. In some cases, it can be less than half the size of the original Raw file.
Because DNG combines lossless quality, wide compatibility, and smaller file size, some photographers convert native Raw files like NEF into DNG when importing photos. This makes storage and file management easier. Of course, for most photographers and photo enthusiasts, this step is not required. Keeping the native Raw file is usually enough.

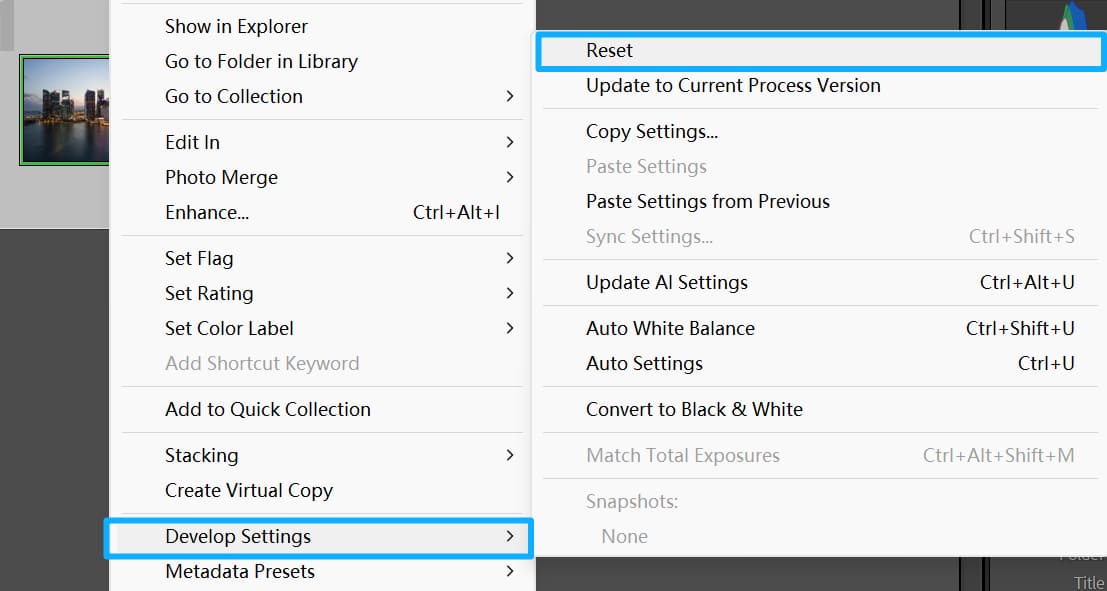
There is one more very important difference. Native Raw files cannot be edited directly. If you make changes to a native Raw file in Camera Raw, those changes are not written back into the Raw file itself. Instead, a separate .xmp file is created to save the settings. In Lightroom, these changes are saved in the catalog.
DNG files are different. If you make adjustments to a DNG file, those changes can be written directly into the file itself, without creating an extra file. And because this process is lossless, you can always restore the file to its original state with one click.
Editing Files: PSD and TIFF
PSD stands for Photoshop Document. In simple terms, it is Photoshop's native file format, used mainly to save files that have been edited in Photoshop.
A PSD file can save not only the edited photo, but also detailed editing data like layers, alpha channels, and masks. In other words, if you may want to keep editing a photo later, saving it as PSD is very convenient.
That said, PSD has one small drawback: the file size cannot be larger than 2GB. For complex retouching with lots of layers and channels, the file can easily go over that limit. In that case, you can use PSB, which stands for Large Photoshop File.
PSD has another downside too. It relies heavily on Adobe software, and usually only Adobe programs can open and edit it directly. If you want to keep working on the photo in a third-party program, you may find that it cannot read PSD files. And if you convert it to JPG and then keep editing, the image quality will drop more noticeably.
That is where TIFF comes in. TIFF, short for Tagged Image File Format, is a very flexible and widely used image format.
It supports many color modes, including RGB and CMYK. It also supports color spaces like Adobe RGB and ProPhoto RGB. It can save 8-bit, 16-bit, and even 32-bit color depth. In some cases, it can also keep layers and alpha channels. More importantly, most third-party software and printing devices work well with TIFF files.
TIFF also supports lossless compression methods like LZW and ZIP, which help reduce file size without hurting image quality too much. After compression, TIFF files are often about the same size as PSD files, and sometimes even smaller. Because of that, many photographers prefer to save edited photos as TIFF instead of PSD.
In real use, though, the difference between TIFF and PSD is not that big. If you mostly use Adobe software for editing, saving as PSD or PSB is usually more convenient. But if you often work with other editing apps or printing workflows, TIFF is usually the safer choice.
Output Files: TIFF, JPEG, PNG, and WEBP
As mentioned earlier, TIFF files are widely supported by major photo editing software, and they are also highly compatible in the printing industry. So if the file is for high-quality print output, or if you want better viewing quality on a professional monitor, it is usually best to export it as a 16-bit TIFF file in Adobe RGB.
The strength of TIFF is that it preserves image detail and color information as much as possible. It is very well suited for situations where image quality matters most. For photographers, it is more like a "high-quality output and archive format" that can be used for printing and later editing.
That said, if the photo is going to be sent to someone else, or uploaded to a website or social media, TIFF is often not the best choice. Even though the quality is very high, most operating systems, browsers, and websites do not handle TIFF files very well. In that case, JPEG is still the more common output format.
JPEG is a lossy compression format. It only supports 8-bit color depth, and the file size is usually much smaller, sometimes only a few MB or even a few hundred KB. Although some image data is lost during compression, the quality is usually more than enough for web display, social media, and everyday sharing.
So if you have already finished editing a photo, a safe approach is to save two versions: one original-size TIFF file for printing, viewing, and future edits, and one compressed JPEG file, such as one with the long side around 1600 pixels, for web use and online sharing.
Besides TIFF and JPEG, PNG is also a common image format. But for photographers, PNG is usually not the most common output format for photos. Its biggest advantage is that it supports transparent backgrounds and uses lossless compression.
It works well for icons, illustrations, interface graphics, or images that need transparency. But for normal photos, PNG files are usually much larger than JPEG, and they do not offer a clear advantage for photo sharing or display. So it is usually not the first choice for photo output.
Further Reading:
WEBP is a format that is more focused on web use. It supports both lossy and lossless compression, and at the same image quality, it can usually keep a smaller file size than JPEG. That makes it very useful for web loading and online sharing.
Still, WEBP is more common in website optimization than in a photographer's standard export workflow. For photos that need to go on the web, it is a good extra option. But for printing, archiving, and professional post-processing, it is still not as commonly used as TIFF and JPEG.
In short, if your goal is printing and long-term storage, TIFF is the better choice. If your goal is sharing and distribution, JPEG is still the most universal and reliable option. PNG and WEBP both have their strengths, but for most photographers, they are more like extra formats for specific situations rather than the main formats for everyday output.
Conclusion
In this blog post, we looked at a few common image file formats and what they are used for. Here is a simple summary:
- Camera capture record: native Raw format
- Backup and storage of original photos: native Raw format or DNG
- Saving edited photos: PSD/PSB or TIFF
- Printing: TIFF
- Sharing online: JPG
- Special uses: PNG and WEBP
Now that we have covered these file formats, we also want to recommend a tool that is very useful for many photographers. Portrait photographers and commercial photographers alike often use it to help with photo editing.

When you edit photos with TourBox, you can better feel the effect of every small adjustment. It gives you a more direct sense of "touching" and shaping the image, instead of just clicking around in software. That kind of hands-on control is hard for a mouse and keyboard to truly replace.

TourBox's physical dials also make adjustments more precise and fine-tuned. Compared with dragging sliders with a mouse, you do not have to keep staring at changing numbers. Instead, you can make small, step-by-step changes, just like fine-tuning focus by hand, until the image looks right.