How to Reduce Noise in Images: Tips for Shooting and Editing
In photo editing, noise is like "grains of sand" on your picture. It doesn't just affect clarity. It can make your entire photo look less professional.
So, where does the noise come from? There are many causes: shooting at high ISO, brightening dark areas, or even sensor overheating can all lead to unwanted noise creeping into your images.
That's why image noise reduction has become an essential skill for anyone who loves photography and wants polished results. In this article, we'll share some simple and effective noise-reduction techniques for post-processing.

In this article, you will learn:
- What Is Image Noise and Its Causes?
- Tips to Reduce Image Noise Before Shooting
- When Should You Pay Attention to Noise Reduction?
- How to Reduce Noise in Post-Processing?
- Conclusion
What Is Image Noise and Its Causes?
Noise in digital photography is almost unavoidable. No matter how expensive your camera is, noise can still appear in your images. However, higher-end cameras tend to handle noise better thanks to larger sensors, advanced noise-reduction algorithms, and higher signal-to-noise ratios.
Older cameras—especially those used extensively over three or more years—may show slightly more noise compared to when they were new.
This is often due to factors like sensor aging or increased heat generation, which can elevate thermal noise. That said, the difference is usually minor unless the camera has been subjected to extreme or prolonged use, such as heavy video recording.
Video recording, in particular, can accelerate heat buildup in the sensor. Over time, this can lead to more visible noise in photos and videos because heat increases the random fluctuations in the electronic signals captured by the sensor.
Noise tends to be most noticeable in areas of uniform color, such as clear skies, smooth walls, or misty clouds. These regions lack texture to mask the noise, making it stand out more.
For example, there is a noticeable issue of noise in the white box in the image below.
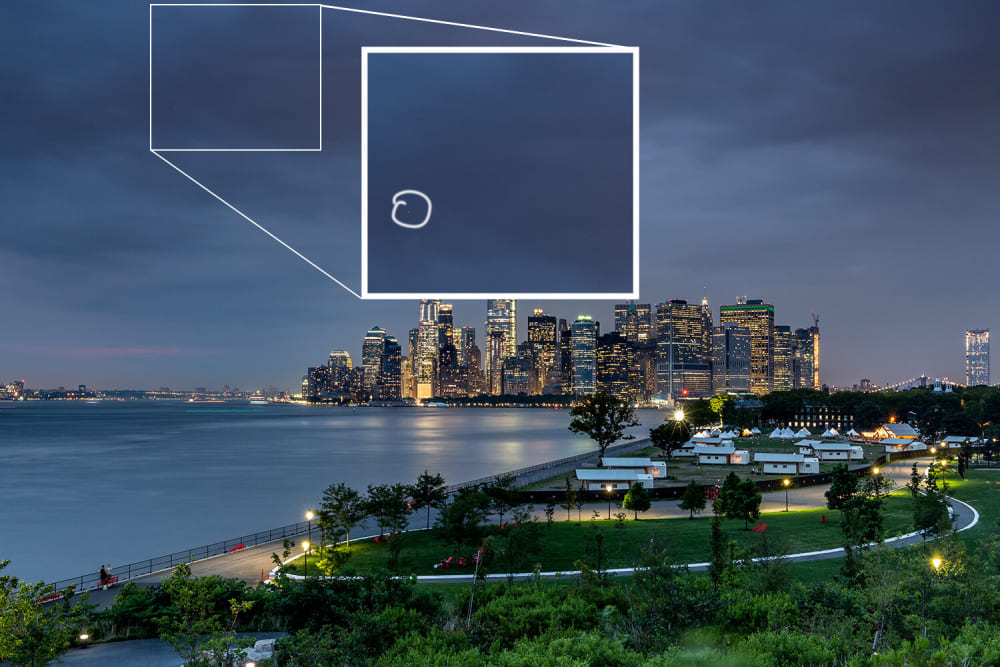
When working on post-processing, we can focus on noise reduction in these areas to improve the photo's quality significantly.
Although proper techniques and tools can minimize or control noise, even the most advanced noise-reduction technologies cannot completely eliminate it without trade-offs:
- Detail Loss: Noise reduction often smooths out textures, leading to a loss of fine details in the image. Over-aggressive noise reduction can make photos look flat or overly processed.
- Color Shifts: Reducing color noise might result in unnatural color transitions or a decrease in saturation, which can impact the overall aesthetic of the photo.
Tips to Reduce Image Noise Before Shooting
1. Shoot in RAW Format
RAW files are uncompressed and retain the maximum data your camera can capture, including richer color information and greater dynamic range. This helps preserve details in areas prone to noise and gives you more flexibility during post-processing.
2. Use Low ISO Settings
Stick to your camera's lowest native ISO setting, usually 80-100. Some cameras offer extended ISO options, like ISO 50 (Canon) or ISO 60 (Nikon). While using the lowest ISO doesn't guarantee a noise-free image, it minimizes noise by reducing the sensor's sensitivity to light.
3. Expose Properly
Underexposed shots often show more noise when you brighten them in post-processing. In some cases, consider exposing to the right (ETTR), where the histogram leans toward overexposure.
This method works especially well for portraits, as slight overexposure is easier to recover than underexposure.
4. Enable In-Camera Noise Reduction
If time allows, use your camera's built-in noise reduction (NR) function to reduce noise directly in the camera. The downside is that this feature often takes additional time to process.
For example, a 60-second exposure will require another 60 seconds for the camera to perform noise reduction, which may not be practical in most shooting scenarios.
When Should You Pay Attention to Noise Reduction?
Some situations make high ISO unavoidable, leading to noticeable noise in your photos. For example:
- Indoor Photography in Low Light: Shooting in dimly lit spaces, such as museums or other indoor locations, often requires using ISO 1250 or higher. This naturally results in more noise in the image.
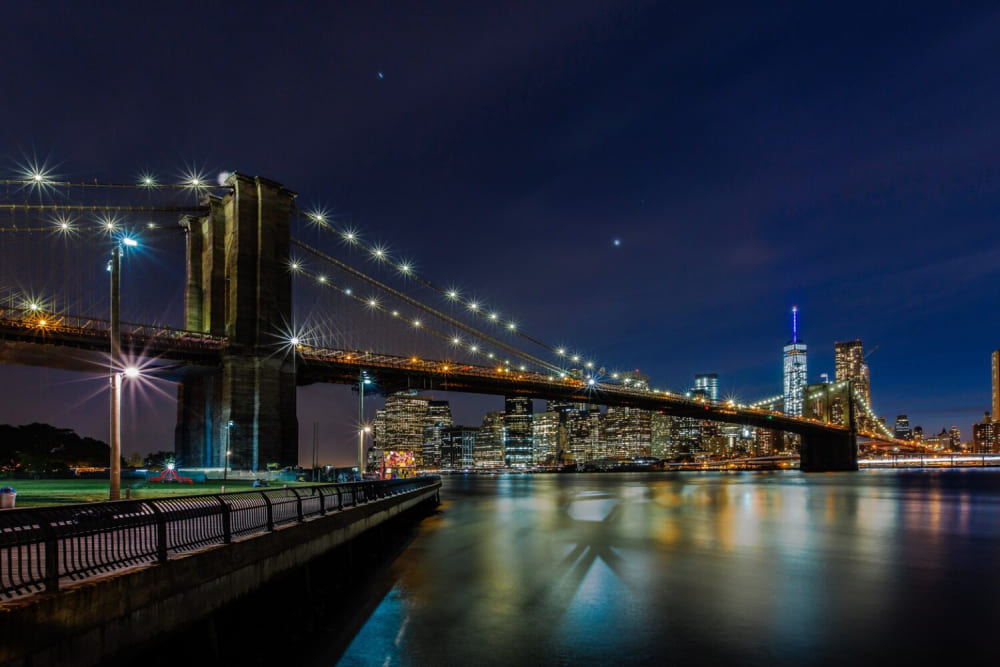
- Long Exposure Shots: Even with a low ISO like 80, long exposure times (e.g., a 60-second shutter speed for architectural photography) can significantly increase noise, especially in areas like the sky or clouds where it becomes most obvious.
- Night Photography: Any nighttime subject, such as cityscapes, the moon, auroras, or starry skies, typically demands a higher ISO. These scenarios are particularly sensitive to noise, making noise reduction crucial for a clean final image.
While minimizing noise during shooting is ideal, post-processing is also essential.
Reducing image noise means using software to bring noise levels down to an acceptable range, but it's impossible to eliminate noise completely.
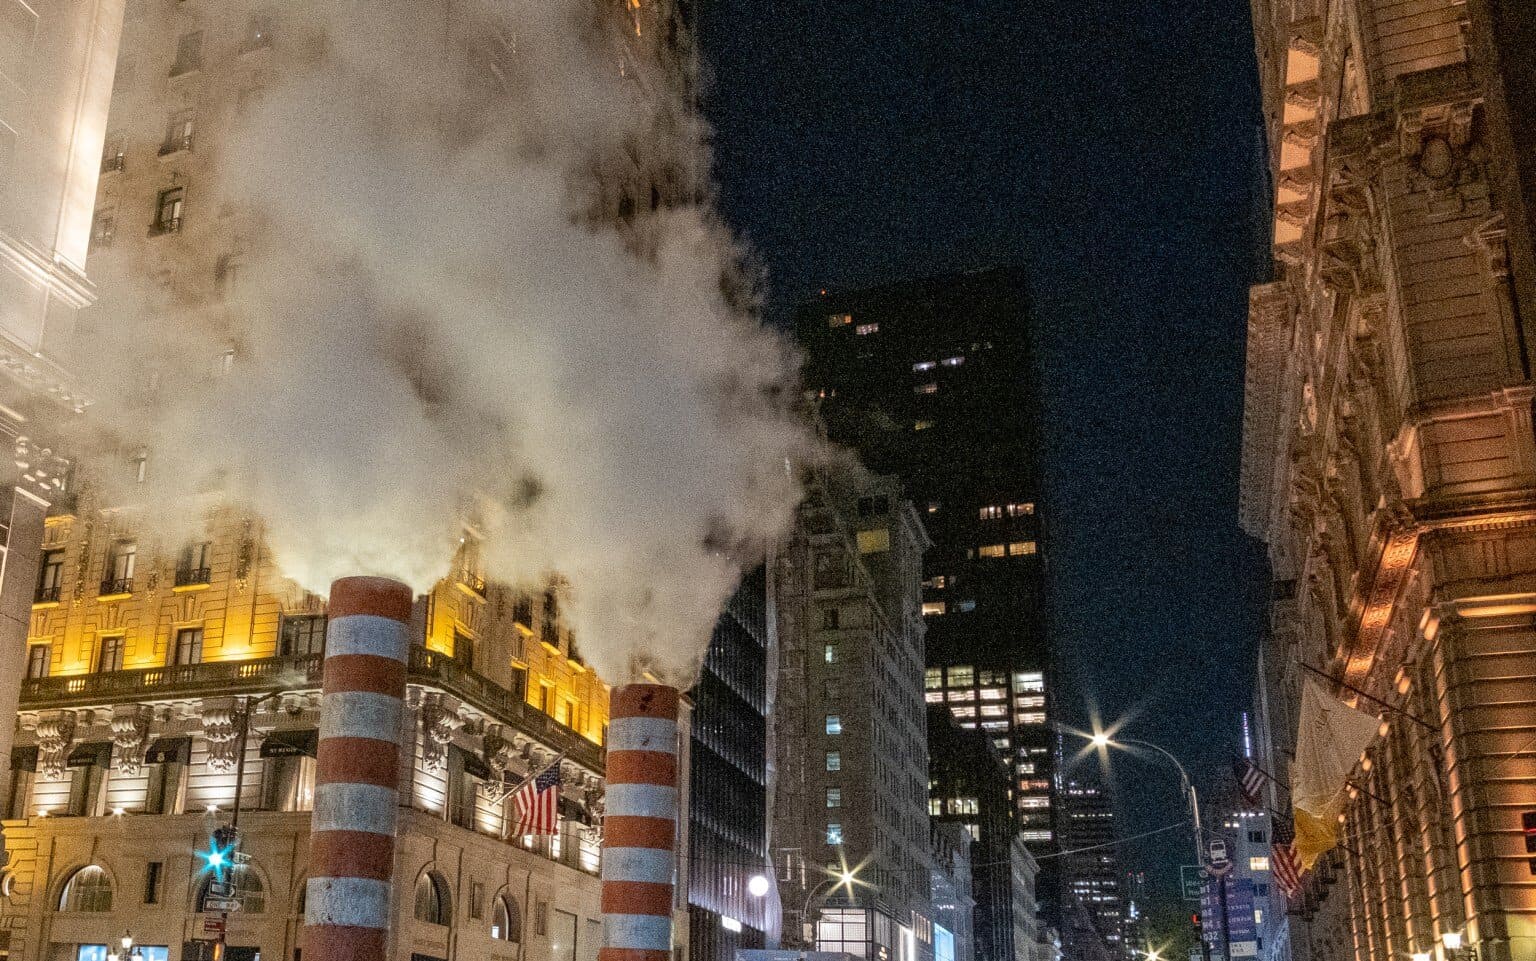
In some cases, a bit of noise is acceptable, especially for specific types of photography. Take this nighttime street photo, for example. Shot at ISO 12,800, the noise is intense — almost overwhelming — but it suits the scene's mood.
How to Reduce Noise in Post-Processing?
Method 1: Use Adobe Camera Raw (ACR) or Lightroom
Adobe Camera Raw (ACR) and Lightroom are two of the most popular tools for photo editing. Since they offer similar features, this section will use Camera Raw as an example to demonstrate how to reduce noise and enhance image quality.
In Photoshop, go to Filter > Camera Raw Filter to open the Camera Raw interface. Once inside, navigate to the Detail tab on the right-hand panel. Here, you'll find the sliders for Noise Reduction and Color Noise Reduction.
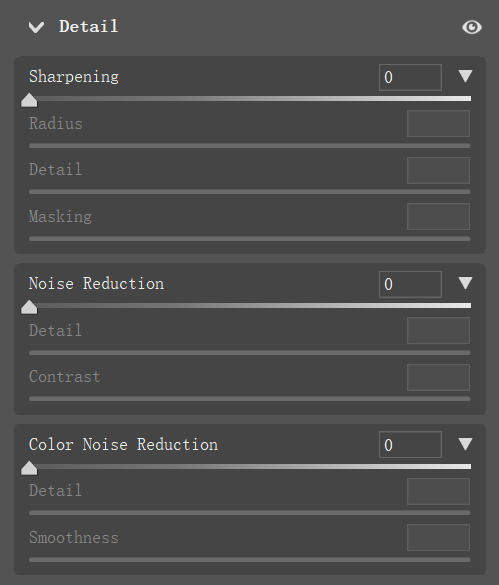
1. Noise Reduction
The Noise Reduction slider focuses on minimizing luminance noise — those white or silver grainy specks that can appear in your photo.
- Noise Reduction: Move this slider up to reduce luminance noise. It's best to keep the value below 40 to avoid over-smoothing, which can strip your image of important details.
- Detail: After reducing noise, adjust this slider to recover some of the finer details in your image. Keep it around 50 to maintain a balance between detail and noise suppression — going higher might reintroduce noise.
- Contrast: This slider restores contrast lost during noise reduction. However, its effect is subtle, and in most cases, you won't need to adjust it significantly.
2. Color Noise Reduction
The Color Noise Reduction slider targets color noise — those distracting patches of random colors, often caused by sensor heat.
- Color Noise Reduction: Increase this slider to reduce minor color noise. However, avoid values over 40, as it may lead to unnatural color transitions or a loss of saturation.
- Detail and Smoothness: These sliders can refine color details and smooth transitions further. While their impact is less noticeable, small adjustments can help fine-tune the result.
3. Key Features of Camera Raw Noise Reduction
- Quick and Convenient: The tools are straightforward and don't require complex steps.
- Limited Sampling Control: Unlike some specialized noise-reduction software, ACR doesn't allow precise sample point selection.
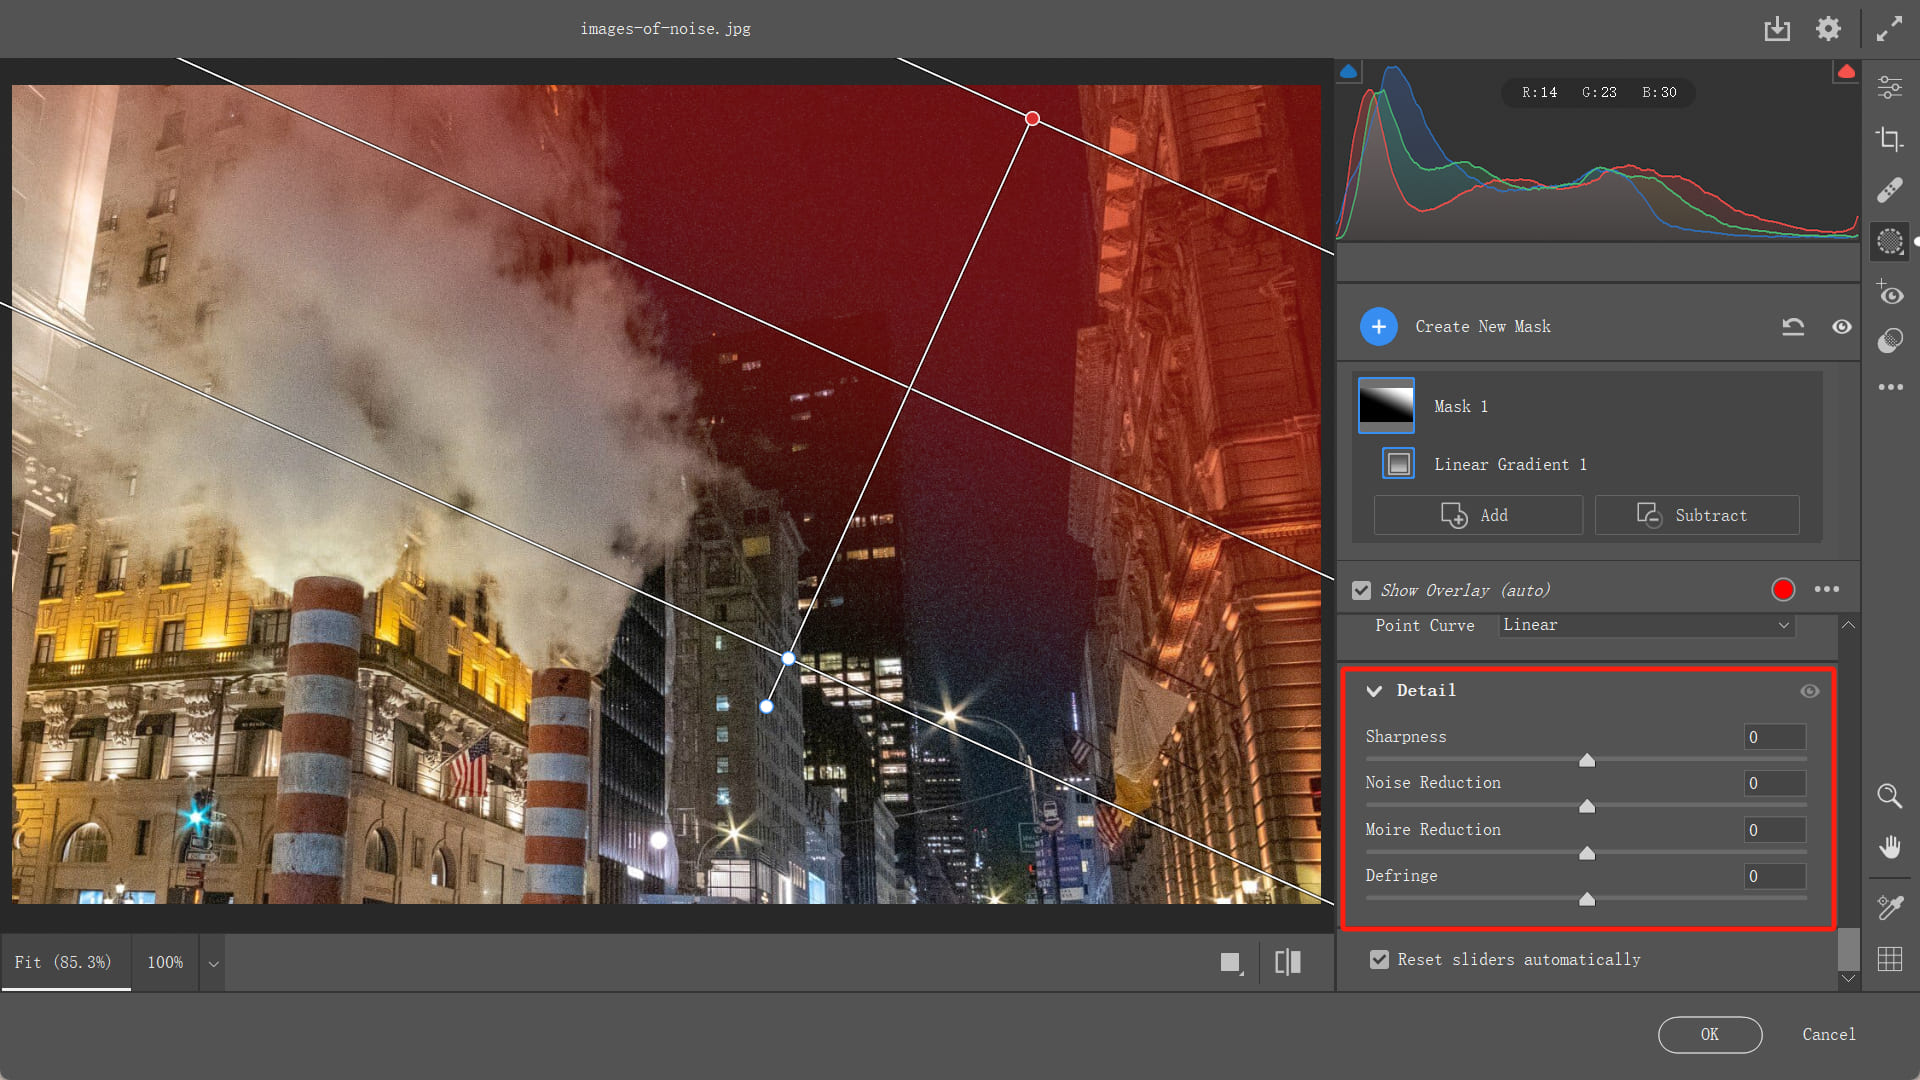
- Regional Noise Reduction: You can use tools like Linear Gradient or Radial Gradient to apply noise reduction selectively to specific areas of your image.
It's worth mentioning that when using the Linear Gradient or Radial Gradient in Camera Raw, we can find the noise reduction slider in the adjustment panel on the right.
This allows us to reduce noise in specific areas within the selection. This method is useful for situations where noise reduction is needed in the background or a specific area while preserving details of the main subject.
In photo editing, if you find it tiring and inefficient to constantly drag sliders in software using a mouse, consider giving the TourBox creative console a try.

TourBox is highly favored by photography enthusiasts, digital artists, and content creators. Using it is like using a game controller for editing photos. Not only does it offer unparalleled control and tactile feedback, but it also allows for precise adjustments of photo parameters with increments of +1 and -1.
The best part is that while using TourBox, you can keep your eyes on the computer screen, ensuring that your creative flow remains uninterrupted. If you're interested, check out our photo editing page to discover more about how TourBox can enhance your photo editing process.
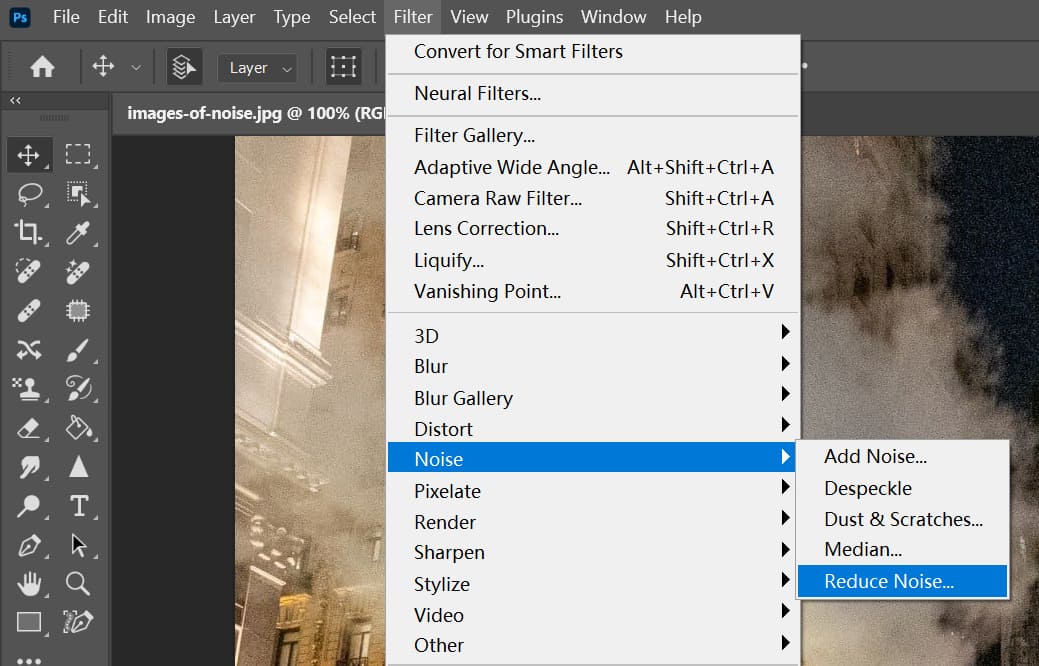
Method 2: Use Photoshop Noise Reduction Filter
In Photoshop, go to the Filter menu and select Noise > Reduce Noise to access Photoshop's built-in noise reduction tool.
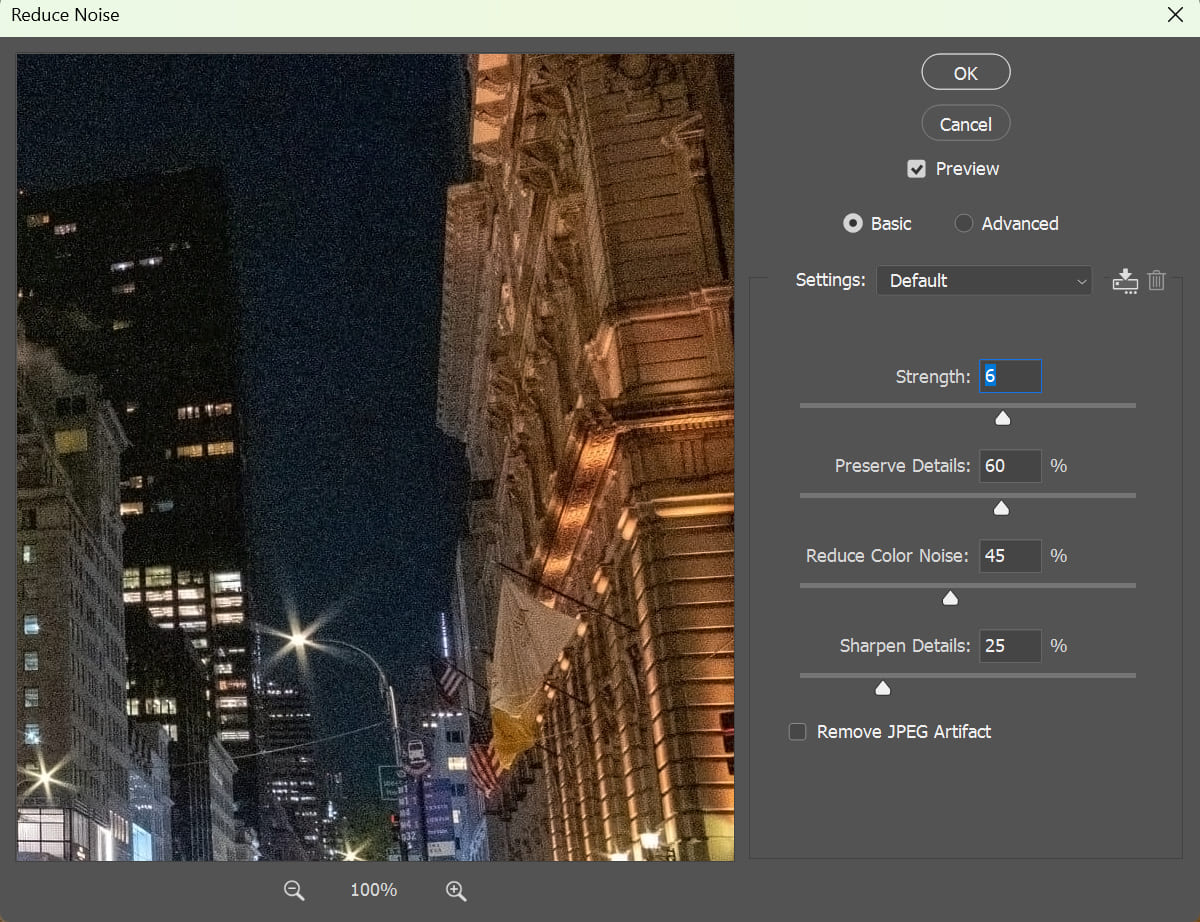
The adjustment options here are similar to those in Camera Raw:
- Strength: Adjust this slider to control how much noise is reduced. Higher values remove more noise but can also blur details.
- Reduce Color Noise: Use this slider to target color noise in your image. Be careful not to overdo it, as it may affect color transitions.
- Preserve Details: Increase this slider to retain fine details in your image after noise reduction. Balance is key — too much can bring back noise, while too little can make your image look overly smooth.
Method 3: Average Stack Noise Reduction
This method is more time-consuming since it involves both careful shooting and post-processing.
First, we need to capture at least 5 photos of the same scene from a fixed position (a tripod is a must). Avoid scenes with moving objects like flowing water or swaying plants, as these will cause ghosting when stacked.
In post-processing, Photoshop calculates pixel differences through averaging to reduce noise. It works best for landscapes or other static scenes where nothing moves.
1. Steps to Perform Averaging Stack Noise Reduction in Photoshop
- Import your photos into Photoshop, and align them if necessary.
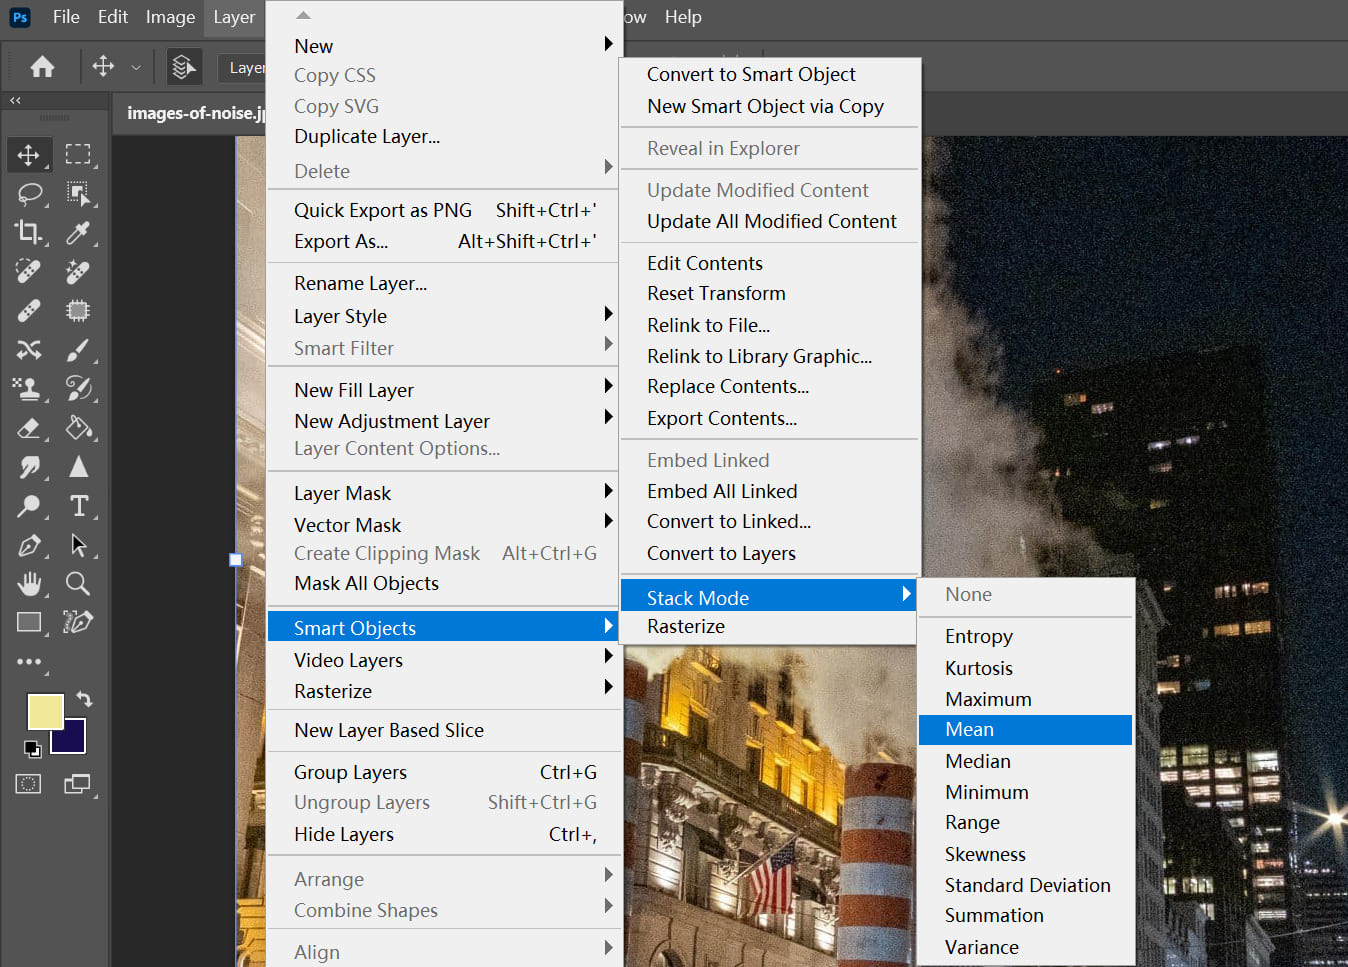
- Go to the Layers menu and select Convert to Smart Object. This combines all your layers into a single smart layer.
- With the smart object selected, go to Layers > Smart Objects > Stack Mode > Mean.
- Photoshop will process the layers and calculate an average for each pixel.
The rendering speed will depend on your computer's performance and the number of layers. More layers will take longer.
Further Reading:
2. How Averaging Stack Works
Most luminance noise (random bright or dark specks) is random across multiple shots. For example:
- In photo 1, a certain pixel has noise.
- In photo 2, the same pixel has no noise.
- In photo 3, the same pixel also has no noise.
When averaged, the noisy pixel's intensity becomes weaker — reduced to 1/3 of its original strength.
If two out of three photos have noise in the same pixel, the average reduces it to 2/3 strength. If all three photos have noise in the same spot, the noise remains unchanged.
The more photos you stack, the greater the likelihood that noise is weakened, improving the noise reduction effect.
3. Why This Method Preserves Image Quality
While noise is random and gets reduced through averaging, the actual content in your photos stays consistent because it doesn't change across frames. As a result, this method reduces noise without compromising the sharpness or detail of your image.
Method 4: Use Plugins
Using a plugin is one of the easiest ways to reduce noise. Here, we recommend the Dfine plugin from the Nik Collection, a tool many photographers are already familiar with.
Compared to Lightroom or Photoshop's built-in noise reduction tools, Dfine offers an additional feature: manual sampling.
This allows you to select specific areas of the photo where you want to reduce noise, making it more targeted and precise. It's both smart and user-friendly.
How It Works:
- Open your photo in the plugin.
- Select the area where you want to reduce noise. The software will recalculate based on your input.
- After processing, you can manually adjust contrast noise reduction and color noise reduction to fine-tune the result.
Conclusion
While image noise is an unavoidable part of digital photography, it's not always a bad thing. In some photos, the right amount of noise can actually enhance the artistic or vintage feel of the image.
In this article, we've covered ways to reduce noise during shooting and introduced four post-processing methods for image noise reduction.
Generally, stacking and plugins tend to deliver the best results in post-processing. The downside of stacking is that it's complicated and demands strict conditions during shooting. Plugins, on the other hand, are much simpler and work well for most photos, though they usually come at a cost.
With the right shooting techniques and thoughtful editing, you can minimize the impact of noise and make your photos look more polished and professional!

At the end of the article, if you're interested in TourBox and enjoy working and creating on an iPad, consider checking out our TourBox Elite Plus. You're sure to like how it can change your workflow.