[TourBox Tips] How to Insert Clips in Premiere Pro?
When browsing source material in Premiere Pro's Source Monitor, you can mark in and out points to select a clip from the source video.
Then, drag this marked clip onto the timeline track to insert it into your sequence.
So, how can you set up TourBox to intuitively insert selected source material clips into your sequence with ease?
Extra Tip:
To quickly insert clips, create a timeline sequence first. Check out our article on mastering Premiere Pro sequences: "Premiere Pro Sequences: Everything You Need to Know"
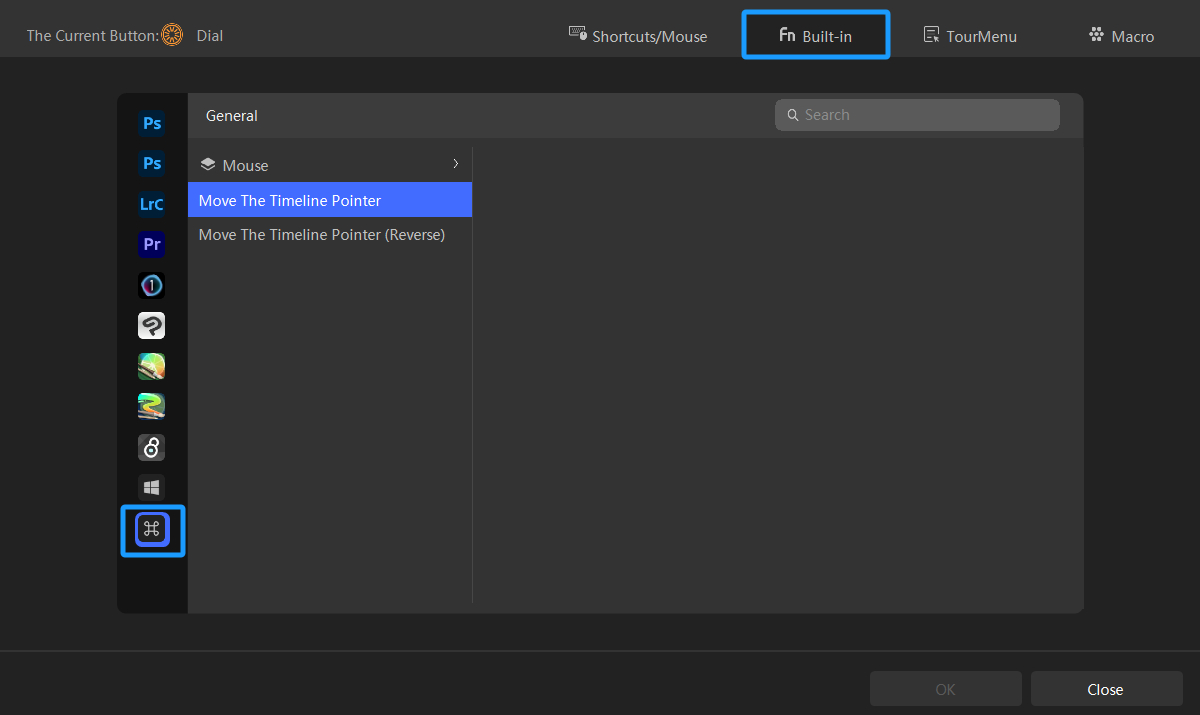
In the TourBox Console, click the Dial control to access the settings panel, then switch to the Built-in tab. Under the General tab in the left application bar, select "Move the Timeline Pointer" from the command options.

This allows you to control Premiere Pro's Timeline Pointer by turning the Dial. In fact, when you create a Premiere Pro preset in the TourBox Console, "Move the Timeline Pointer" is already preconfigured.
Here comes the crucial step: you need to map the keyboard shortcuts for the following three actions to any button on the TourBox:
- Mark In: I
- Mark Out: O
- Insert: ,

With this setup, return to your Premiere Pro project. Use the Dial to browse clip content, mark in and out with the designated TourBox buttons, and insert them into the timeline sequence.
TourBox is especially convenient when you have multiple material clips to work with. Give it a try and see how easy it makes handling your clips!