Unlock Creativity: How to Invert Colors in Photoshop?
In the realm of digital art and design, sometimes it's the unexpected that truly captivates and inspires. Photoshop, Adobe's powerhouse software, is packed full of features that can help you unlock a world of creativity, one such feature being the ability to invert colors.
Color inversion in Photoshop flips each color to its opposite on the RGB or CMYK color wheel, transforming your images in surprising and often stunning ways.
Whether you're looking to create a unique graphic for your website, add an intriguing twist to your photography, or just experiment with a new technique, mastering color inversion can be a game-changer.
In this tutorial, we'll guide you through the simple yet powerful process of how to invert colors in Photoshop. Whether you're a seasoned pro or a beginner just getting started, you'll find this guide useful.

In this article, you will learn:
- What Is Color Inversion?
- What Happens When You Invert Colors?
- Where Is Color Inversion Used?
- How to Invert Colors in Photoshop?
- Advanced Tips for Color Inversion
What Is Color Inversion?
To truly master the technique of color inversion, it's essential to first understand the underlying principles of color theory.
In the world of digital art and design, colors are typically represented in RGB (Red, Green, Blue) or CMYK (Cyan, Magenta, Yellow, Key/Black) models.
The exact opposite of any color can be found directly across from it on the color wheel. This opposing color is known as its "complementary" color.
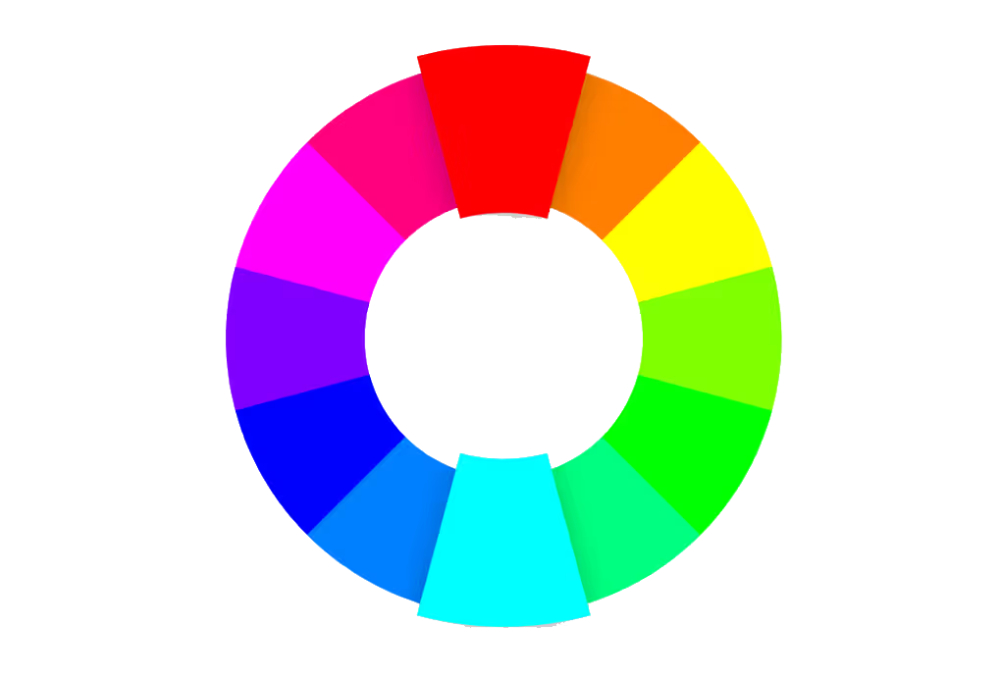
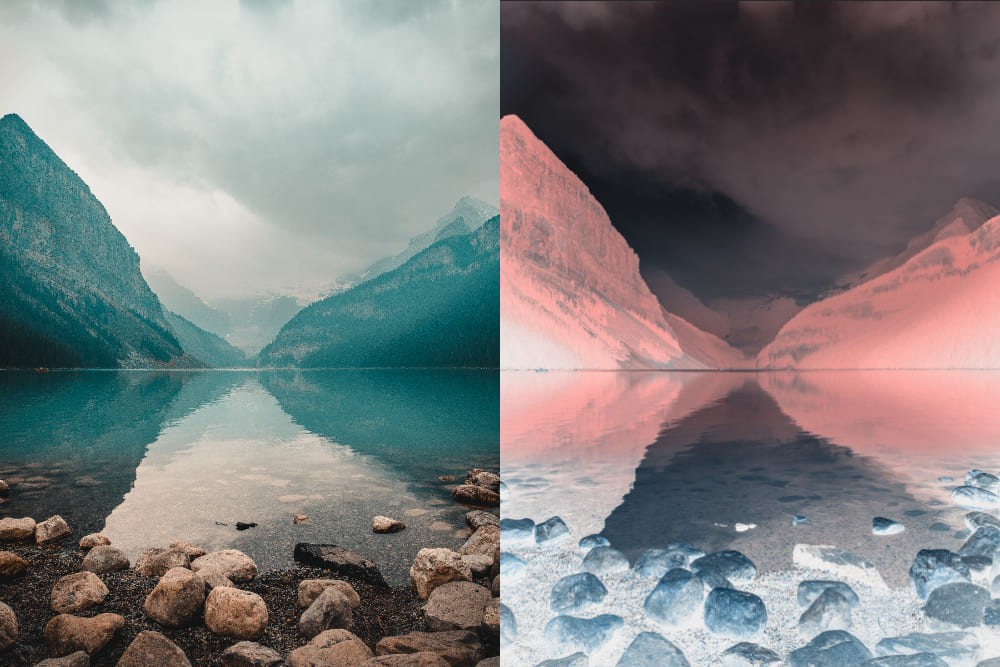
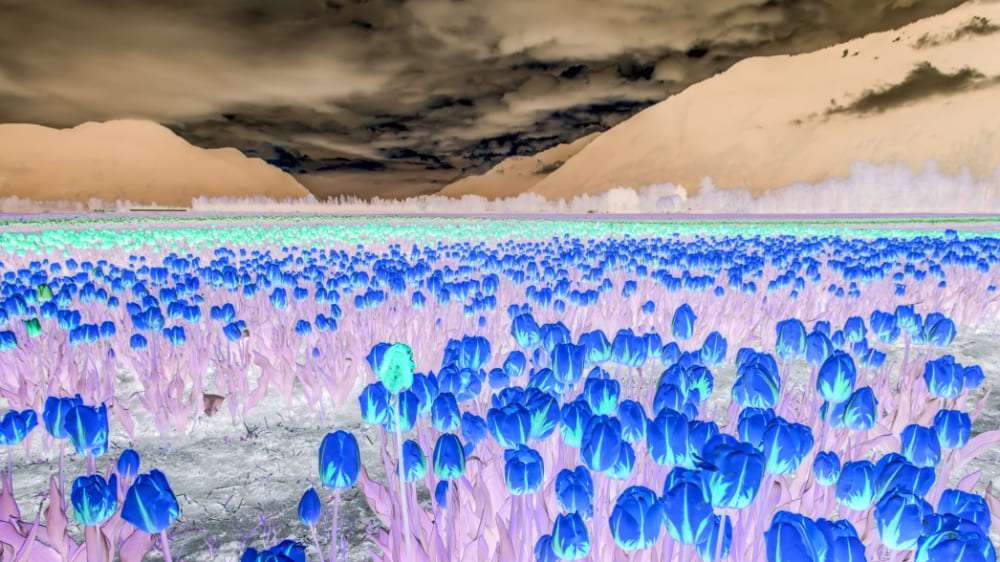
What Happens When You Invert Colors?
When you invert a color in Photoshop, the software automatically replaces each color with its complementary color from the color wheel. This means that each shade of red is replaced with cyan, green with magenta, blue with yellow.
The result is an image that might look like a photographic negative or simply a piece of artwork with a surreal or dreamlike quality.
Where Is Color Inversion Used?
Color inversion isn't just a fun trick. It's a powerful tool with a range of applications across various fields. Here are a few instances where you might find color inversion particularly useful:
- Graphic Design: Inverting colors can give a fresh and unexpected look to logos, brochures, web graphics, and more. It can help to highlight certain elements and bring a dynamic, modern feel to your designs.
- Photography: Color inversion can transform an ordinary photo into a striking piece of art, giving it an ethereal or otherworldly quality. It's also a popular technique in the creation of negatives in traditional film photography.
- Accessibility: Many digital platforms offer a "dark mode" or "night mode" where the color scheme is inverted to reduce eye strain. Learning how to invert colors can be beneficial if you're designing user interfaces or digital resources.
In the coming sections, we'll dive deeper into the step-by-step process of color inversion in Photoshop.
By the end of this tutorial, you'll be well-equipped to use this technique to its maximum potential, adding a new level of depth and creativity to your digital projects.
How to Invert Colors in Photoshop?
Now that we've covered the basics of color inversion, let's dive into the specifics of how to invert colors in Photoshop. This guide will take you through every step of the process, from opening your image to fine-tuning the results.
Step 1: Open Your Image in Photoshop
Begin by launching Adobe Photoshop. From the top menu, select File > Open, and choose the image you want to invert from your files.
Step 2: Duplicate Your Layer
It's always a good idea to work on a duplicate layer when making significant changes. This way, you can easily return to the original image if needed.
To duplicate your layer, go to the Layers panel (usually on the right side of the screen), right-click on the Background layer, and select Duplicate Layer. You can name it something like "Inverted Colors".
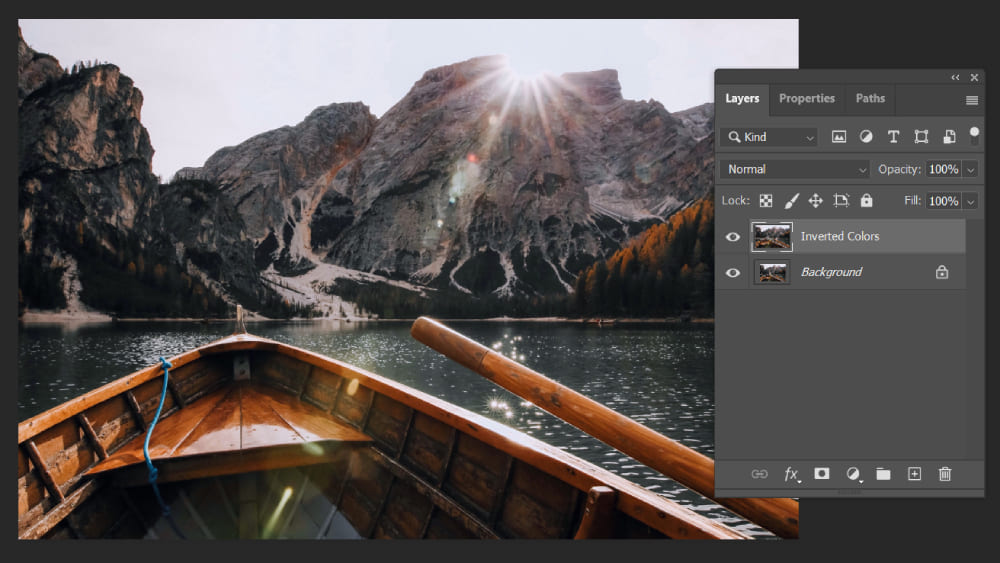
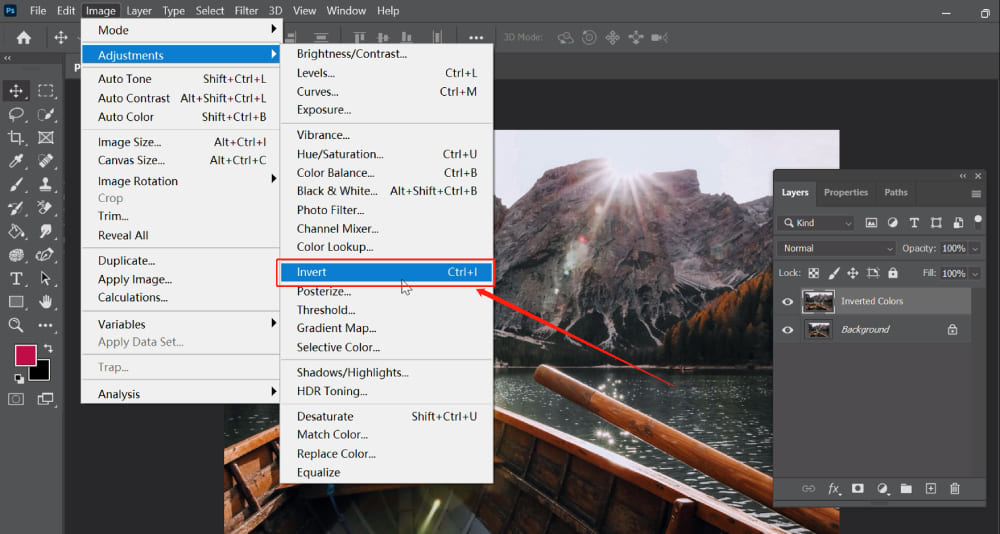
Step 3: Invert the Colors
With the duplicate layer selected, go to the top menu and click on Image > Adjustments > Invert. Alternatively, you can use the shortcut Ctrl+I on Windows or Command+I on Mac. This action will invert all colors in your image.
Step 4: Fine-Tune Your Image
While the basic inversion process is simple, there's plenty of room for creativity in the fine-tuning stage. You can adjust the opacity of your inverted layer to create a blend of the original and inverted colors. Just go to the Layers panel and adjust the Opacity slider.
For more advanced adjustments, you might want to play around with the Levels, Curves, or Brightness/Contrast settings, found under Image > Adjustments.
These options allow you to tweak the light and dark areas of your image, adjust the color balance, and more.
Step 5: Save Your Image
Once you're satisfied with your image, don't forget to save it. Go to File > Save As, and choose the desired format and location for your file.

Advanced Tips for Color Inversion
While the above steps will quickly get you a color-inverted image, there are some advanced techniques that can further enhance your results:
- Selective Color Inversion: Instead of inverting the entire image, you can select specific areas for color inversion. Use the Lasso Tool, Quick Selection Tool, or Magic Wand Tool to select the area you want to invert, then follow the steps above.
- Layer Blending Modes: Experiment with different blending modes for your inverted layer. This can create a variety of unique effects.
- Adjustment Layers: Instead of applying adjustments directly to your image layer, use adjustment layers. You can then modify or remove these adjustments without affecting the original image.
Product Recommendation:
Now that you've mastered the art of how to invert colors in Photoshop, let's talk about a tool that can make your entire Photoshop experience more efficient and enjoyable: the TourBox.

TourBox is a versatile controller specifically designed for graphic design, image editing, and digital artistry. It integrates seamlessly with software like Photoshop, allowing you to access key functions and shortcuts at your fingertips.
Whether you're cropping images, adjusting brushes, playing with layer opacity, or navigating your workspace, TourBox can make each process faster and more intuitive.
It's all about enhancing your efficiency and letting you focus more on your creativity.
So, if you're serious about Photoshop and want to take your editing to the next level, we highly recommend giving TourBox a try. It's a game-changer for any digital artist or designer, and we believe it will be for you too!
And that's it! You've just learned how to invert colors in Photoshop, from the basics to the more advanced techniques. With a bit of practice, you'll be able to use color inversion to add a new dimension to your creative projects. Happy editing!