Lightroom Keyboard Shortcuts: 10 Combinations You Should Know
In this digital photography era, photographers inevitably capture a large number of photos during their shoots. The challenge lies in quickly selecting the desired photos and making necessary adjustments. It can be quite a headache.
Adobe Lightroom Classic is a commonly used photo-processing tool among photographers. To enhance efficiency, mastering essential keyboard shortcuts is essential.
In this article, we will share 10 sets of commonly used Lightroom shortcuts. So, let's get started!

In this article, you will learn:
- How to Change Keyboard Shortcuts in Lightroom?
- 10 Sets of Common Lightroom Classic Keyboard Shortcuts
- Final Thoughts About Lightroom Shortcuts
How to Change Keyboard Shortcuts in Lightroom?
In Adobe Lightroom Classic, keyboard shortcuts are preset. However, Lightroom Classic itself does not provide a direct way to modify keyboard shortcuts.
If you want to customize the keyboard shortcuts, you may need to rely on third-party software or operating system settings. However, this method may affect the shortcut settings in other applications, so please make sure to confirm before making any modifications.
If you simply want to view the default keyboard shortcuts in Lightroom Classic, you can refer to Adobe's official keyboard shortcuts list.
10 Sets of Common Lightroom Classic Keyboard Shortcuts
If you've looked at Adobe's official Lightroom Classic keyboard shortcuts list, you might have lost patience. Because in reality, you don't need that many shortcuts, and it's also difficult to remember so many of them.
Generally speaking, these 10 sets of commonly used Lightroom shortcuts below should meet your basic needs.
1. Photo Import Lightroom Shortcuts
- Ctrl + Shift + I / Command + Shift + I: Import photos from disk
2. Module Related Lightroom Shortcuts
- G: Switch to the Library module Grid view
- E: Switch to the Library module Loupe view
- D: Switch to the Develop module for editing photos
3. Panel Related Lightroom Shortcuts
- F5: Hide/Show Module Picker (top bar)
- F6: Hide/Show Filmstrip (bottom bar)
- F7: Hide/Show left panels
- F8: Hide/Show right panels
- T: Show/Hide toolbar
- Shift + Tab: Hide/Show all panels
4. Grayscale Lightroom Shortcuts
Note: These shortcuts can only be used in the Develop module
- V: Toggle grayscale mode
5. Before and After Lightroom Shortcuts
Note: These shortcuts can only be used in the Develop module
- \: Toggle Before/After view
- Y: Display Before/After side-by-side
6. Photo Management Lightroom Shortcuts
Here, we will recommend three sets of shortcuts that you'll find useful when managing photos in Lightroom Classic:
6.1 Deciding Whether to Keep a Photo:
- P: Flag as Pick
- X: Flag as Rejected
- U: Remove Flag
6.2 Adding Star Ratings to Photos:
- [0-5]: Assign star ratings directly, corresponding to 1 star to 5 stars
6.3 Adding Color Labels to Photos:
- [6-9]: Assign color labels to photos, corresponding to red, yellow, green, and blue, respectively. If you're observant, you'll notice there's also a purple color, but unfortunately, it doesn't have a corresponding shortcut.
Additional Tip:
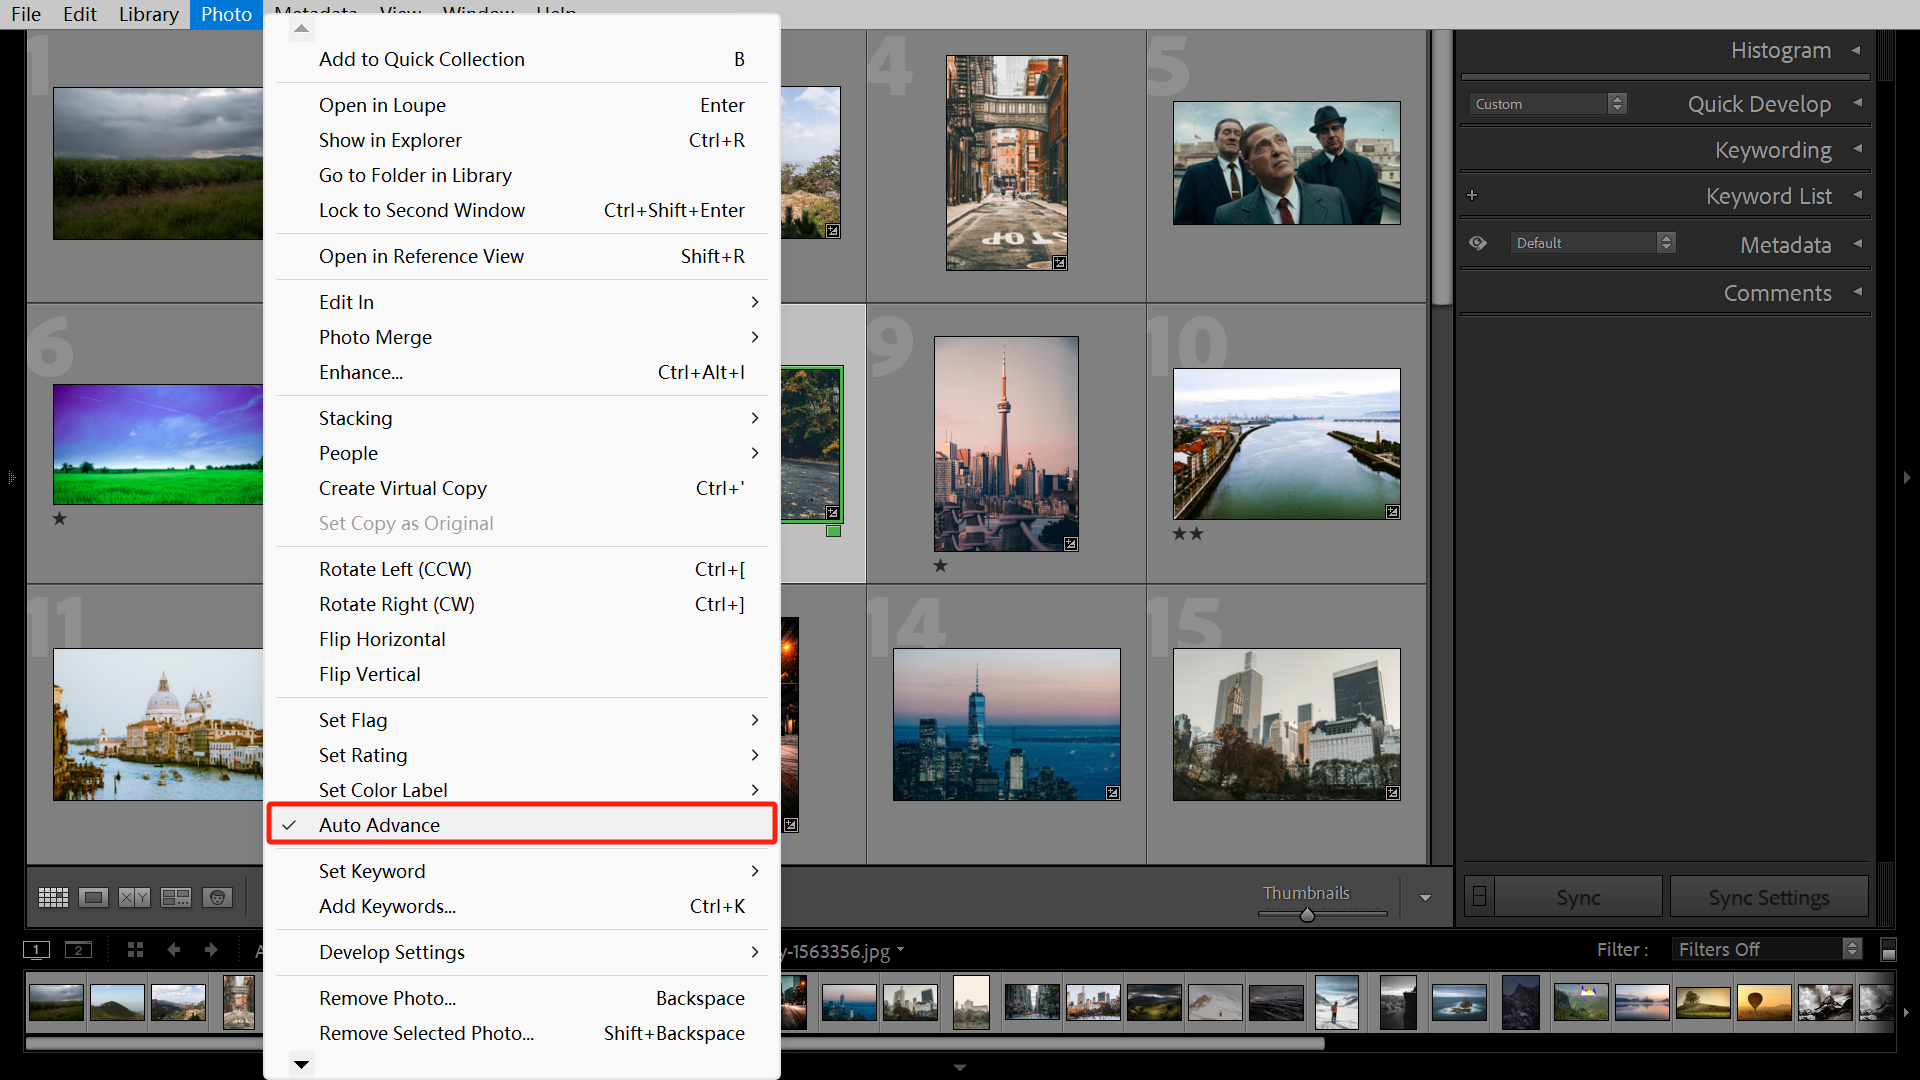
If you want to automatically advance after flagging (or unflagging), go to the Lightroom Classic menu in the Library module and make sure "Auto Advance" is checked.
If you don't have "Auto Advance" checked, you can also hold down the "Shift" key when using the flagging shortcuts.
Suppose you want to streamline your photo editing workflow and enhance your editing efficiency. In that case, you definitely don't want to miss out on the creative tool designed specifically for photographers and digital artists – TourBox.

You can easily perform rating and flagging operations on your photos using TourBox with just one hand, and you can also effortlessly adjust colors in your photos.
All you need to do is make simple configurations on TourBox, eliminating the need to memorize numerous keyboard shortcuts or engage in tedious operations.
You can watch the video below to see how TourBox simplifies every step of photo post-production, or visit our dedicated photo editing page for more information.
7. Screen Mode Lightroom Shortcuts
- L: Lights Out mode. Pressing the L key once dims the background except for the photo, pressing it again makes the background completely black, and pressing it a third time restores the normal view. You can also use "Ctrl/Cmd + Shift + L" to toggle between a dimmed background and a normal view.
- F: Toggle between fullscreen preview mode and normal mode.
8. Copy and Paste Lightroom Shortcuts
- Ctrl/Cmd + Shift + C: Copy settings.
- Ctrl/Cmd + Shift + V: Paste settings.
- Ctrl/Cmd + Alt/Opt + V: Paste the settings from the previous photo.
Further Reading:
Mastering Batch Editing in Lightroom Classic: A Comprehensive Guide
9. Overlay Mask Lightroom Shortcuts
- O: Show/hide selected overlay mask.
10. Crop Lightroom Shortcuts
- R: Enter or exit the crop overlay tool.
Cropping is a great way for photographers to fine-tune their compositions, and using guides makes the process even more convenient.
Lightroom offers up to 8 different guide overlays, including the basic rule of thirds, grid lines, diagonal method, golden ratio, Fibonacci spiral, and triangle method.
These guides cover a wide range of composition techniques and can fulfill your needs to a great extent. But how do you switch between these guides?
In crop mode, simply press the "O" to toggle through the different guides. Pressing "Ctrl+O" allows you to change the orientation of the guides.
Additional Tip:
While cropping, holding down the "Ctrl/Cmd" key allows you to switch to the angle tool.
Final Thoughts About Lightroom Shortcuts
In this tutorial, we introduced ten sets of commonly used shortcuts in Lightroom Classic. These shortcuts can help you use Lightroom Classic more efficiently and increase your productivity.
Of course, if you're looking for a smoother editing experience during photo post-processing, you might consider TourBox. Especially the latest product, TourBox Lite, which offers great value for money and is particularly suitable for first-time users of TourBox.

That concludes our tutorial on Lightroom shortcuts. We hope this has been helpful to you.