What Is Long‑Exposure Photography and How to Shoot It?
Have you ever wished you could turn car headlights at night into glowing trails or make a rushing waterfall look like smooth silk?
Long exposure photography lets you capture those almost impossible moments, giving ordinary scenes a touch of magic.
In this article, we'll explain what long exposure photography is and share some easy tips for shooting it. If you're new to this technique, let's dive in together!

In this article, you will learn:
- What Is Long Exposure Photography?
- How to Do Long Exposure Photography?
- What Scenes Work Best for Long‑Exposure Photography?
- Extra Tips for Long‑Exposure Photography
What Is Long Exposure Photography?
Long‑exposure photography is a technique where you slow down your shutter speed so the camera's sensor (or film) keeps gathering light for a longer time.
By leaving the shutter open longer, your camera records motion in ways our eyes can't see — think blurry moving objects, bright light trails, or soft, flowing water.
Instead of freezing one split‑second moment, you capture changes over time. That's the magic of long exposures.
There are two key ideas to understand:
1. Recording Motion over Time
- Any light that moves during the exposure (like car headlights, stars, or a flashlight) will draw continuous streaks in your image.
- Any object in motion (like flowing water, drifting clouds, or walking people) will blur or even disappear if it moves fast enough or the exposure is long enough, creating smooth, ghostly effects.
2. Freezing Still Subjects
- Anything that stays perfectly still (like buildings, rocks, or a person who holds very still) stays sharp and clear.
That contrast between sharp, static elements and soft, moving ones makes long‑exposure shots so striking.
How to Do Long Exposure Photography?
1. Use a Sturdy Tripod
A solid tripod is essential for long exposures. Even the slightest shake can blur your entire image, so make sure your camera is rock steady.
Further Reading:
2. Set Your Shutter Speed
- Switch your camera to Manual (M) mode or Shutter Priority (Tv/S) mode.
- Choose a slow shutter speed — anywhere from 1 second up to 30 seconds, or use "Bulb" mode. The exact time depends on available light, how fast your subject is moving, and the look you want.
- Close down your aperture (use a higher f‑number) to avoid overexposure and to gain more depth of field.
- Keep your ISO as low as possible (for example, ISO 100) to minimize noise and preserve image quality.
3. Add an ND Filter for Daylight
- Think of an ND filter as sunglasses for your lens. It cuts down incoming light.
- Filters come in different strengths, like ND8 (3‑stop reduction) or ND1000 (10‑stop reduction). Pick one based on how bright it is outside and how slow you want your shutter speed.
- Screw the filter onto your lens to dramatically reduce light. This makes it possible to shoot long exposures even in daylight, so you can turn daytime waterfalls into silky streams.
Further Reading:
4. Avoid Camera Shake
- Use a remote shutter release or your camera's built‑in timer to fire the shutter without touching the camera. This is especially important in Bulb mode, where exposure lasts as long as you hold the button.
- Turn off any image‑stabilization or vibration‑reduction features when your camera is on a tripod. These systems can introduce tiny movements that ruin sharpness.
- On DSLRs, enable "Mirror Lock‑Up" so the mirror flips up before the exposure starts. This further cuts down on vibration.
5. Enable Long‑Exposure Noise Reduction
- The longer your sensor is active, the more heat builds up, which creates noise (random bright pixels called "hot pixels").
- Turn on your camera's long‑exposure noise‑reduction setting to automatically subtract this noise and give you cleaner images.
Further Reading:
How to Reduce Noise in Images: Tips for Shooting and Editing
6. Be Patient and Experiment
Every scene is different. Play with shutter speeds, apertures, and filter strengths until you get the look you want. Take test shots, review them, and adjust. Patience pays off with stunning, silky results!
What Scenes Work Best for Long‑Exposure Photography?
Low light is your best friend for long exposures. Moving city lights, vast starry skies out in the country, or waves crashing on the shore all make great subjects. Here are five fun ideas to try:
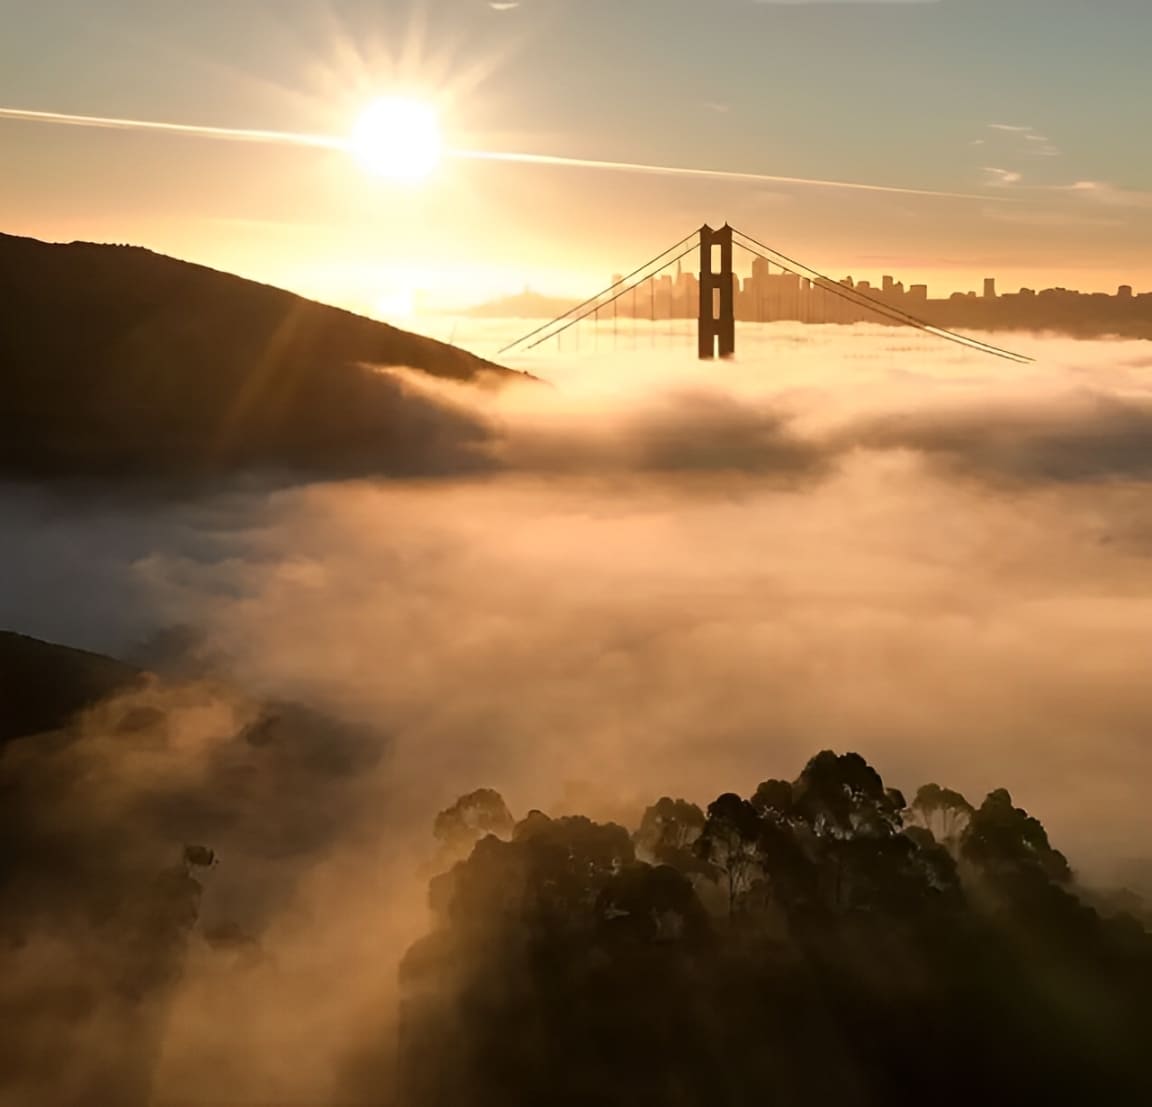
1. Capturing the Ethereal Fog
When you're inside the fog, use a wide‑angle or standard lens to highlight nearby details emerging from the mist. If you shoot from outside the fog, a mid‑telephoto lens helps you layer mist and clear air in your composition.
For an otherworldly effect, like fog rolling over a cliff, try stopping down to f/16 and using a 10–15 second exposure. Keep your ISO as low as possible to avoid noise from the long shutter time and small aperture.
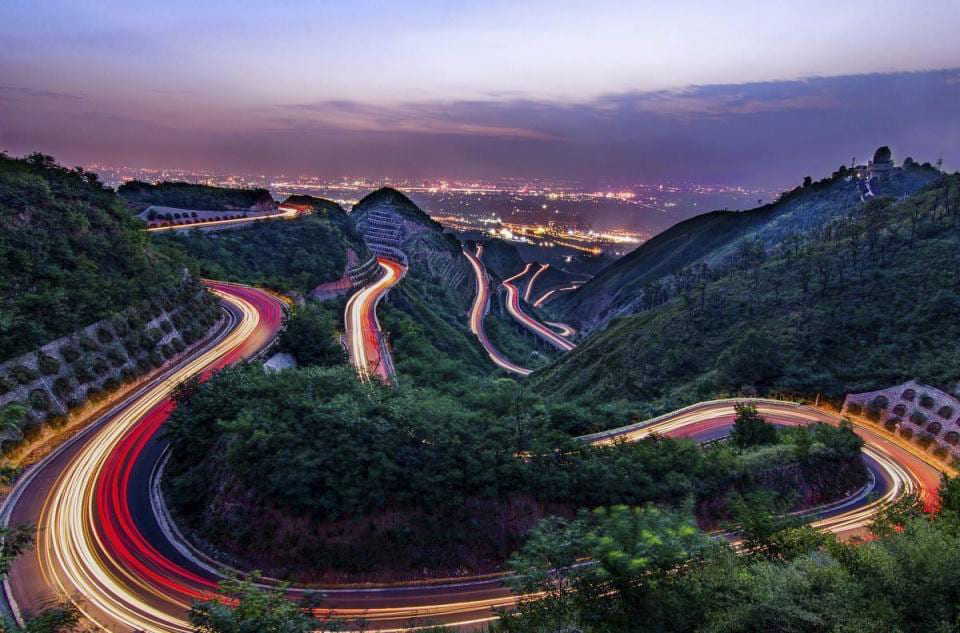
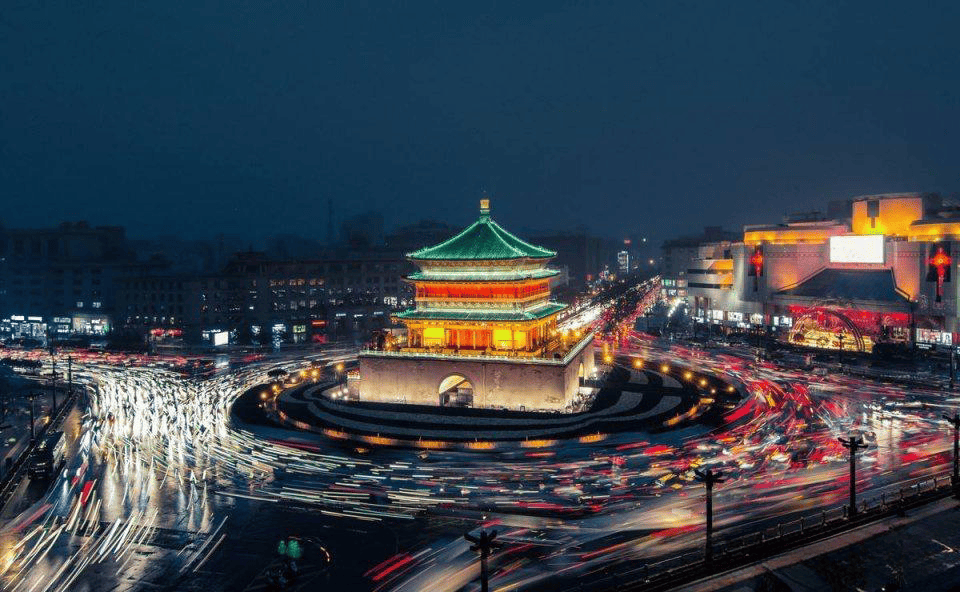
2. Tracing City Light Trails
Shoot at dusk or dawn so you catch both car headlights and the soft colors of the sky. The movement of cars and even pedestrians adds energy and life to the scene.
You can shoot from street level for a dramatic, up‑close view, or find a rooftop or balcony for a bird's‑eye perspective on the flowing traffic below.

3. Finding Serenity in Water
The best time to photograph water is just before sunrise or right after sunset, when light levels allow for long exposures without overexposing the shot.
Especially during fall mornings and evenings, the sky often lights up with beautiful colors.
A long exposure smooths waves into a glass‑like surface, but it can also leave the frame feeling empty. Look for a static element: a rock, a fallen leaf, or a perched bird, to give your image more interest.

4. Revealing the Splendor of Fireworks
Switch to continuous shooting and set your lens to manual focus at infinity. Keep ISO between 200 and 400 to avoid grain.
Since a single firework takes about 5–6 seconds from launch to fade, and its peak beauty happens in the first 2–3 seconds, try exposures in that 2–3 second range to capture the burst at its best.

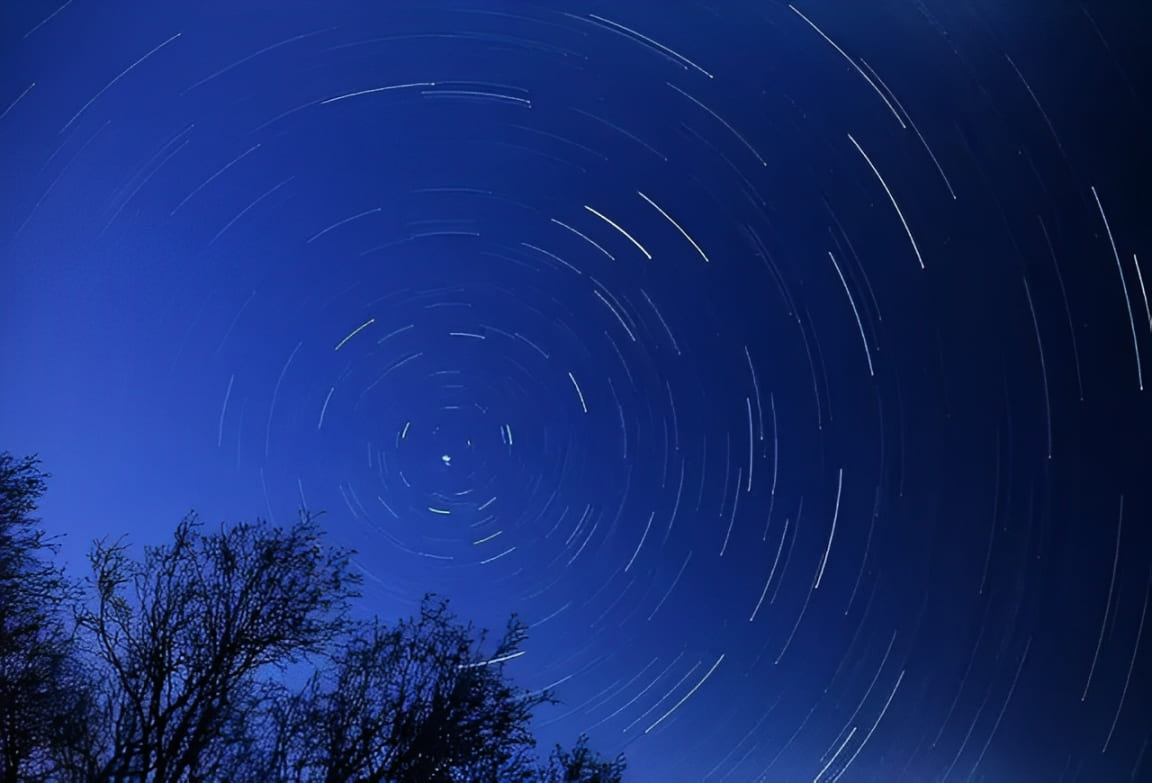
5. Painting with Star Trails
On a moonless night, open your aperture wide and raise your ISO to capture faint starlight. Then leave your shutter open for an hour or more to record the stars' circular paths.
To add depth and drama, briefly use a flashlight to illuminate a tree, rock, or other foreground subject. This mixes static detail with the dynamic sky.
Give these ideas a try on your next shoot. With a steady tripod and some patience, you'll turn ordinary scenes into magical, long‑exposure masterpieces.
Extra Tips for Long‑Exposure Photography
Here are a few extra tips to help you get the most out of your long‑exposure shots:
- First, use a solid tripod and a cable (or remote) shutter release. Keeping your camera rock‑steady during a long exposure is the key to sharp images. Even the tiniest shake can blur everything.
- Second, think about contrast. Blurry motion looks most striking when it's set against something totally still. Try to include at least one unmoving subject, like a rock, a tree branch, or a parked car, to make the soft blur pop.
- Because you're working with slow shutter speeds, even a tiny bit of bright light can overexpose your shot. That's why it's smart to shoot in low‑light situations — overcast days, dawn, or dusk — when the light is naturally softer. Remember, some glow in the sky (city lights or sunrise colors) can actually add mood to your photo.
- Finally, when you do need to shoot in stronger light, slap an ND filter onto your lens. It works like sunglasses for your camera, cutting down light so you can stretch out your shutter time without blowing out your highlights.
You might still see noise‑like artifacts in your long‑exposure shots, so strong post‑processing is just as important as good shooting techniques.
If dragging sliders with your mouse feels slow and tiring, give the TourBox Creative Console a try.

Loved by photographers, digital artists, and content creators, TourBox feels more like a game controller than a mouse. It gives you precise +1 and –1 adjustments and satisfying tactile feedback.

Best of all, TourBox keeps your eyes on the screen and your creative flow uninterrupted. To see how it can speed up your photo editing, check out our Photo Editing page for more details on TourBox's features.