The Ultimate Guide to ND Filters in Photography
For photographers, it's essential to know how to use ND filters (Neutral Density Filters), understand the different types, and work out their conversions. Without further ado, let's explore all that in this article.

In this article, you will learn:
- What Is an ND Filter?
- Why You May Need an ND Filter?
- Main Types of ND Filters
- How to Read ND Filter Ratings?
- What Can You Use an ND Filter For?
- How to Calculate ND Filter Settings?
- Extra ND Filter Tips
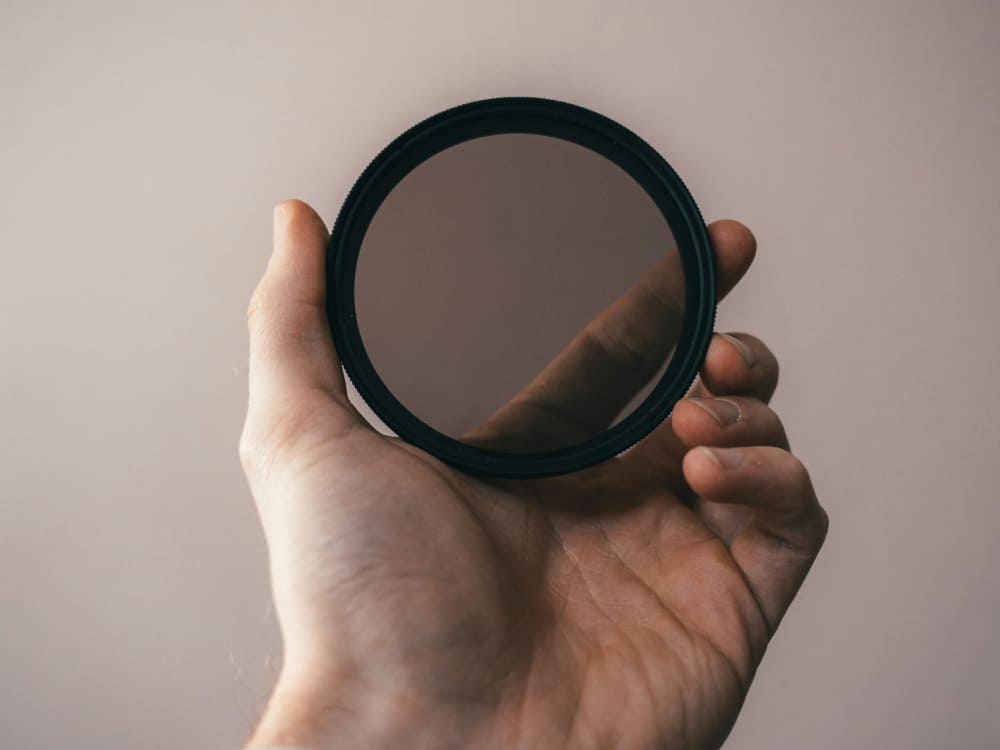
What Is an ND Filter?
An ND filter, also known as a neutral density filter, is a type of light-reduction filter. It cuts down light without changing its color (ideally).
It works by evenly reducing all wavelengths of light. It won't shift your image's color balance.
It's made from special optical materials that absorb or reflect light across the spectrum. ND filters don't favor any color — red, green, or blue light all get dimmed equally.
It lets you use slower shutter speeds or wider apertures in bright conditions without overexposing your shot.
Why You May Need an ND Filter?
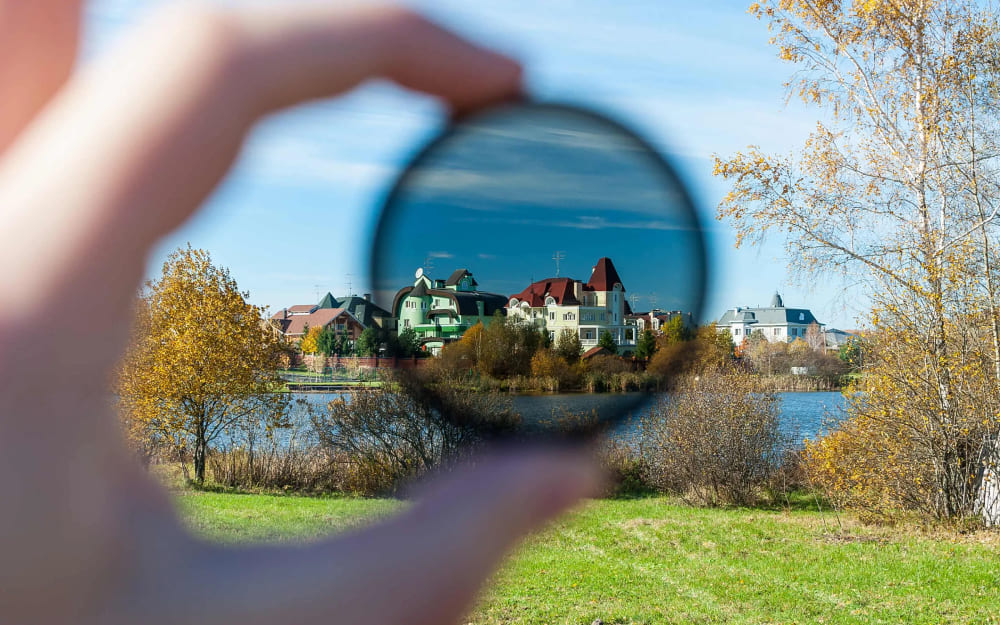
Imagine slipping a pair of sunglasses onto your camera lens. That's exactly what an ND (Neutral Density) filter does. By reducing the amount of light entering your camera, it opens up creative possibilities that you can't achieve otherwise.
1. Smooth Out Motion
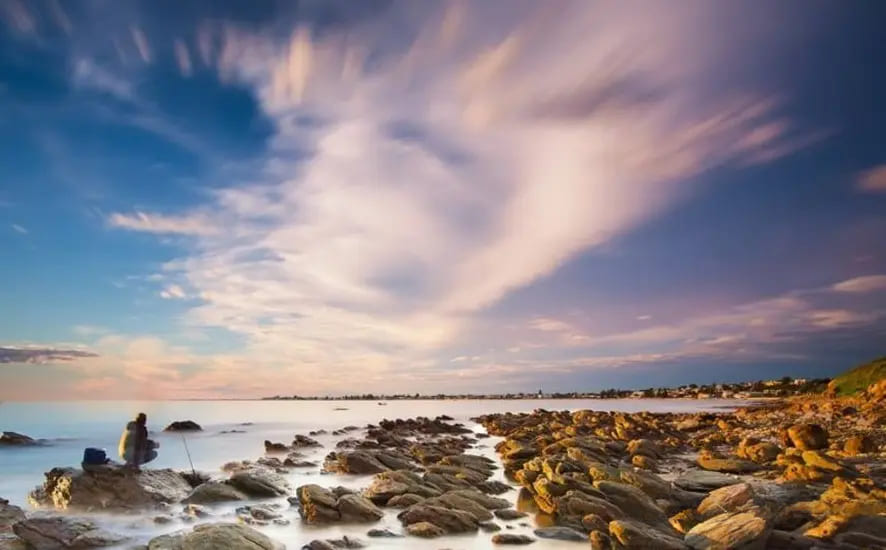
Have you ever wanted clouds to streak across your sky or waterfalls to look like flowing silk? In bright sunlight, long exposures will just overexpose the shot.
An ND filter darkens the scene enough that you can drag your shutter for several seconds (or even minutes) without blowing out the highlights. The result? Dreamy landscapes, ghost‑free crowds, and endless creativity:
- Landscapes: Turn roaring rivers into soft ribbons, blur ocean waves into glassy mirrors, or let busy hiking trails empty out as people fade into ghostly blurs.
- City Scenes: Give busy streets a Zen‑like calm by letting cars and pedestrians streak through your frame, leaving behind a surreal, almost deserted look.
- Night & Creative Shots: From swirling star trails to light‑painting experiments, long exposures become your artistic playground.
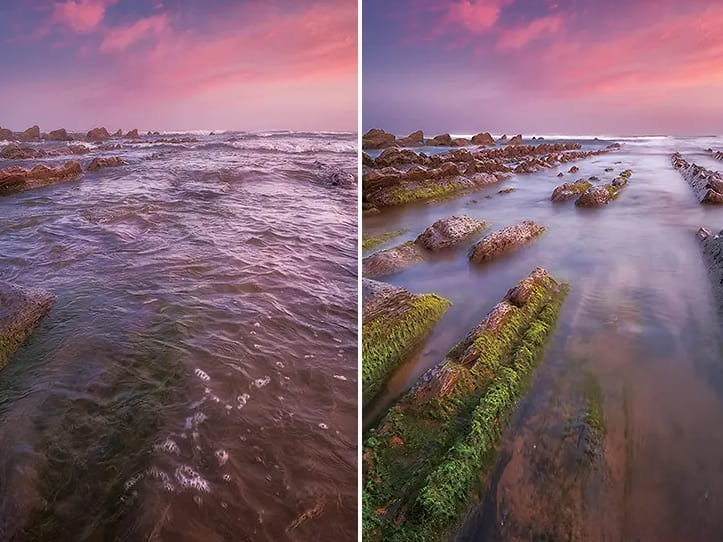
For example, in the comparison picture below, the left shot was taken without an ND filter. The right shot was taken with an ND filter.
2. Shoot Wide Open on Bright Days
Love that creamy background blur at f/1.4 or f/1.8?
Normally, on a sunny afternoon, even your camera's fastest 1/8000 s shutter and lowest ISO can't stop an over‑bright image. Throw on an ND filter, and you can keep shooting wide open while beautiful bokeh is intact, without your subject turning into a white blob.
3. Nail the Cinematic Shutter Speed
Filmmakers follow the "180° shutter rule," which means at 24 fps you shoot around 1/50 s shutter to get natural motion blur. In daylight, that rule is impossible without overexposure, unless you use an ND filter. It's the must‑have accessory for any videographer chasing that movie‑style look.
4. When You Can't or Don't Want to Touch ISO or Aperture
Sometimes you need a specific depth of field or want to keep noise levels down. But you still crave motion blur.
An ND filter lets you slow your shutter speed without changing your aperture or ISO, so you get the effect you want without compromising image quality.
Main Types of ND Filters
ND filters come in two basic styles:
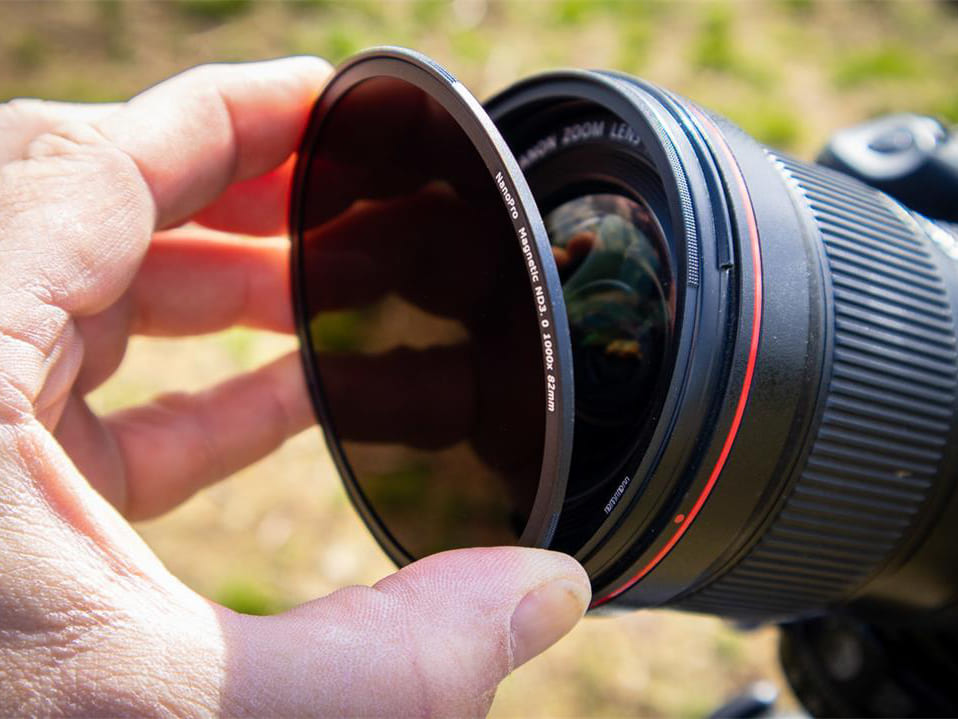
1. Screw‑on (Circular) ND Filters
Pros:
- Easy to use—just screw it onto your lens like a UV filter.
- Compact and lightweight.
- Usually more affordable.
- Less chance of light leaks.
Cons:
- You need a different size for each lens (or buy the largest size plus step‑up rings, which can cause vignetting).
- Stacking multiple filters makes vignetting worse.
- Thicker filter rings can still vignette on ultra‑wide lenses.
Best for: Beginners, single‑lens setups, or anyone who values portability.
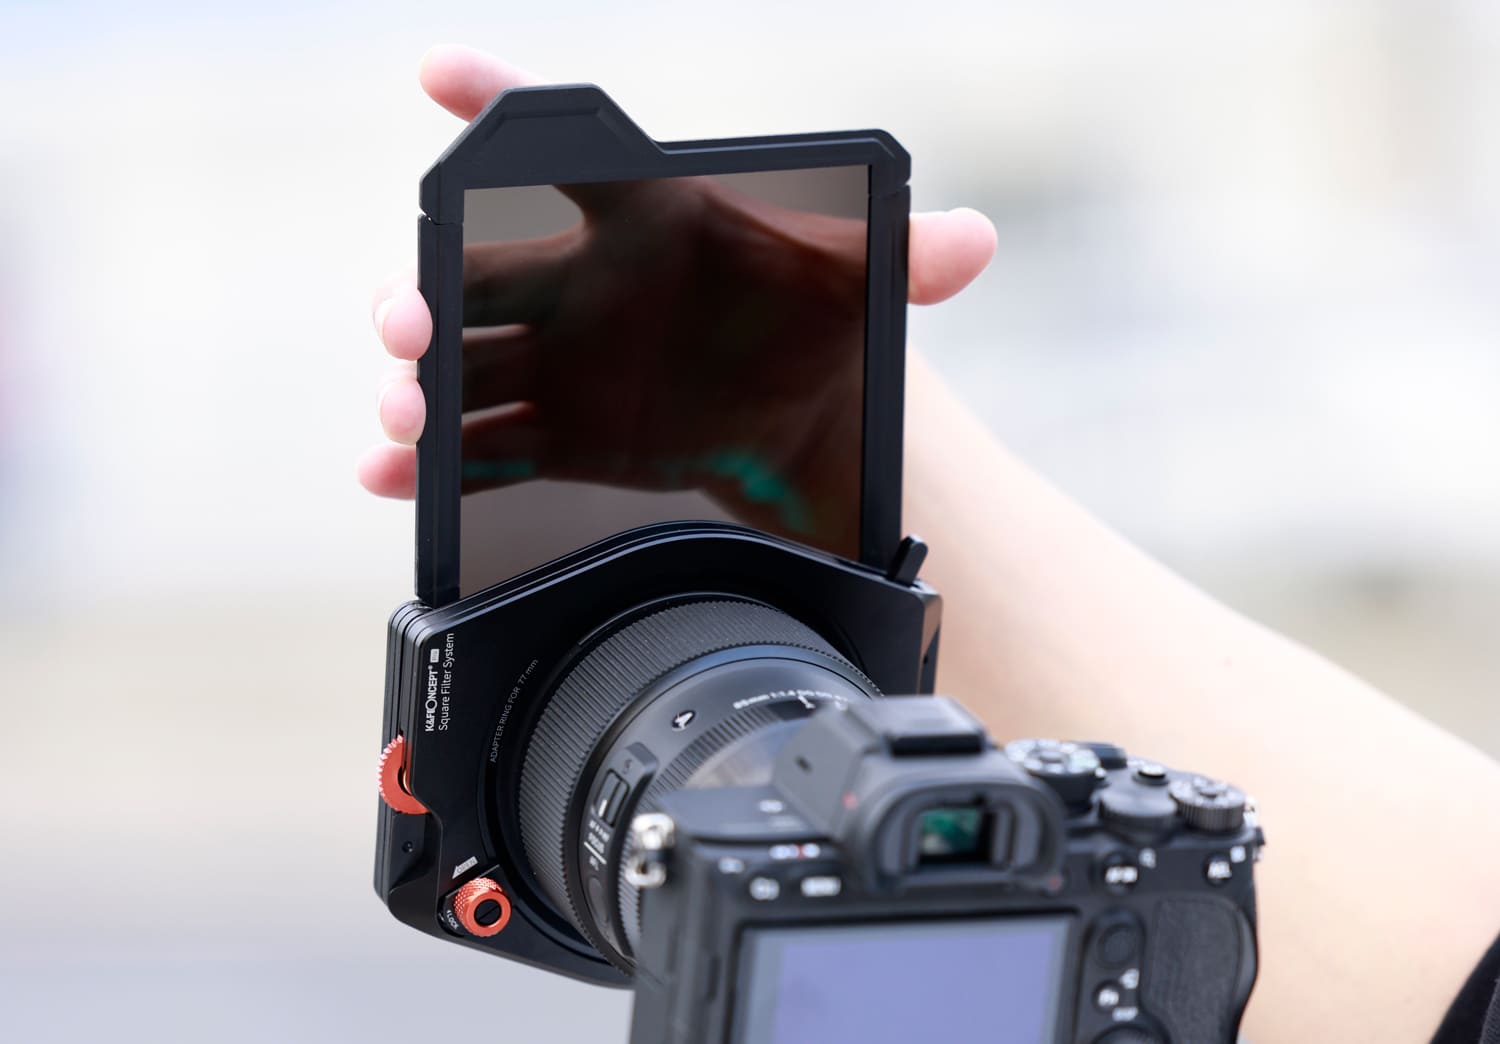
2. Square (Drop‑in) ND Filters
Pros:
- One set works on all your lenses with a universal holder and the right adapter rings—more cost‑effective.
- Easy to stack (for example, ND + graduated ND).
- Thin holders reduce vignetting on ultra‑wide lenses.
- Typically easier to clean.
- High‑end brands offer excellent optical quality.
Cons:
- You need to buy a filter holder and adapter rings separately.
- Bulkier to carry.
- Slightly more complex to set up.
- If the holder isn't tight, light can leak in around the edges (so be sure to block stray light).
Best for: Landscape pros, photographers with many lens sizes, anyone demanding top image quality, or those who combine filters (ND + GND).
How to Read ND Filter Ratings?
ND filters are labeled as "ND" plus a number. The higher the number, the stronger the light reduction.
ND filter ratings you'll commonly see include ND2, ND4, ND8, ND16, ND32, ND64, and ND1000. These numbers show how many times the light is cut:
- ND1000 = 10 stops of light reduction (2¹⁰ ≈ 1000)
- ND2 = 1 stop (light is cut to 1/2)
- ND4 = 2 stops (light is cut to 1/4)
- ND8 = 3 stops (light is cut to 1/8)
For example, if your normal exposure is 1/100 s, adding an ND1000 filter means you need 1/100 s × 1000 = 10 s to get the same exposure without over‑brightening.
If the math seems tricky, here's a quick reference:
| ND Rating | Stops of Reduction | Light Transmitted | Typical Uses |
|---|---|---|---|
| ND2 | 1 | 1/2 | Slight light reduction (great for cloudy days) |
| ND4 | 2 | 1/4 | Shooting flowing water on a sunny day (4× longer shutter) |
| ND8 | 3 | 1/8 | Slow‑shutter effects in bright light (like misty waves) |
| ND16 | 4 | 1/16 | Capturing car light trails at noon |
| ND32 | 5 | 1/32 | Wide‑aperture blur for video |
| ND64 | 6 | 1/64 | Daytime long exposures (e.g., moving clouds) |
| ND1000 | 10 | 1/1000 | Slow shutter in extremely bright conditions |
What Can You Use an ND Filter For?
1. Daytime
Using an ND filter in bright daylight lets you shoot long exposures. You can turn waterfalls, rivers, and ocean waves into silky-smooth scenes.
When you point your camera at the sky, the filter lets you use slower shutter speeds so fast-moving clouds streak across your frame, adding drama and motion to your shots.
2. Night
For city nightscapes, an ND filter lets you stretch your exposure time. This captures car light trails and other moving lights, giving your photos a dynamic, artistic feel.
3. Wide Aperture
On sunny days, it's almost impossible to shoot wide open without overexposing. An ND filter solves that.
It cuts the light so you can use a large aperture for shallow depth of field, perfect for portraits or close‑ups that make your subject pop against a soft, blurred background.
4. Video
When you shoot video in bright light, your shutter speed often jumps up to around 1/200 s. That makes your footage look too sharp and loses that natural motion blur.
With an ND filter, you can slow your shutter to about 1/50 s. This adds a gentle, realistic blur to moving subjects while keeping your video smooth and lifelike.
How to Calculate ND Filter Settings?
To adjust your camera settings when using an ND filter, first find your base shutter speed without the filter. Do this by metering the scene under normal light.
1. Manual Calculation
Each stop of the ND filter doubles your shutter time. Say your base shutter speed is 1/125 s:
- With a 1‑stop ND filter (ND2), your new shutter speed is 1/125 s × 2 = 1/60 s.
- With a 2‑stop ND filter (ND4), it doubles again: 1/60 s × 2 = 1/30 s.
- With a 3‑stop ND filter (ND8), double 1/30 s to get 1/15 s.
- For an ND1000 (10 stops), you multiply 1/125 s by 2¹⁰ (about 1000), giving you roughly 8 s.
For an ND1000 (10 stops), you multiply 1/125 s by 2¹⁰ (about 1000), giving you roughly 8 s.
2. Using an App or Online Calculator
The easiest way is to use a smartphone app or a web calculator. Just enter your base shutter speed and the ND filter's stop value. The app then tells you the new shutter speed.
If you shoot with ND filters often, these tools save you from doing the math yourself.
Extra ND Filter Tips
That's everything photographers need to know about ND filters. In real‑world shooting, though, theory only goes so far. You may run into all kinds of issues when using an ND filter. Below are some key points and tips to help you out:
- Focus & Framing: When you screw on a high‑strength ND filter (like an ND1000), your viewfinder will go almost pitch‑black. Always set up your shot and lock in focus (switch to manual focus first) before adding the filter.
- Exposure Mode: Use full manual mode. Once the filter's on, your camera's meter will struggle or give wrong readings. Dial in your aperture, shutter, and ISO by calculation or experience. You can also take a test shot, check the histogram, and tweak from there (you might need a much longer exposure, wider aperture, or higher ISO).
- Tripod & Remote Shutter: For long exposures, any tiny shake blurs the image. Use a sturdy tripod and a remote trigger or cable release. Turn off any lens or in‑body stabilization, too.
- Watch for Color Casts: Even good ND filters can add a slight tint (blue, magenta, or green). Buy from reputable brands and fix any color shifts in post with white‑balance tweaks. Cheap filters can have very strong casts.
- Vignetting: Stacking filters or using thick filters on ultra‑wide lenses can cause dark corners. Pick ultra‑slim filters or holders. If needed, crop or correct in post.
- Image Quality: Poor‑quality ND filters can soften your image and add flare. Invest in reliable brands like B+W, H&Y, Haida, NiSi, Lee, Breakthrough, or Kase.
- Filter Size: Make sure the filter size (in millimeters, like 58 mm or 77 mm) matches your lens's filter thread.
You'll still run into quirks even with top‑quality ND filters, but you can fix most flaws in post. For example, if your shots have a slight color cast, just correct the white balance during editing.
Those tweaks are easy on a single image, but sorting, editing, and color‑grading dozens (or hundreds) of photos one by one gets tedious fast. That's where a creative controller like TourBox really shines. It speeds up your post‑production and makes the whole process more enjoyable.

With TourBox, you can group your favorite adjustment sliders into a single TourMenu, so you don't have to hunt through panels for each tool. And TourBox offers even more shortcuts, letting you handle complex editing tasks with just one controller.

Interested? Check out our photo‑editing page to learn more.