Photoshop Curves: How to Harness the Power of the Color Grading King?
The curve tool is arguably the most commonly used tool in post-processing, not only in Photoshop but also in Adobe Camera Raw, Lightroom, and many other mobile editing apps.
The curve tool serves various purposes. It can be used to adjust the exposure and contrast of photos and perform color grading. It's safe to say that curves are the kings of color correction.
So, how do you utilize this powerful color correction tool? This tutorial will take Photoshop Curves as an example and delve into this essential tool for adjusting tones and colors.

In this article, you will learn:
Where Is the Curve Tool?
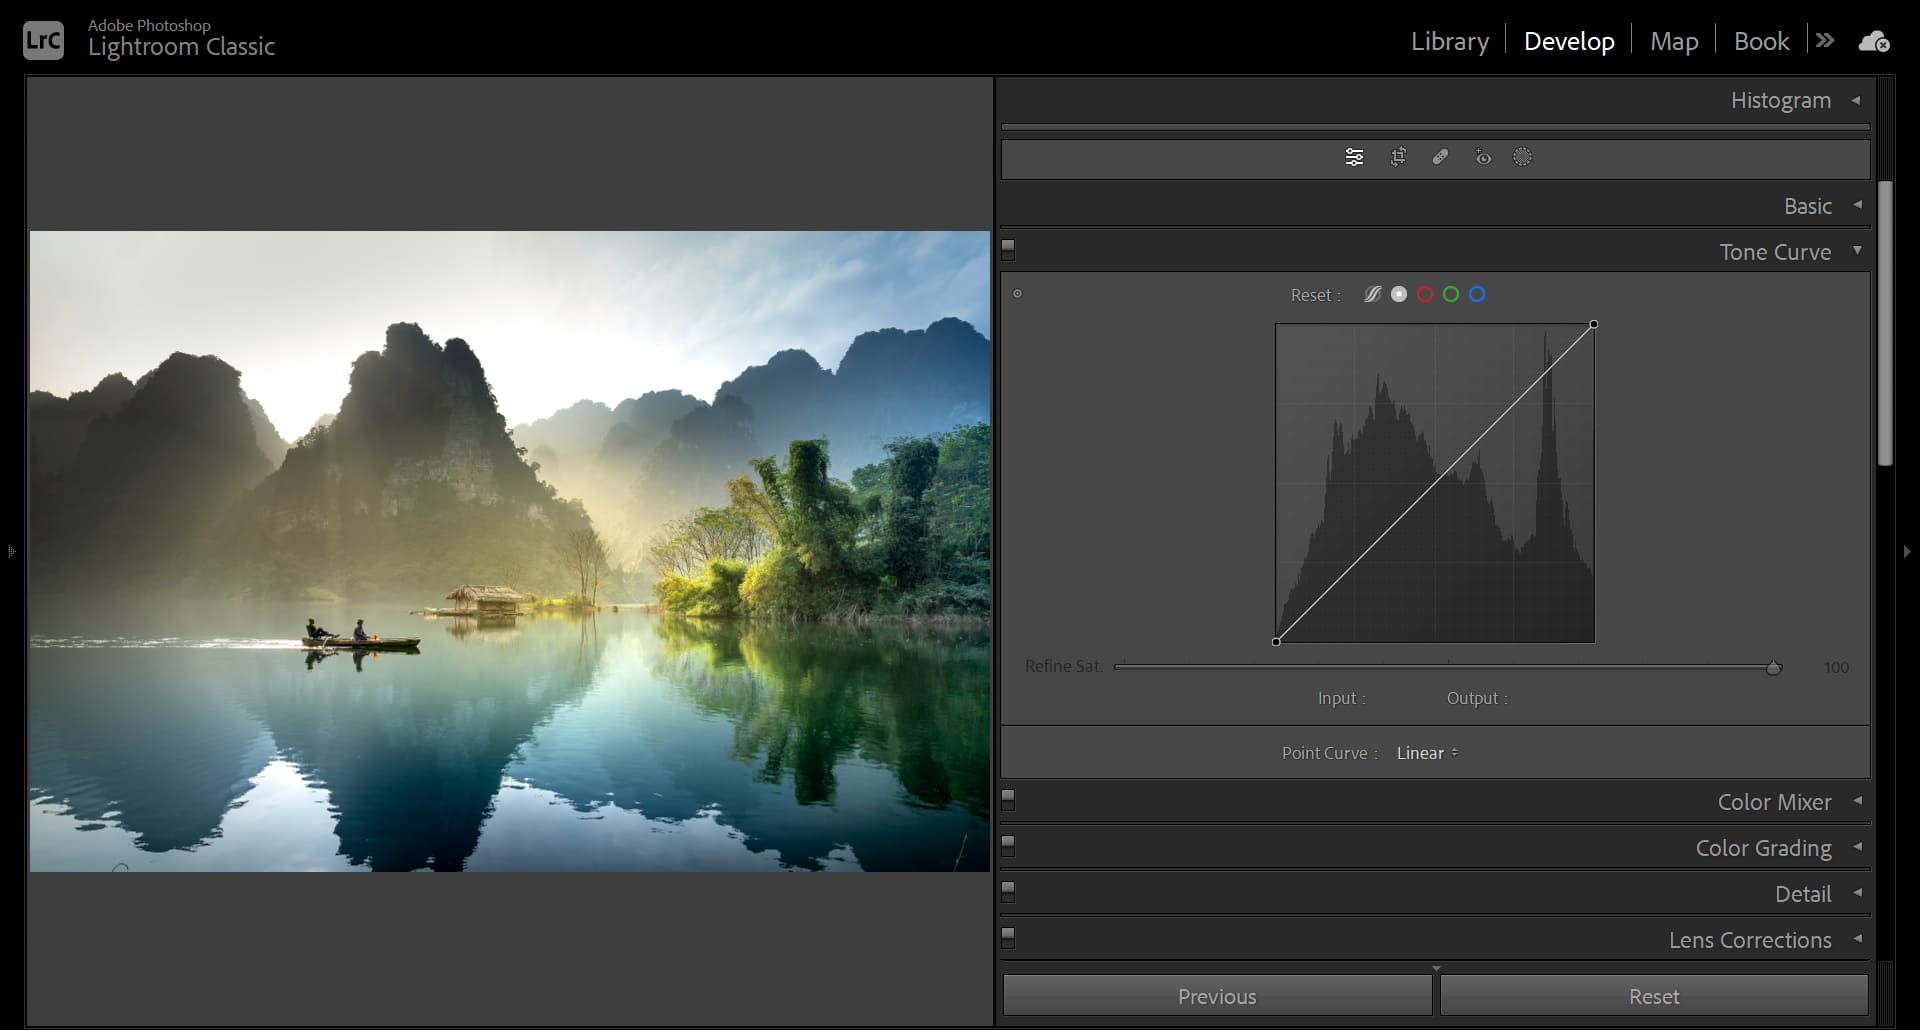
The Curve panel is located right after the Basic panel in both Lightroom and Adobe Camera Raw, highlighting its importance.
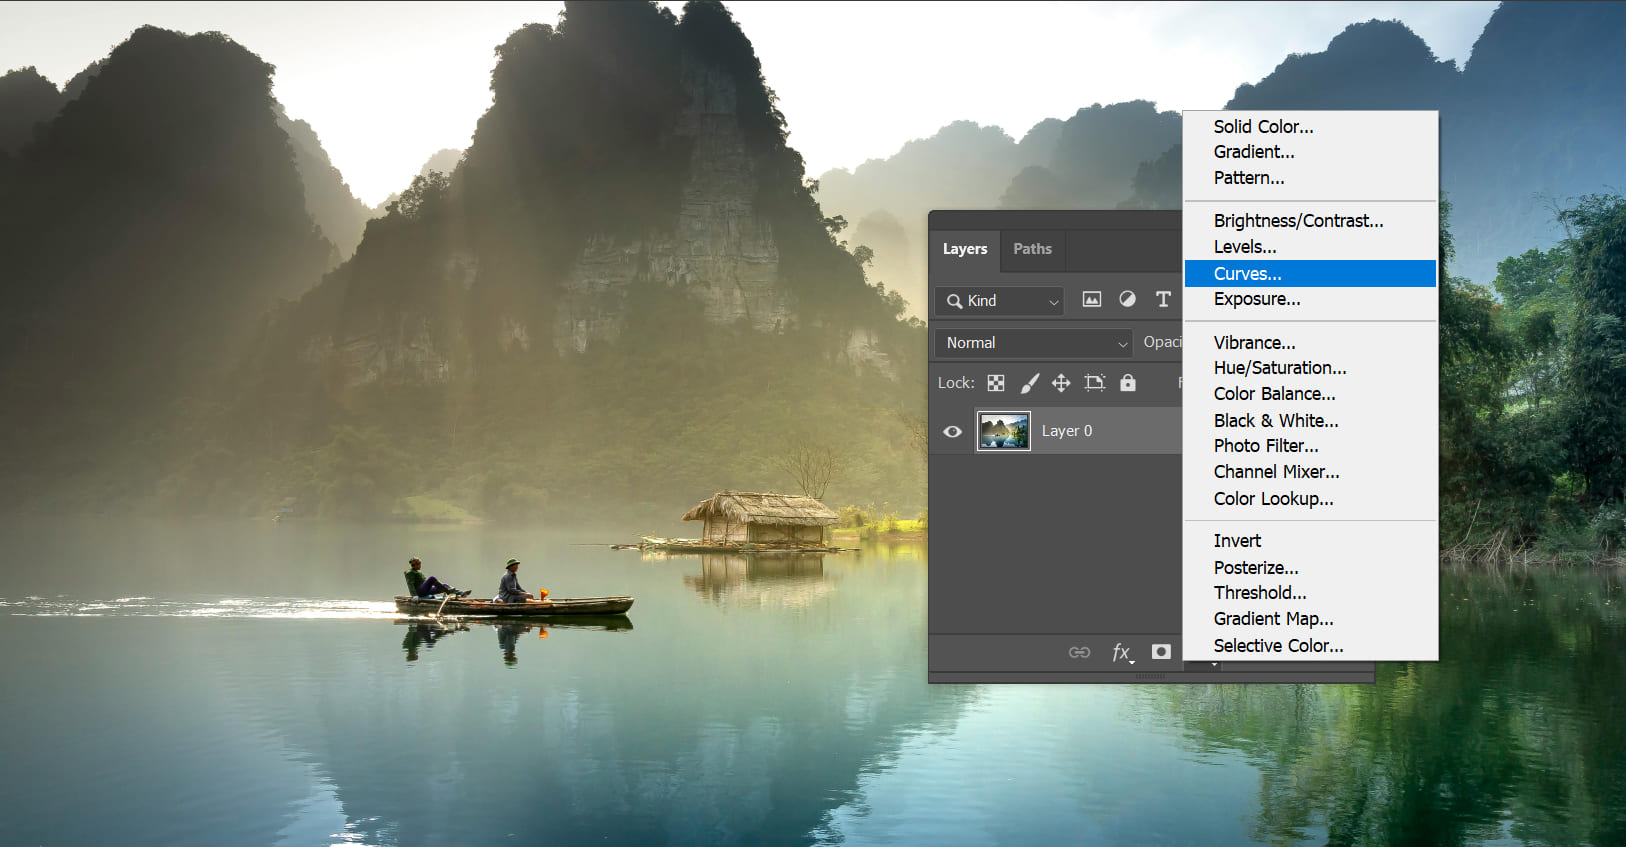
In Photoshop, the curve adjustment is typically done using an adjustment layer. In the bottom right corner of the Layers panel, you'll find the fourth icon, which is the "Create a new adjustment layer" option.
Clicking on it and selecting "Curves" allows you to create a "Curves adjustment layer" instead of directly modifying the curve on the original layer. This enables you to easily undo or revert any adjustments made.
How to Use the Photoshop Curves?
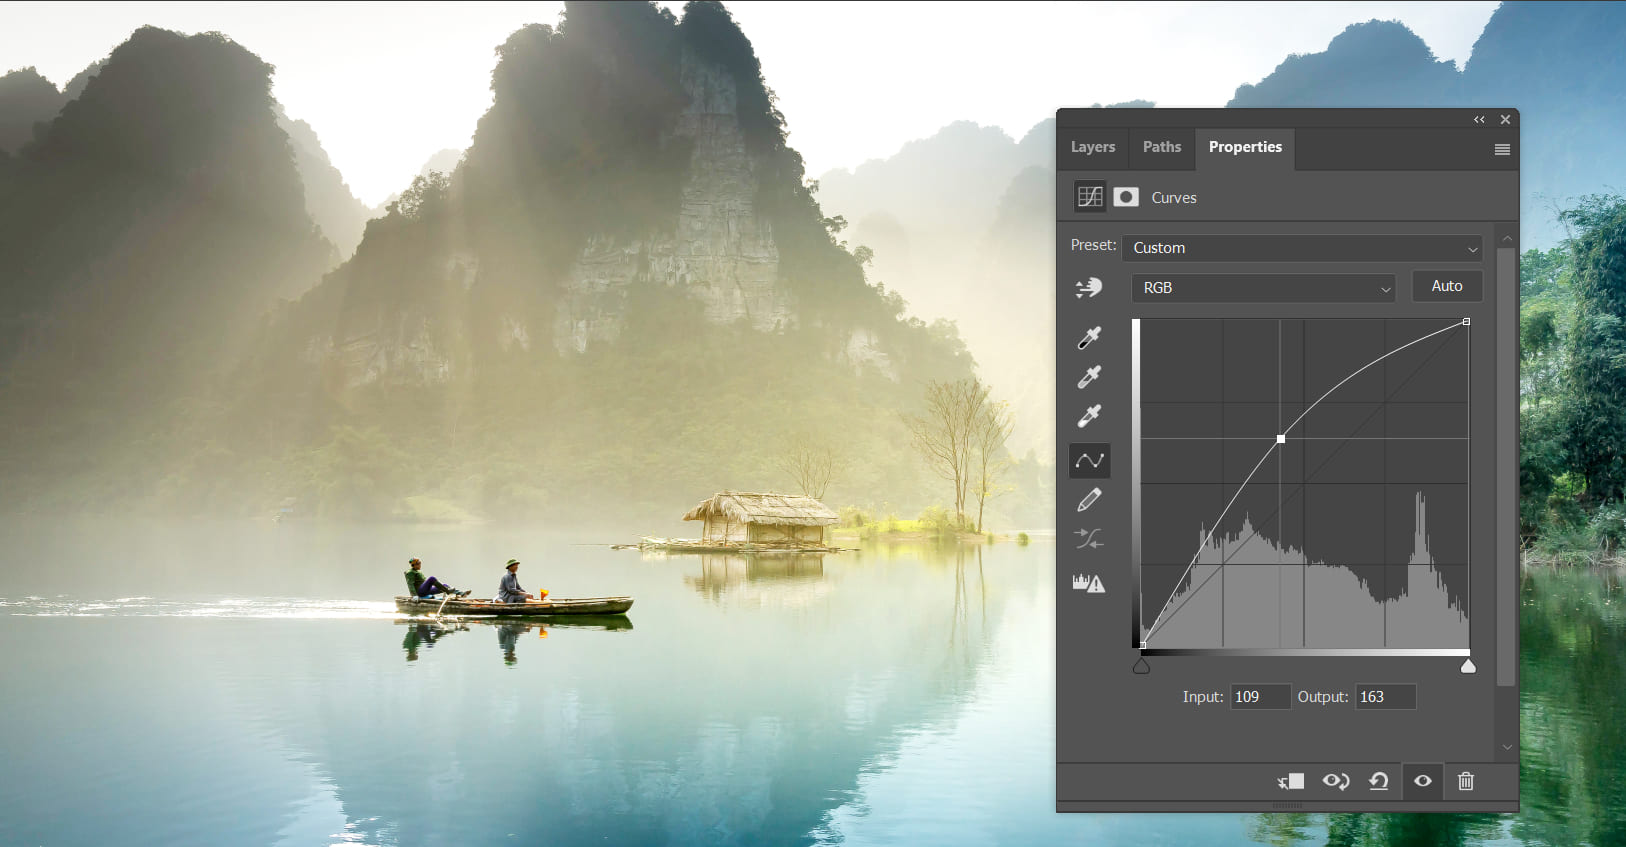
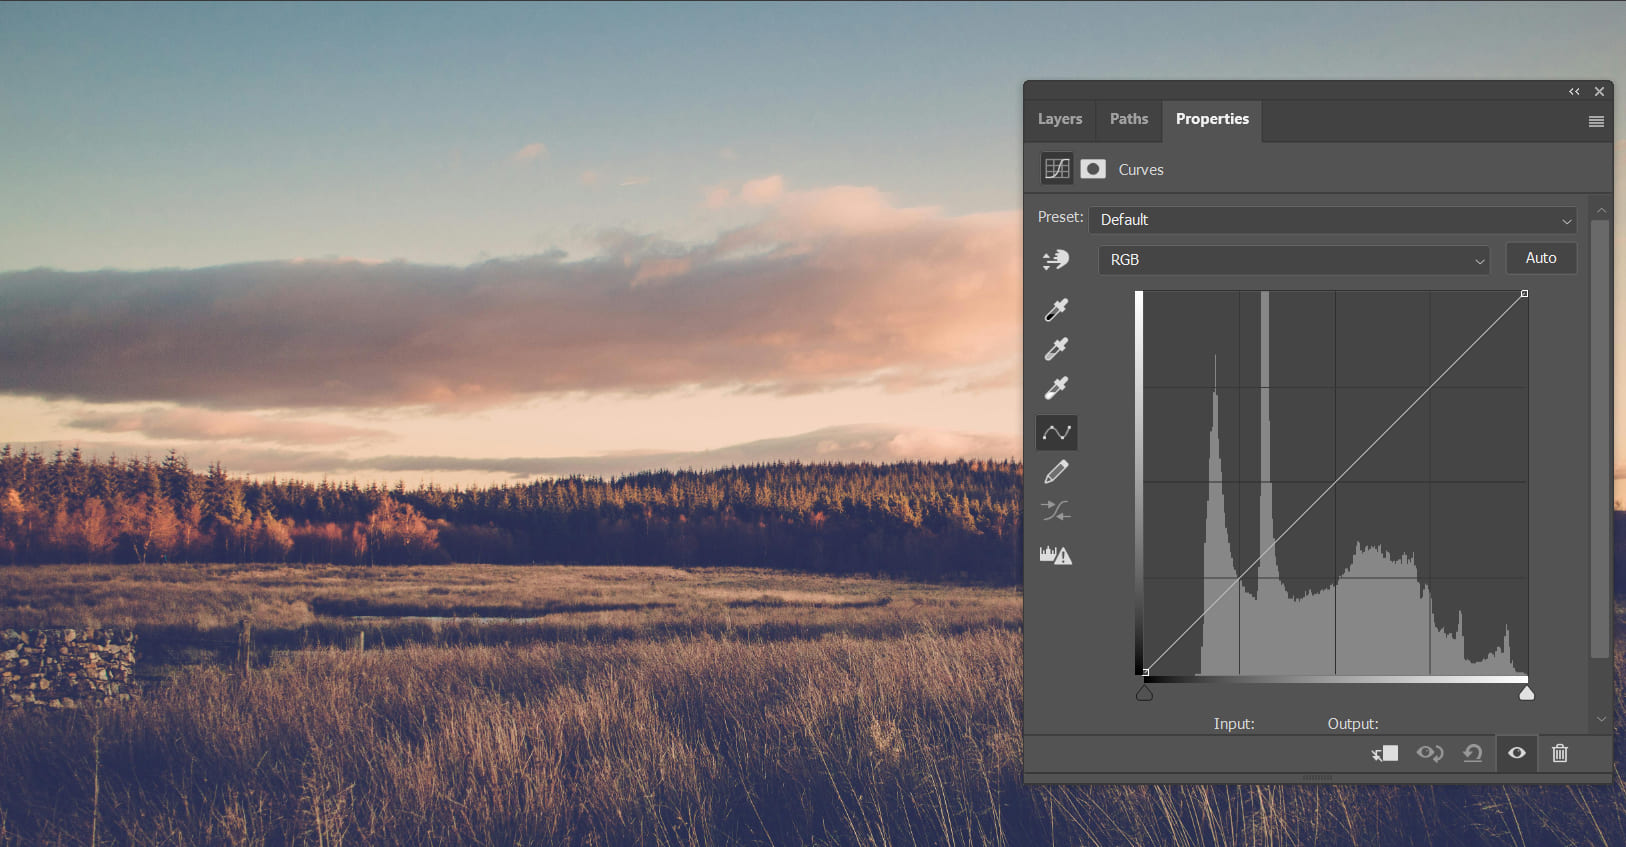
The Curve tool looks similar to a histogram, with both having a horizontal and vertical axis.
The horizontal axis represents the tonal range from black to white, indicating shadows, midtones, and highlights. The vertical axis represents the pixel quantity.
Unlike the histogram, the curve has a line running diagonally through it that can be adjusted up or down. By dragging this line, you can achieve the desired adjustments.
Feel free to experiment by dragging this line and observing the results. Moving the line upward brightens the image while moving it downward darkens it. Additionally, the effect varies depending on where you drag the line.
If you're having trouble pinpointing the exact location, you can click on the hand-like tool on the left side of the Curve panel.
Click on the desired area in the image, and it will automatically display the corresponding point on the curve. You can directly drag on the image to adjust the curve.
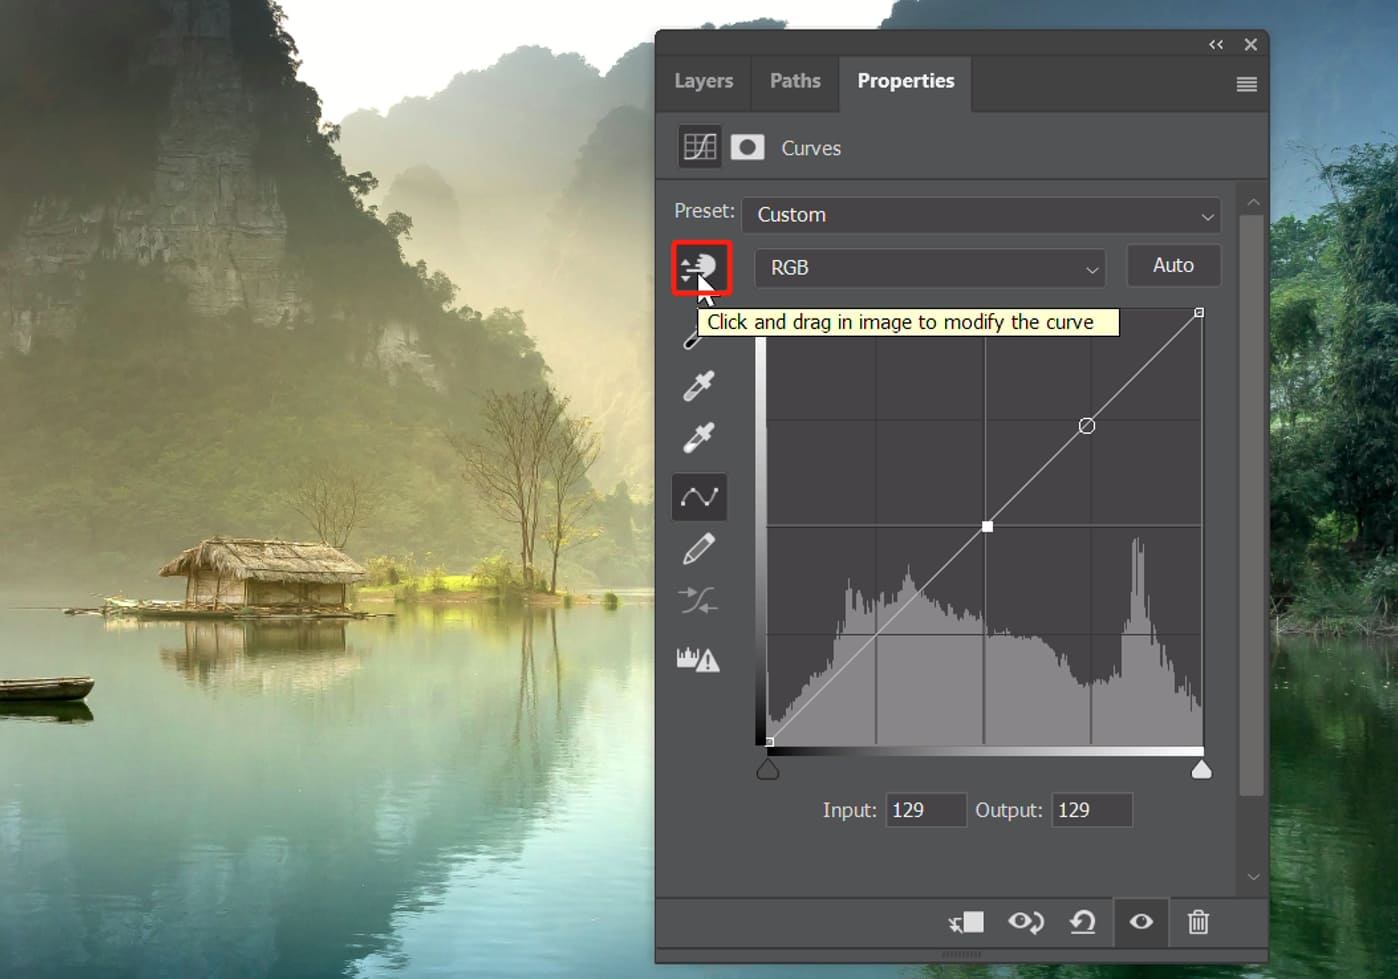
During the adjustment process, it's best to drag the adjustment point up and down rather than left and right.
Because when you drag left or right, the adjustment point changes. Dragging left or right actually changes the position of the adjustment point, which affects the scope of the adjustment.
If you sampled a point and then shifted it left or right while dragging, the final adjustment may not be applied to that specific point anymore.
Additional Tip:
This method is based on adjusting the brightness of the sampled point. So, while adjusting, if the brightness of that point changes, other areas with the same brightness as that point will also be affected. You can use masks to fine-tune the adjustments and have more precise control.
Of course, a single photo usually requires adjustments in multiple areas. In addition to adding extra curves, you can also make multiple adjustments on the same curve by adding multiple points. The most common technique is the five-point curve adjustment.
As the name suggests, you place five points on the curve. Start with two points at the endpoints, then add one in the middle, and finally place one between each pair of points. This divides the curve into four equal sections.
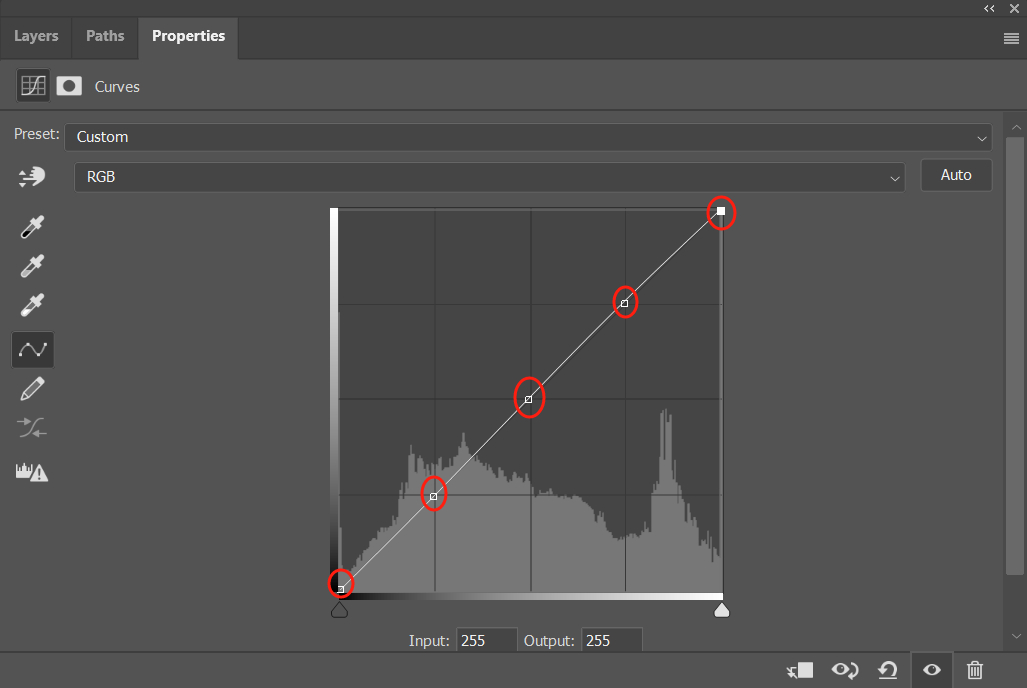
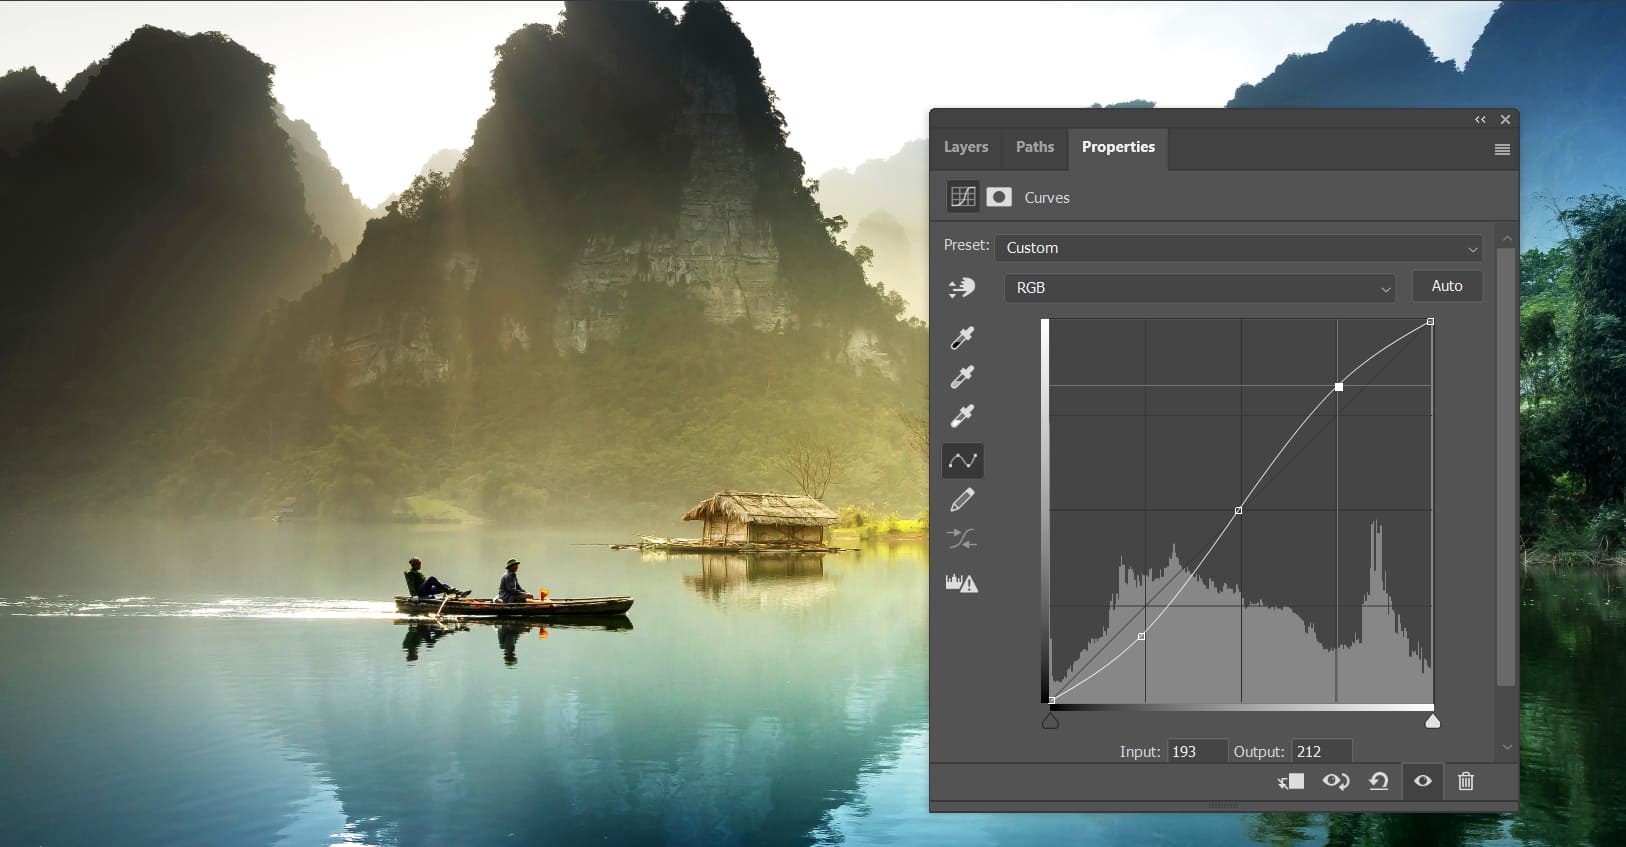
Then you have more flexibility in your operations. You can pull the upper part of the curve upwards and the lower part downwards, creating an "S" shape curve.
It's easy to see that the "S" curve brightens the highlights and darkens the shadows, making the bright areas even brighter and the dark areas even darker.
This effectively increases the contrast in the image. Conversely, if you have a reverse "S" curve, it reduces the contrast.
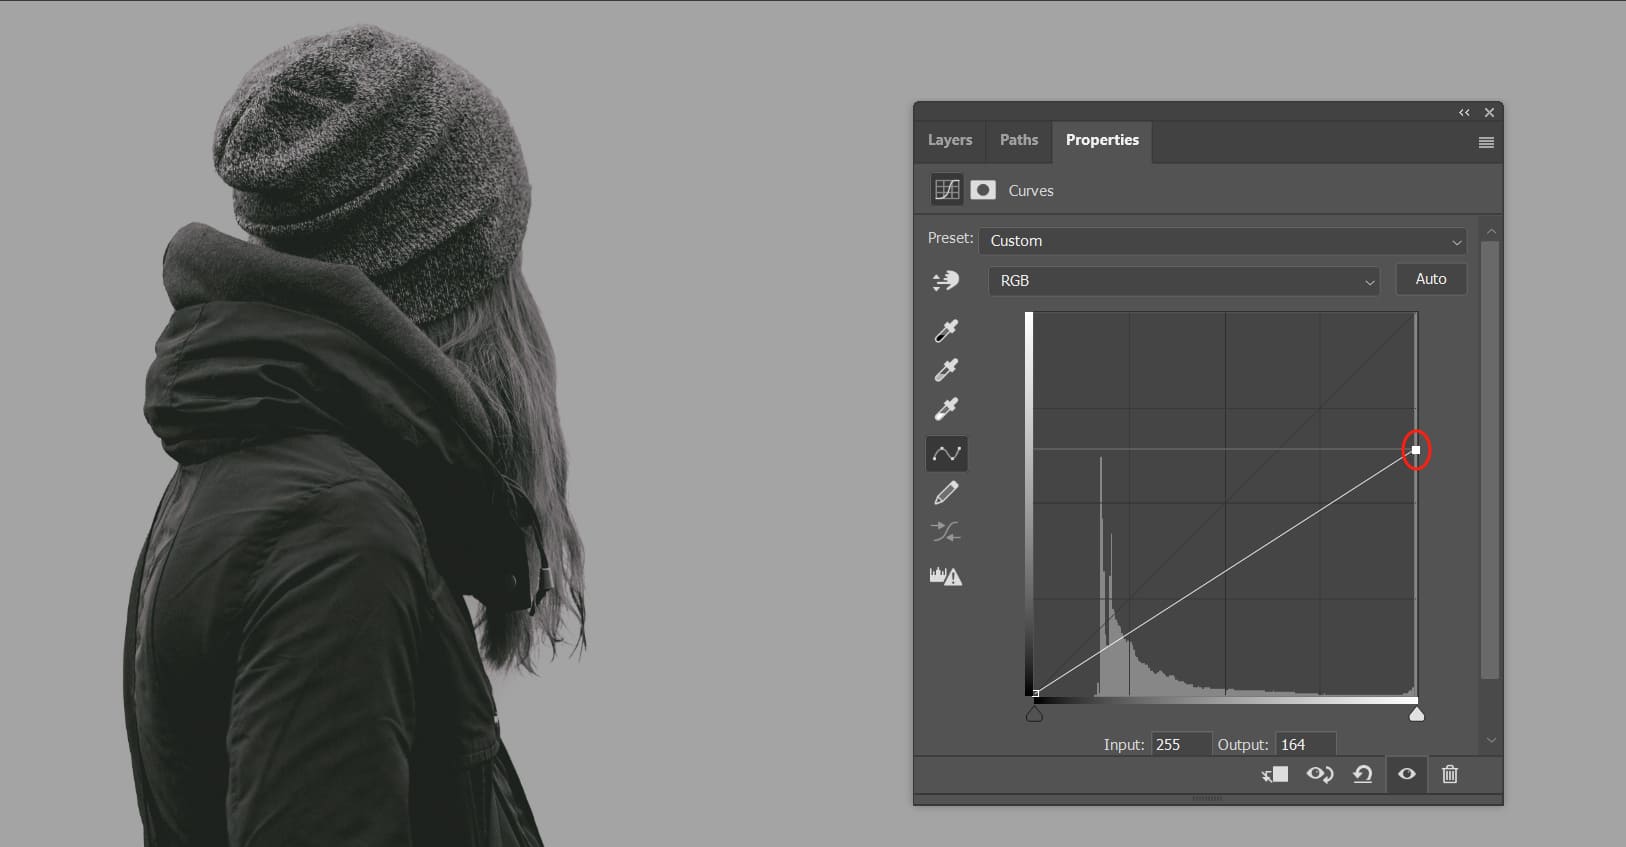
In general, you don't need to adjust the endpoints of the curve panel, but there are exceptions.
When either end of the curve has no information, meaning there are no pixels on one end, you can slide the sliders at the ends of the horizontal axis to the position where there is pixel information.
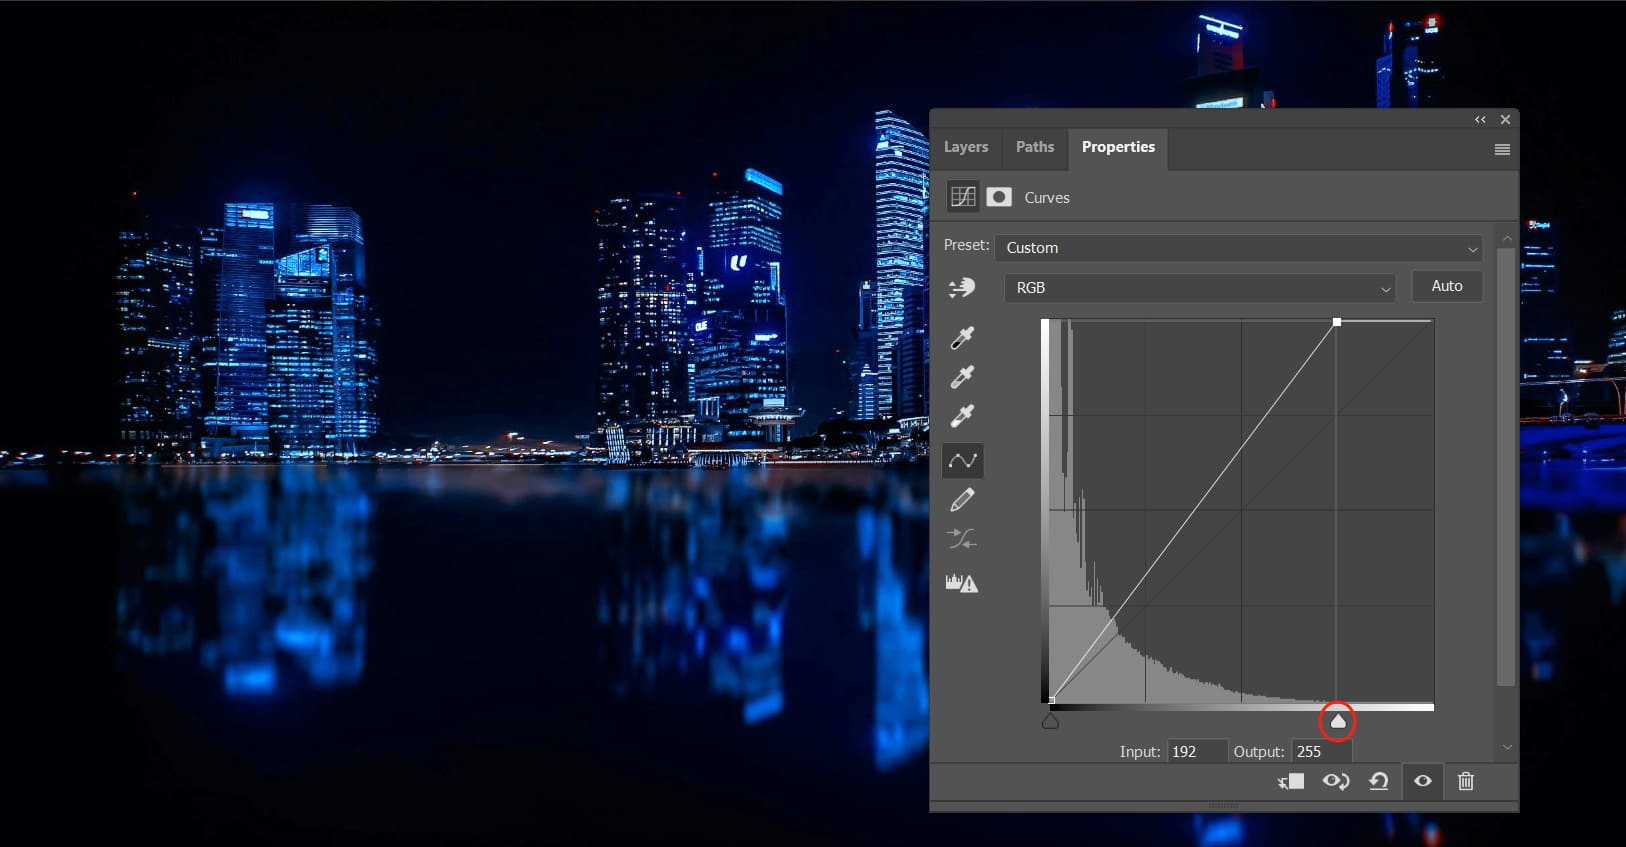
Alternatively, if the curve looks too "short," even if the highest point of the curve is far from the top of the vertical axis, you can adjust the right endpoint of the curve downwards.
Move it down to approximately align with the highest point of the curve, and then proceed with other adjustments.
Of course, the curve adjustments mentioned above are just the basic usage of curves.
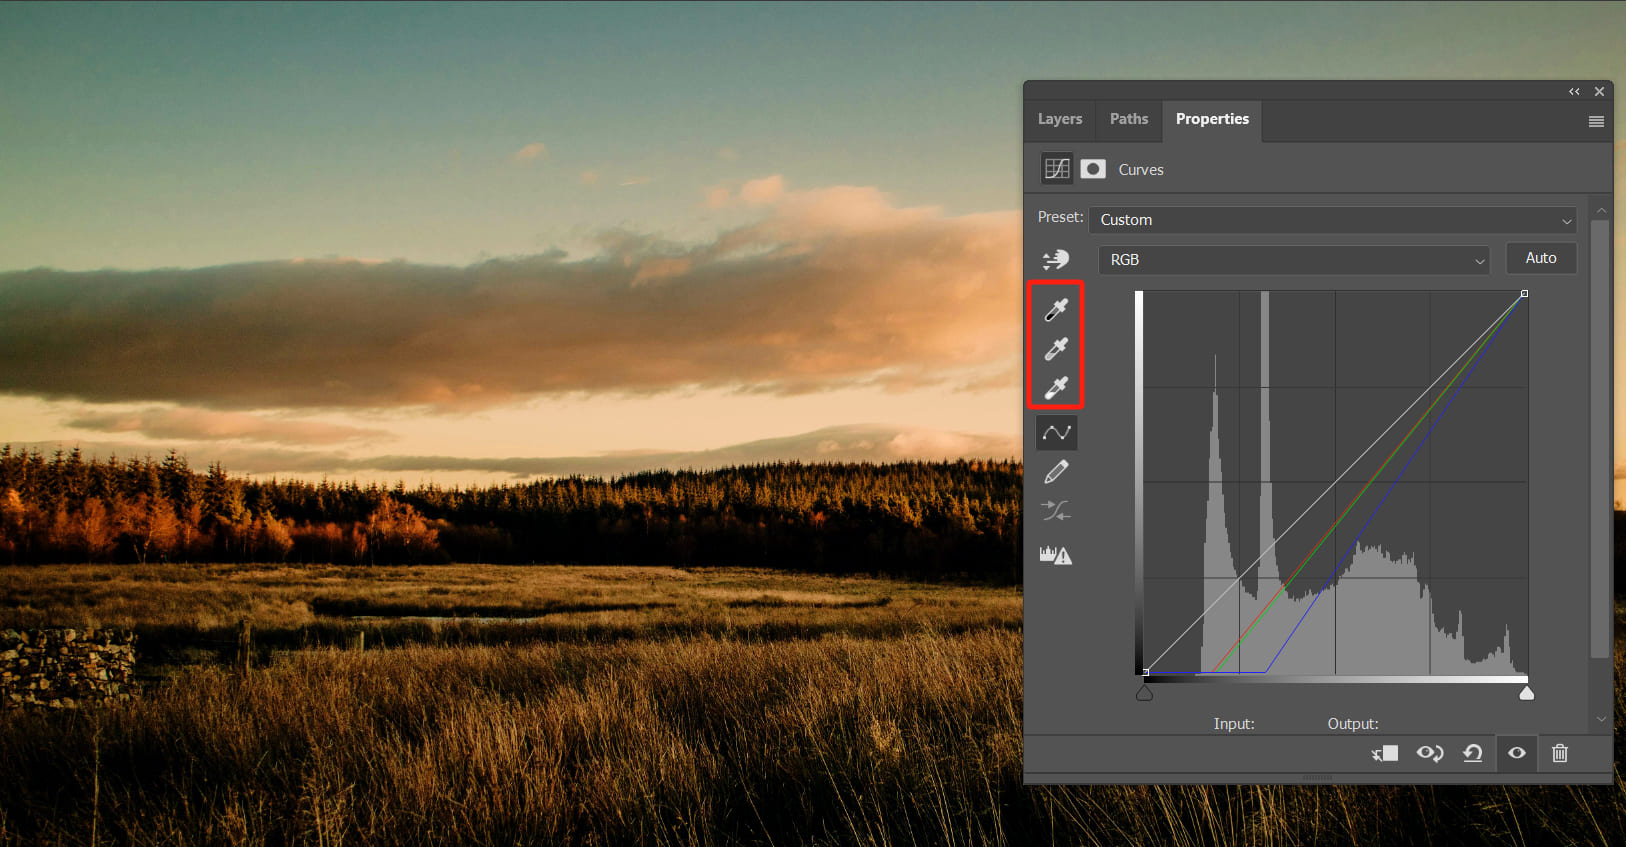
You can also use curves to set the black point, white point, and gray point, which is a great tool for correcting color casts. The black point, white point, and gray point refer to forcibly converting a certain color to black, white, or gray.
For example, if the black in your photo is not deep enough, it may be due to environmental factors or lighting conditions, causing other colors to mix in.
For instance, if you took a photo in the evening and the black appears slightly yellow, the entire photo may have a yellowish tint.
In this case, setting the original black object as the black point will automatically restore the color to a standard black in Photoshop, while also correcting other colors.
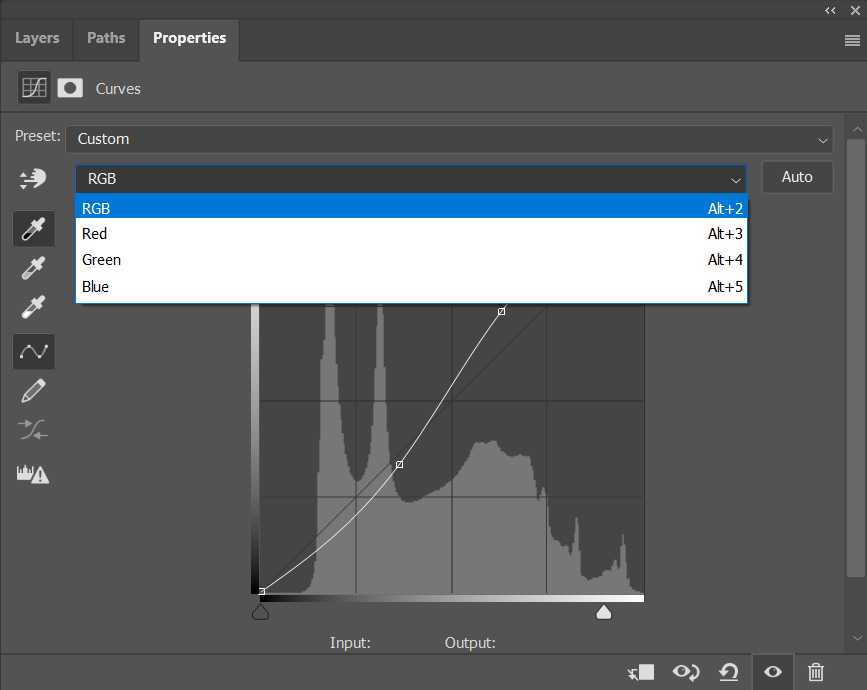
As you know, photos have three primary color channels: red, green, and blue. Normally, when using the curve tool to adjust an image, it defaults to the RGB channel.
However, if you switch to these three individual color channels, you can adjust each color separately, allowing for more precise color control.
If you're unfamiliar with color channels, we don't recommend using the RGB channel in the curves tool, as it may confuse the colors and result in strange color shifts in the image.
Final Thoughts About Photoshop Curves
Photoshop's Curves is a simple and powerful tool. Besides manually adjusting the curve, you can also simply click the "Auto" option to let Photoshop intelligently adjust the curve for you. In most cases, this is a good choice.
Photoshop also provides various curve presets for you to choose from.
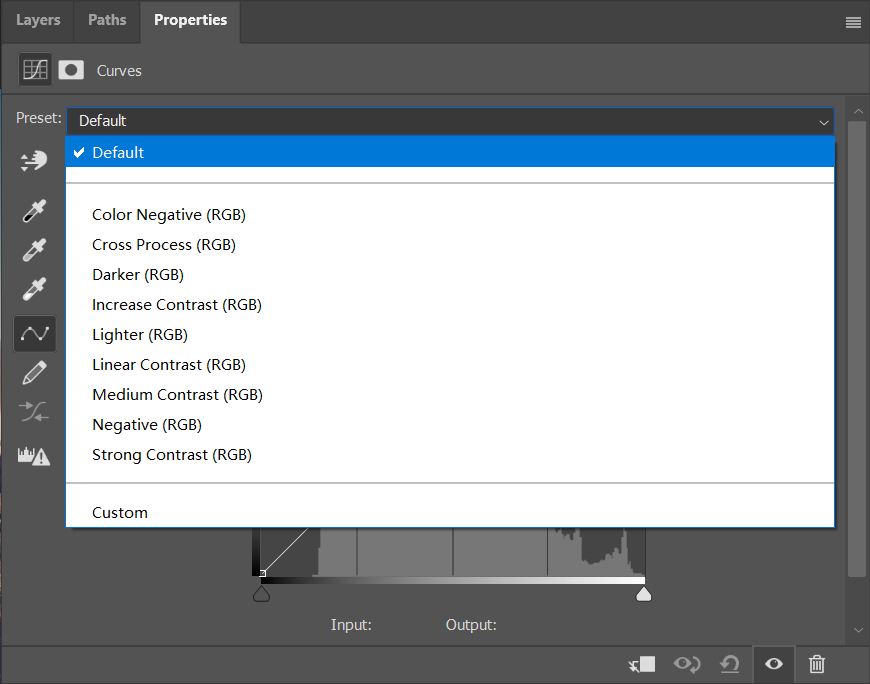
If you study these presets, you'll find that no matter how complex the effects may seem, they are essentially combinations of brightening/darkening, black point/white point adjustments, and contrast adjustments, applied to the overall image and specific areas.
So, you don't really need to memorize the exact appearance of those complex effect curves. As long as you understand how to brighten/darken an image, how to use black and white points, and how to adjust image contrast, you can combine them to achieve various tonal effects according to your needs.
Product Recommendation:
If you want to streamline your photo editing process, you might want to check out TourBox, a creative tool that greatly enhances the efficiency of photographers, digital artists, and content creators.

Tedious keyboard shortcuts and repetitive operations may have made you tired. But TourBox allows you to achieve various complex operations with fewer actions, and you can control it with just one hand.
TourBox's ergonomic design makes it feel like an effortless extension of your hand when you use it. Check out our dedicated page on photo editing, and you'll be curious to know how TourBox can revolutionize your creative workflow.
If you're interested in TourBox, take a look at our TourBox Lite. It offers even better value for money and is perfect for first-time users of TourBox.

That concludes our tutorial on Photoshop Curves. We hope this has been helpful to you.