How to Use Chroma Key in Premiere Pro?
We often see exaggerated, stunning, and virtual scenes in film and television, especially in Hollywood's visual effects movies.
These scenes are impossible to shoot in reality, and creating them involves a crucial post-production technique called Chroma Key.
In this article, we will share some methods and techniques on how to use the chroma key in Premiere Pro. Let's dive in.

In this article, you will learn:
- What Is Chroma Key?
- Tips for Shooting Chroma Key Footage
- How to Use Chroma Key in Premiere Pro?
- Final Thoughts About Chroma Key in Premiere Pro
What Is Chroma Key?
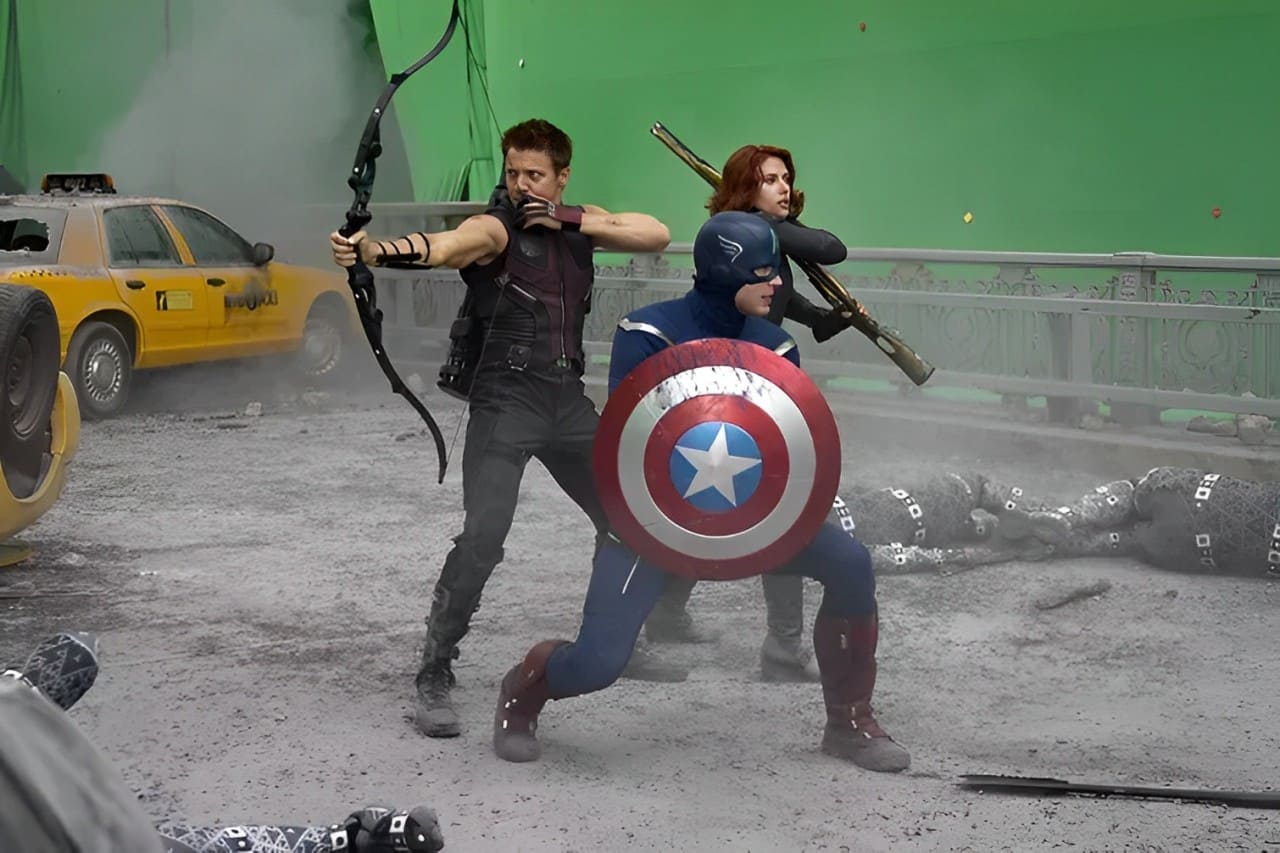
Chroma key involves actors or objects performing in front of a green or blue screen, which is then removed using software like Premiere Pro to replace it with a suitable background, seamlessly blending the people with the new setting.
In behind-the-scenes clips of many films, you may see actors performing in front of a green or blue screen, which is later replaced in the final footage. This is achieved through chroma keying.
Green and blue are typically used for their stark contrast with skin tones. However, in filmmaking, the background color can extend beyond these two to any solid color that can be distinguished from actors' clothing and makeup, enhancing the virtual or composite effects.
Tips for Shooting Chroma Key Footage
Before chroma keying in Premiere Pro, having good footage can save you time in post-production and result in higher-quality visuals.
If you're shooting footage for chroma keying in Premiere Pro, it's essential to follow some guidelines for better results. Here are some suggestions that may help you:
- Before shooting, opt for a uniformly colored, flat green, or blue background for chroma keying.
- Ensure that the lighting direction during shooting matches the lighting in the final composite to avoid an artificial look.
- Pay attention to the shooting angles for a more realistic composite.
- Try to avoid having subjects wear green or blue clothing that matches the background color to prevent these colors from being removed during chroma keying in post-production.
How to Use Chroma Key in Premiere Pro?
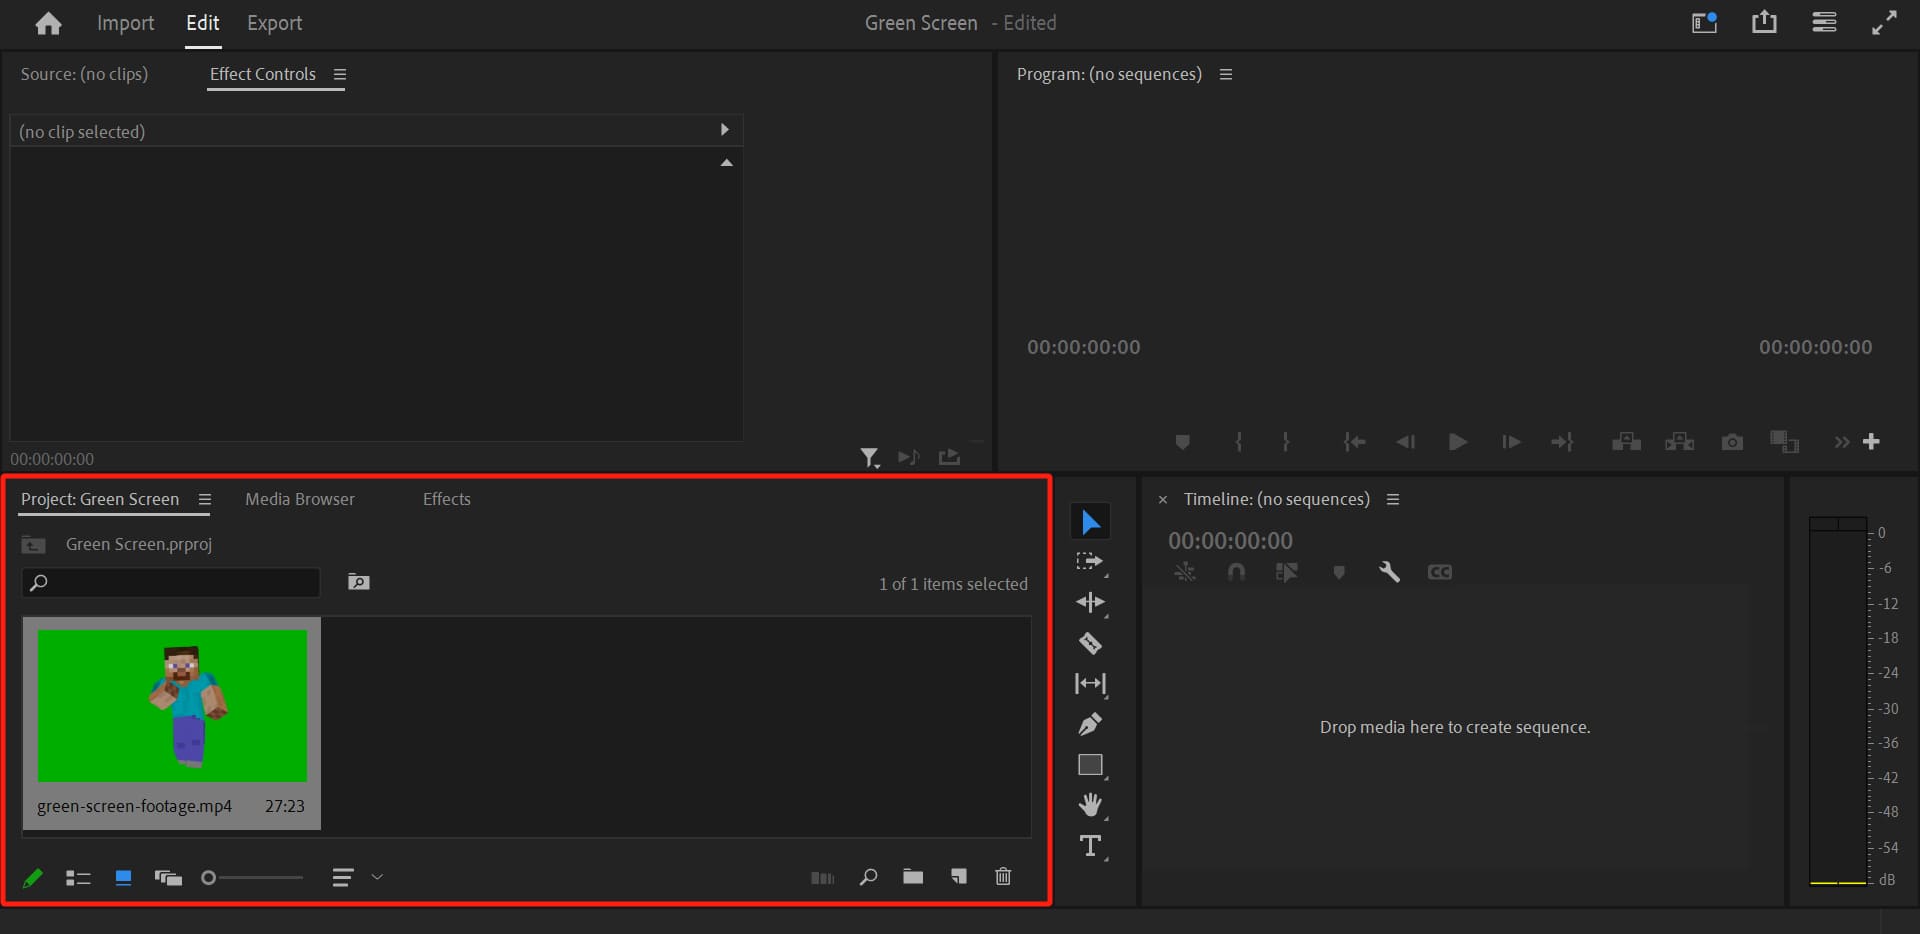
To begin chroma keying in Premiere Pro, first open the program and create a new project. Drag your green screen footage directly into the Project panel or go to "File" in the top menu bar, select "Import," and choose your green screen footage.
Your green screen footage will then appear in the Project panel.
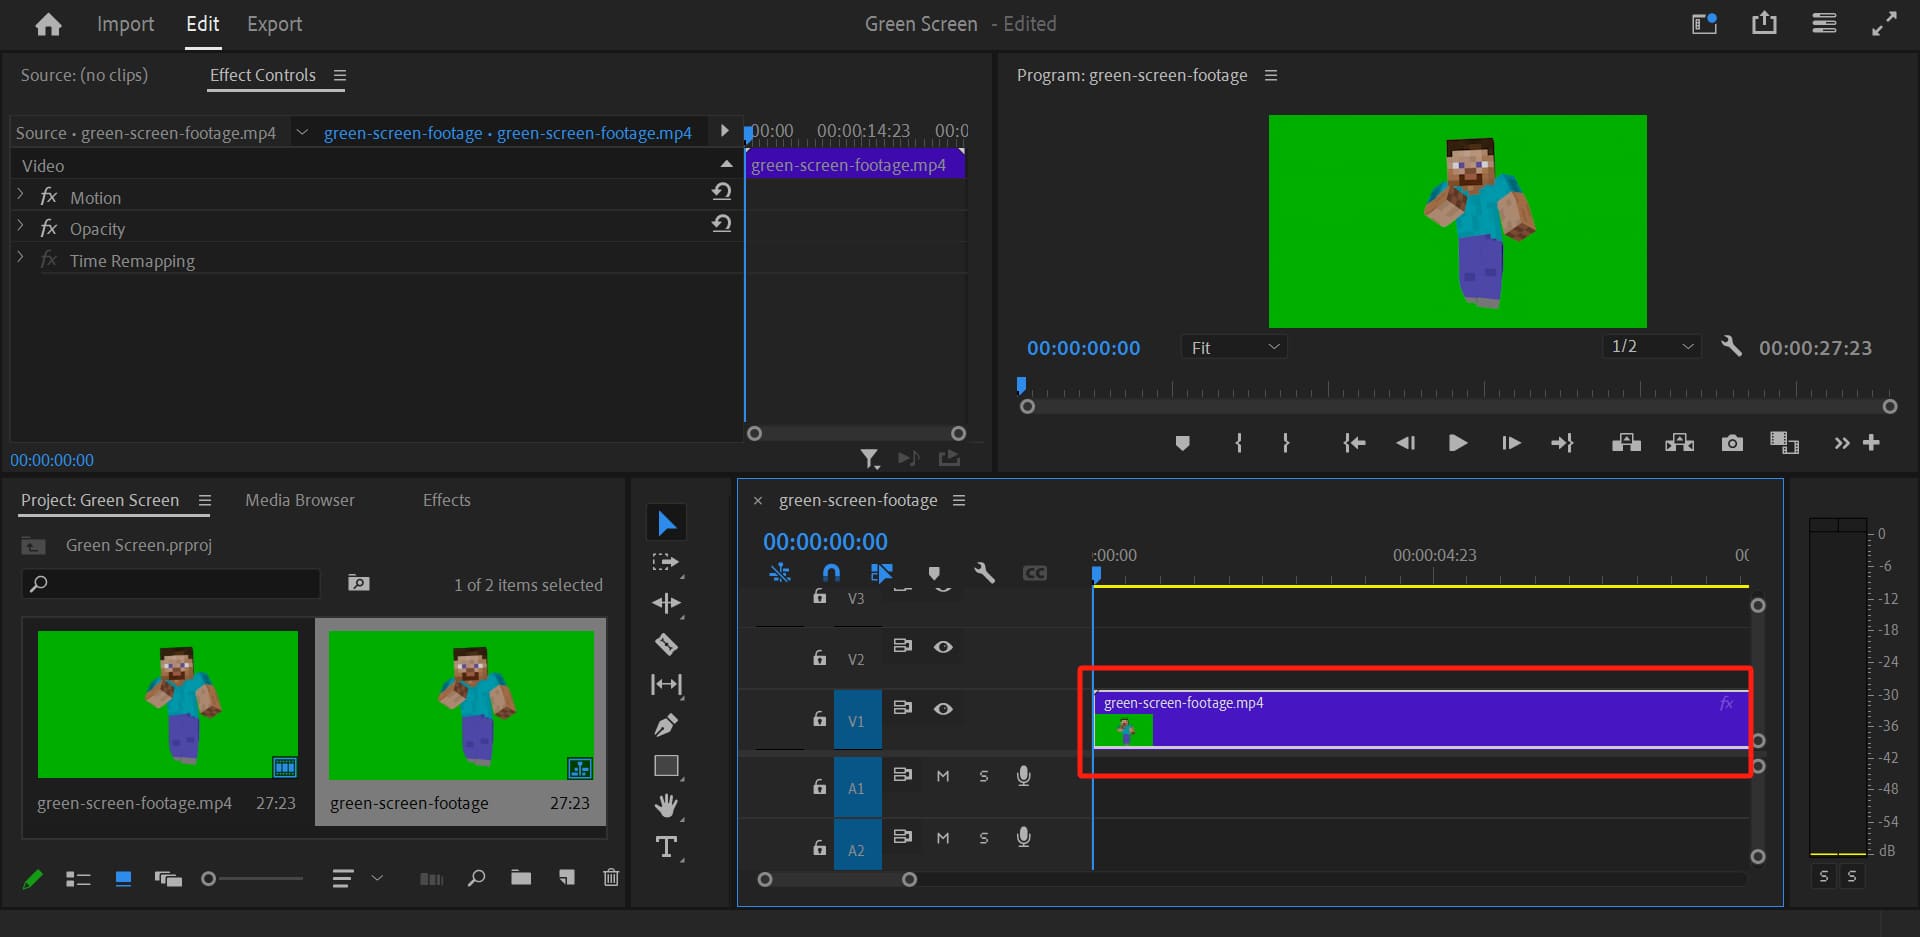
Drag the green screen footage onto the timeline, which will automatically create a sequence matching the original footage settings.
Alternatively, go to "File," then "New," and select "Sequence" to set up a new sequence. Drag your footage into this newly created sequence.
Further Reading:
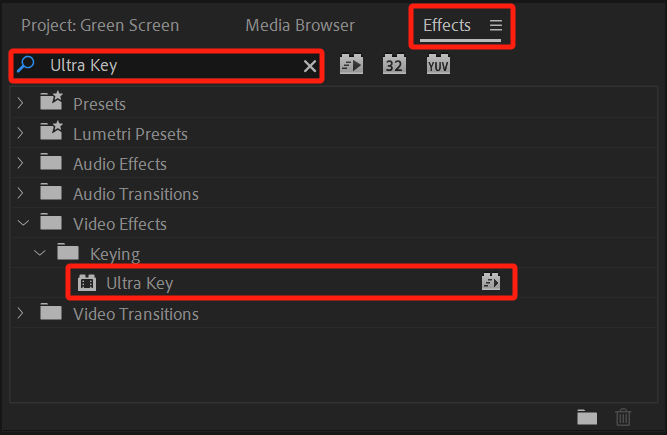
Search for "Ultra Key" in the Effects panel and drag this effect onto the video clip on the timeline that you want to key out.
Further Reading:
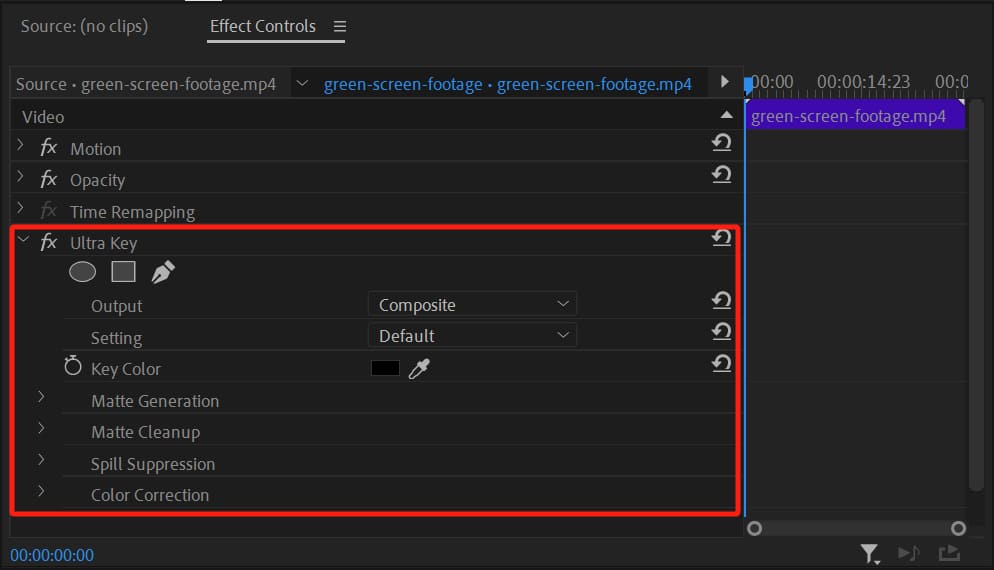
Now, in the Effect Controls panel, you will see the "Ultra Key" effect that you just added.
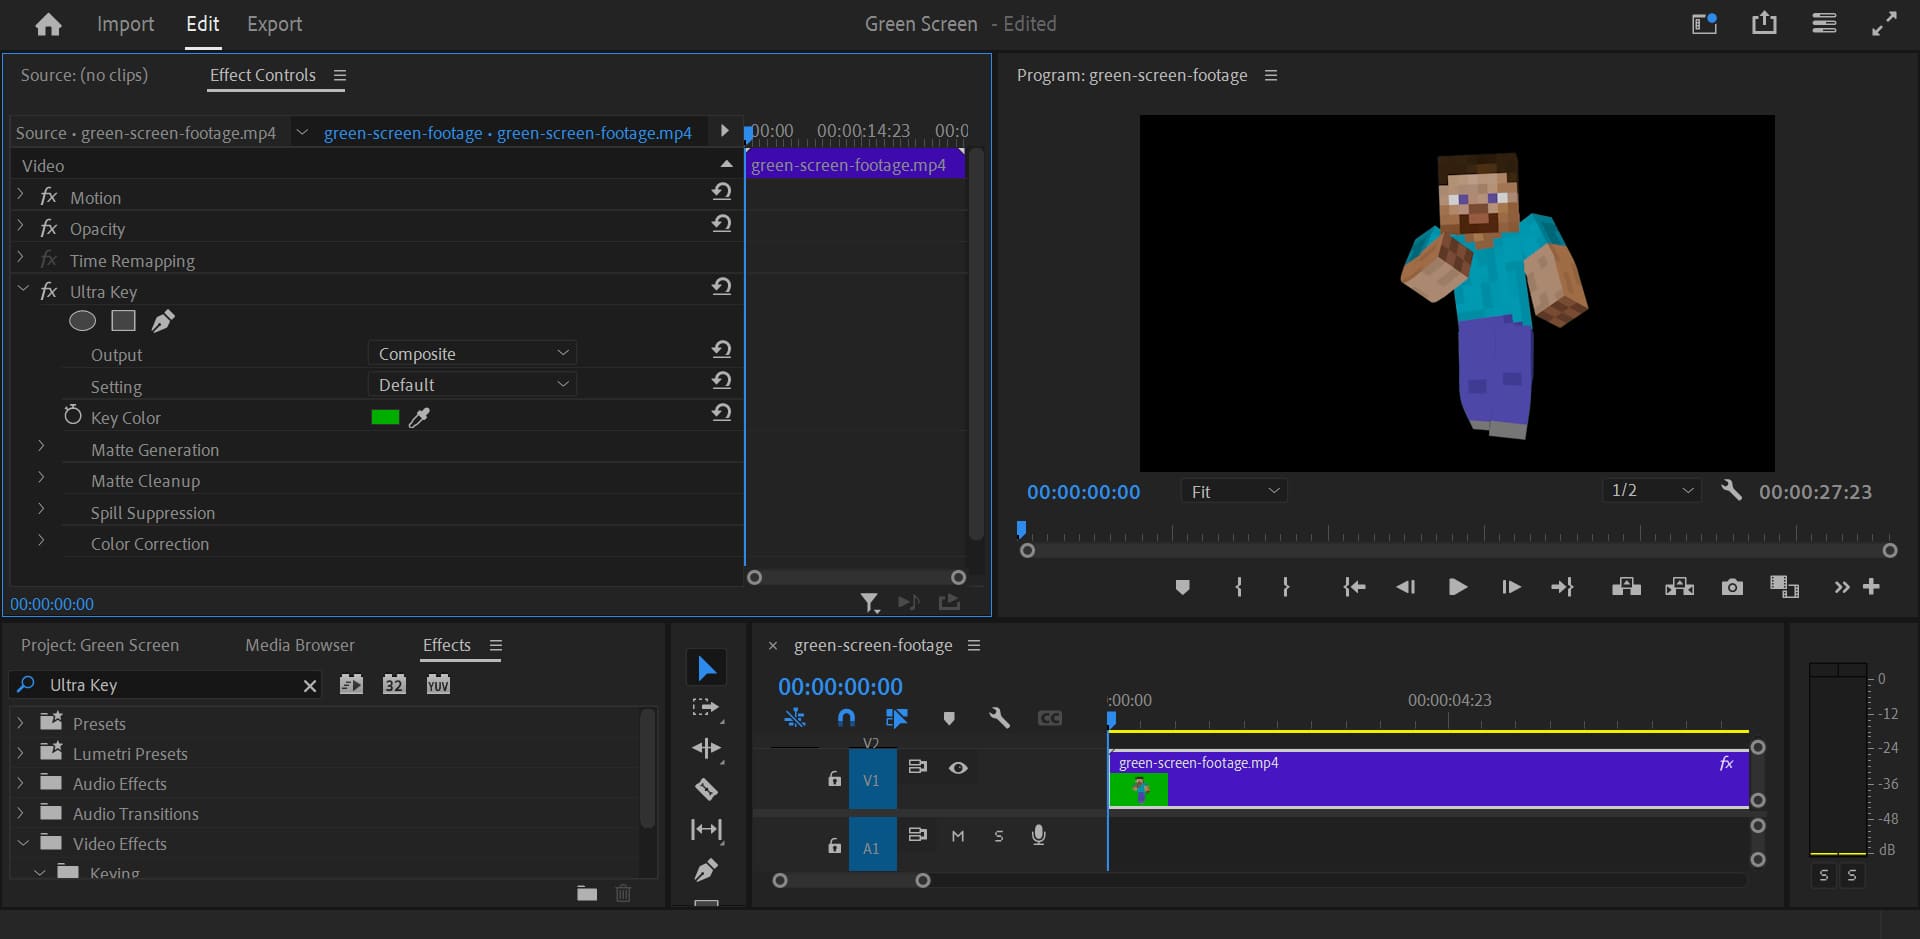
In the Effect Controls panel, under the Ultra Key effect, navigate to the Key Color option. Click on the color picker tool and then click on the green color of the green screen footage.
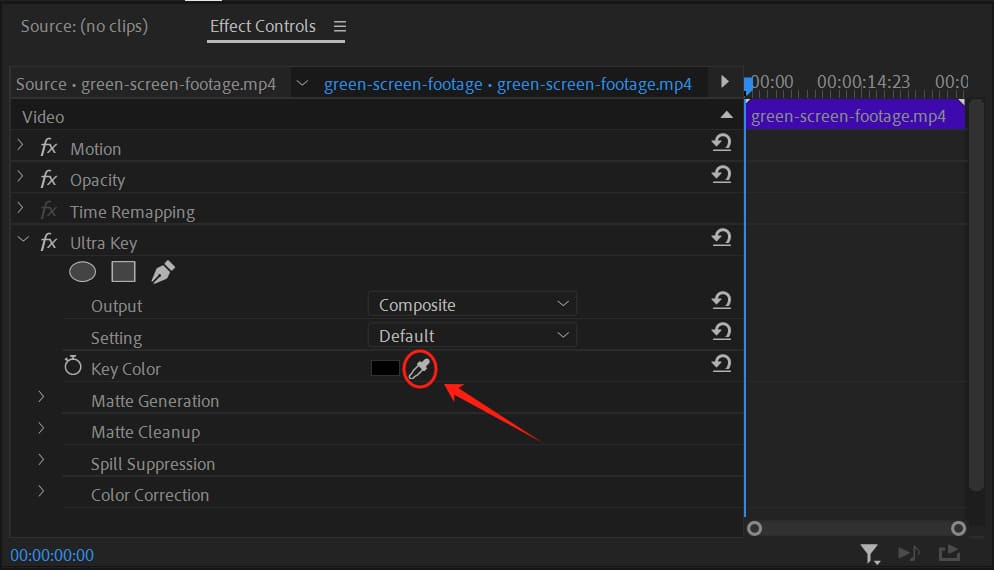
If the background color is pure without any variations, clicking on it will make all the green disappear, leaving it as the default black color.
The Ultra Key feature also offers additional parameter control options, allowing you to achieve the desired effect by adjusting these parameters.
The Setting option lets you adjust the color range of pixels:
- Relaxed: Narrows the pixel color range to reduce transparency.
- Aggressive: Expands the pixel color range to increase transparency.
- Custom: Manually adjust transparency.
The Matte Generation control options help enhance transparency areas:
- Transparency: Adjusts the transparency of the source image when keying out the background. 100 is fully transparent, and 0 is fully opaque.
- Highlight: Adjusts the opacity of light areas in the source image.
- Shadow: Adjusts the opacity of dark areas in the source image.
- Tolerance: Adjusts the range of the selected color.
- Pedestal: Filters noise from the Alpha channel, useful for improving keying when working with low-light footage.
The Matte Cleanup options are used to reduce the size of transparent areas or soften the edges of transparent regions:
- Choke: Decreases the size of the matte. Avoid shrinking too much as it can lead to the loss of edge details.
- Soften: Blurs the edges of the matte.
- Contrast: Adjusts the contrast of the matte edges. Higher contrast yields cleaner keying results.
- Mid Point: Specifies the starting level for the contrast adjustment. Different levels allow for finer control over the contrast.
The Spill Suppression option helps eliminate color spills from the background reflecting onto the subject. Use this option to clean up green spill around light areas. This function typically works based on color complement principles.
- Desaturate: Reduces saturation to minimize color spill effects.
- Range: Controls the amount of correction for spilled colors.
- Spill: Governs the amount of complementary color added.
- Luma: Fine-tunes the brightness of the spill suppression.
The Color Correction option adjusts the color of the source clip to smooth out the selected color range for keying, ensuring better integration with a new background.
- Saturation: Controls the saturation of the foreground source.
- Hue: Manages the color tone.
- Luminance: Regulates the brightness of the foreground source.
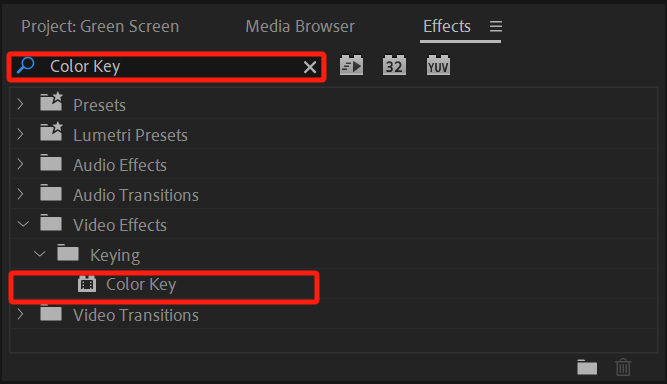
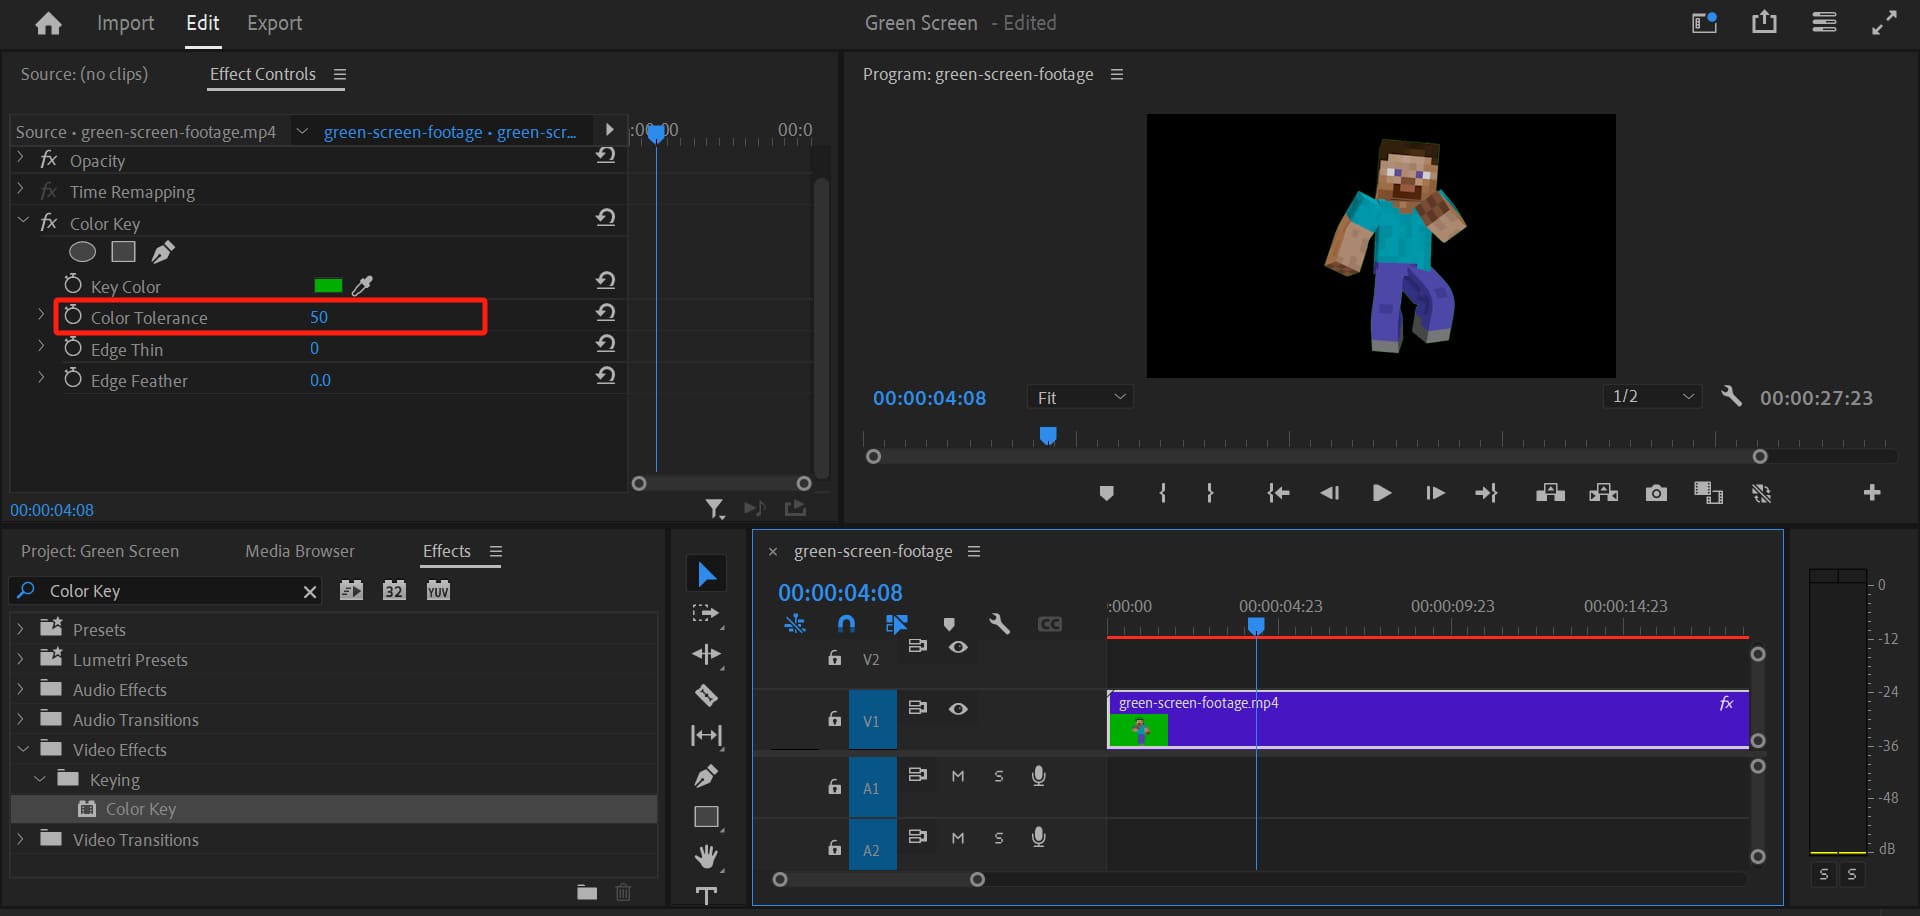
In addition to "Ultra Key," the "Color Key" in the Effects panel can also achieve a similar keying effect, but the process might be slightly more complex than with "Ultra Key."
The initial steps remain the same. You simply search for "Color Key" in the Effects panel and drag it onto your footage on the timeline.
In the Effect Controls panel, use the color picker tool to select the green background. You may notice that while the green background is removed, there might still be some green residue left.
To address this, adjust the "Color Tolerance" value in the Effect Controls panel. Typically, setting the tolerance to 30-50 should suffice (adjust based on your specific needs).
That's how you can perform keying in Premiere Pro. Give it a try yourself and start creating some fun videos!
Final Thoughts About Chroma Key in Premiere Pro
Once you've grasped the basic concept of Chroma Key and its application in Premiere Pro, here are some handy tips to optimize your results:
- Even Lighting: Ensure the background lighting is uniform during filming to avoid shadows. This makes chroma keying much easier.
- Fine-Tune Settings: When using Ultra Key or Color Key, meticulously adjust the parameters for a more natural composite effect.
- Check for Spillage: Make sure the background color doesn't spill onto your subject. This can be rectified by adjusting settings.
By employing these techniques, you can seamlessly integrate Chroma Key technology into your projects, achieving professional visual effects. Keep practicing and exploring to create stunning pieces!
Product Recommendation:
If you're looking to boost the efficiency of your video editing, you'll likely appreciate TourBox, a creative controller loved by many digital artists and editors.

TourBox offers intuitive operation and customizable key settings, streamlining every step of editing and color grading, significantly enhancing your workflow in Premiere Pro.
What's great is that TourBox provides a gaming controller-like experience. If you're tired of relying solely on your keyboard for video post-production, TourBox will pleasantly surprise you.

Check out our video editing page for more information.