How to Color Match Clips in Premiere Pro?
Premiere Pro has a really handy color grading feature called Color Match. With this feature, you can match the colors of your clips (or any clips) with just one click. It makes it easy to give your clips a consistent look and speeds up the whole grading process.
If you're curious about how to color match clips in Premiere Pro, let's take a look together.

In this article, you will learn:
- How to Color Match Clips in Premiere Pro?
- How Premiere Pro's Color Match Works?
- Tips for Using Color Match in Premiere Pro
- Conclusion
How to Color Match Clips in Premiere Pro?
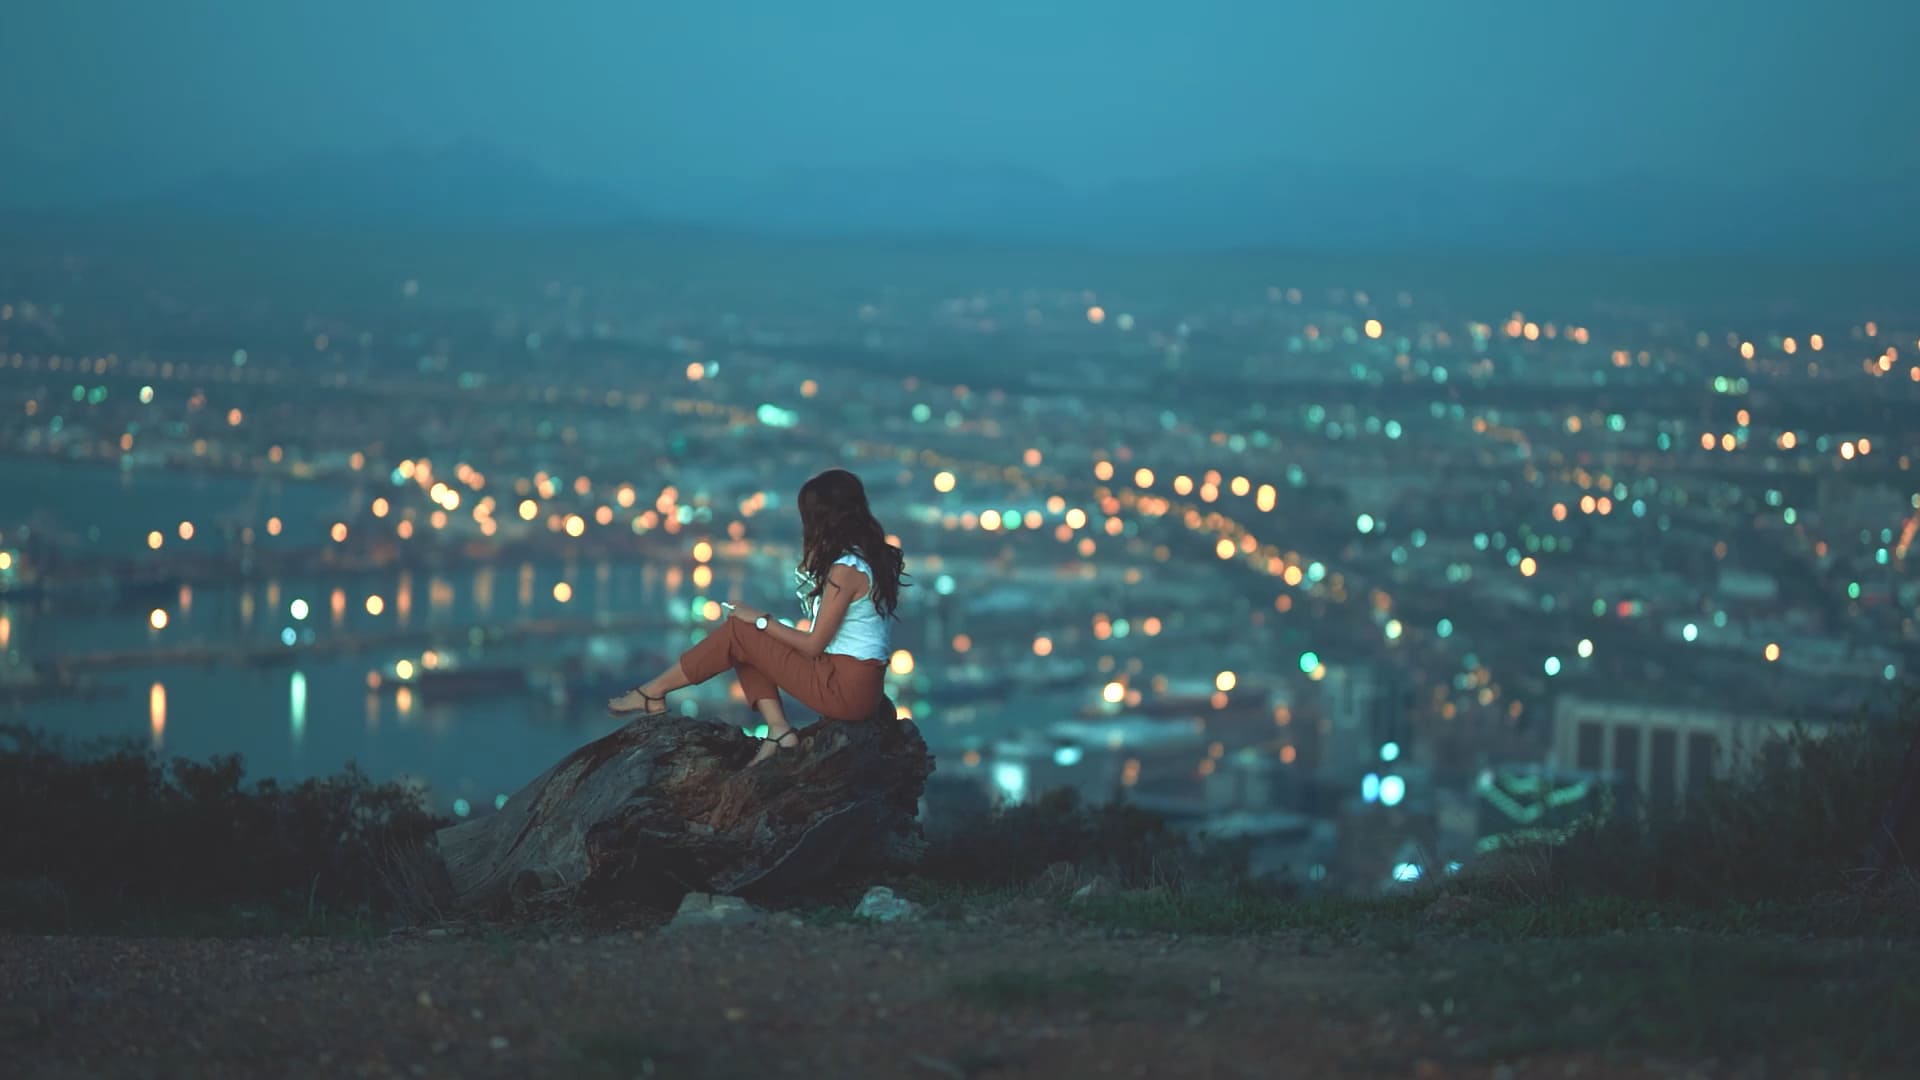
First, import two clips into the timeline. In our example, the first clip has a cool blue tone, as shown below.
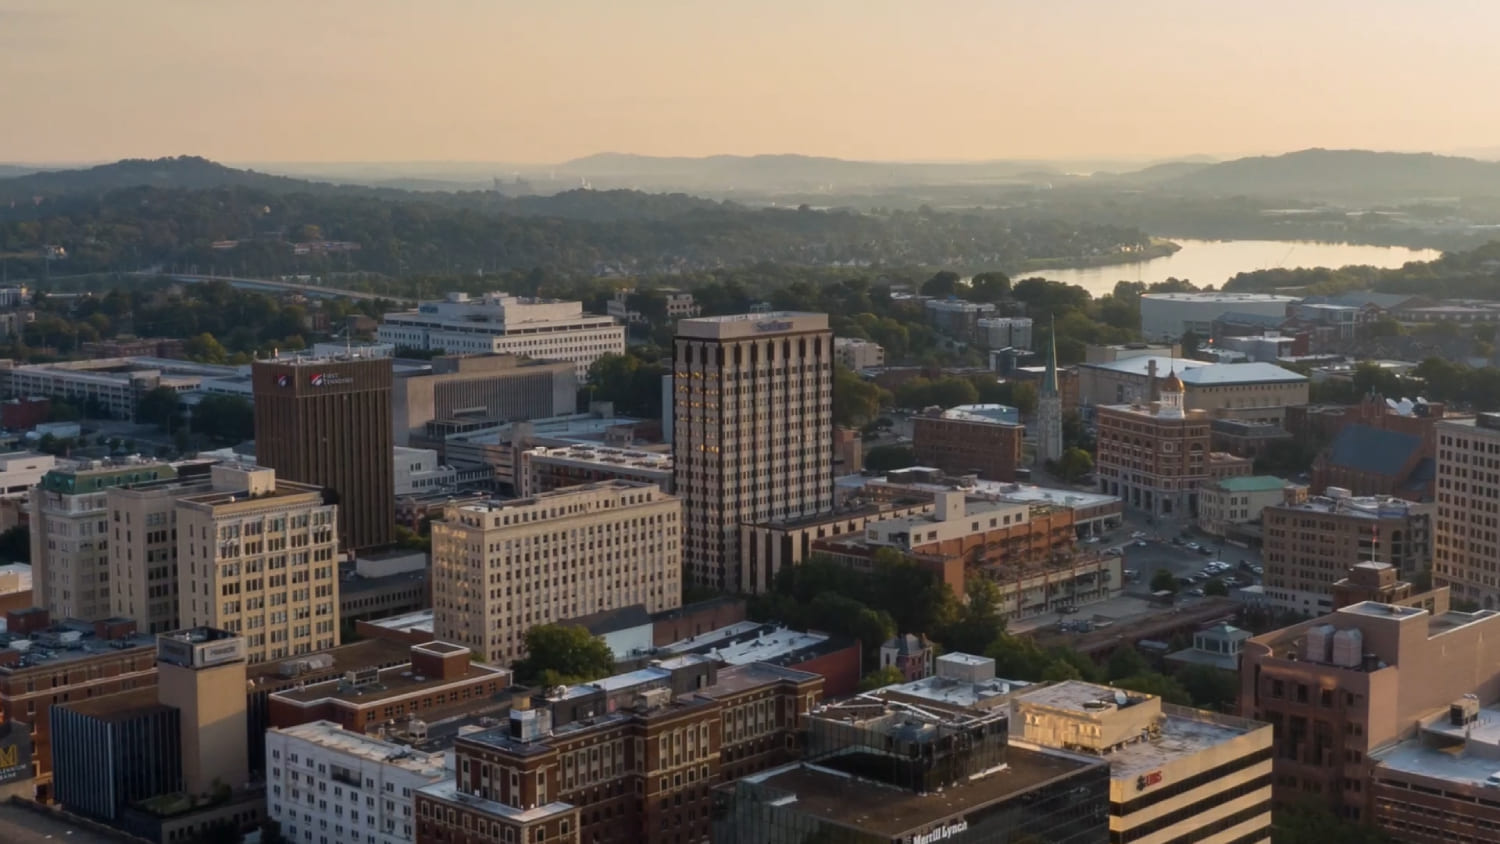
The second clip has a warm tone. Clearly, these two clips look very different.
To make them look similar, we need to turn on the Comparison View feature first. You can find this feature in two places.
The first place is among the buttons below the Program Monitor. If you don't see the button, you can add it from the Button Editor by clicking the small plus icon in the lower right corner.
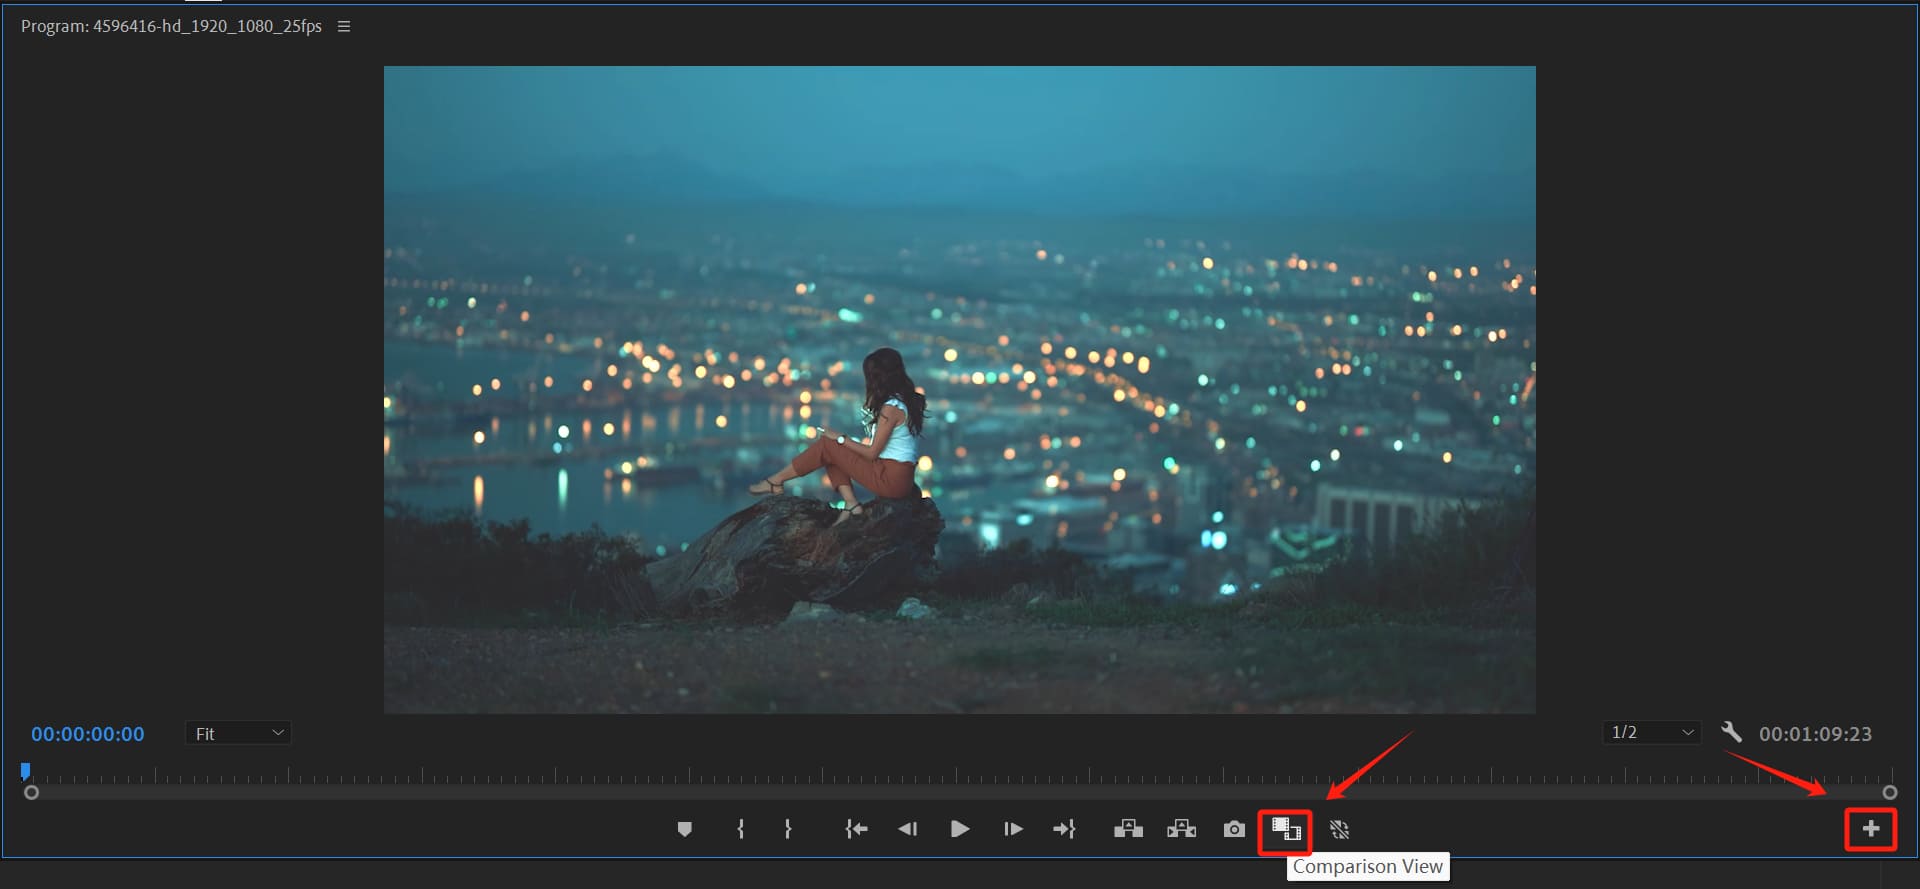
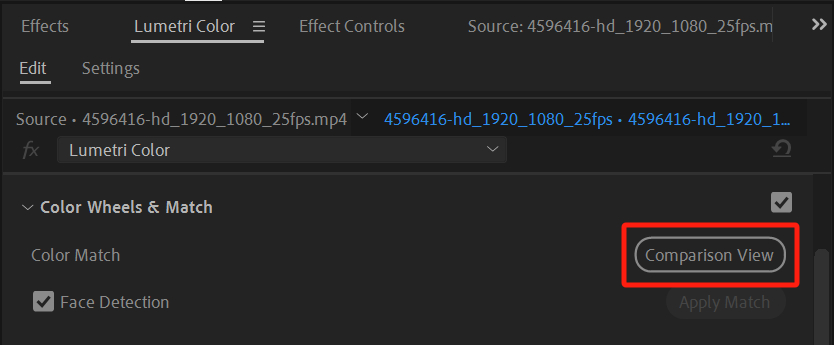
The second place is in the Lumetri Color panel, under the Color Wheels & Match section, where you'll also find the Comparison View button.
In Comparison View, the left side shows the reference frame, and the right side shows the clip you want to match. The clip on the right will copy the color of the specific frame on the left.
Make sure the playhead is on the clip you want to match in the timeline and that the clip is selected. You can also click the Swap Sides button in the Comparison View panel to switch the positions of the two clips.
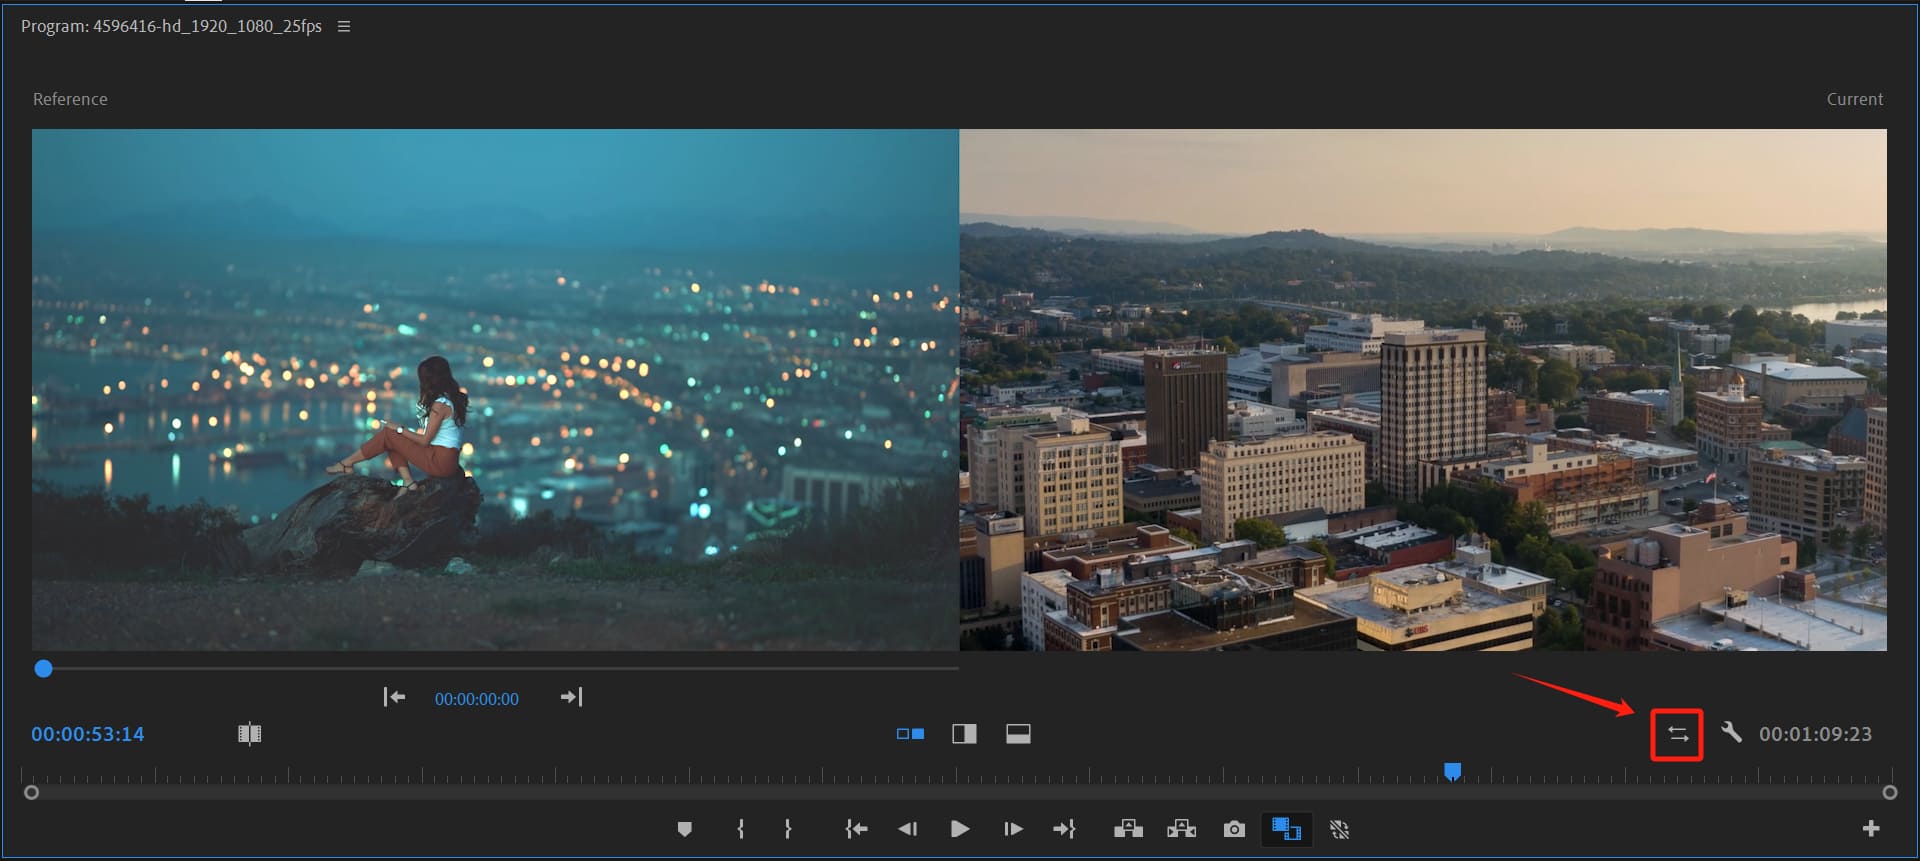
When choosing the frame to match, pick one that clearly shows the overall color and brightness of the clip.
Finally, open the Lumetri Color panel, go to the Color Wheels & Match section, and click the Apply Match button to match the color of the reference clip.
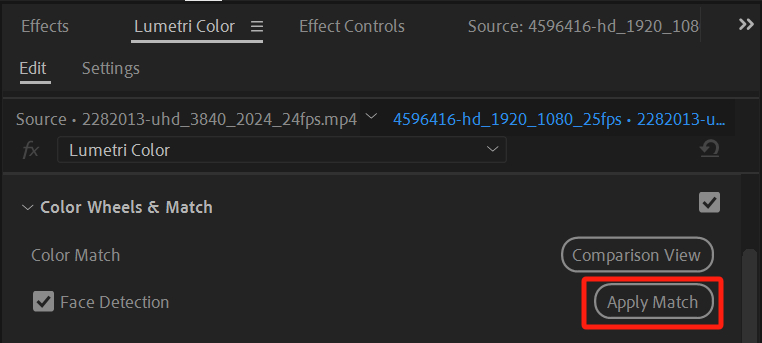
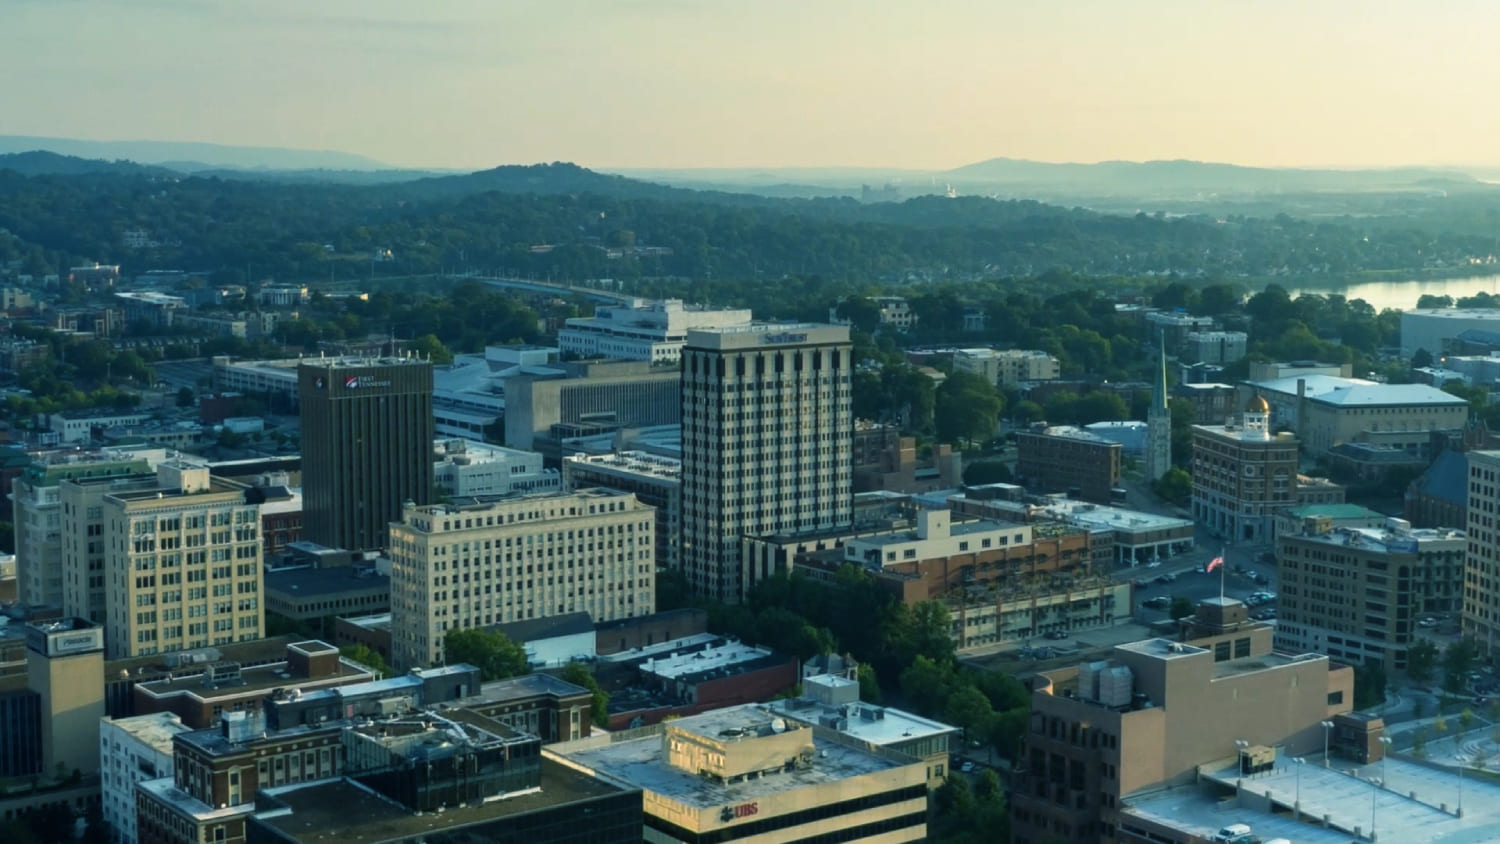
You'll see the result looks pretty good. This way, after adjusting the color of one clip, you can quickly apply it to other similar clips in Premiere Pro.
If you're not completely happy with the match, you can always make further adjustments manually.
How Premiere Pro's Color Match Works?
When you use Color Match, you'll notice that the color wheels in the Color Wheels & Match panel change.
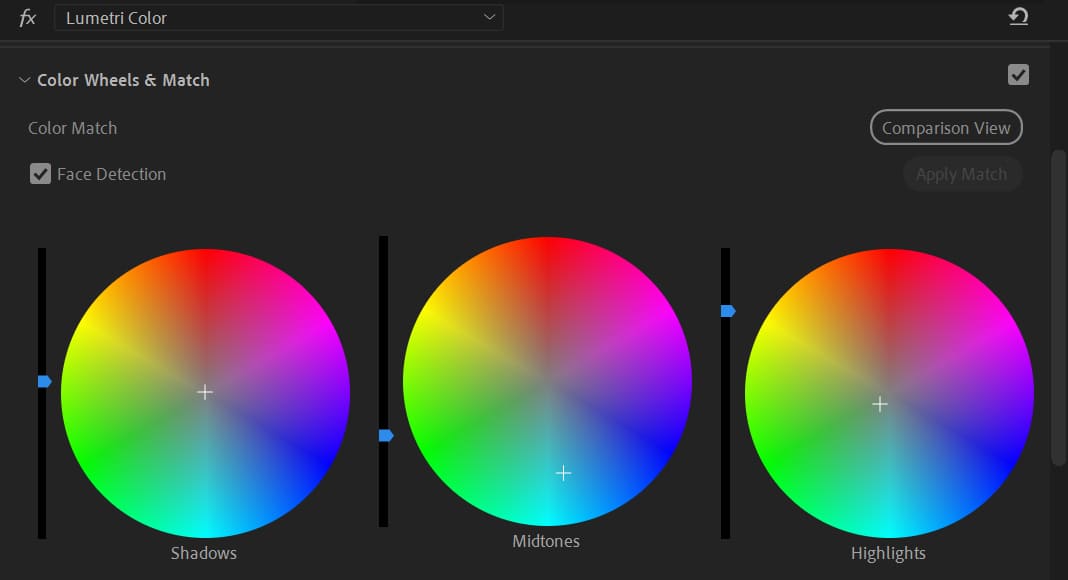
Premiere Pro's auto color matching uses Adobe Sensei. It detects the highlights, midtones, and shadows in your footage and then tweaks the color wheels to match.
Tips for Using Color Match in Premiere Pro
When using Premiere Pro's Color Match feature, keep these tips in mind:
1. Choose the Right Reference Frame
In Comparison View, pick a frame that shows the overall look and brightness of your target shot as your reference. Then, switch to the clip you want to adjust.
A stable reference frame, one with even midtones that isn't too bright or too dark, will give you a better match.
2. Face Detection Option
By default, Color Match uses Face Detection to prioritize skin tones. If your footage has faces and you need accurate skin tones, keep this option on. If there are no people in the shot, you can turn it off to speed up processing.
3. Auto Color Match Isn't Perfect
The tool adjusts the shadow, midtone, and highlight wheels along with the saturation slider. But for complex scenes with high contrast, high saturation, or unusual lighting, the results might not be perfect. You may need to tweak the colors further.
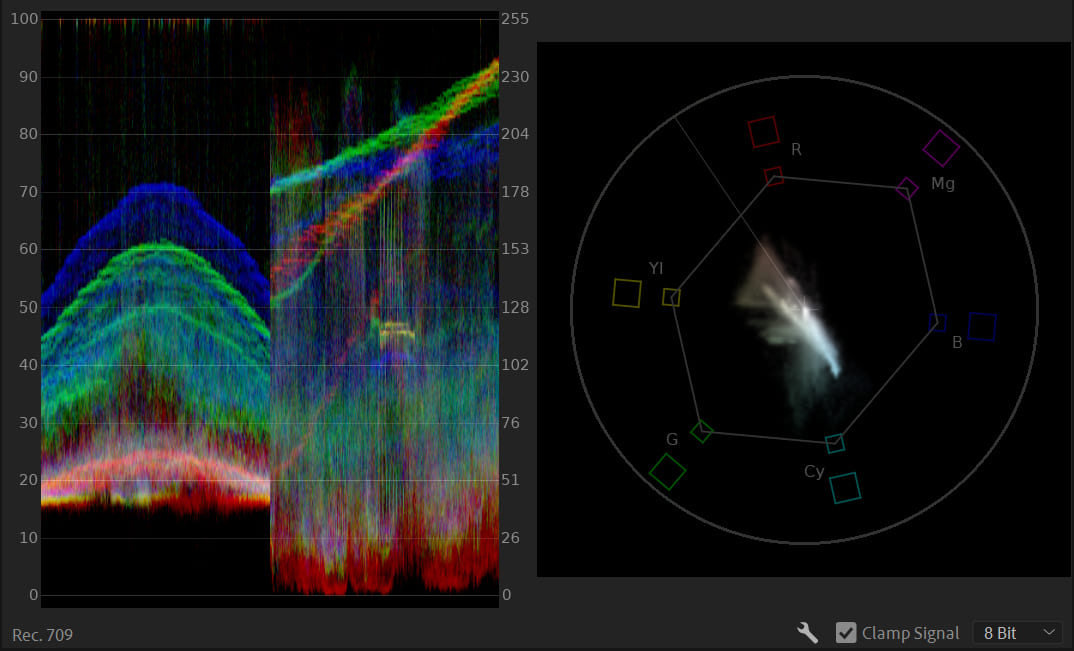
4. Use Scopes for Better Comparison
Don't rely on just your eyes to judge the match. Use tools like the Waveform or Vectorscope to compare color and brightness more precisely. These tools can help you spot small differences that the auto match might miss.
Conclusion
In Premiere Pro, constantly clicking and dragging sliders can break your flow when color grading. TourBox, a controller made for creative pros, makes it simpler. Just twist a knob on the TourBox to adjust settings like exposure, contrast, saturation, shadows, and highlights in precise +1 or -1 steps.

You don't have to watch your mouse pointer or focus on changing numbers. Simply keep your eyes on the screen and use muscle memory to fine-tune each setting.
If you're interested in TourBox, check out our video editing page for more details.

That's it for our guide on Premiere Pro's Color Match. We hope it helps you on your creative journey.