Premiere Pro Sequences: Everything You Need to Know
When you first start using Premiere Pro, you're bound to come across the question of creating sequences when setting up your video project.
Since you've already created a project in Premiere Pro, why do you need to create sequences? What are sequences, and what are they used for?
If you have these questions, this article will provide you with the answers. Without further ado, let's dive right in.

In this article, you will learn:
- What Is a Sequence in Premiere Pro?
- How to Create a New Sequence in Premiere Pro?
- How to Set up a Premiere Pro Sequence?
- How to Delete a Sequence in Premiere Pro?
- How to Change the Sequence Settings in Premiere Pro?
What Is a Sequence in Premiere Pro?
We all know that a movie comprises numerous scenes or clips, and different editors may be responsible for editing different scenes or clips. Each of these scenes or clips can be treated as a sequence.
Once all the scenes or clips of a movie have been edited, you can arrange them, following the director's instructions and the chronological order, within a project for rendering and output, thus completing the movie's editing.
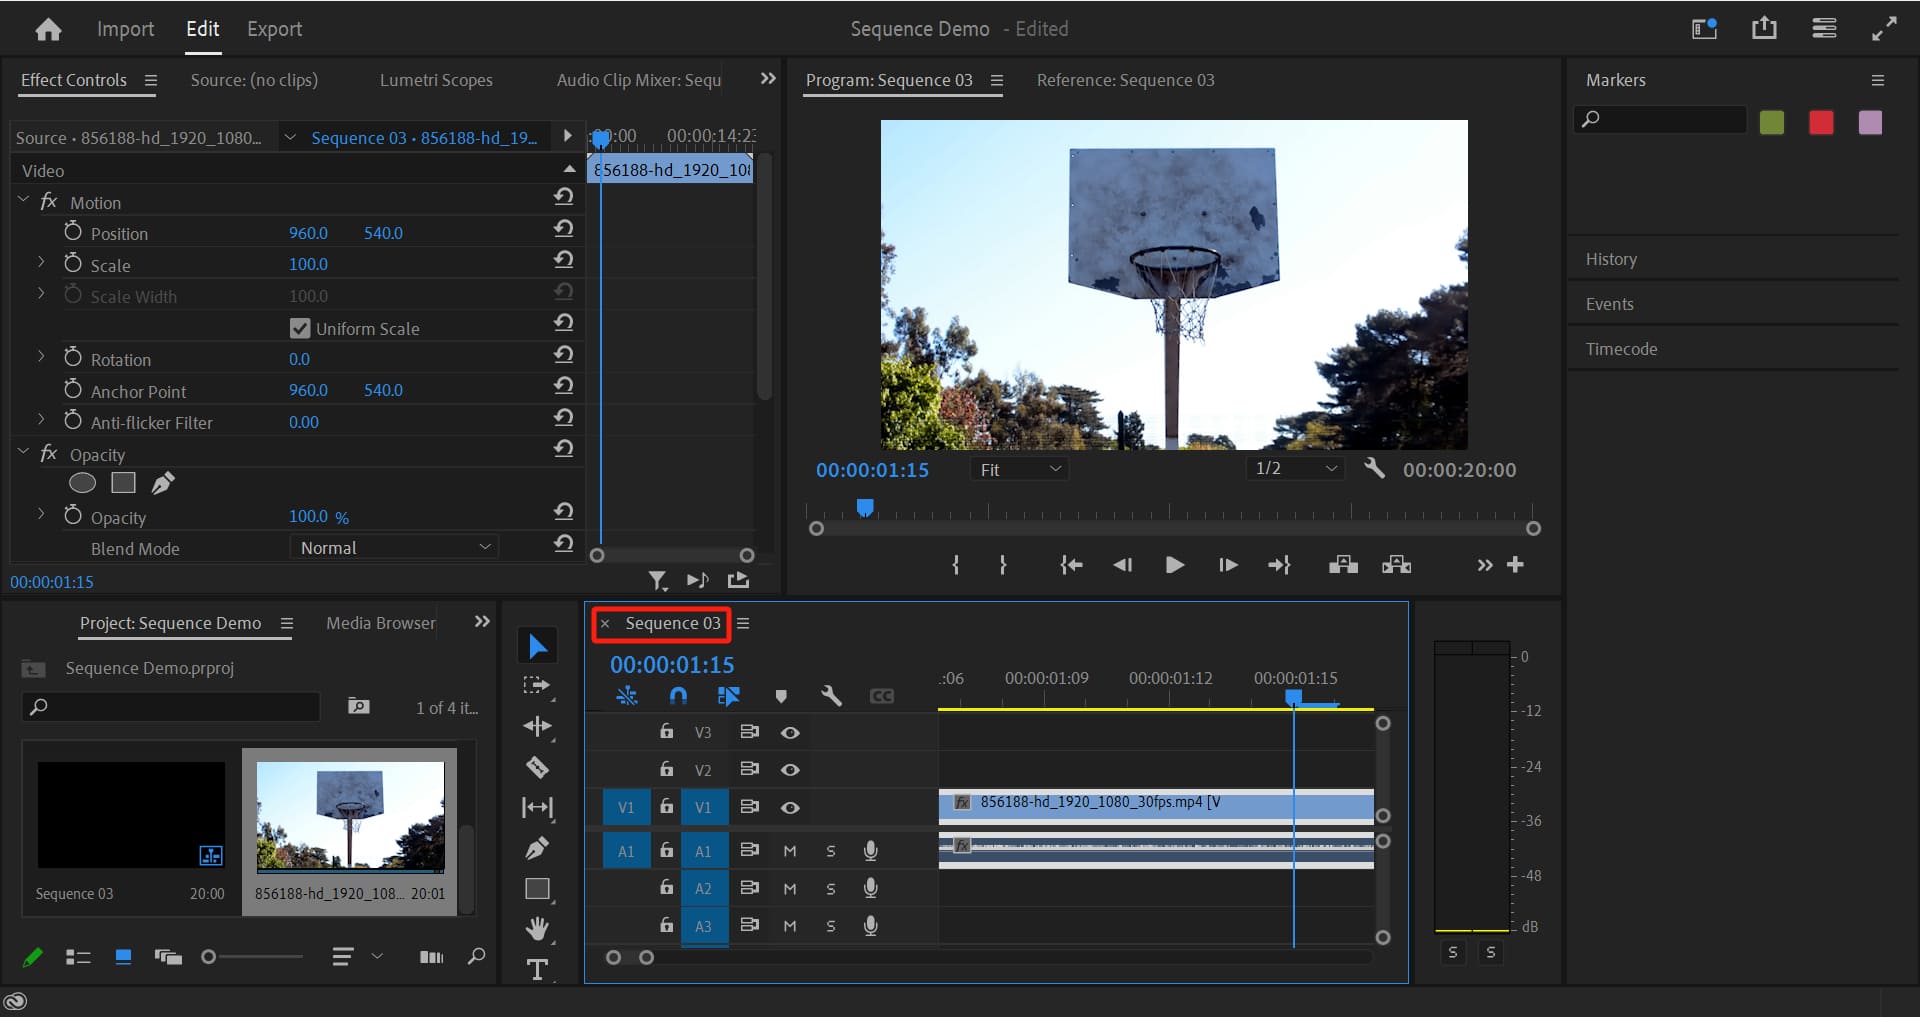
In Adobe Premiere Pro, creating a new sequence means setting up a new editing sequence to organize and edit your assets. It's like a blank canvas where you can place and edit elements such as videos, audio, images, and more.
Let's use a simple analogy to explain it. Imagine you're making a movie. You have various video assets, including different scenes, characters, and special effects. Each asset may have different formats, sizes, and frame rates.
The purpose of creating a new sequence is similar to creating a list of scenes for a movie. Let's say you want to edit an intense action scene. You can choose to create a new sequence and set its properties according to your needs, such as resolution, frame rate, and audio sampling rate.
This sequence is like the setup for shooting that specific action scene. Then, you can drag and drop the corresponding video assets into the sequence. You can trim, adjust audio, add transition effects, and more within the sequence.
This way, you can organize and edit the assets for that action scene within the sequence, ultimately achieving the desired result.
The advantage of creating a new sequence is that it helps you better organize your assets and the editing process. You can create different sequences for different assets, making managing and editing them easier.
Additionally, sequences can be customized according to your requirements, ensuring consistency in editing your assets.
In summary, creating a new sequence is a vital tool in Adobe Premiere Pro for organizing and editing your assets. It's like a scene list in movie production, helping you manage and edit video assets more effectively.
How to Create a New Sequence in Premiere Pro?
There are multiple ways to create a new sequence in Premiere Pro. Here are some methods that we've compiled for you.
Method 1:
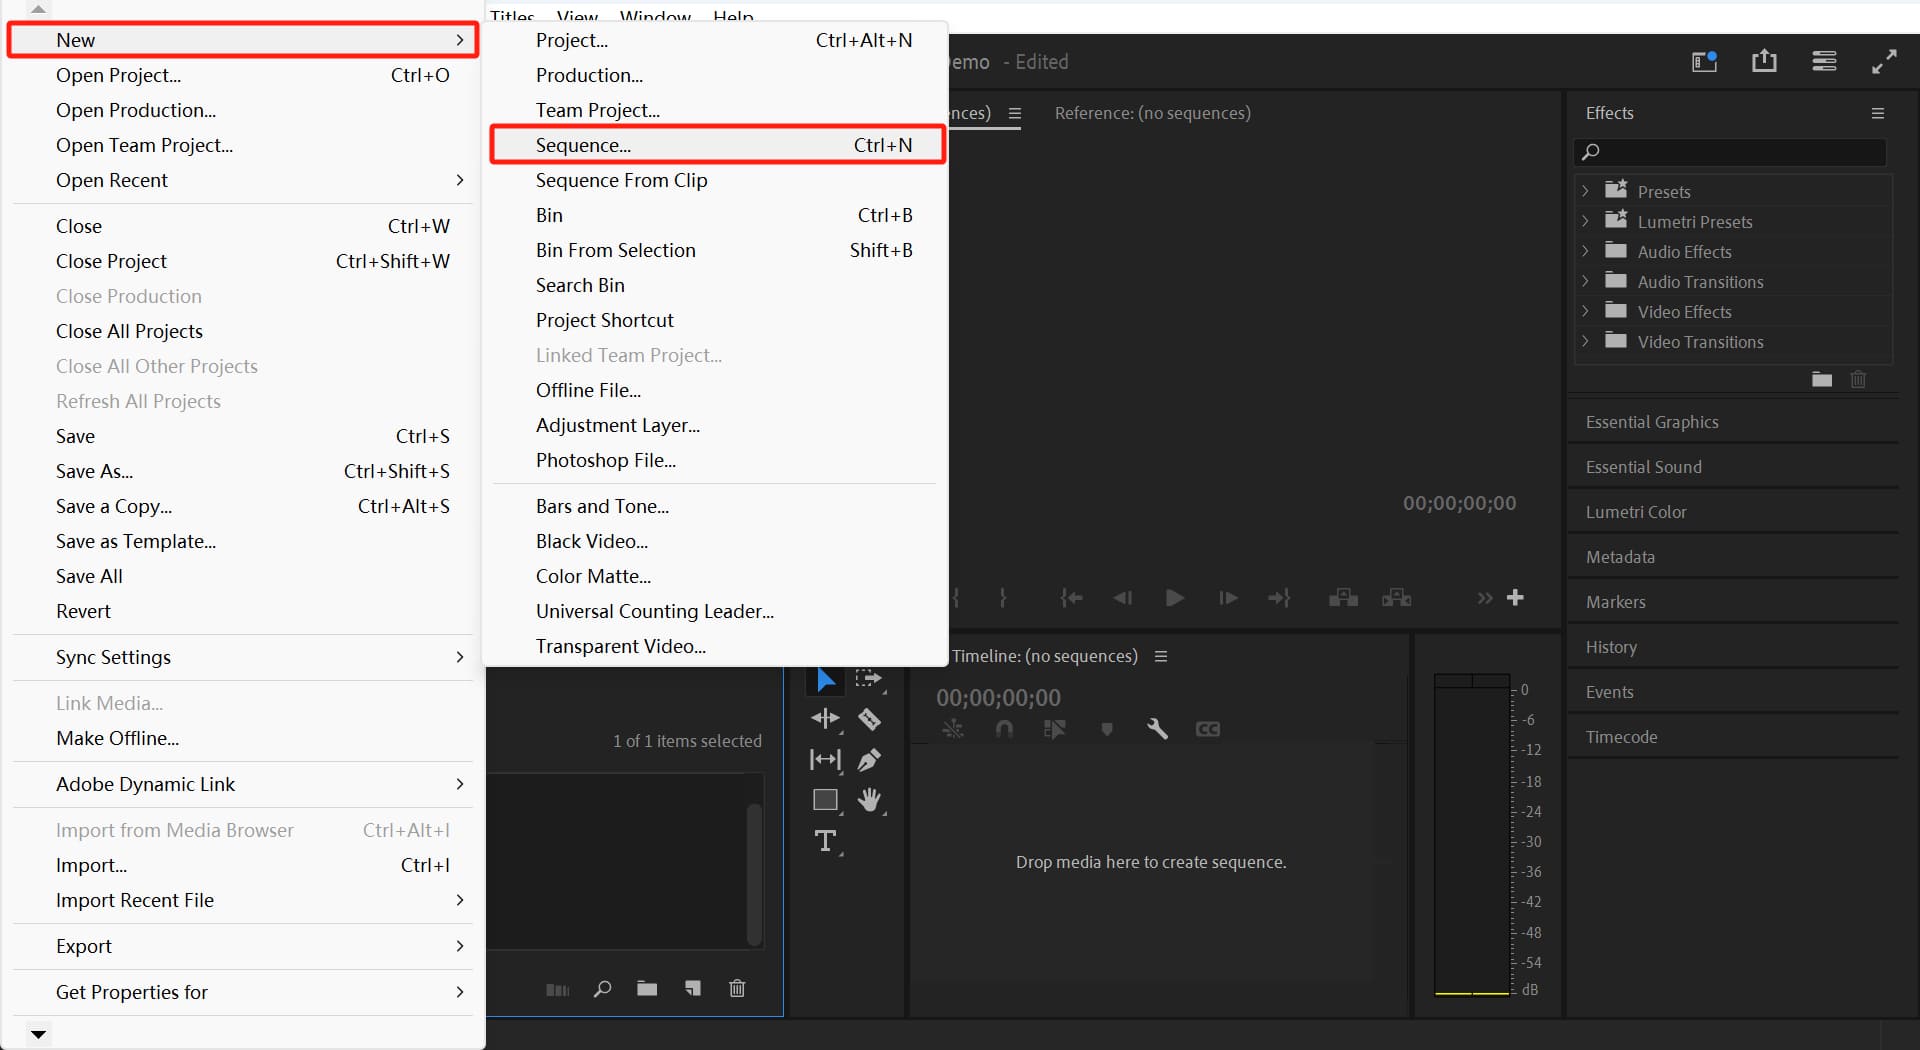
In the top menu bar of Premiere Pro, click on File/New/Sequence. The keyboard shortcut is "Ctrl/Command + N."
Method 2:
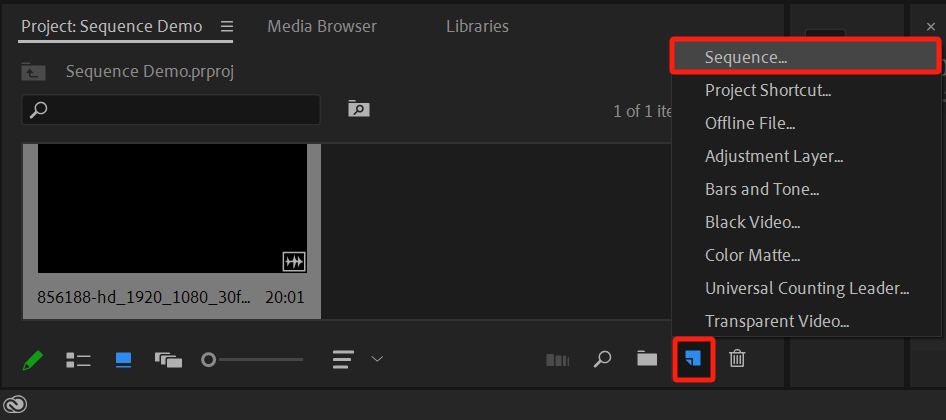
Click on the "New Item" button in the bottom right corner of the Project panel, then select "Sequence" from the menu that appears.
Method 3:
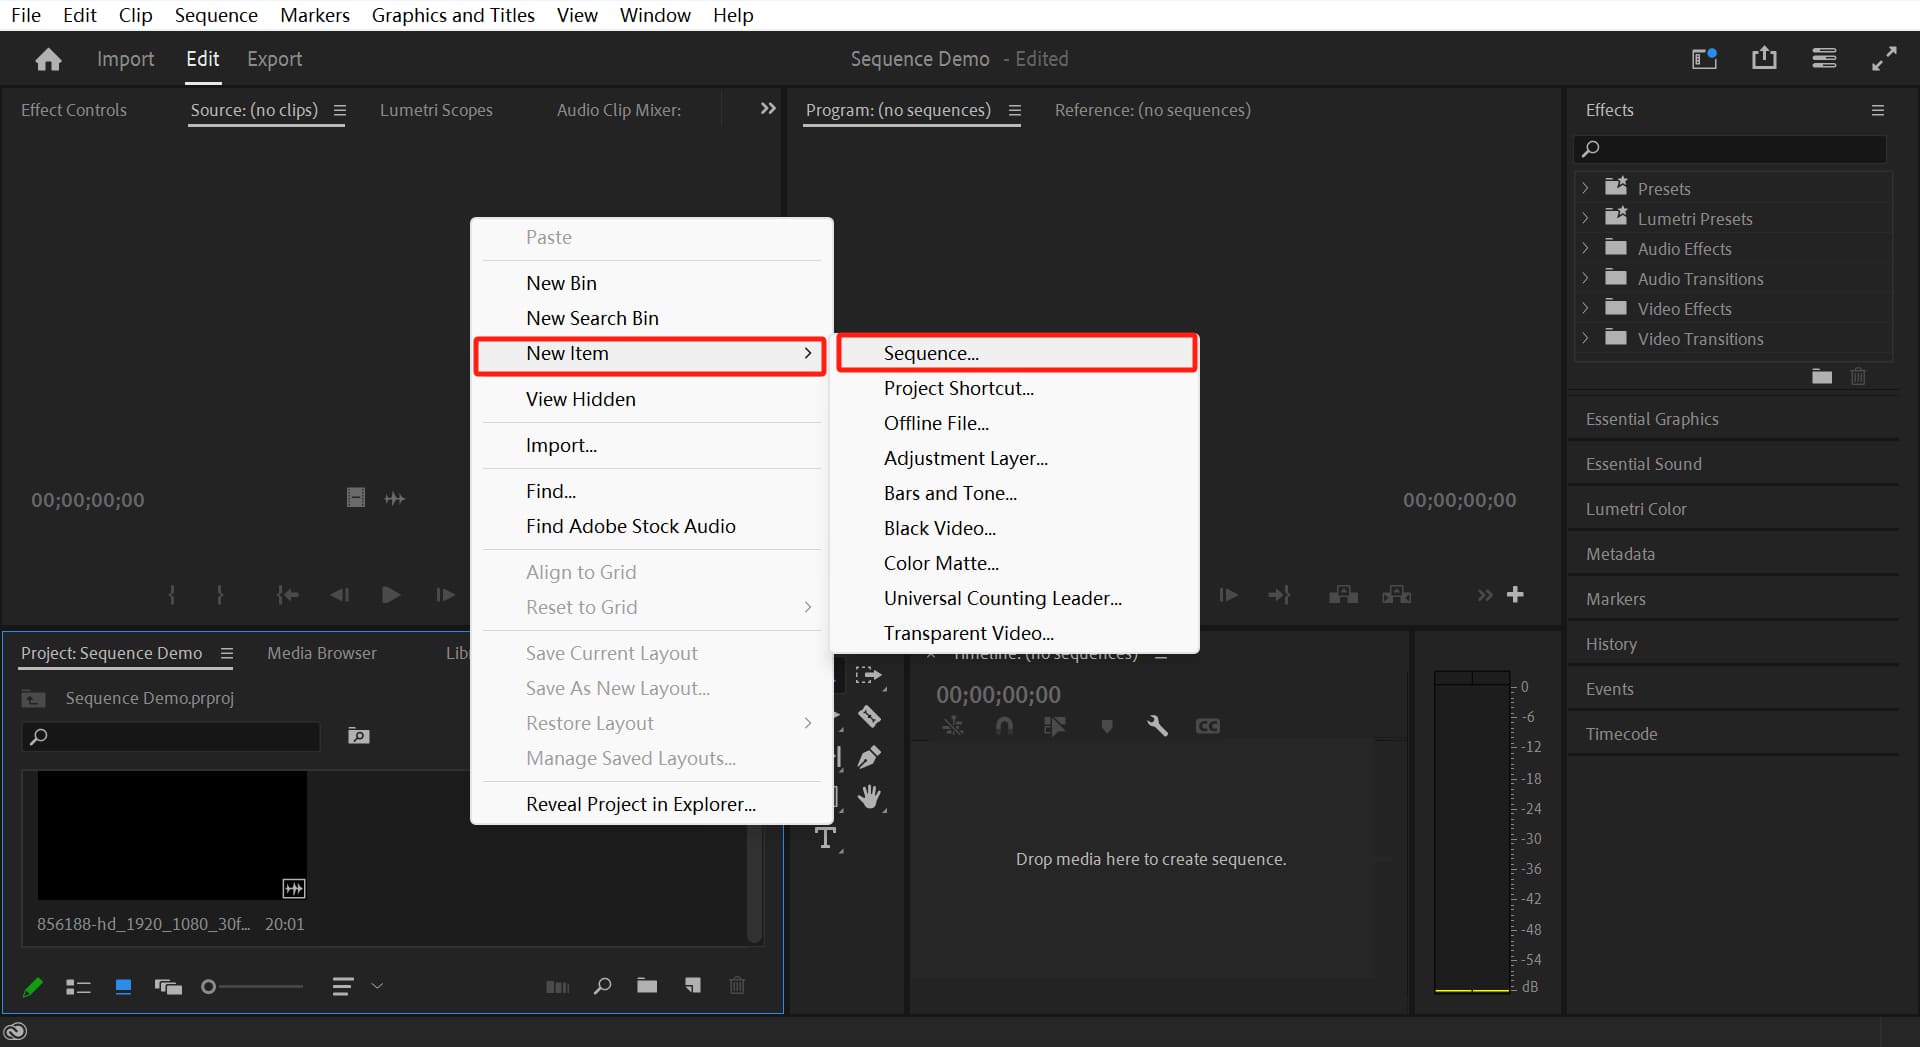
Right-click in the empty space of the Project panel, select "New Item," and then choose "Sequence."
All three methods will bring up the "New Sequence" settings panel. In the next section, we'll dive into how to set up sequences in Premiere Pro.
Method 4:
If you don't have a sequence yet but have imported clips into the Project panel, you can directly drag and drop the assets from the Project panel to the Timeline panel.
Method 5:
If you don't have a sequence and haven't imported any clips into the Project panel, you can directly drag the clips from a folder on your computer to the Timeline panel in Premiere Pro.
The last two methods won't prompt the "New Sequence" setting panel. Premiere Pro will automatically create a sequence based on the properties of the source clips, typically using the attributes of the first clip you drag into the Timeline as the primary parameters for the sequence.
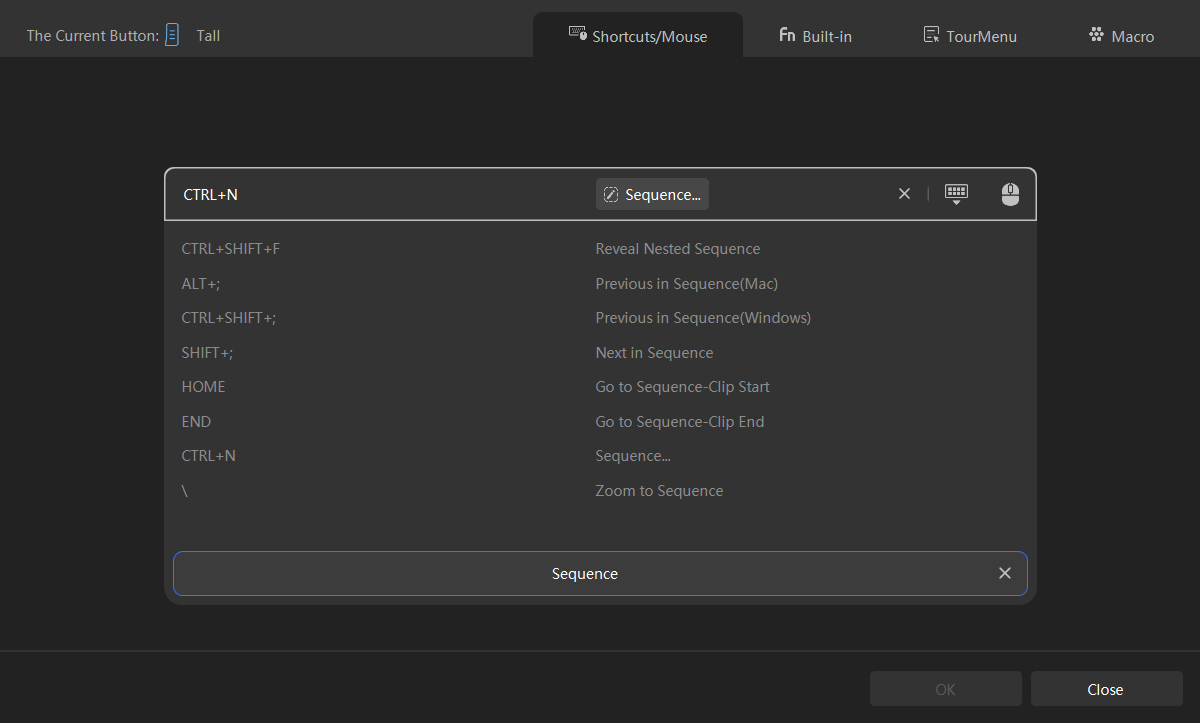
In addition to the aforementioned five methods, you can also use TourBox, a popular creative tool loved by digital artists and content creators, to quickly create sequences.

In the TourBox Console, the setup software for TourBox, you can easily map the relevant keyboard shortcuts for Premiere Pro sequences and assign them to TourBox.
TourBox's capabilities go beyond just creating sequences. It greatly enhances editing efficiency in tasks such as timeline manipulation, color grading, and applying effects. You're sure to enjoy the operational experience that TourBox brings to you.
Check out our video editing page for more information on TourBox.
How to Set up a Premiere Pro Sequence?
When you first open the "New Sequence" panel in Premiere Pro, you might feel overwhelmed and unsure about how to proceed. In this section, we'll provide you with the answers.
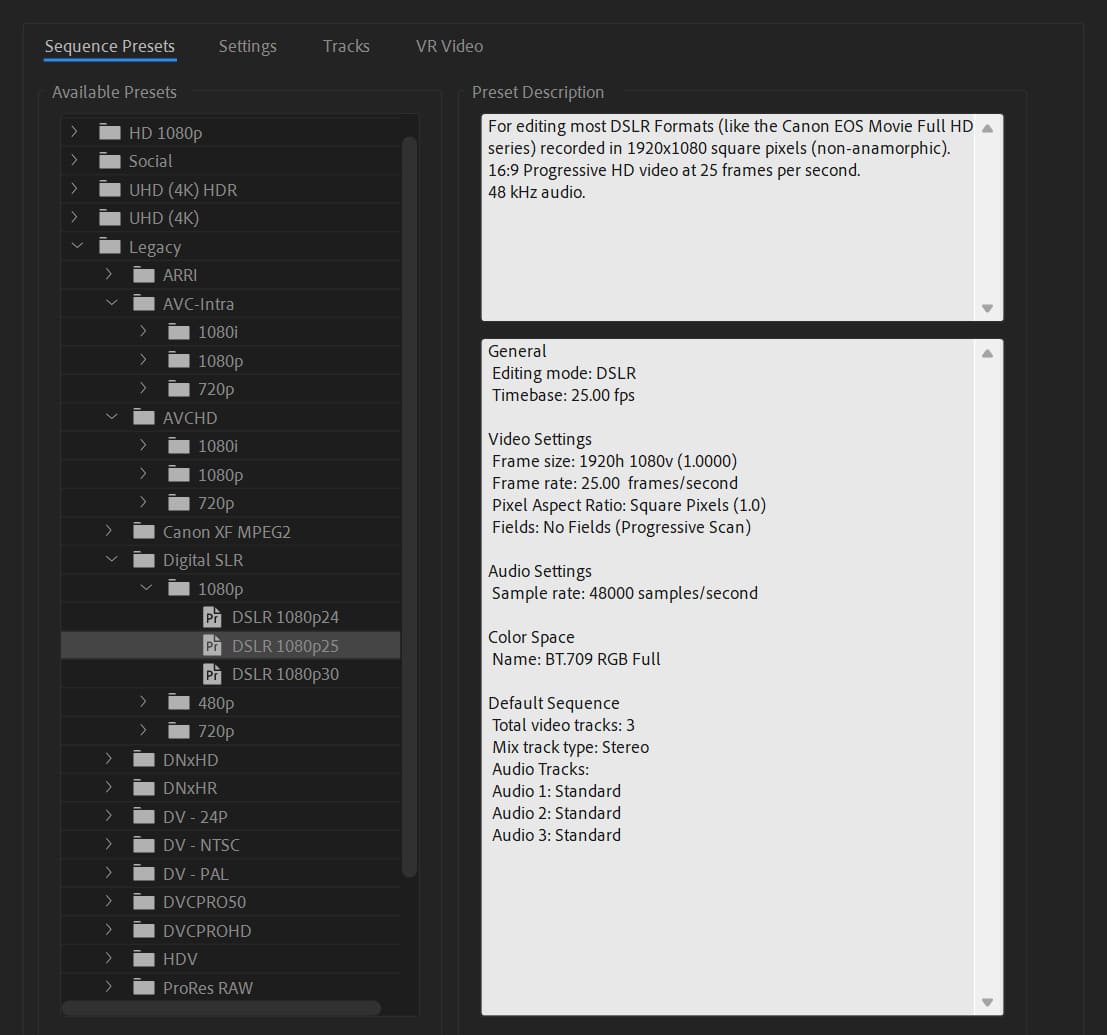
1. Sequence Presets Tab
The first thing you'll notice is the Sequence Presets tab. Here, Premiere Pro offers a wide range of built-in standard sequence presets that are tailored to meet the requirements of different video footage and platforms. Each sequence preset comes with preset descriptions and parameters, which is quite helpful.
For instance, in the example below, you can see the DSLR preset suitable for footage captured with a typical DSLR camera. Depending on your needs, you can choose the preset that best suits your video and simply confirm your selection.
2. Settings Tab
The second "Settings" tab in the New Sequence panel determines the basic characteristics of the sequence. This tab offers several parameters that can be adjusted, and we will focus on explaining the key ones.
Editing Mode & Timebase
Editing Mode:
In the drop-down menu of the Editing Mode, you can choose the video format used for previewing files and playback. If you don't have a specific preset in mind, it is recommended to select "Custom."
Timebase:
Typically, 24 frames per second (fps) is used for editing film footage, 25 fps is suitable for PAL (European, Mainland China standard) and SECAM videos, and 29.97 fps is used for NTSC (North American standard) videos.

For more information on frame rates, you can refer to: "Frame Rate | Everything You Need To Know"
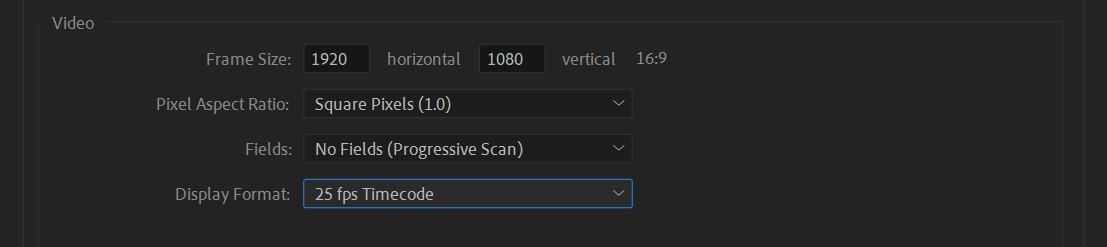
Video
Frame Size:
The frame size refers to the dimensions of the video frame. For commonly used 1080p videos, the frame size is usually 1920 x 1080 pixels, with an aspect ratio of 16:9.
Here are some common video resolutions for reference:
- Standard Definition (SD): 640 x 480 pixels, 4:3 aspect ratio
- High Definition (HD): 1024 x 720 pixels
- Full High Definition (FHD): 1920 x 1080 pixels, 16:9 aspect ratio
- Ultra High Definition (UHD): 3840 x 2160 pixels (4K, 16:9), 4096 x 2160 pixels (Movie 4K), 7680 x 4320 pixels (8K, 16:9)
Pixel Aspect Ratio:
The pixel aspect ratio determines the shape of individual pixels. For digital videos, the most common setting is "Square Pixels."
Fields:
Fields refer to the sequence of interlaced frames. For digital videos, it is generally recommended to select "No Fields" (Progressive Scan).
Display Format:
The display format determines how the time is shown. The default option, "Timecode," is usually sufficient.
"Feet + Frames" is a format used in the film era. "Frames" is commonly used when working with media created in conjunction with 3D software.
Color
Working Color Space:
Rec.709 is the current industry standard for film and television hardware devices. It defines the color gamut specifications followed by major TV stations during the shooting, production, and broadcast of HDTV programs.
Rec.2100 HLG and Rec.2100 PQ are newly supported color spaces in Premiere Pro. If you don't have any specific requirements, it's recommended to keep the default settings for the working color space.

Audio
Sample Rate:
The sample rate refers to the number of audio samples captured per second. In videos, the standard sample rate is typically 48000 Hz (Hertz), which means 48000 audio samples are recorded every second.
Display Format:
In the settings panel, you have the option to choose the unit for displaying audio time. You can select either "Audio Samples" or "Milliseconds." By default, the display format is set to "Audio Samples," which shows the time in terms of the number of audio samples.

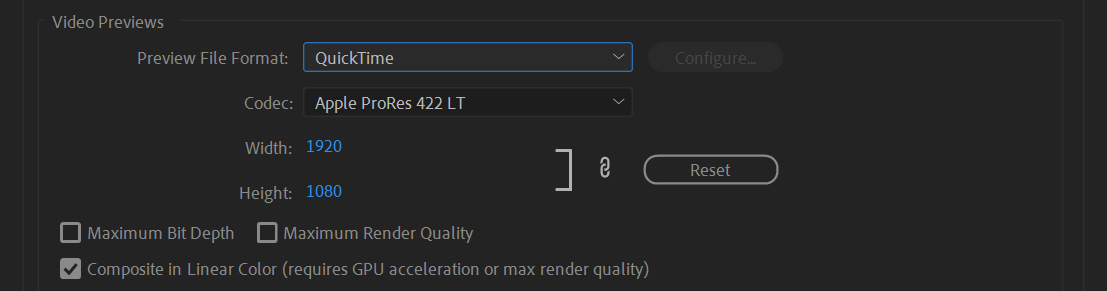
Video Previews
Preview File Format:
You can choose a suitable file format that provides the best preview quality while keeping rendering time and file size relatively small.
Codec:
You can specify the codec used for creating preview files for the sequence.
Width/Height:
You can specify the frame width and height for video previews.
Reset:
You can use this option to clear the existing previews and set the size for all subsequent previews.
Maximum Bit Depth:
If your project includes high-bit-depth media generated by programs like Photoshop or high-definition cameras, it is recommended to enable this option.
Maximum Render Quality:
When enabled, it ensures the best motion quality in rendered clips and sequences, but it also requires more rendering time and memory.
Composite in Linear:
When enabled, it provides a more realistic appearance for blended frames. However, this option requires GPU acceleration or the maximum render quality setting.
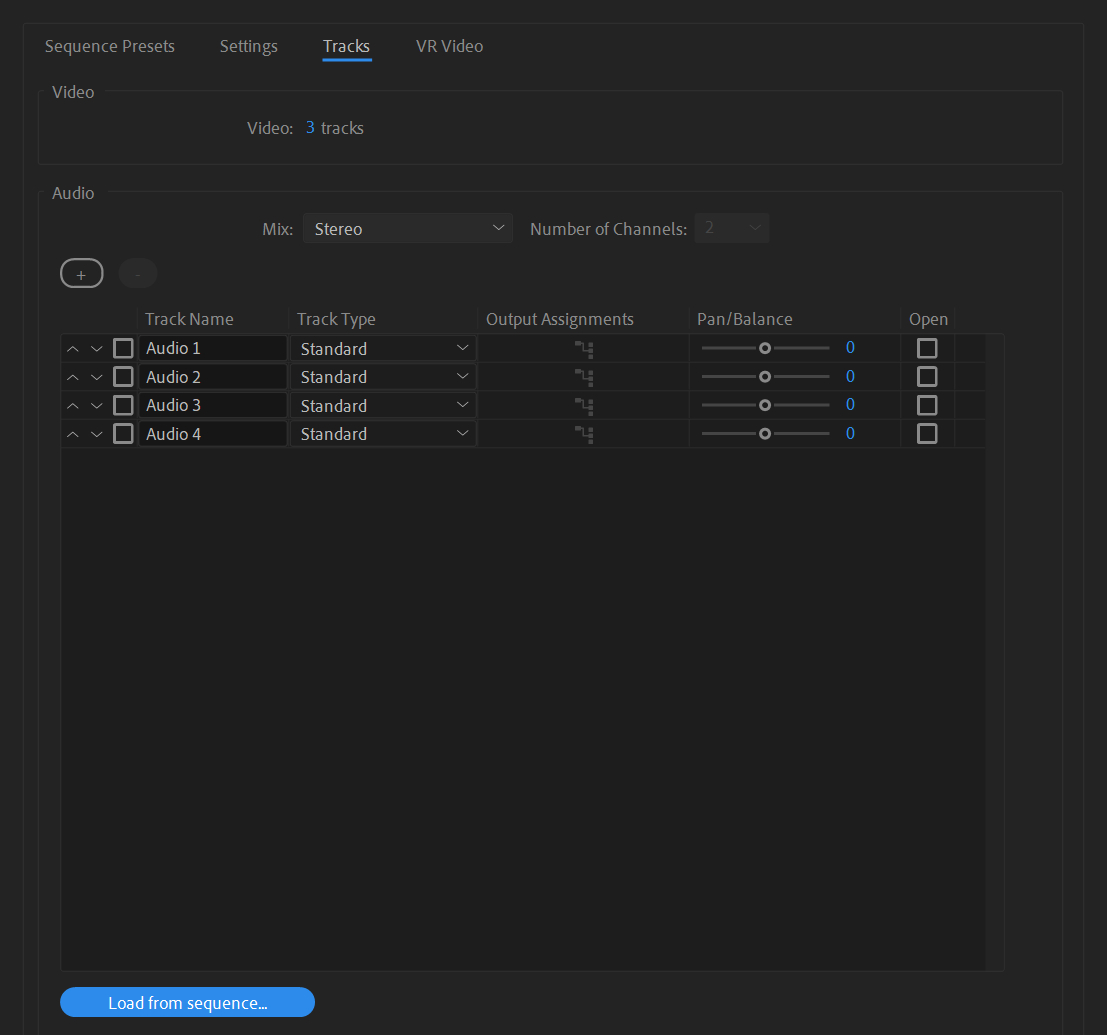
Tracks Tab
By default, Premiere Pro has 3 video tracks and 4 audio tracks in its settings. Here, you have the option to manually add or delete tracks. Additionally, you can load audio track settings from existing sequences in your project.
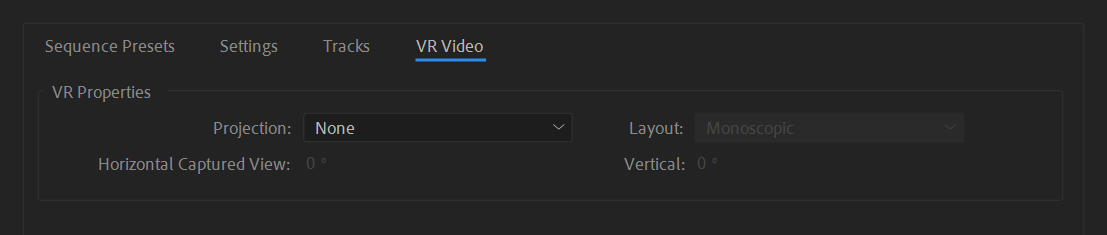
VR Video Tab
Here, you can specify VR properties for your video sequence, including Projection, Layout, Horizontal Captured View, and Vertical.
Due to space limitations in this article and the fact that VR video sequence settings are not widely applicable, we won't go into further detail.
How to Delete a Sequence in Premiere Pro?
There are multiple methods to delete sequences in Premiere Pro, and they are all straightforward. These methods provide various options to delete sequences in Premiere Pro, allowing you to choose the one that suits you best.
Method 1: Shortcut Keys "Delete" or "Backspace"
Select the sequence(s) you want to delete in the Project panel. You can choose one or multiple sequences. Once selected, simply press the Delete or Backspace key to quickly remove the sequence(s).
This method is recommended as it is fast and efficient!
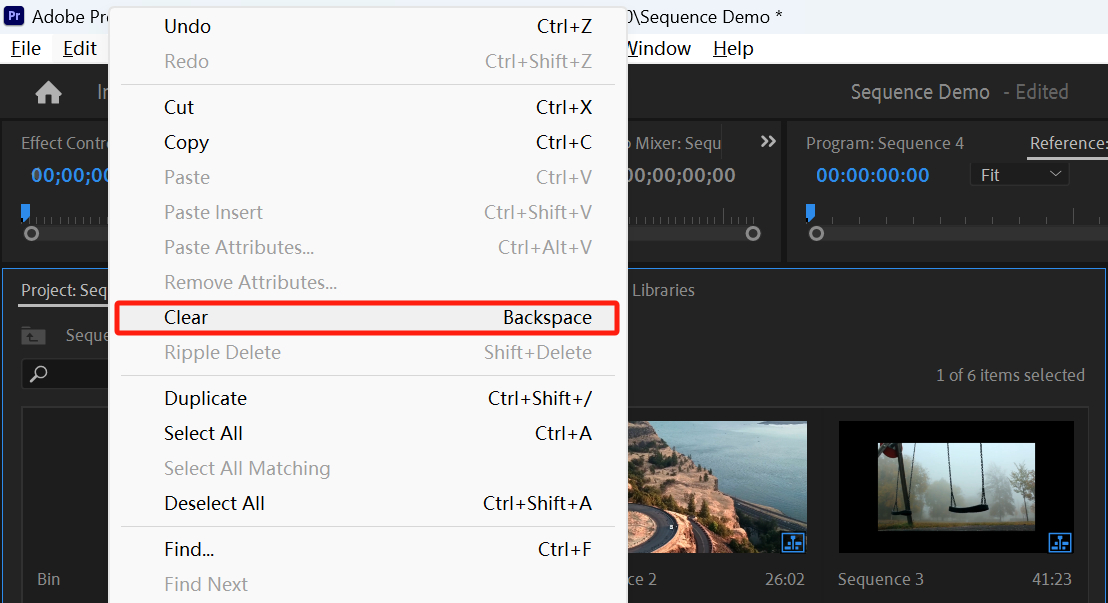
Method 2: "Clear" in the Project Panel
Again, start by selecting the sequence(s) in the Project panel. Then, click on the "Clear" icon located at the bottom right corner of the Project panel, or drag the sequence(s) onto the "Clear" icon and release.
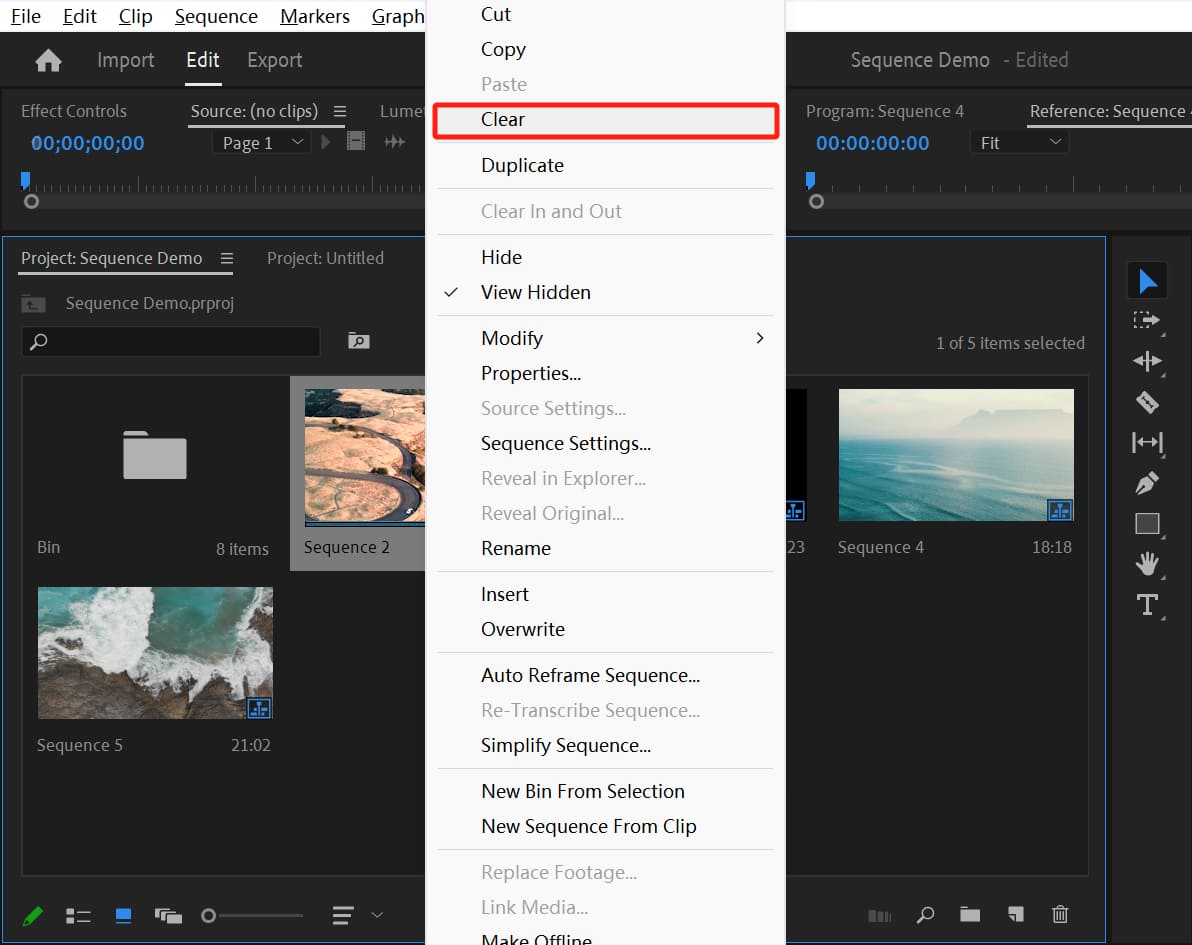
Method 3: "Edit > Clear" in the Menu Bar
Select the sequence(s) to be deleted in the Project panel, and click on "Edit" in the top menu bar of Premiere Pro. From the drop-down menu, choose "Clear."
Method 4: Right-click on the Sequence, Then Click "Clear"
Select the sequence(s) you want to delete in the Project panel. Then, right-click to open the context menu and click on "Clear" from the options.
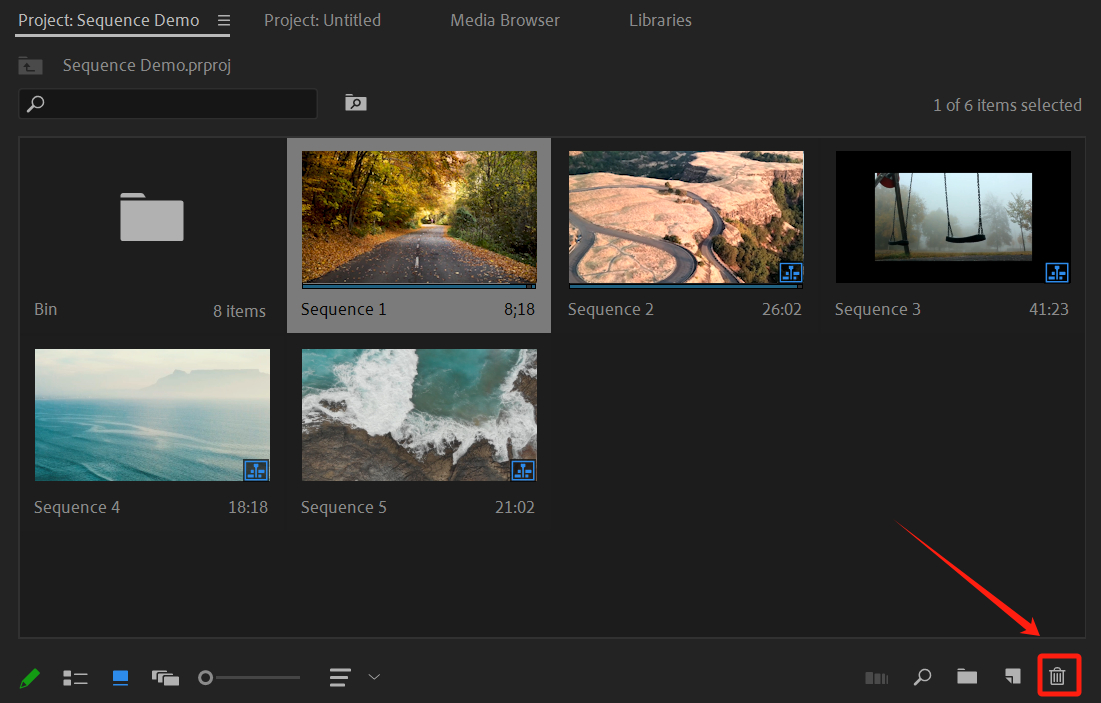
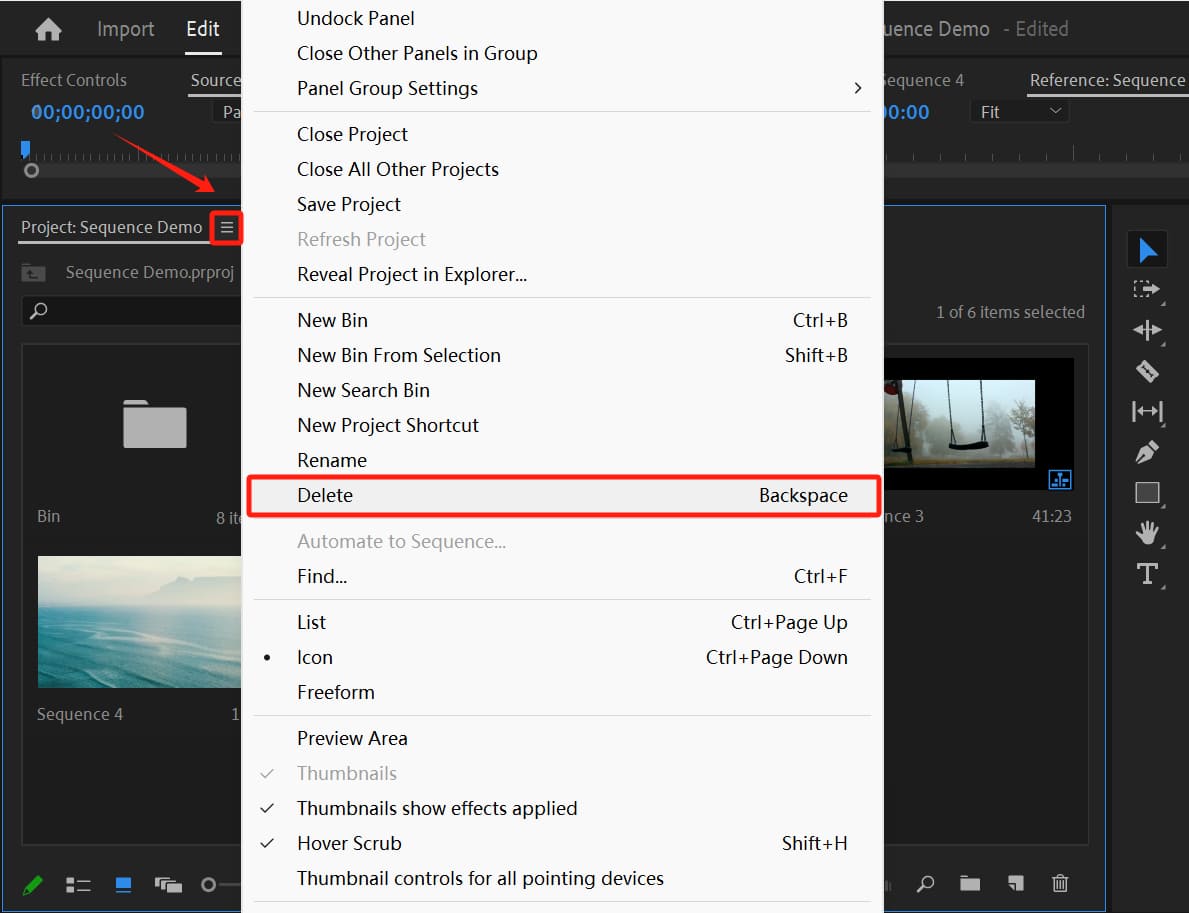
Method 5: Click on the Three-Bar Icon in the Project Panel
In the Project panel, select the sequence(s) to be deleted. Click on the three-bar icon as shown in the image below, and from the submenu that appears, click on "Delete."
How to Change the Sequence Settings in Premiere Pro?
After creating a sequence, if you have any new requirements that call for modifying the sequence, you can easily adjust the important options in the sequence settings.
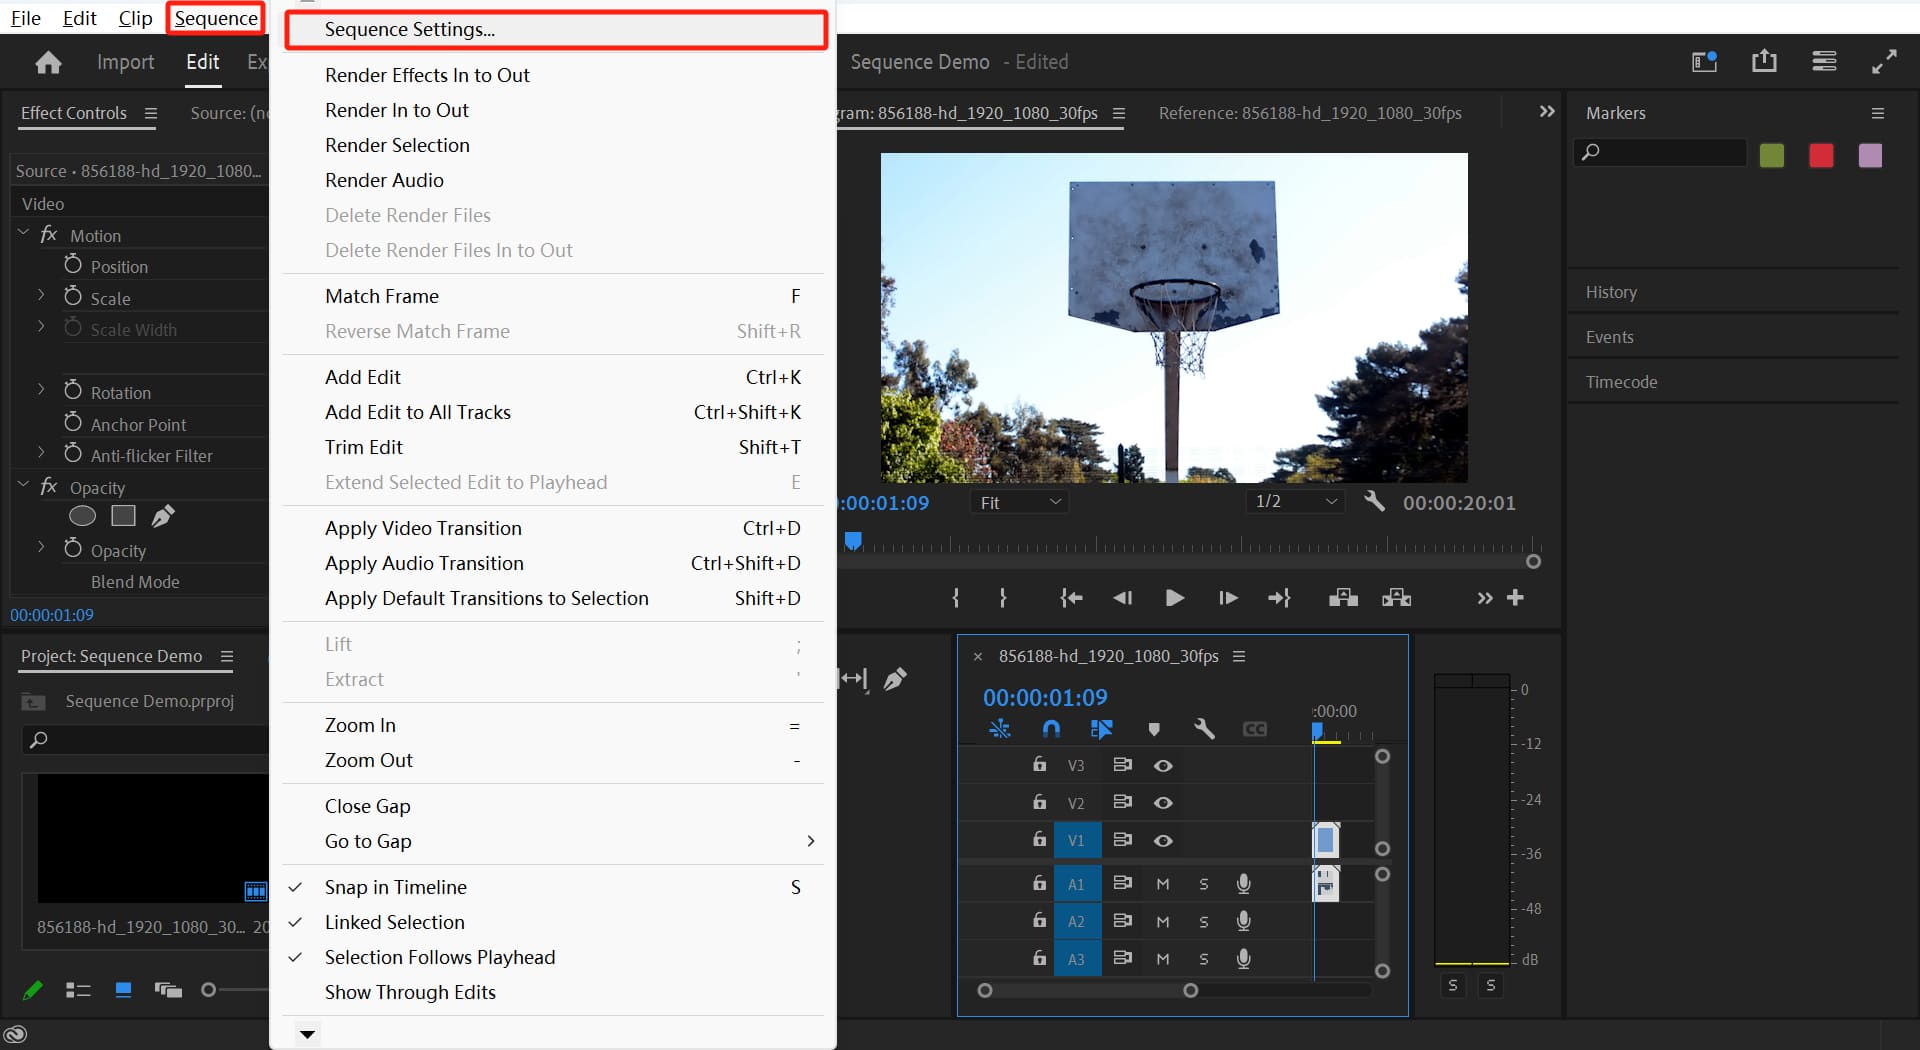
To access the settings panel, you can click on "Sequence Settings" in the Sequence menu located in the top menu bar of Premiere Pro.
The "Sequence Settings" panel offers almost the same options as the "New Sequence" panel, so we won't repeat the introduction here.
Product Recommendation:
If you're interested in TourBox, why not start with our latest product, TourBox Lite? It offers great value for money, and you're sure to love it.

That concludes our tutorial on Premiere Pro sequences. Lastly, we have exciting news to share: TourBox provides excellent support for Premiere Pro's effects controls. Watch the video below to experience the charm of TourBox firsthand.